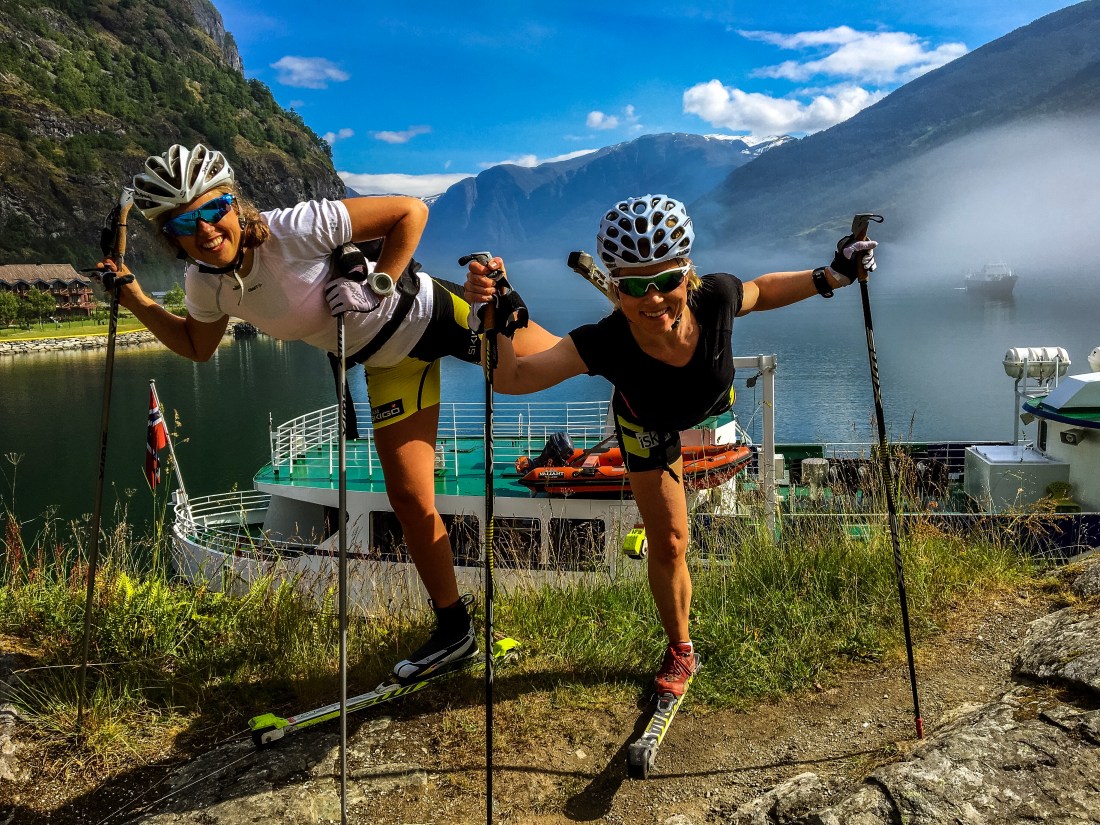
In the heart of the Dolomites you find Passo Falzarego, a busy crossroad between Cortina, Alta Badia and Val di Fiemme, with several historical and nature wonder attractions nearby. This is also the starting point for two of the most beautiful mountain runs you can do, the Gran Lagazuoi circuit and the Nuvolau run. If you are fit, you can easily do both in one day. If you plan on doing the double, I would suggest starting from the Falzarego pass in the morning and run the circuit provided in my Strava link below in the opposite direction, have lunch at Rifugio Lagazuoi, and take the cable car down to the pass before you head in direction of Rifugio Nuvolau. For a unique experience, bring a light backpack with a sleeping liner and some dry clothing and stay overnight at Rifugion Nuvolau (reservations must be made in advance).
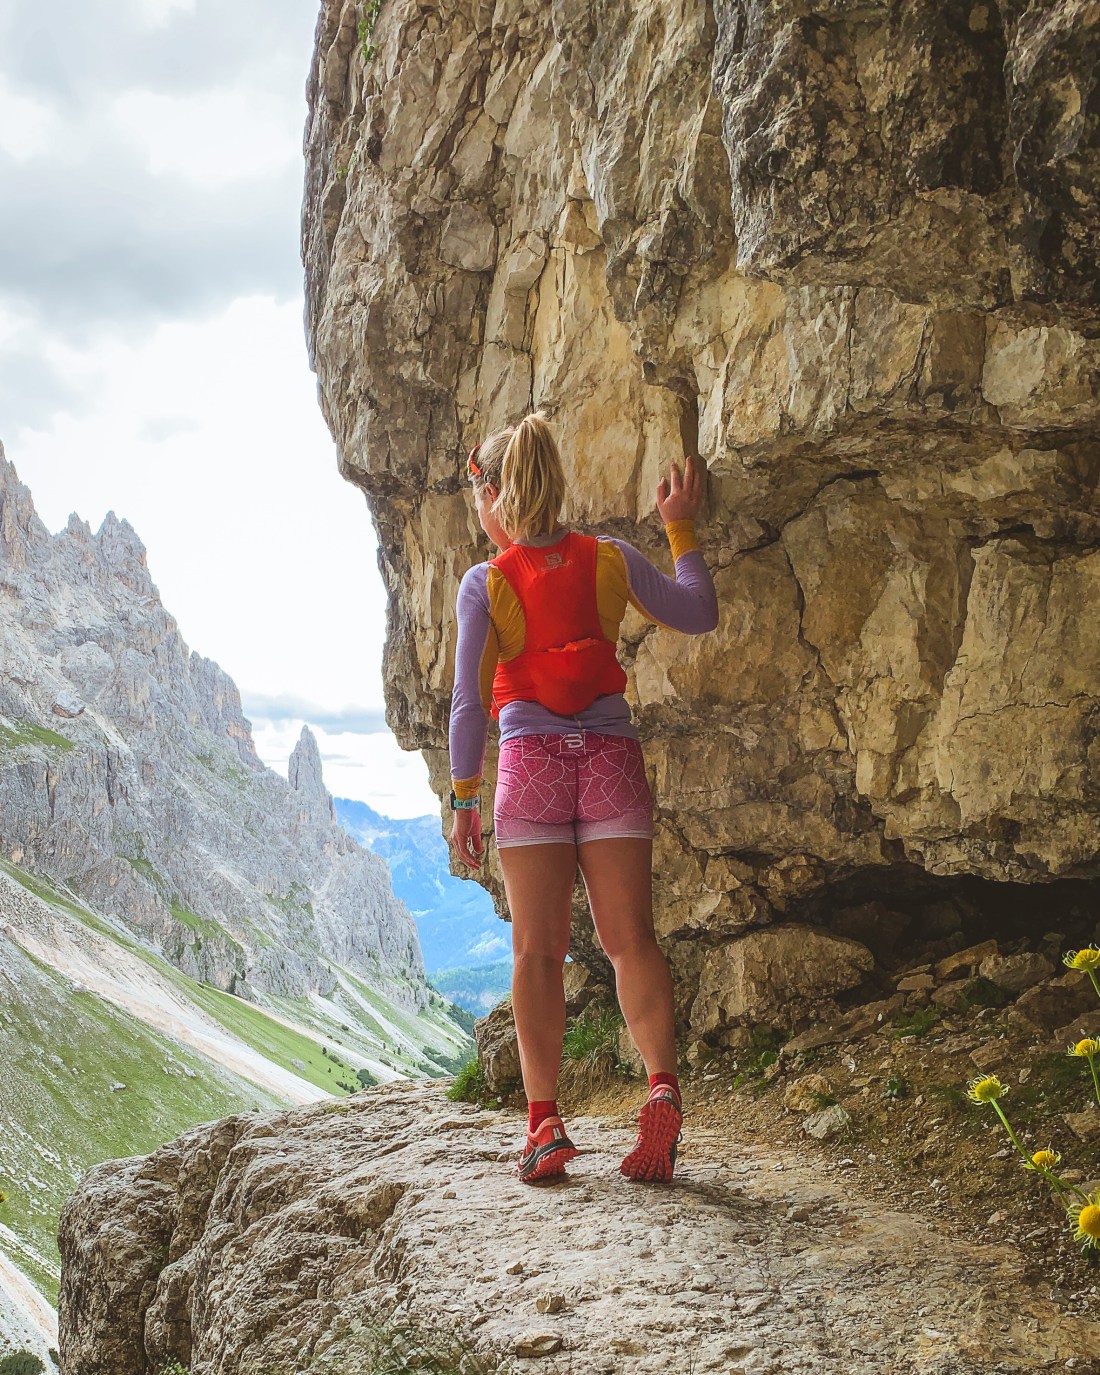
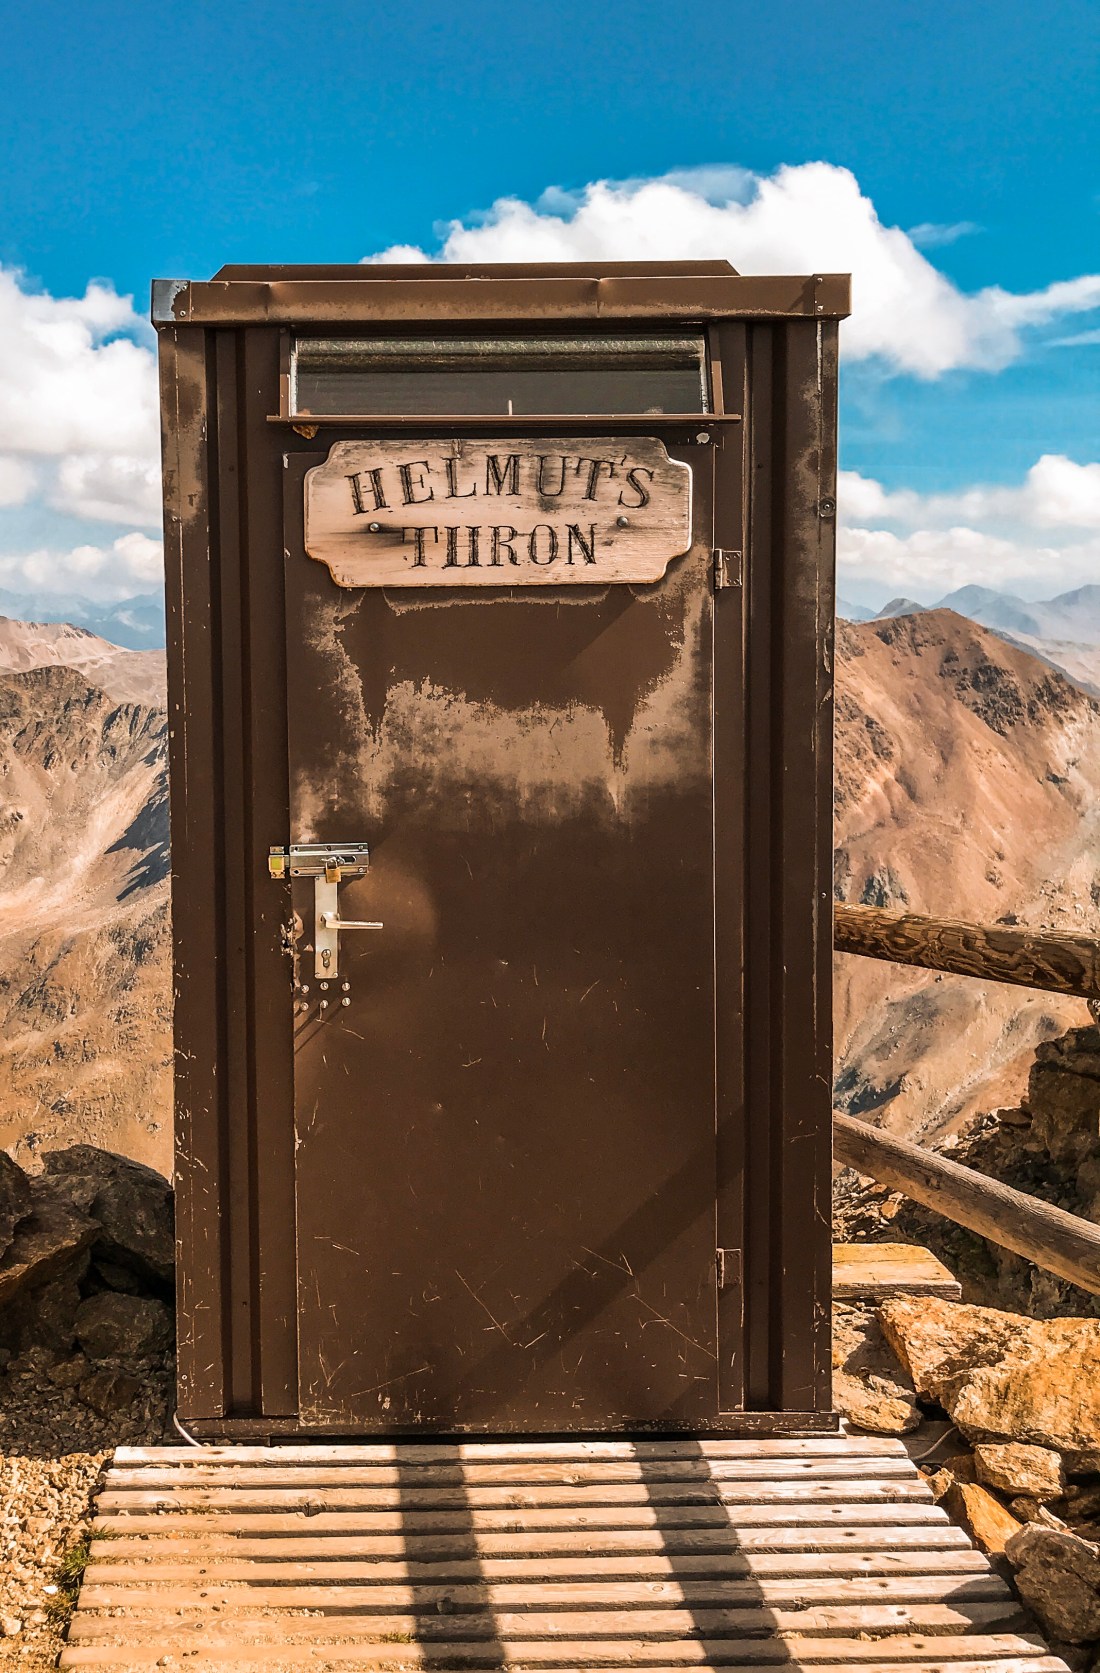
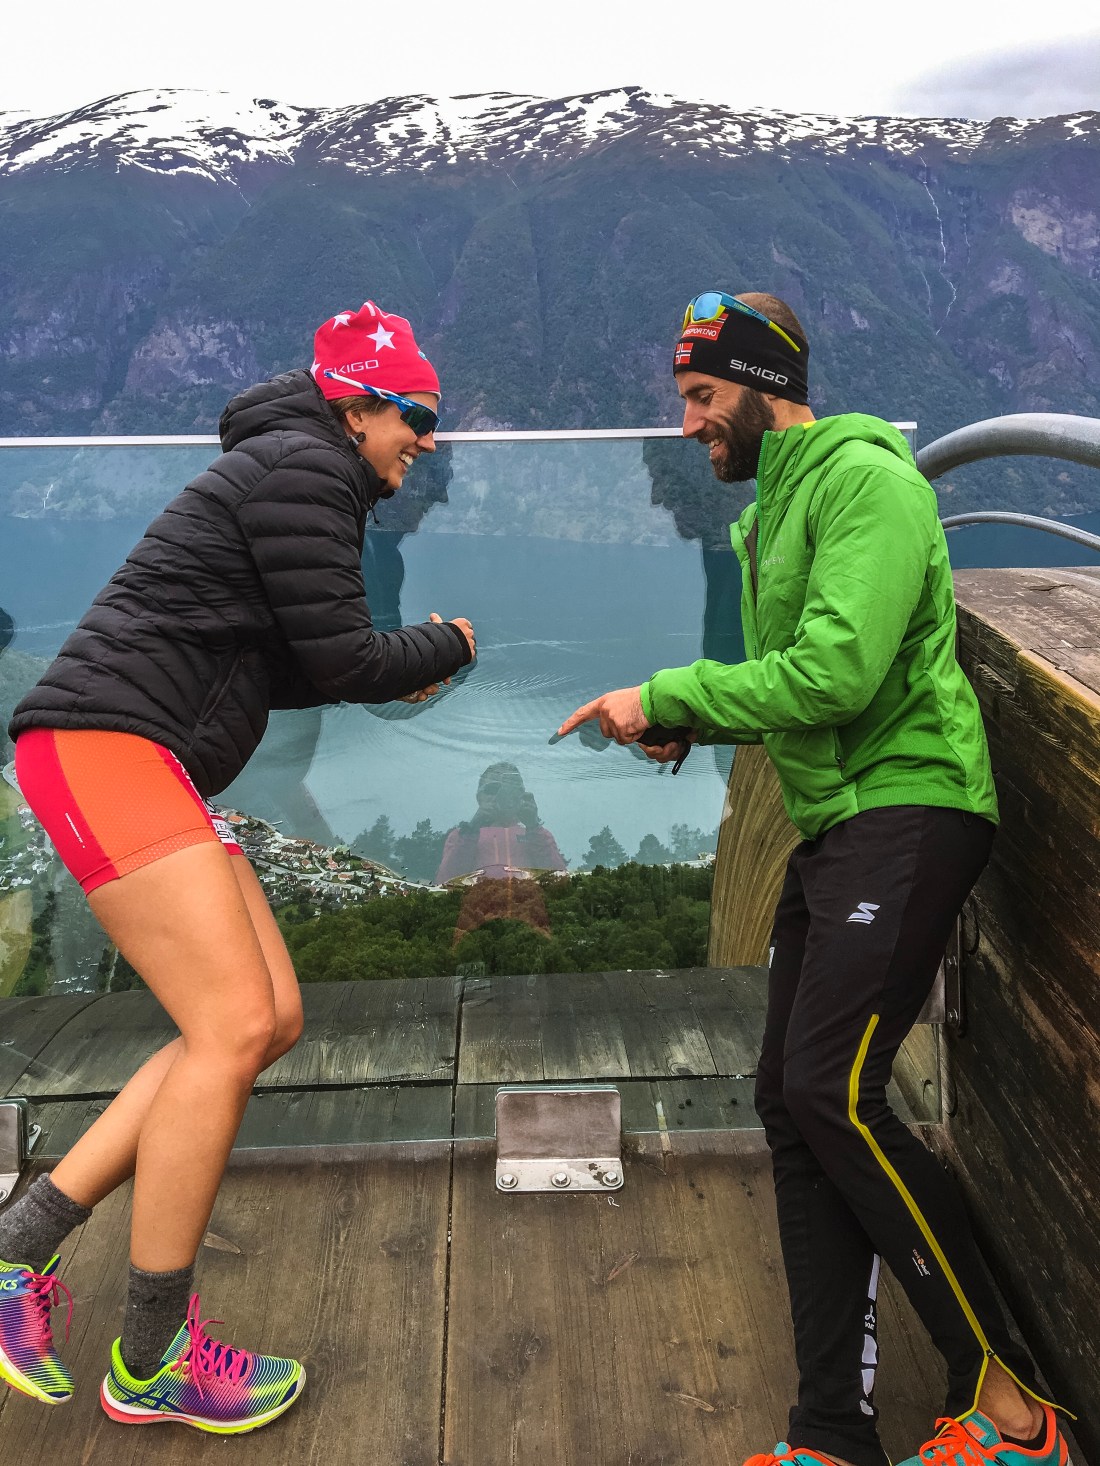
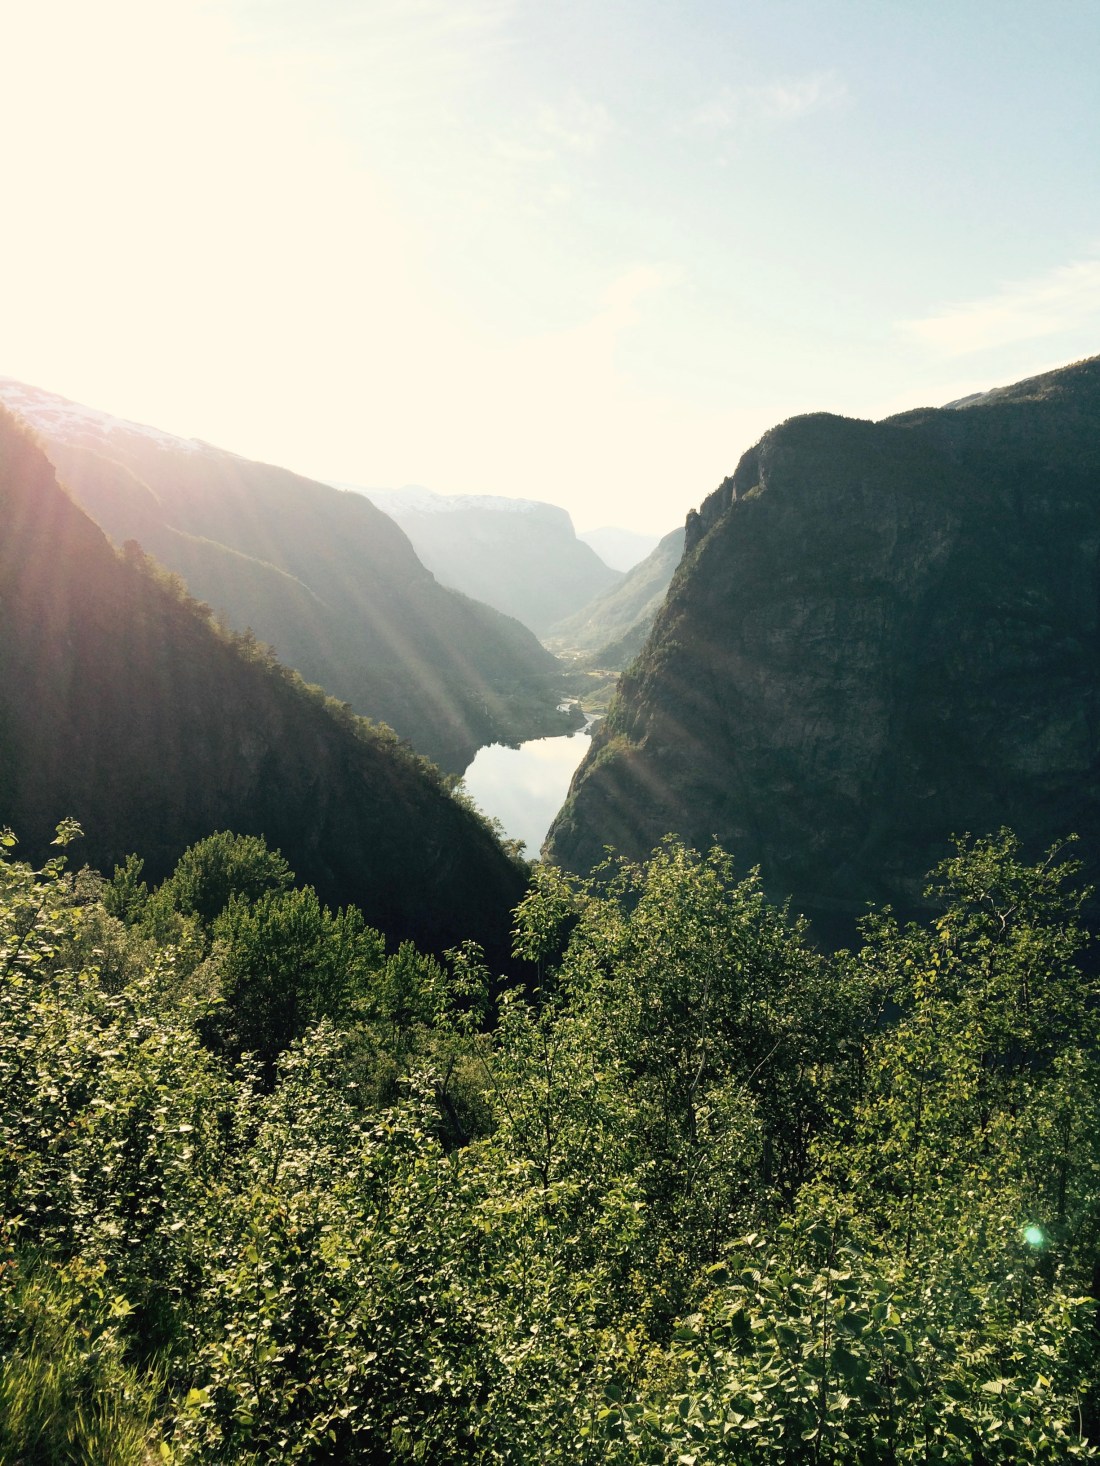
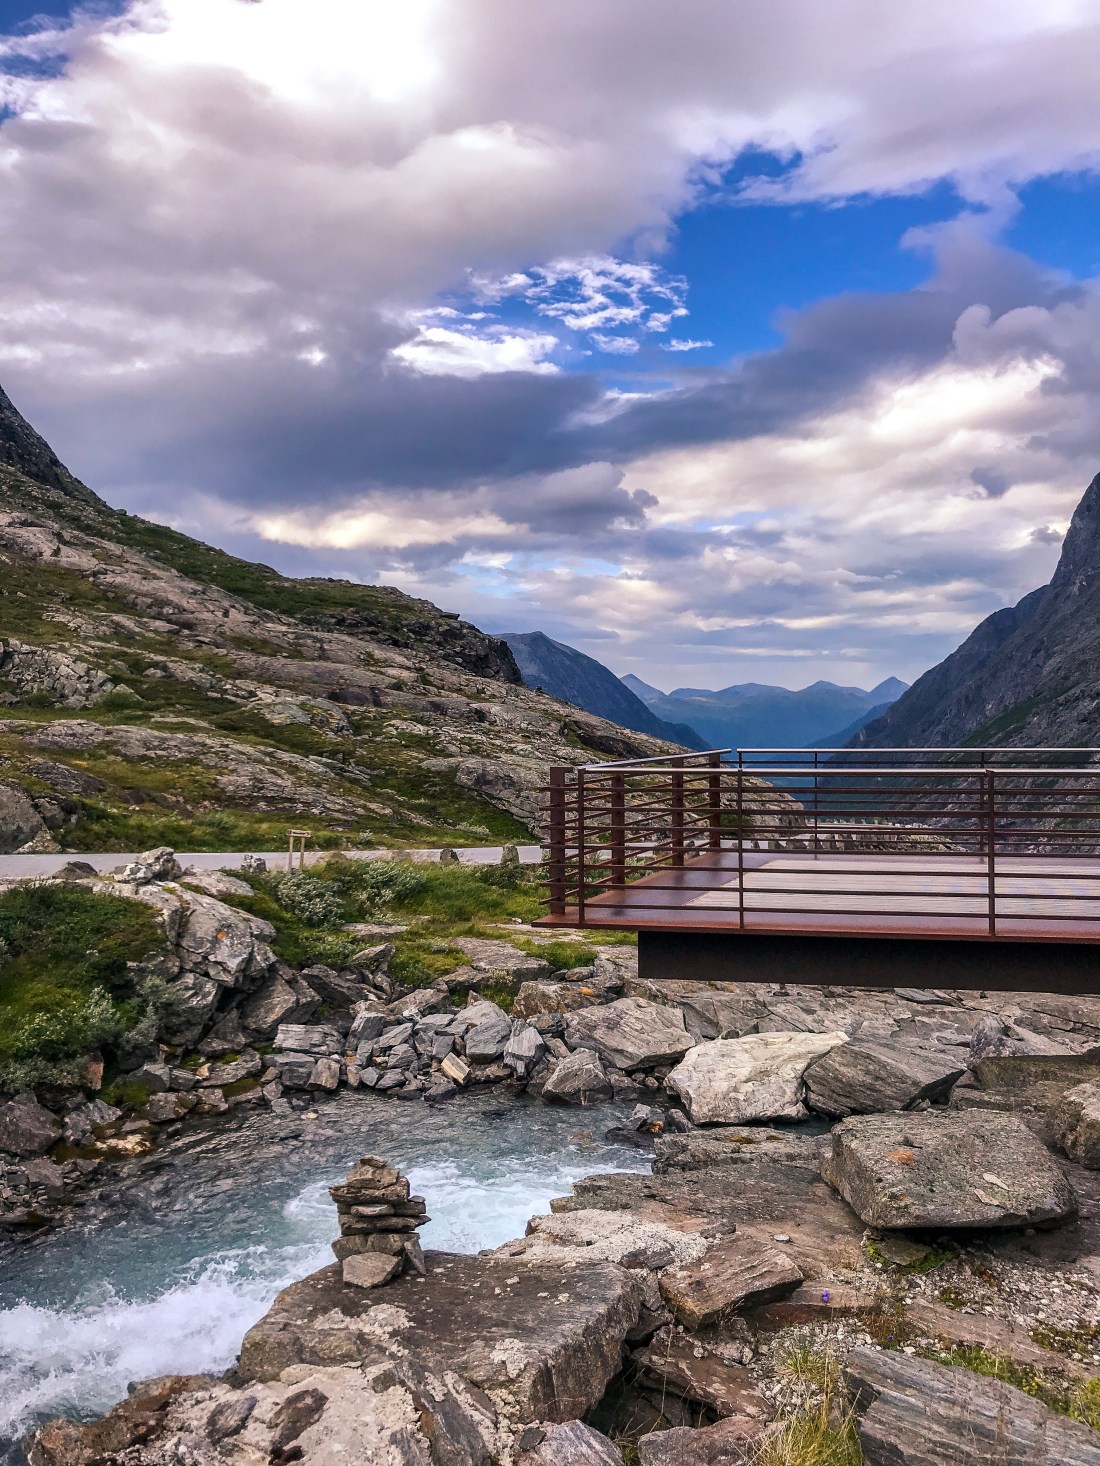
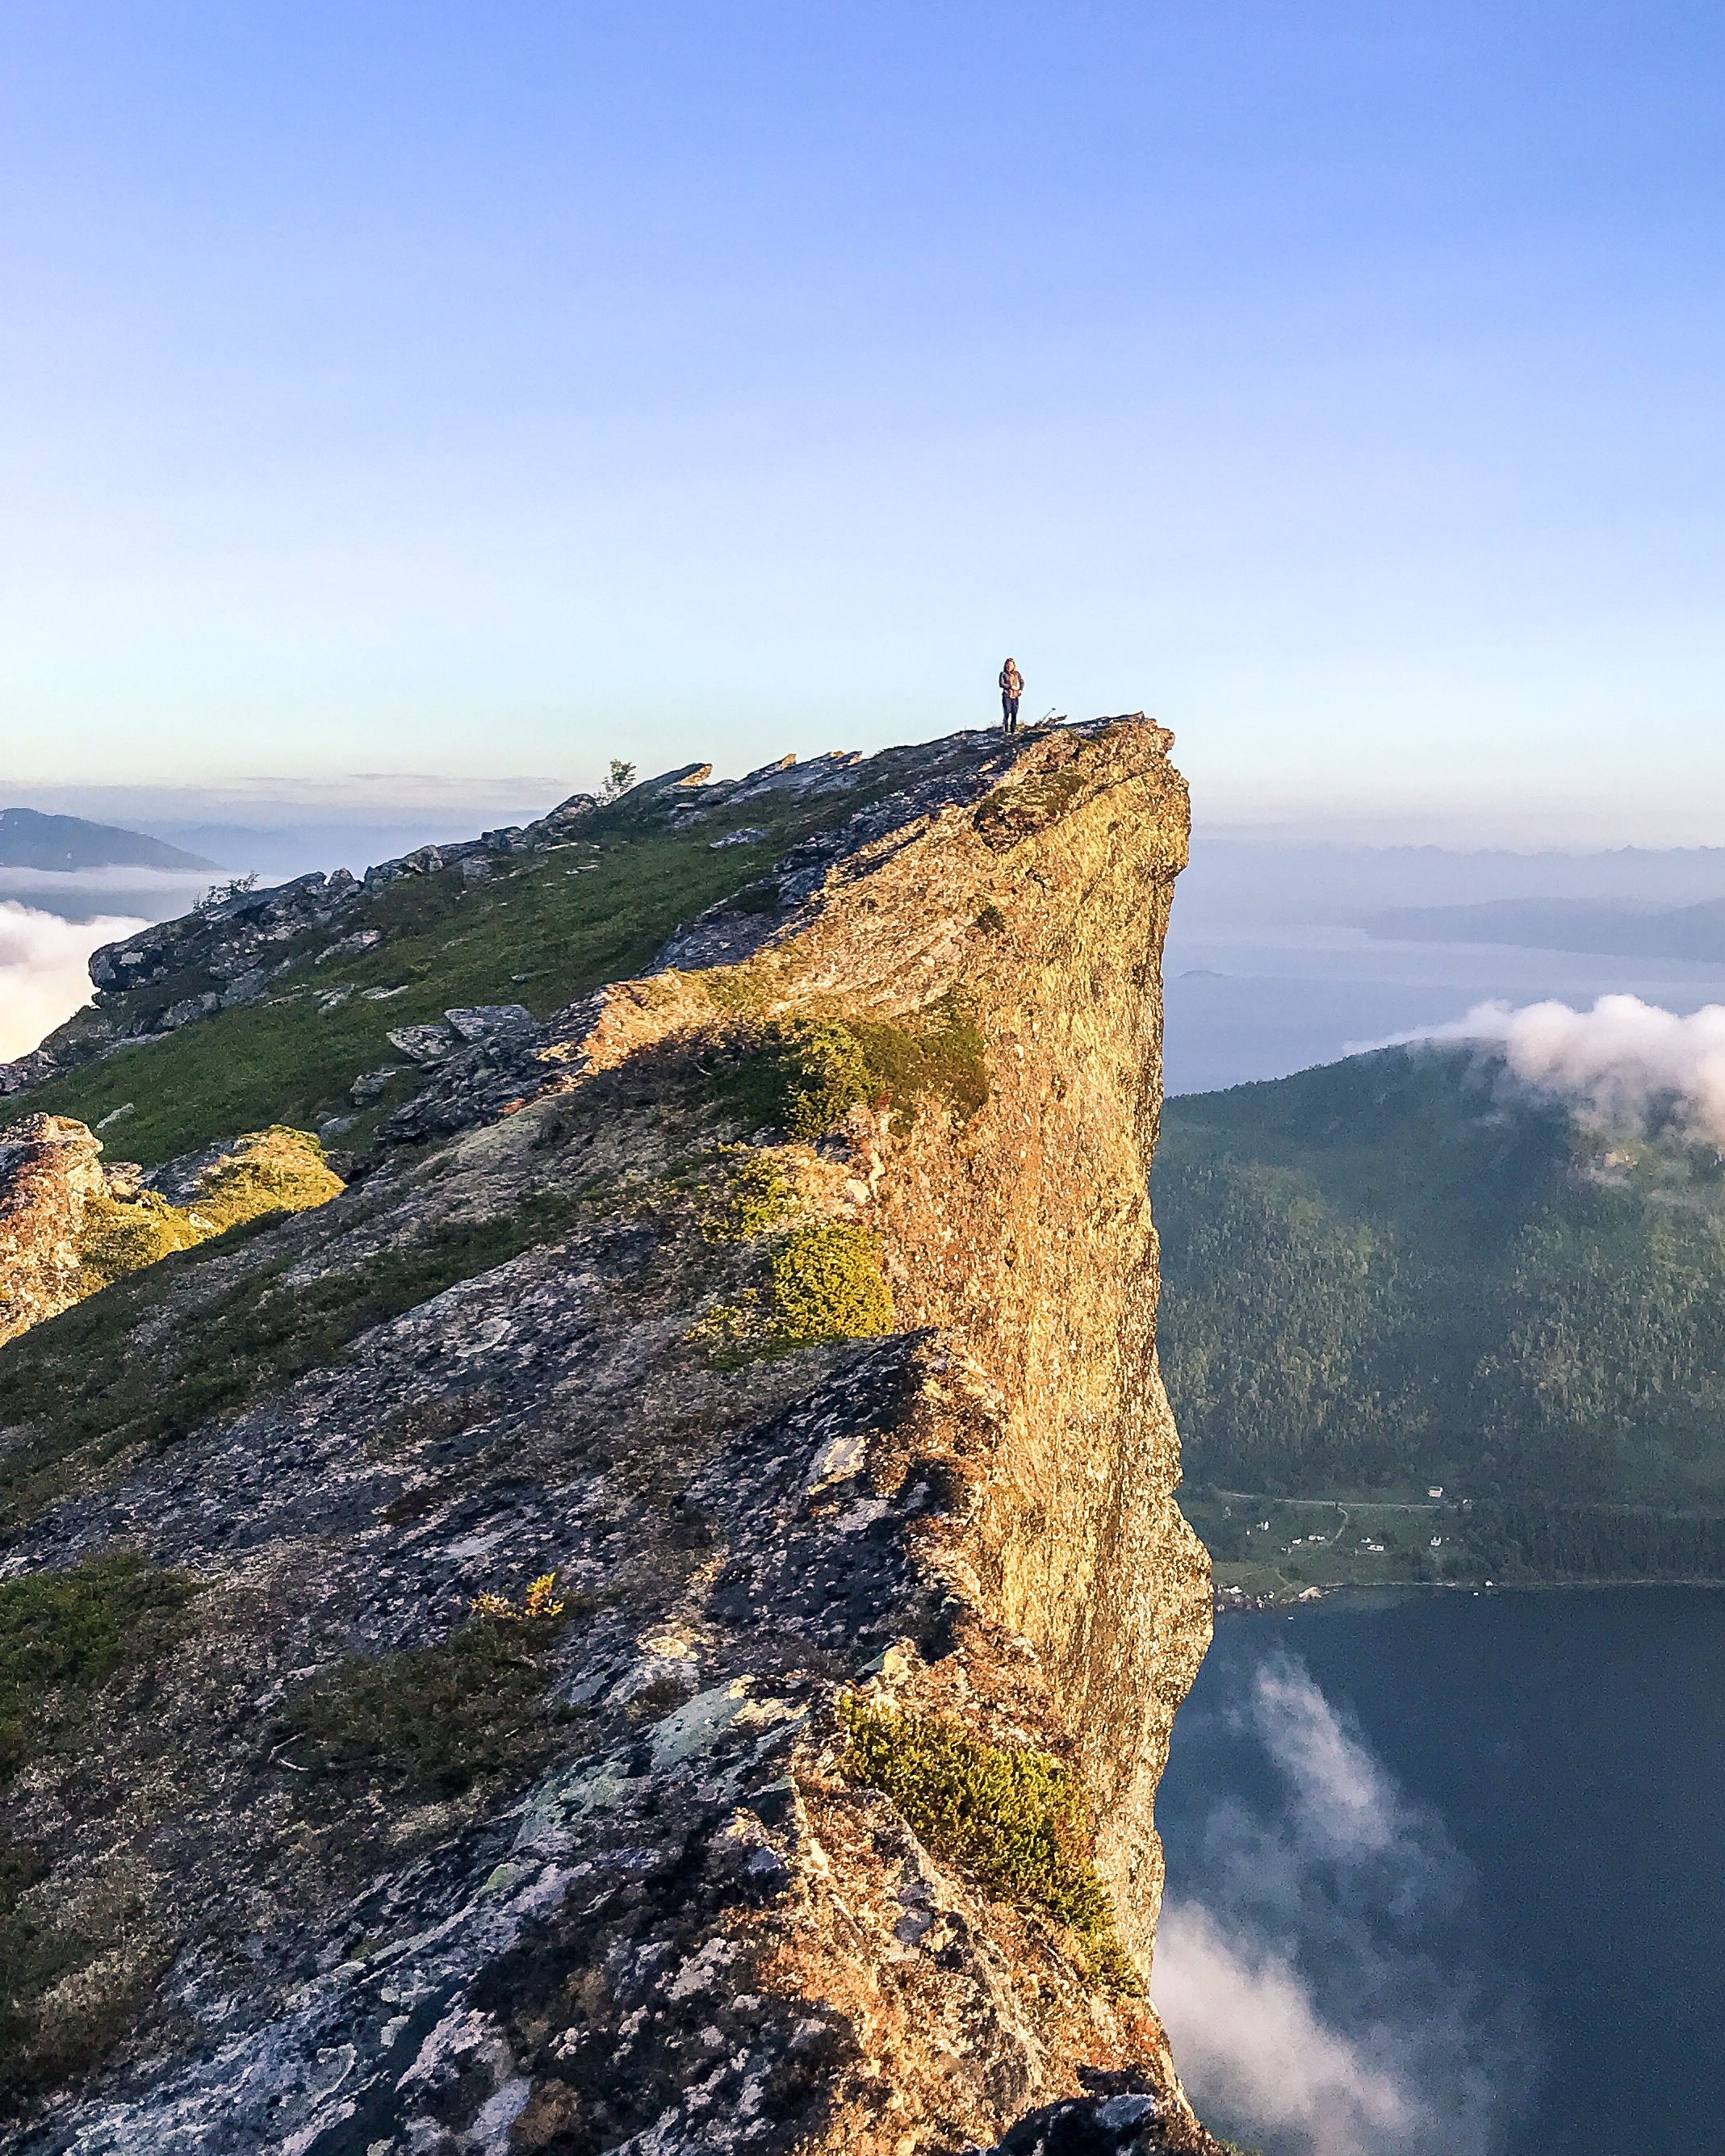
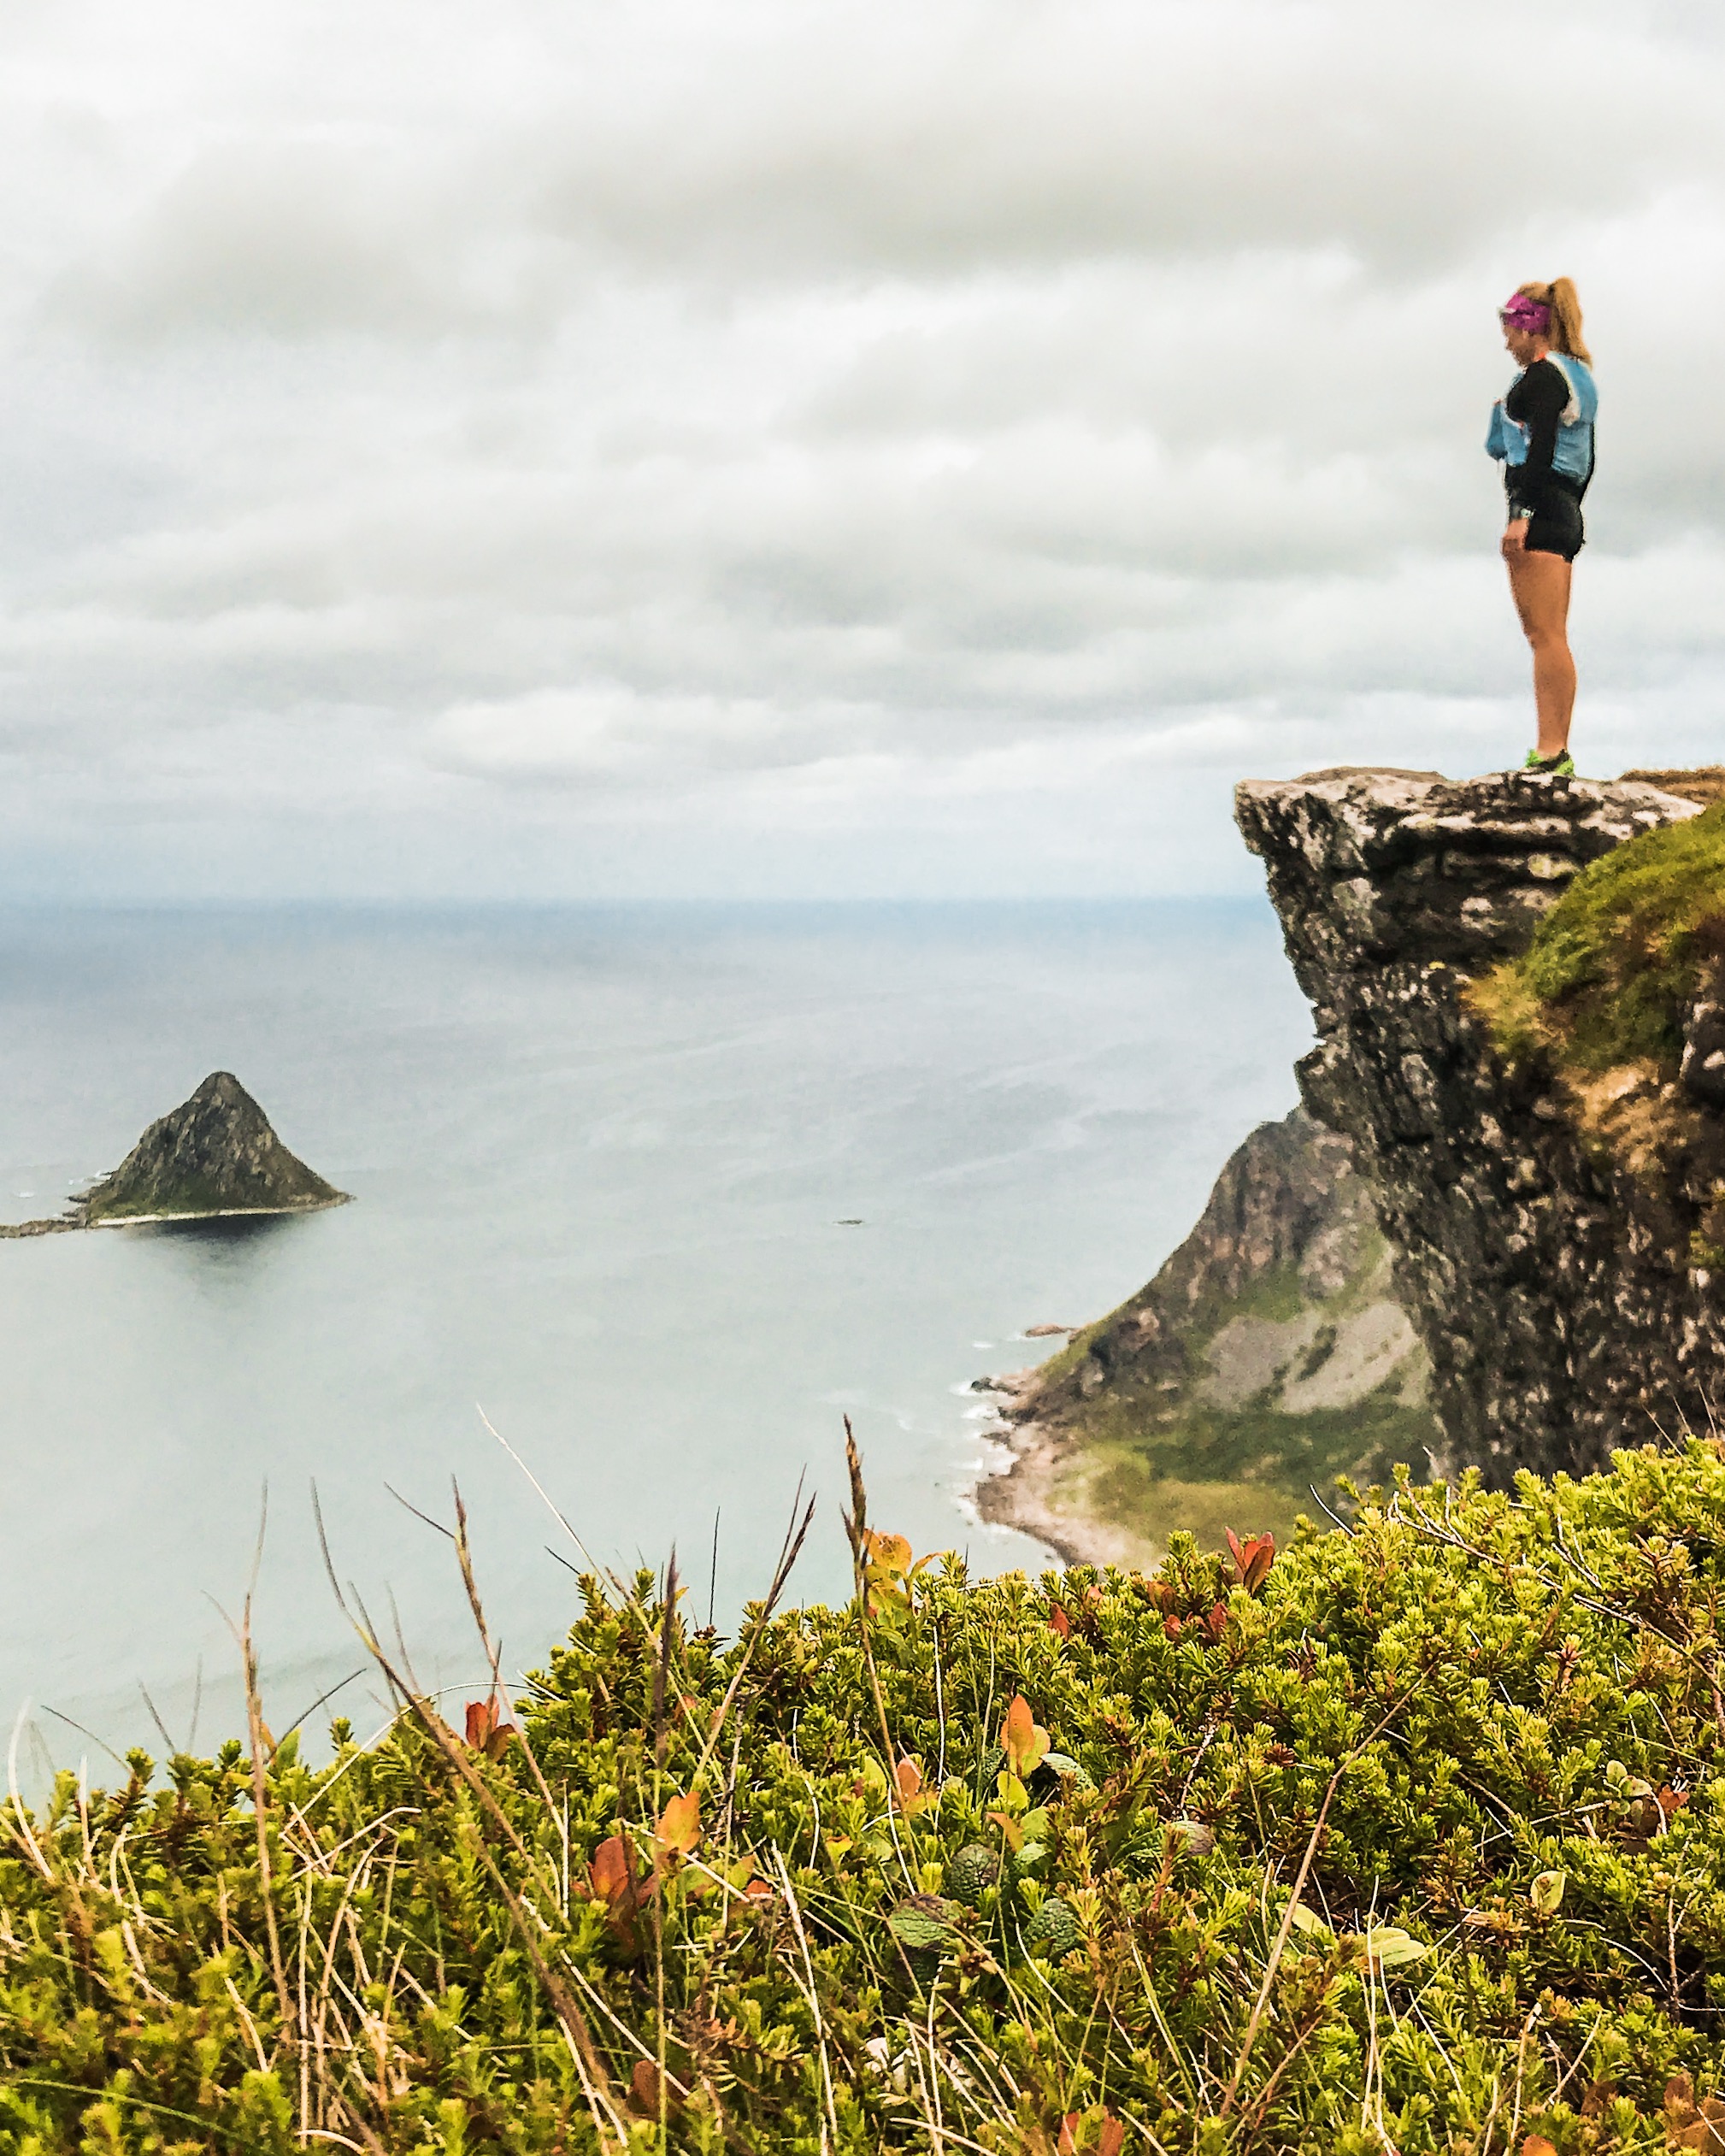
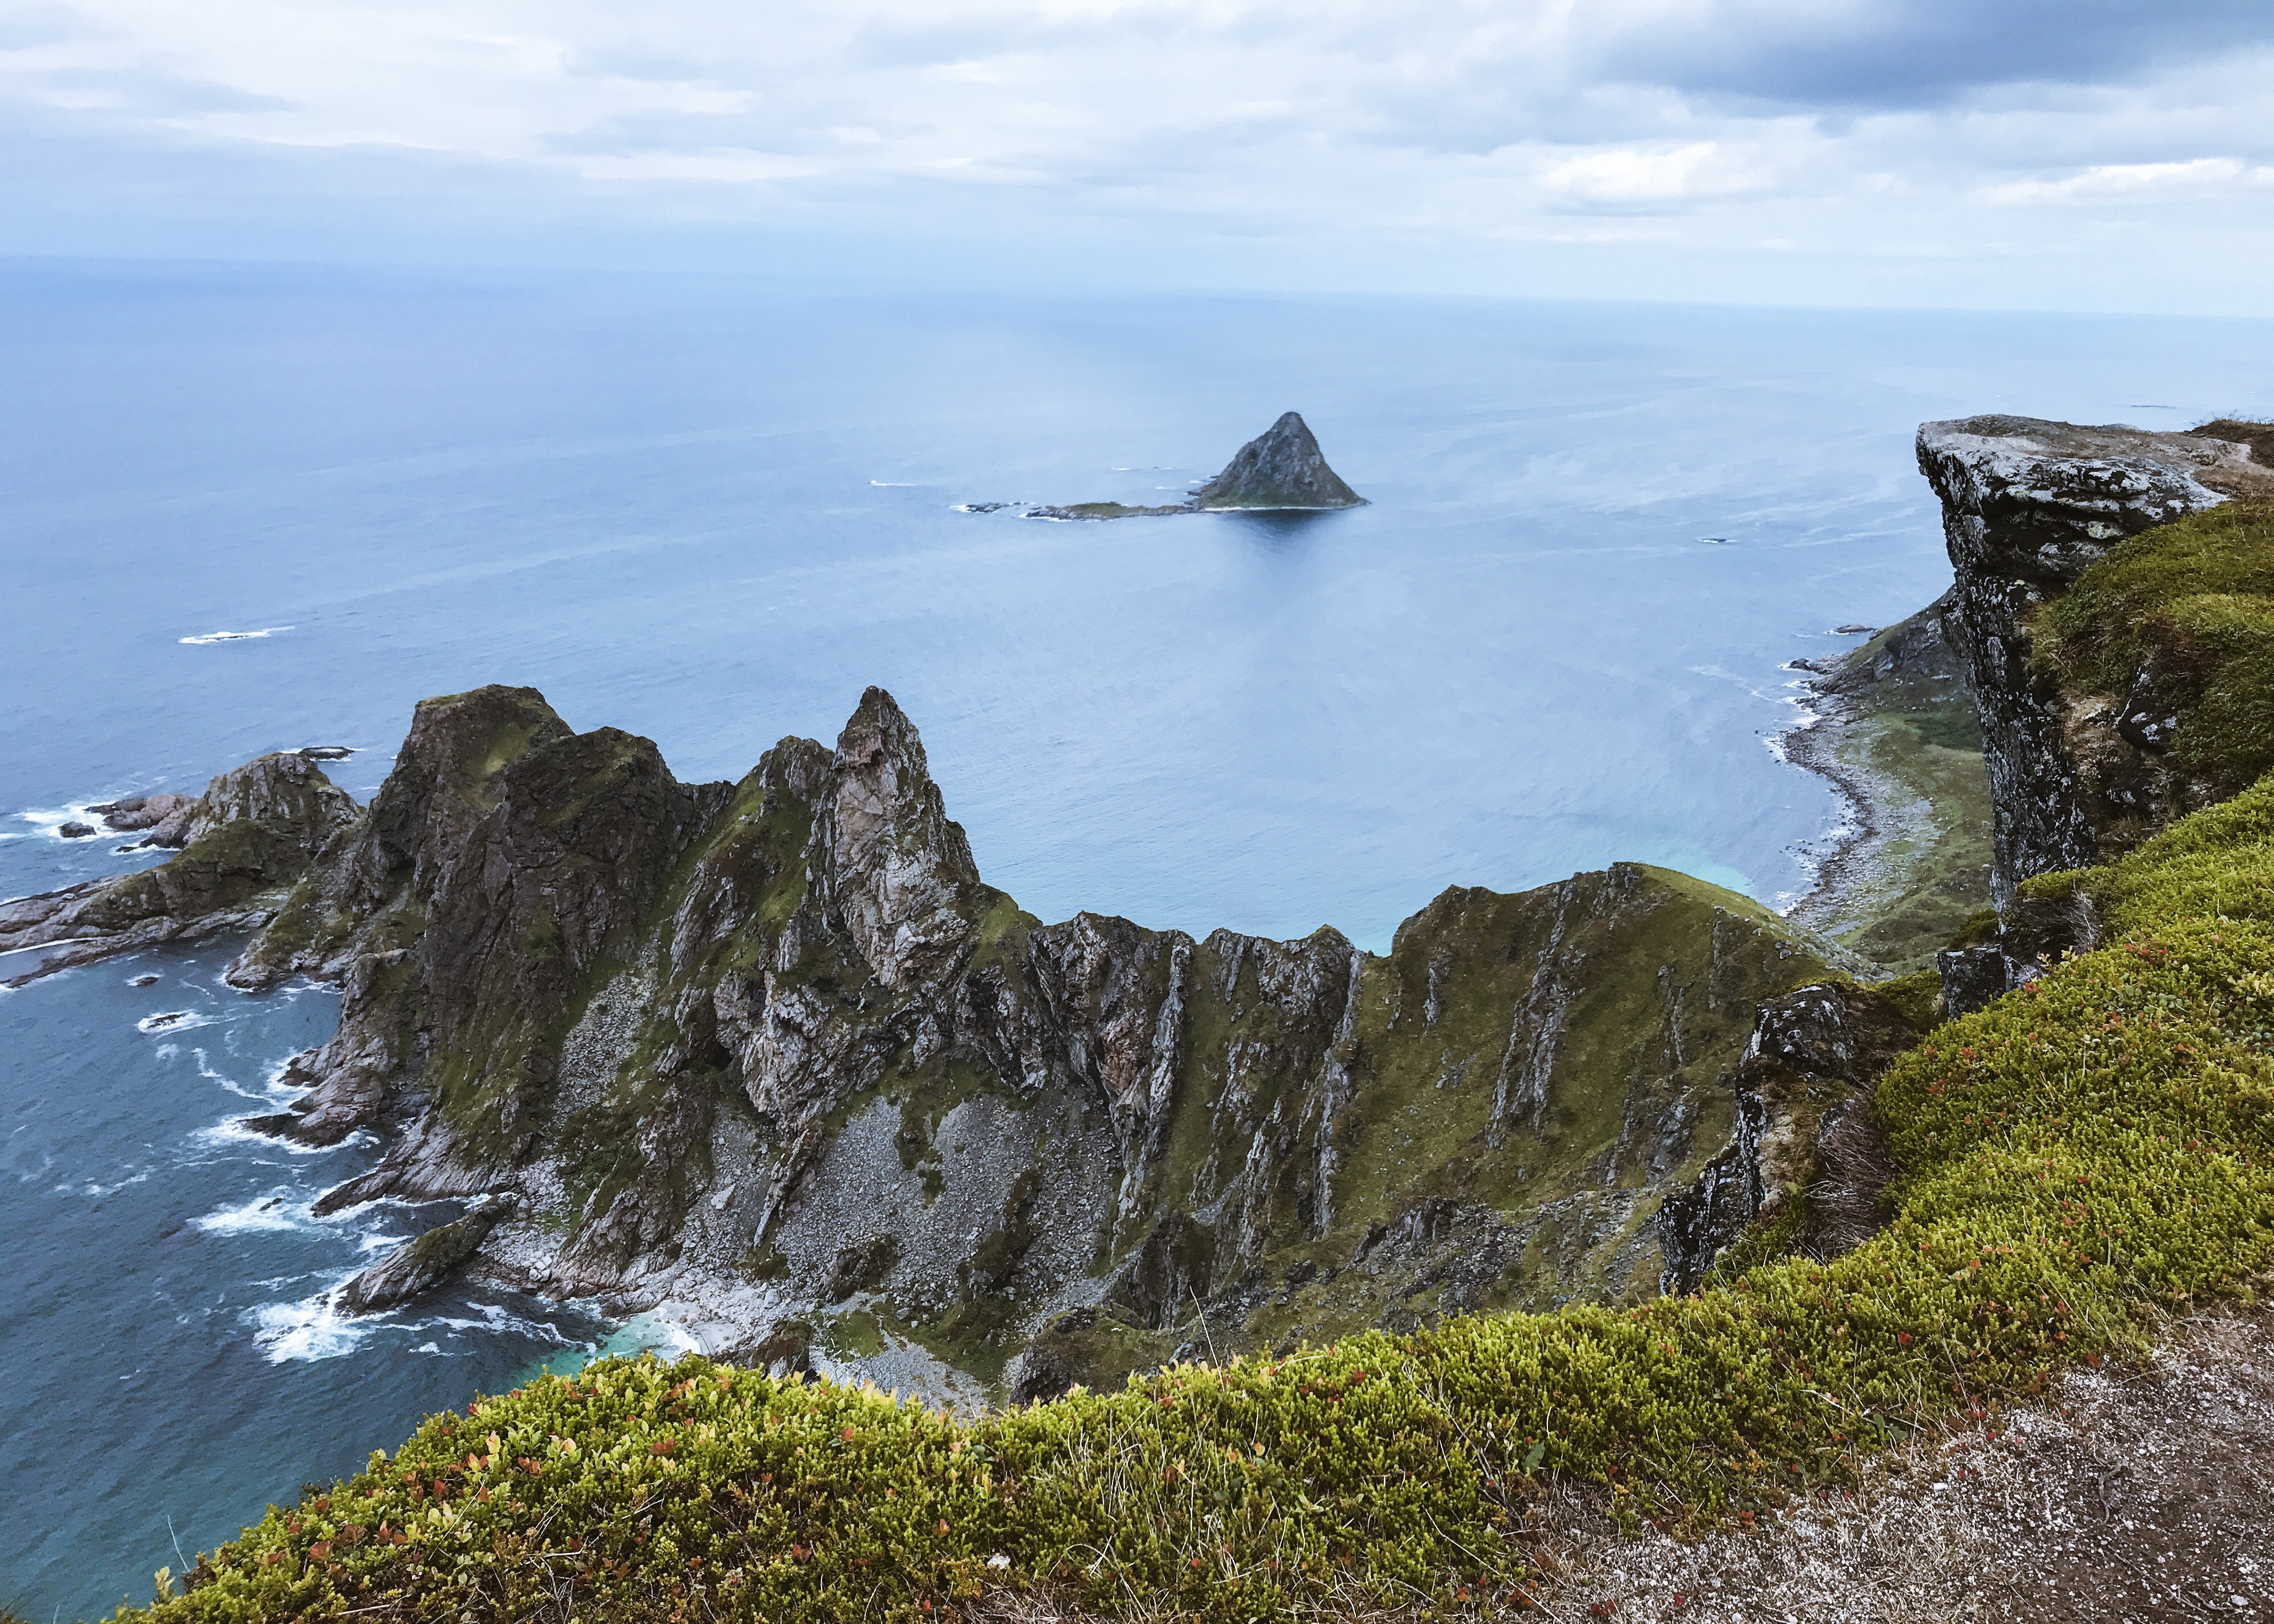
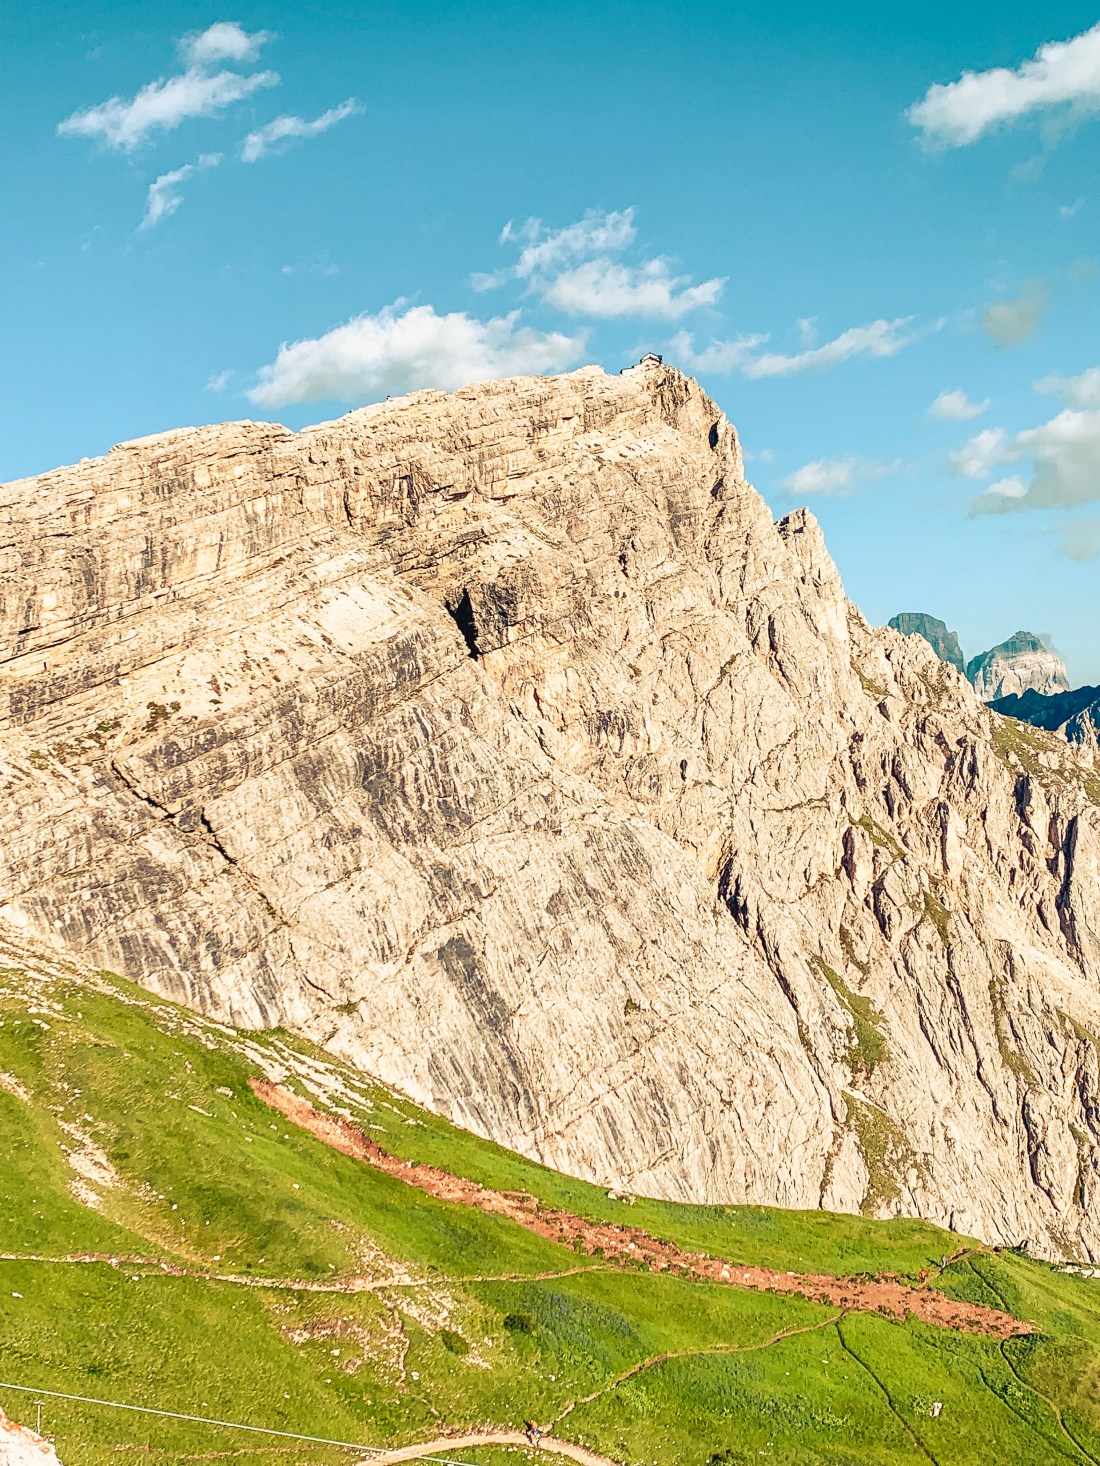
Can you spot the cabin on the edge?
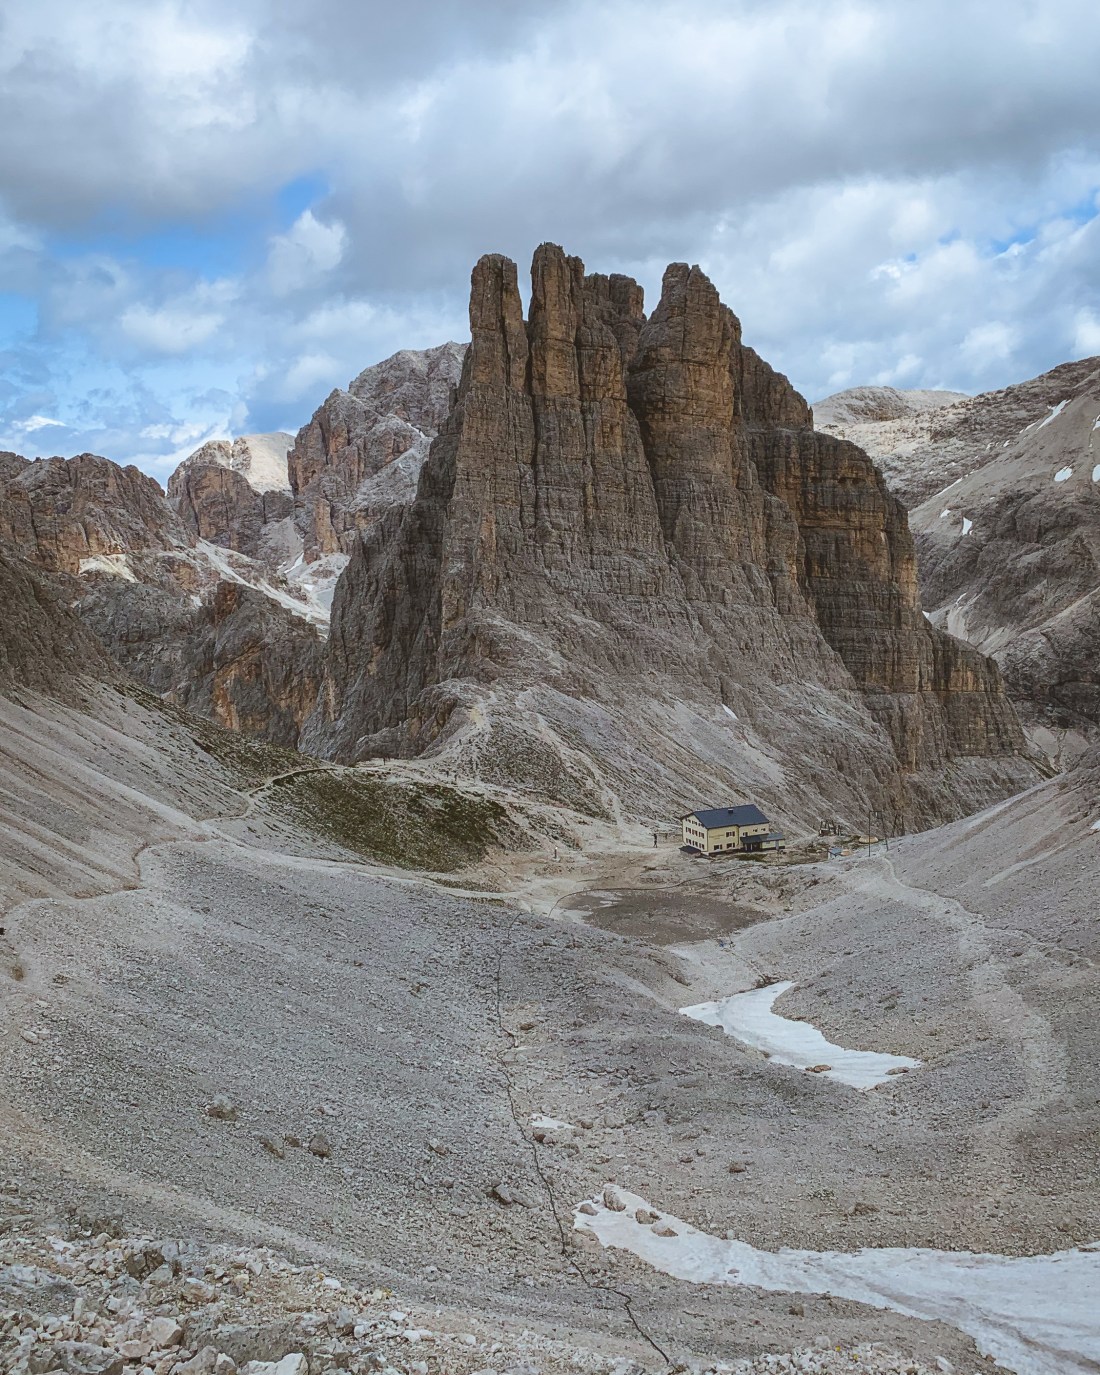
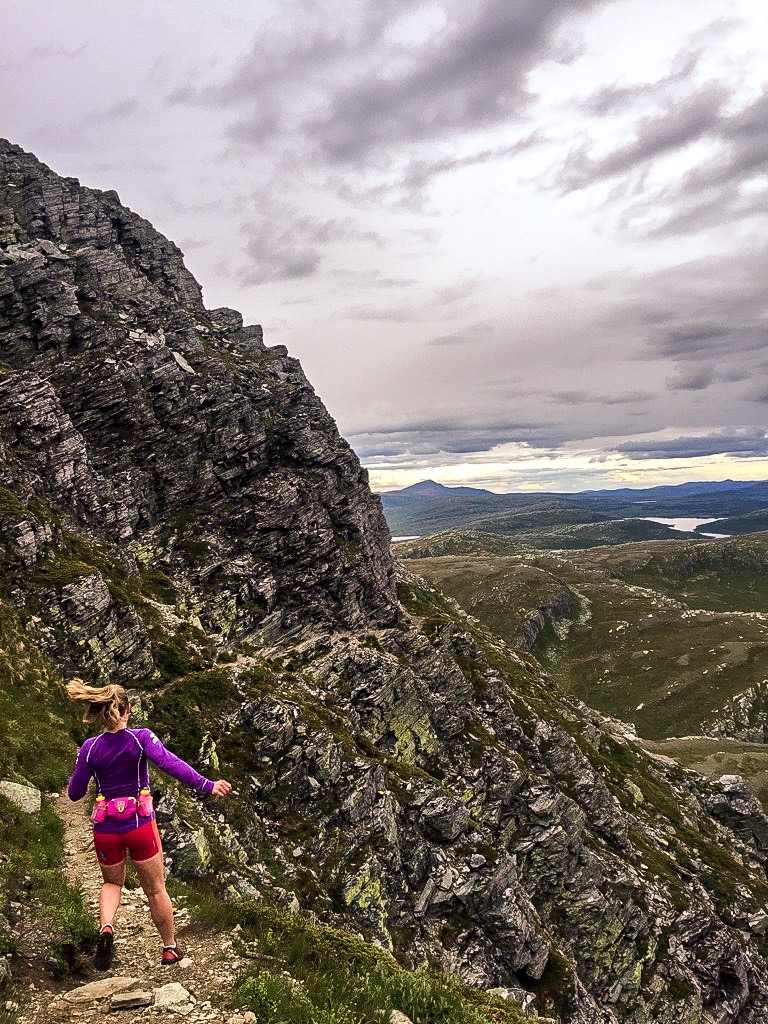
The Lagazuoi run
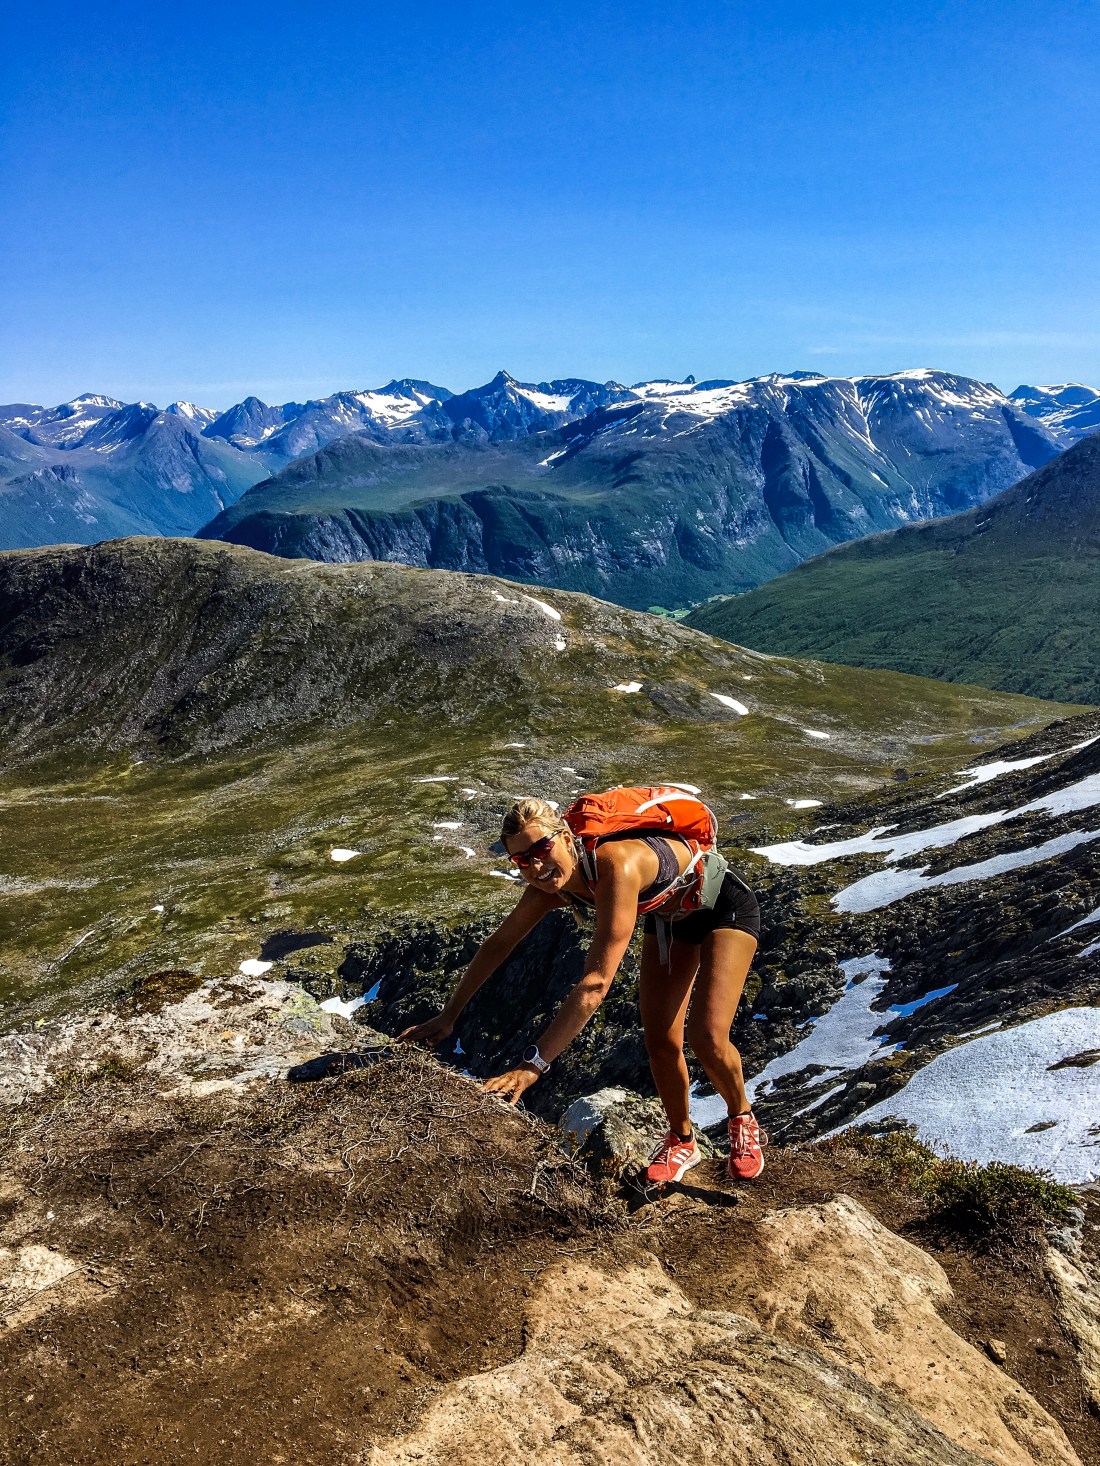
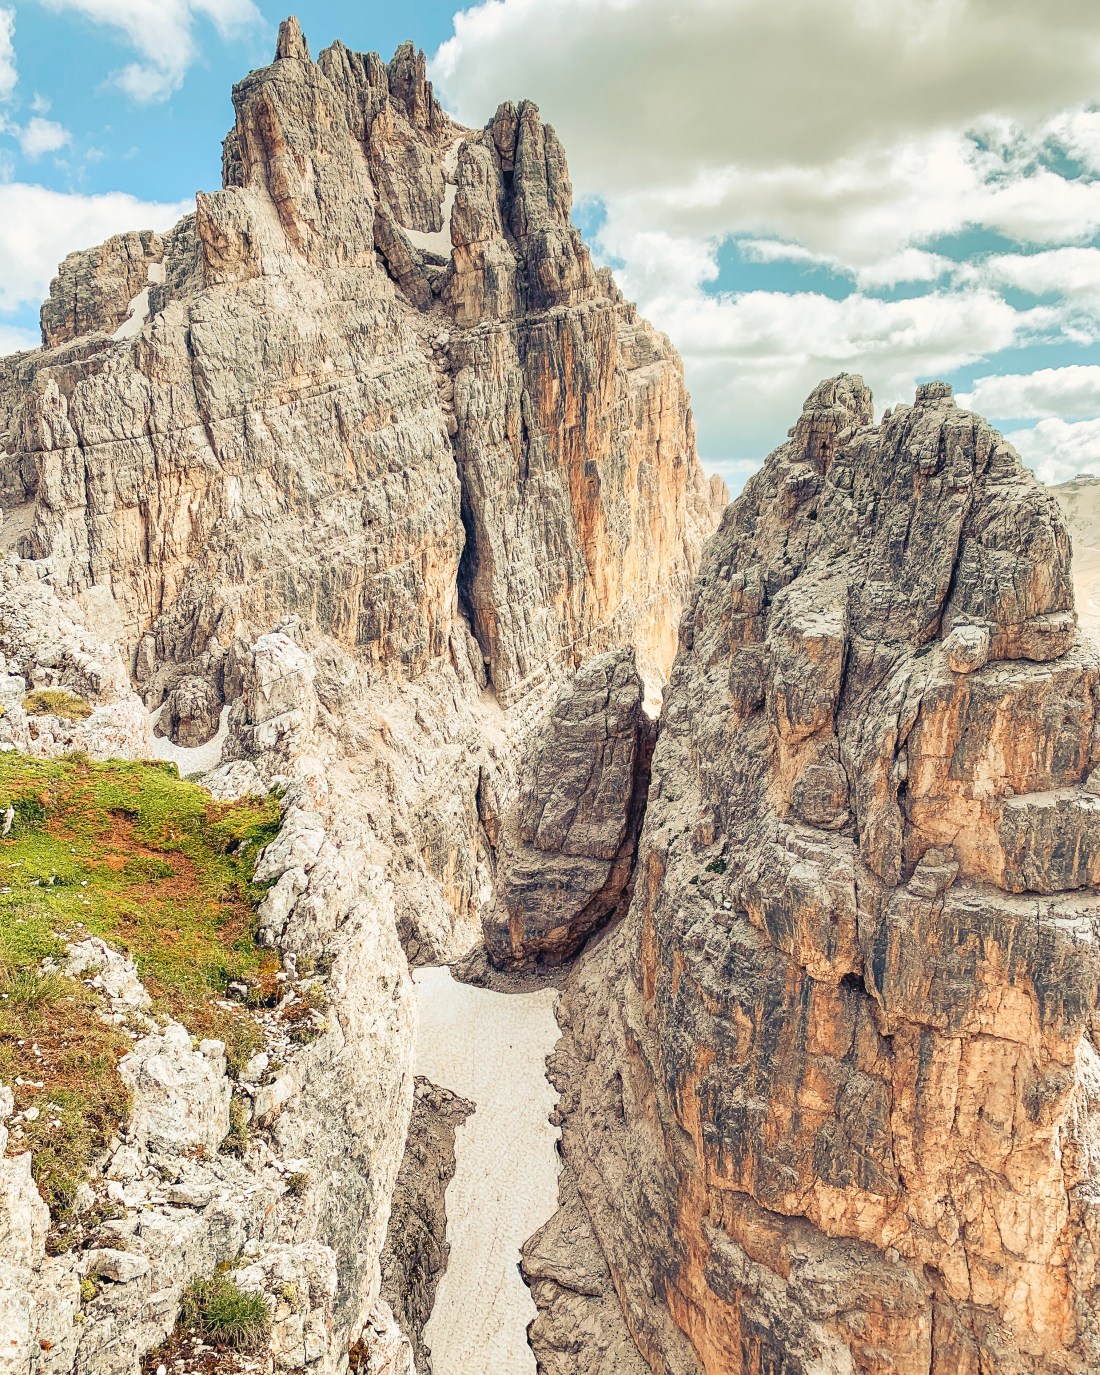
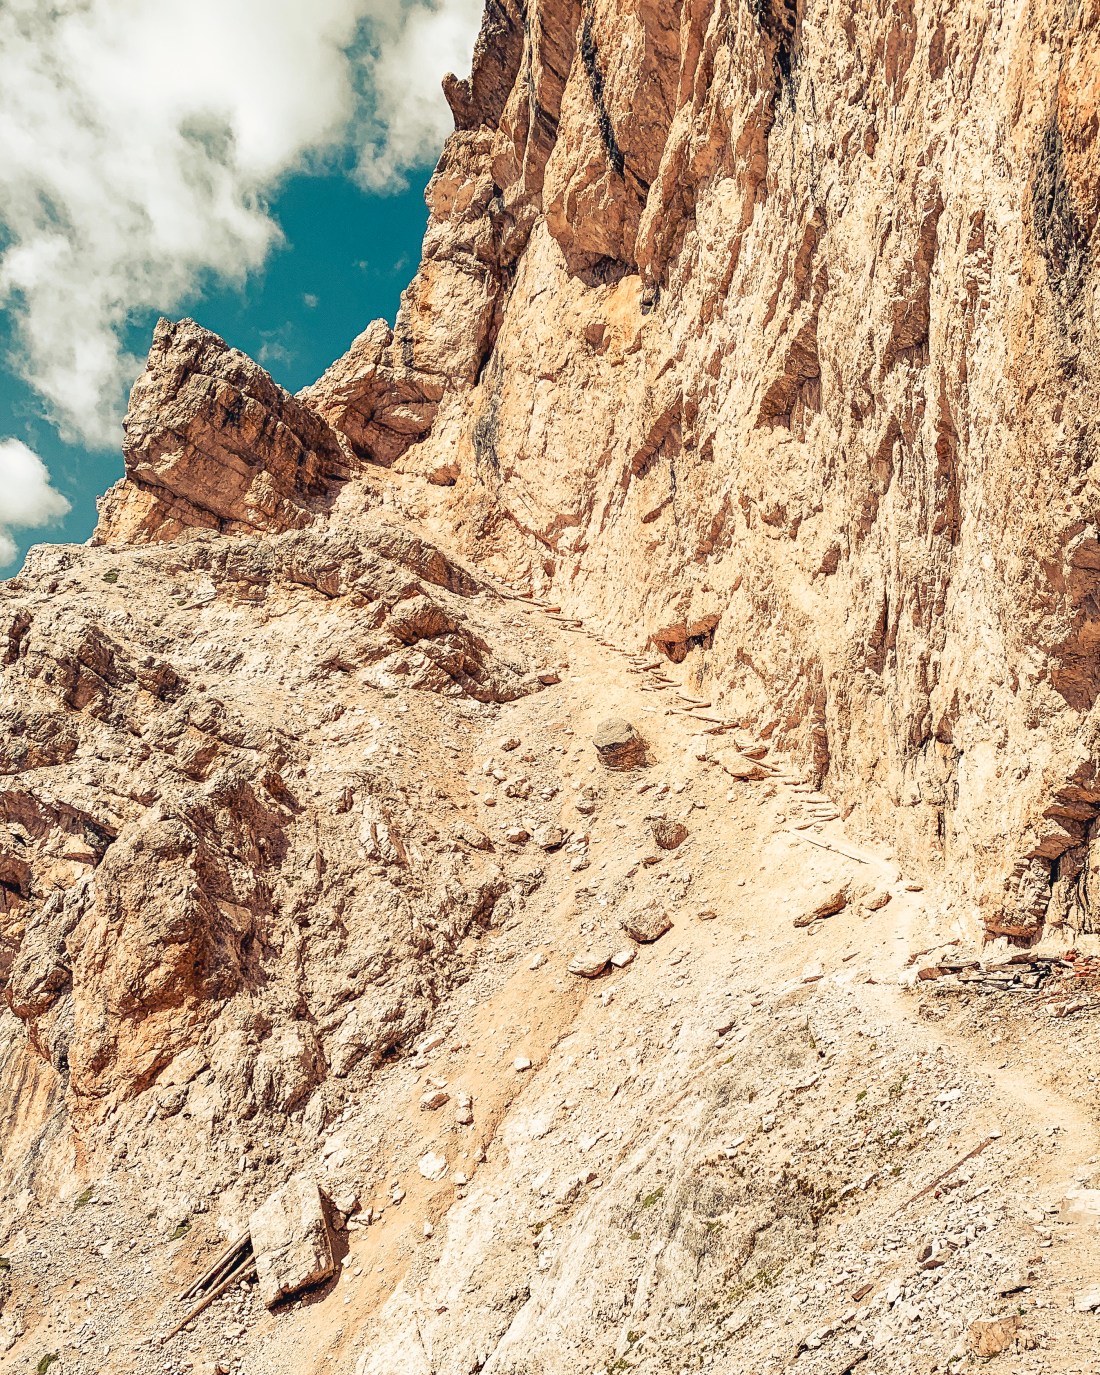
This run takes you around the impressive Gran Lagazuoi and provides some of the most spectacular views of the Dolomites. Take the trail on the right side of the cable car when facing the mountain. There are several trails going up, but for this run choose trail 402 (the Strava link shows the Babylon trail, but 402 is an easier option). Stay on 402 until you reach trail 20B at around 2500 m.a.s.l. and continue the climb on 20B until you reach its highest point, Gran Forcela at around 2650m.a.s.l. From here, again follow 20B going down on the other side and stay on this trail along the mountain wall, which will be on your left side. This is the most technical part of the trail and I have to admit I felt quite vulnerable and small running here alone. Continue on this trail towards Rif. Lagazuoi. As you are approaching the rifugio, the trails will get significantly more crowded. Unless you are very adventurous, don’t bother doing the detour shown on the Strava link, but save the energy for another detour following the Kaiserjägersteig trail towards the peak Piccolo Lagazuoi at 2778 m.a.s.l. Now you have earned your lunch at the Rifugio Lagazuoi.
View from Gran ForcelaDecent from Gran Forcela
After lunch, you have the option to run down, walk down through the war tunnels, or save your legs for the next run by taking the cable car down to Passo Falzarego.
From Piccolo Lagazuoi looking towards Gran Lagazuoi.
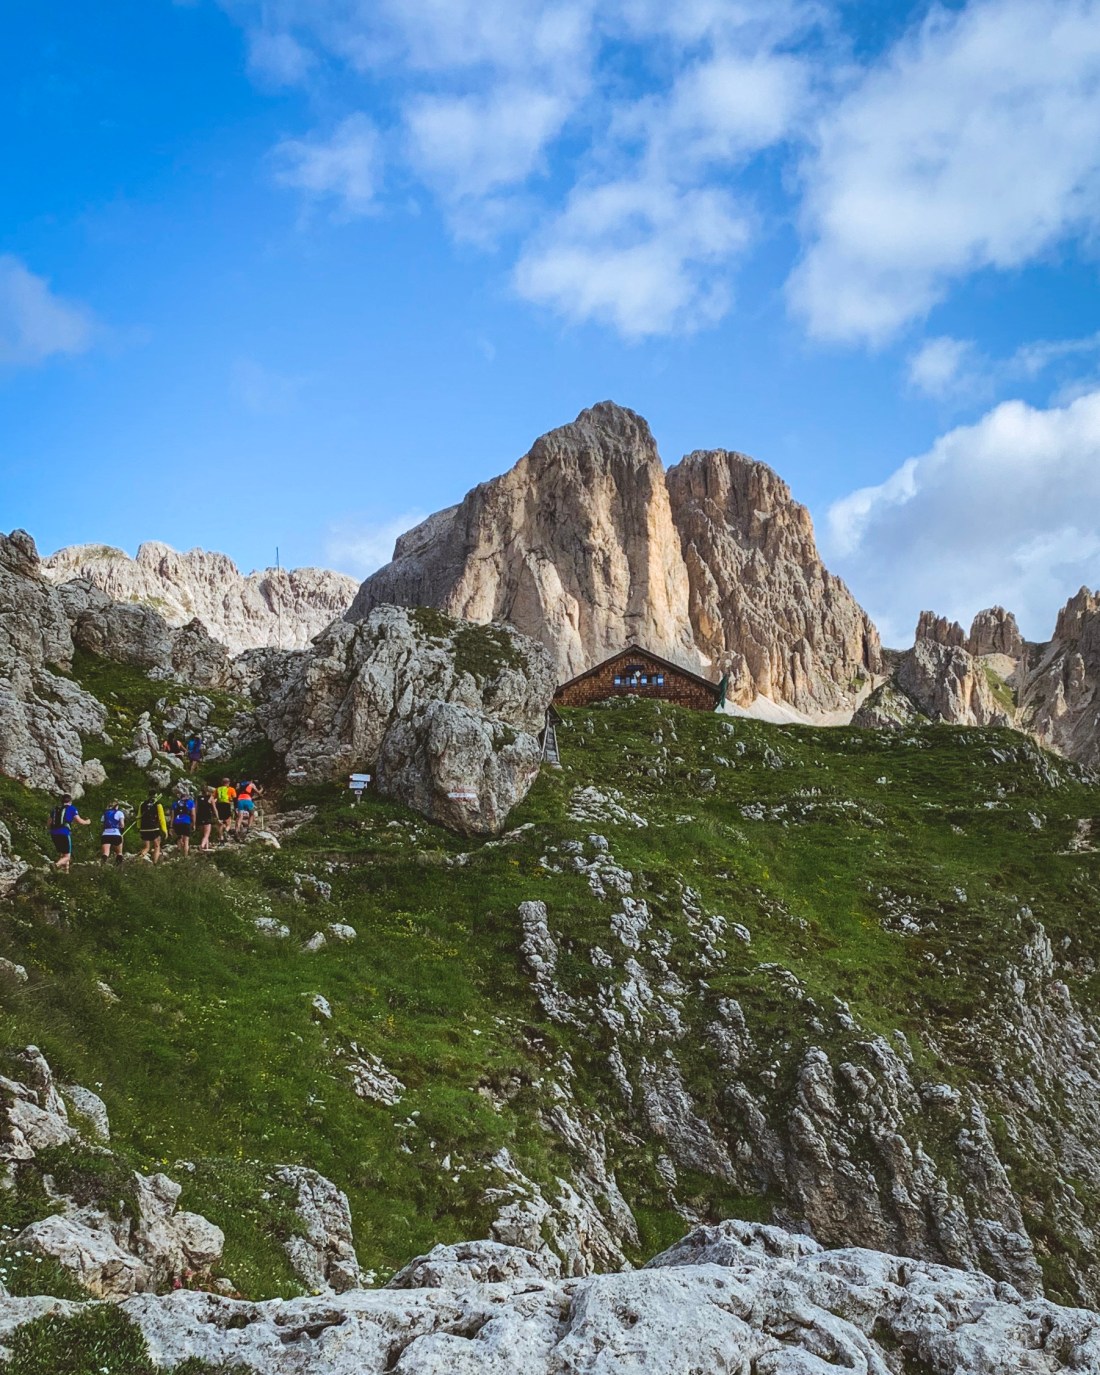
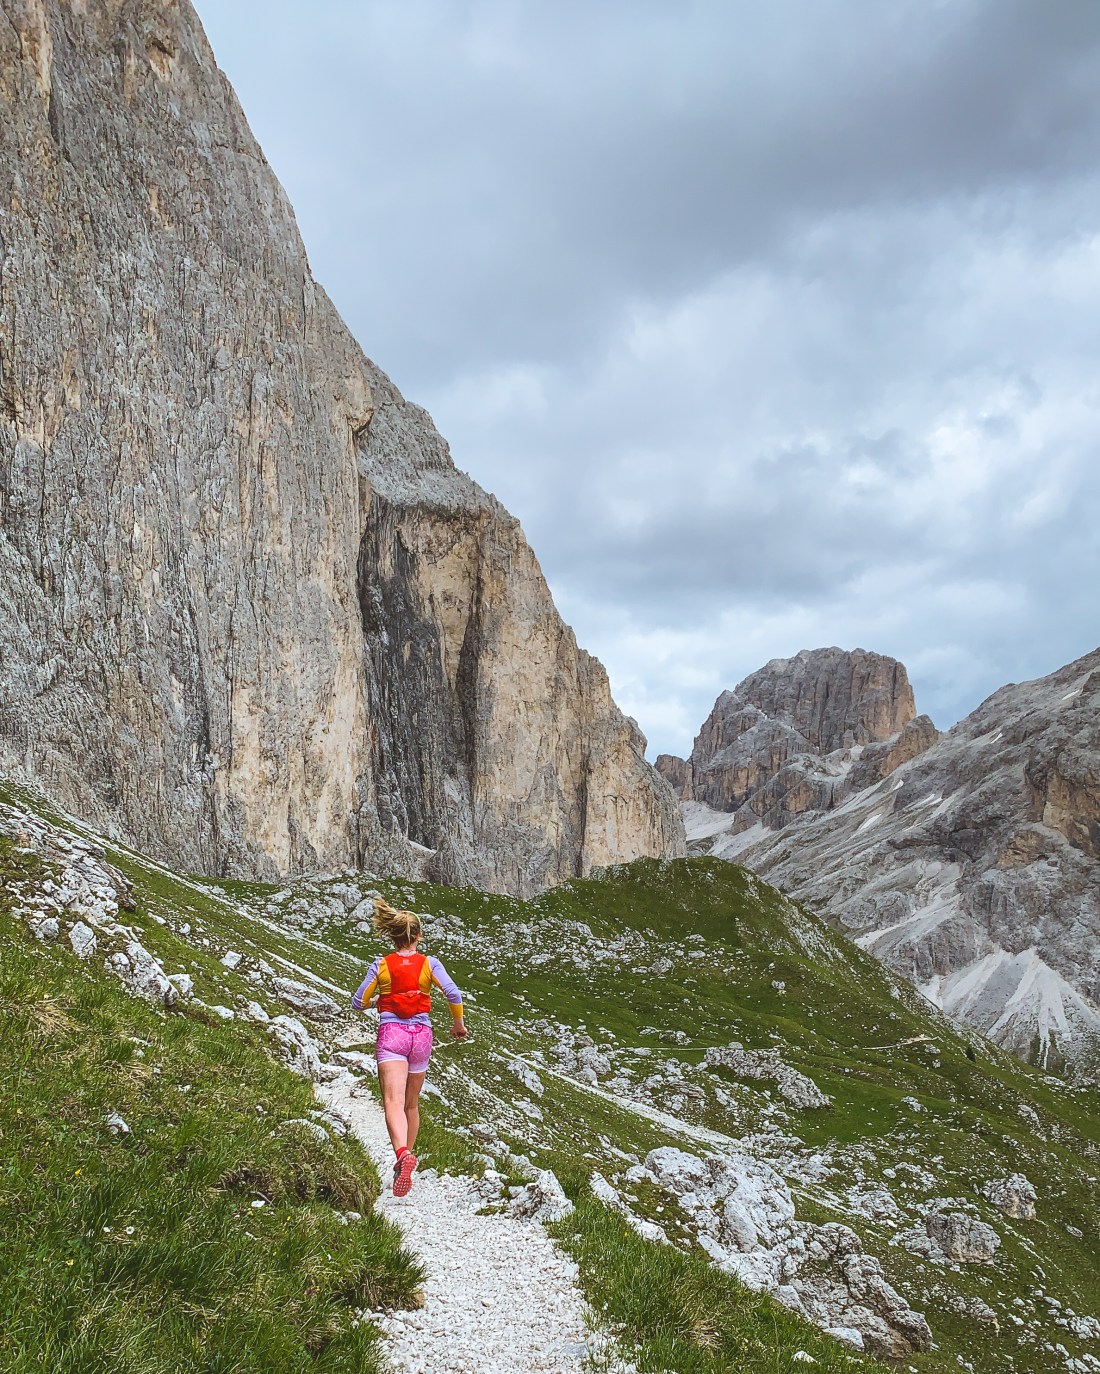
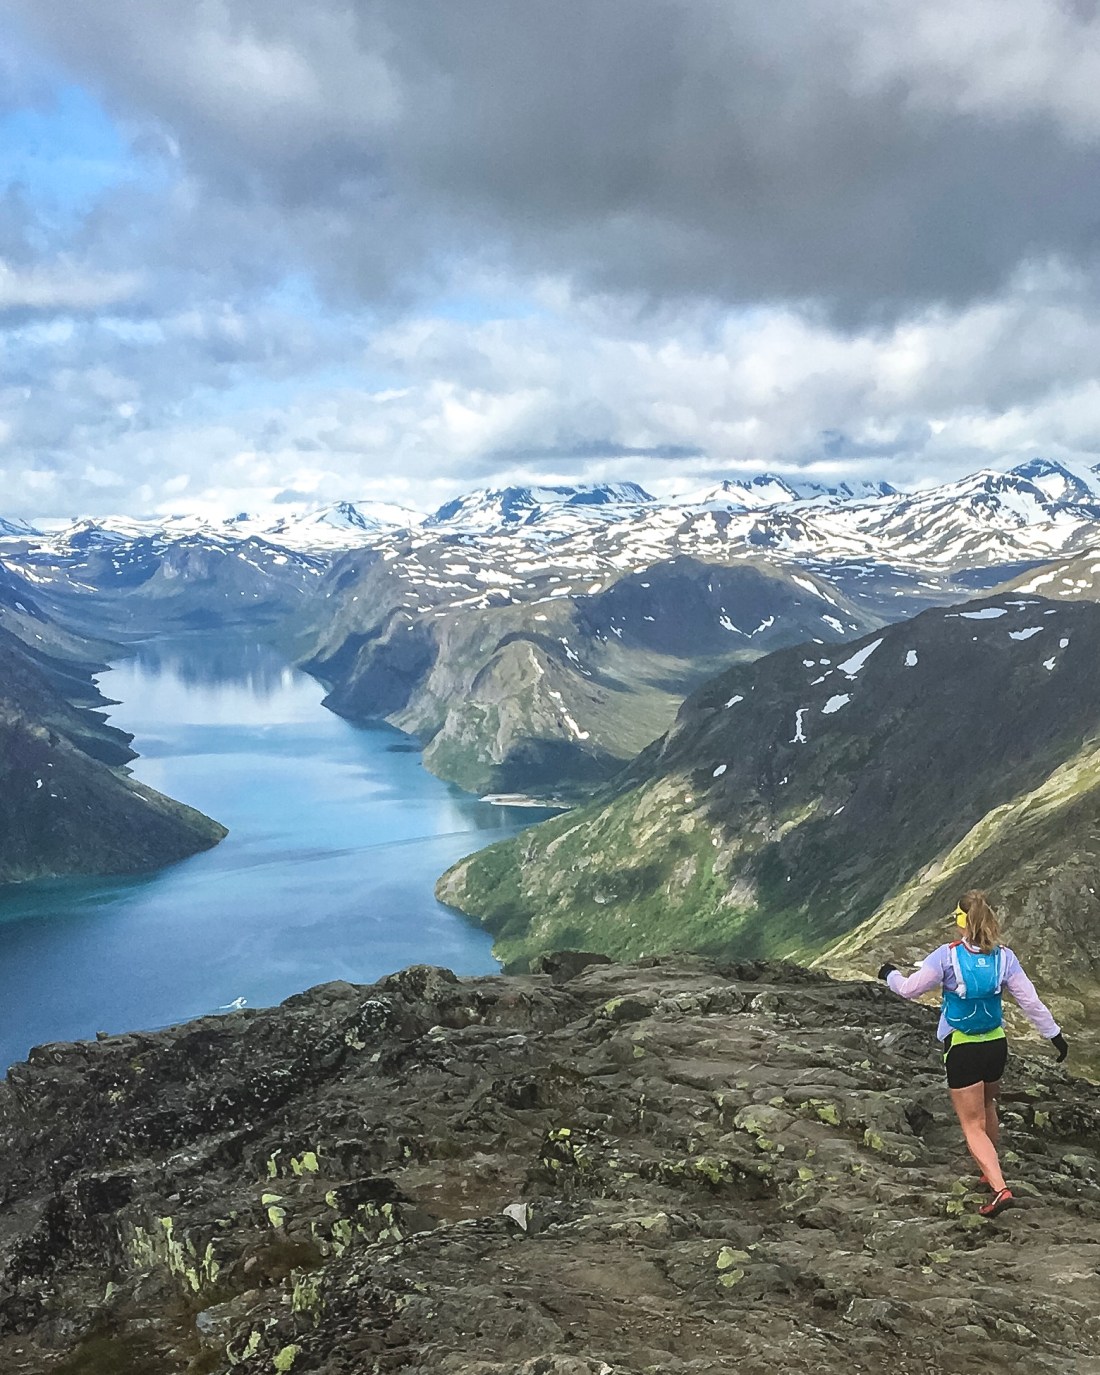
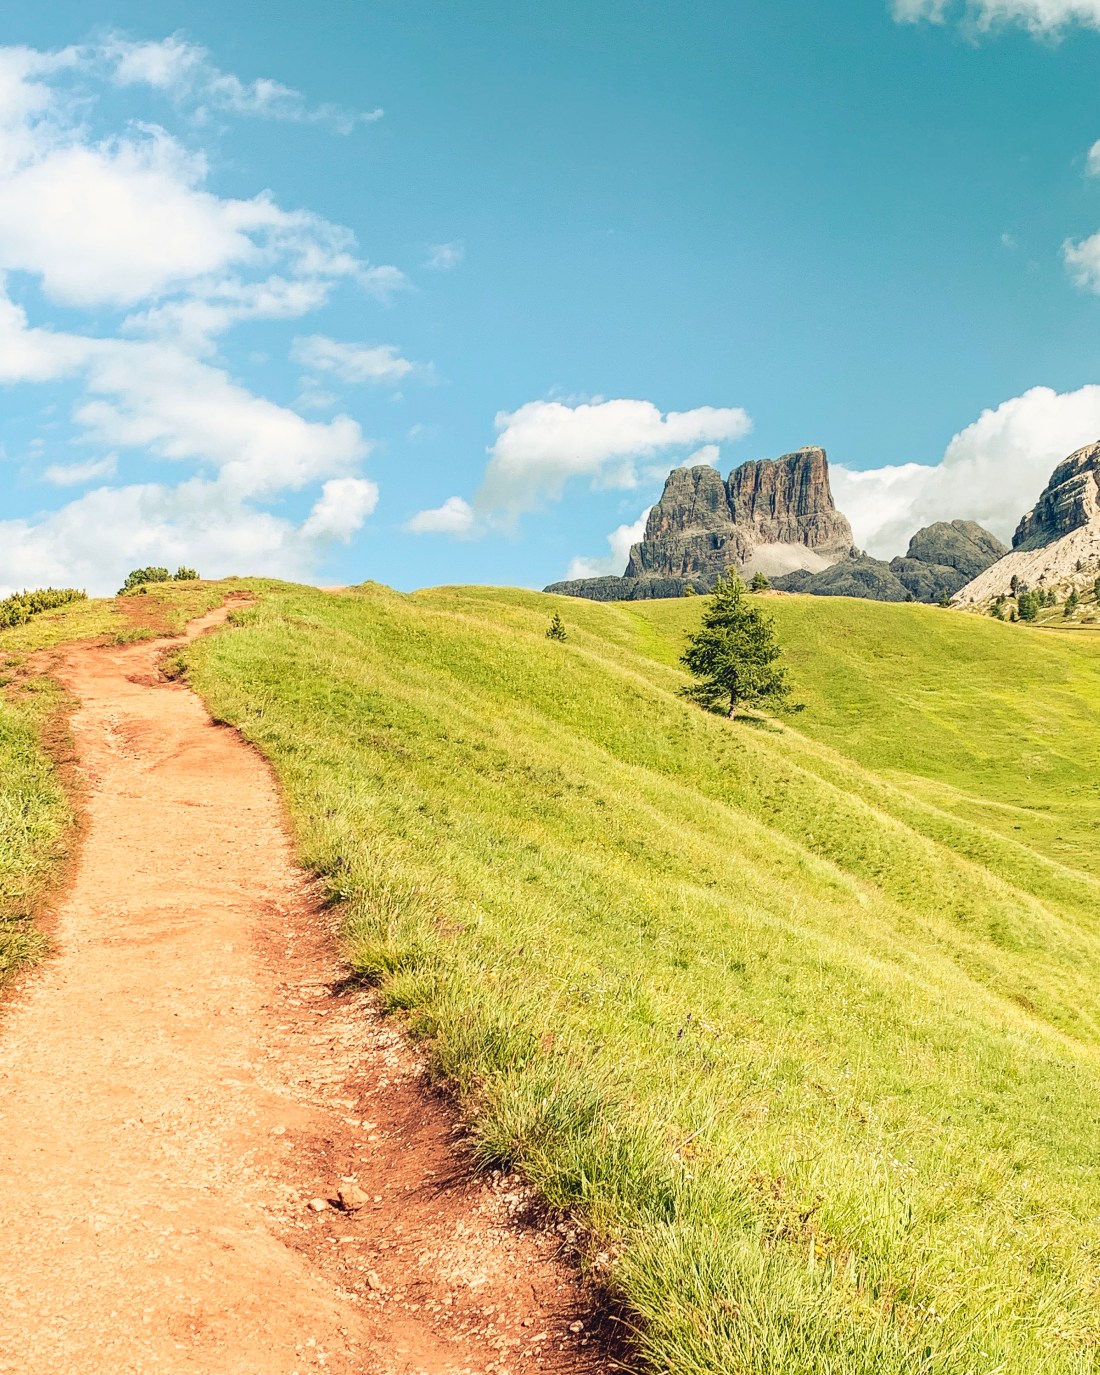
The Rifugio Nuvolau run
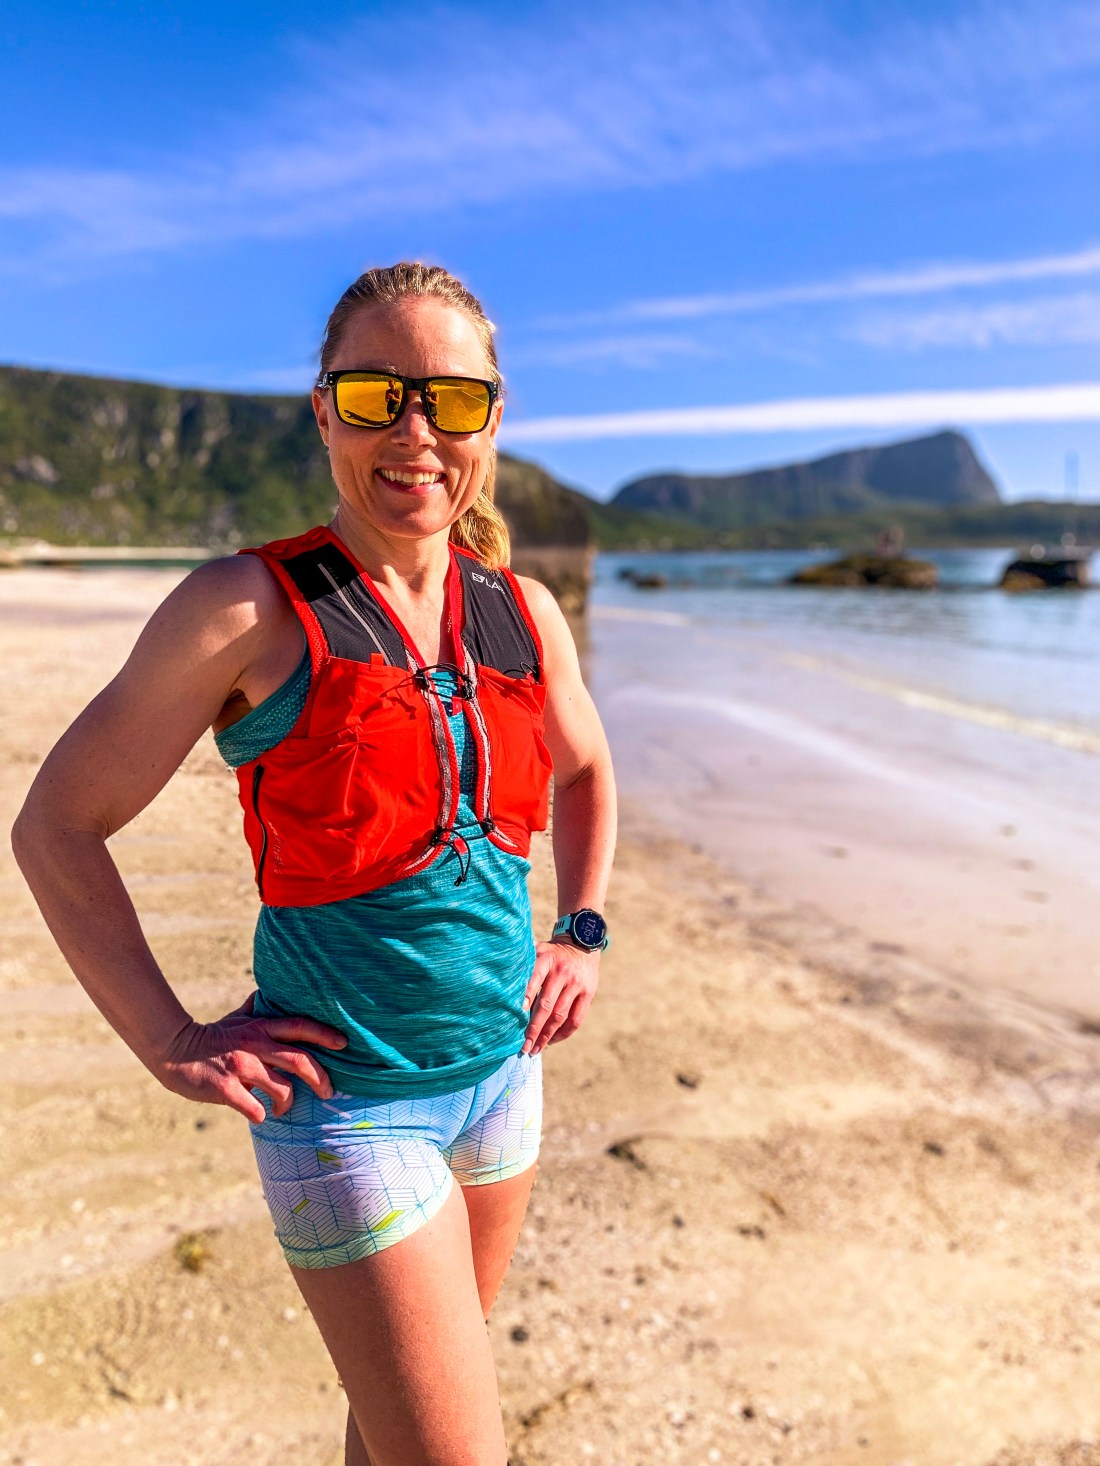
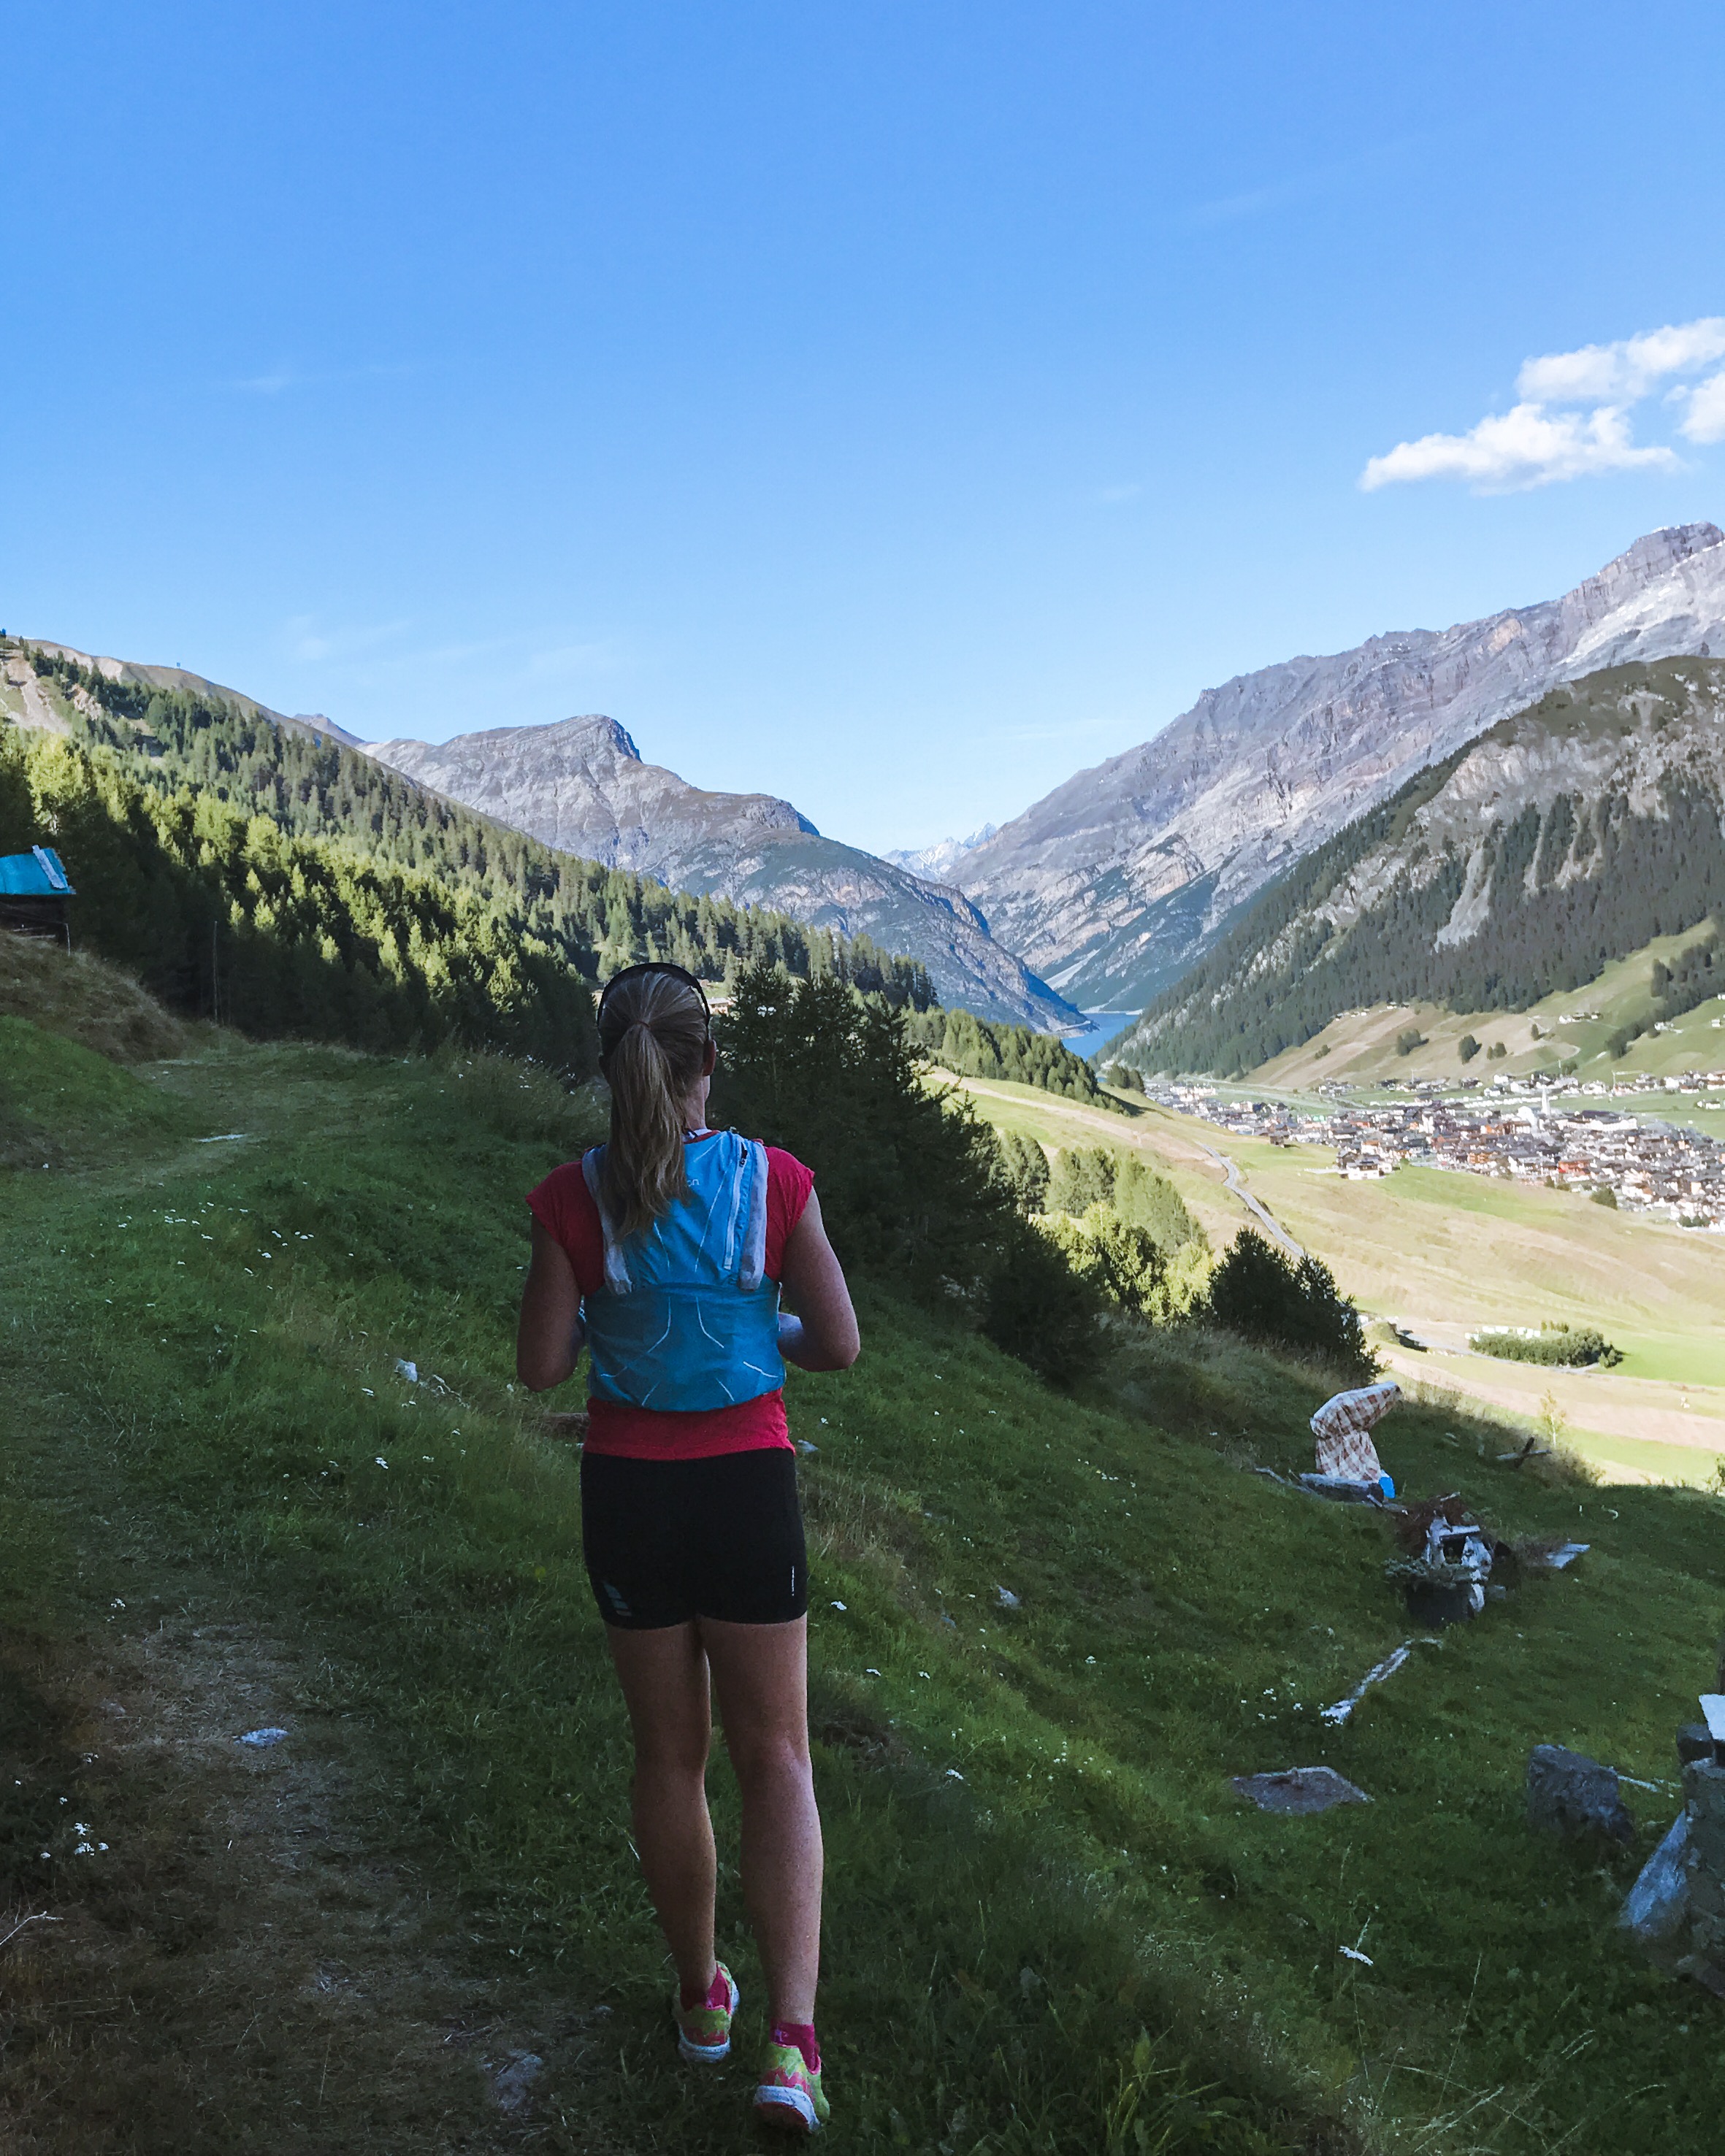
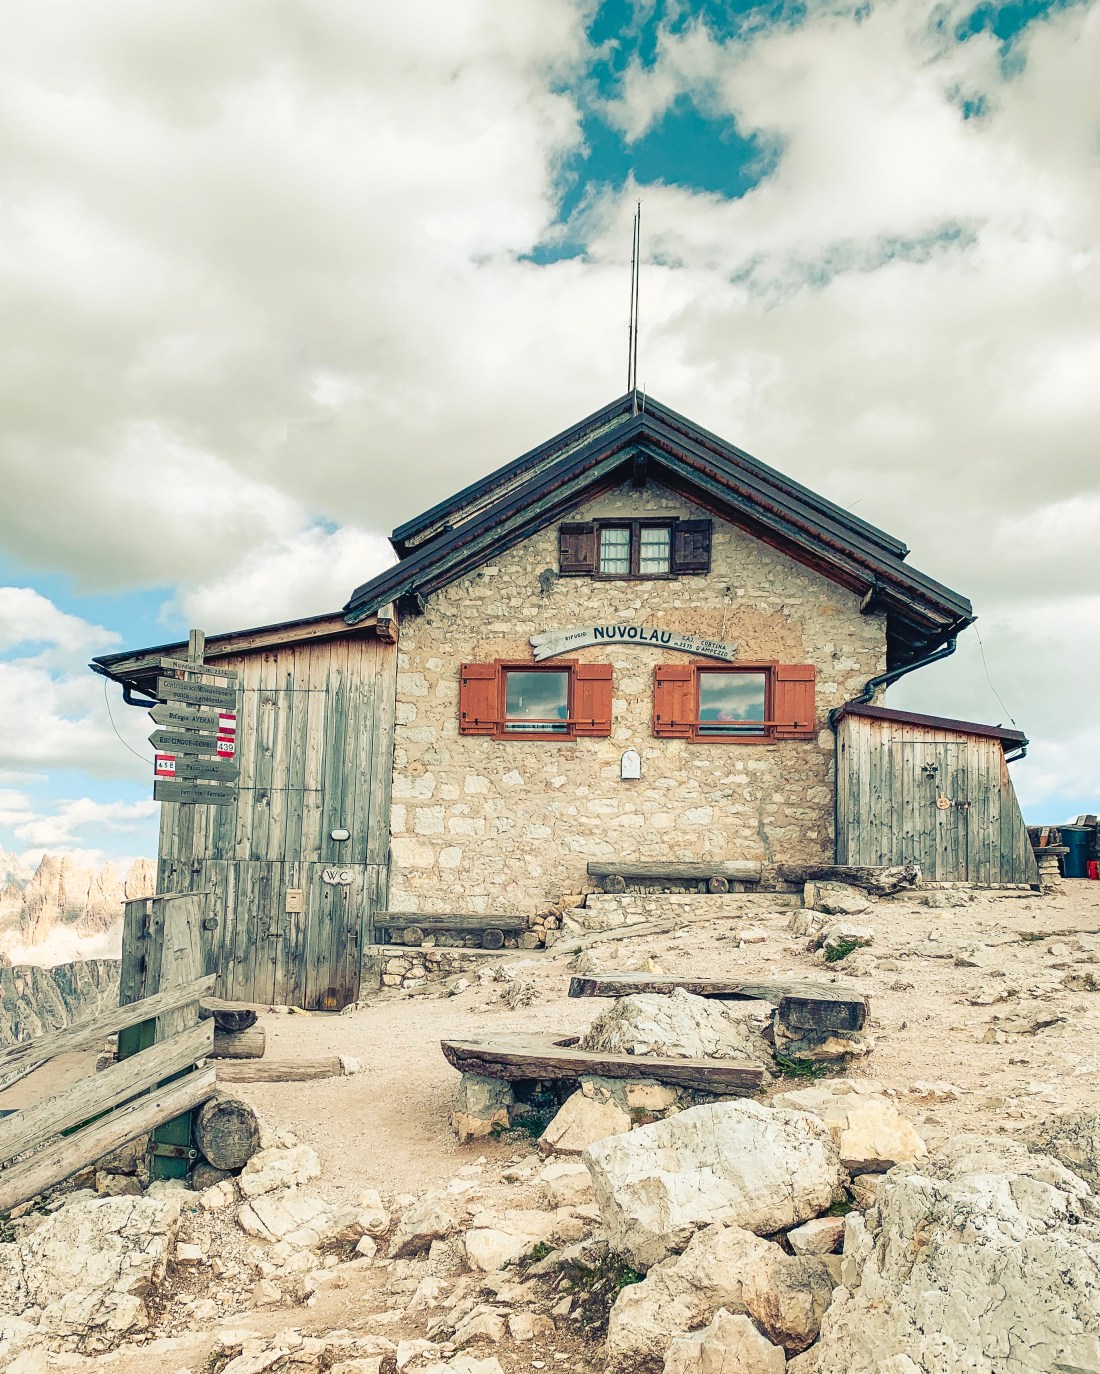
Rifugio Nuvolau is a small mountain cabin placed on the edge of the Nuvolau peak at 2574 m.a.s.l. The cabin can be reached from a multiple starting points and in different ways, one of them being by via ferrata. The alternative presented here is from Passo Falzarego, just across the street from where you descended from the Lagazuoi run. The trailhead is found at the parking next to the Rifugio Passo Falzarego, where you may also buy refreshments, if you need anything before the run.
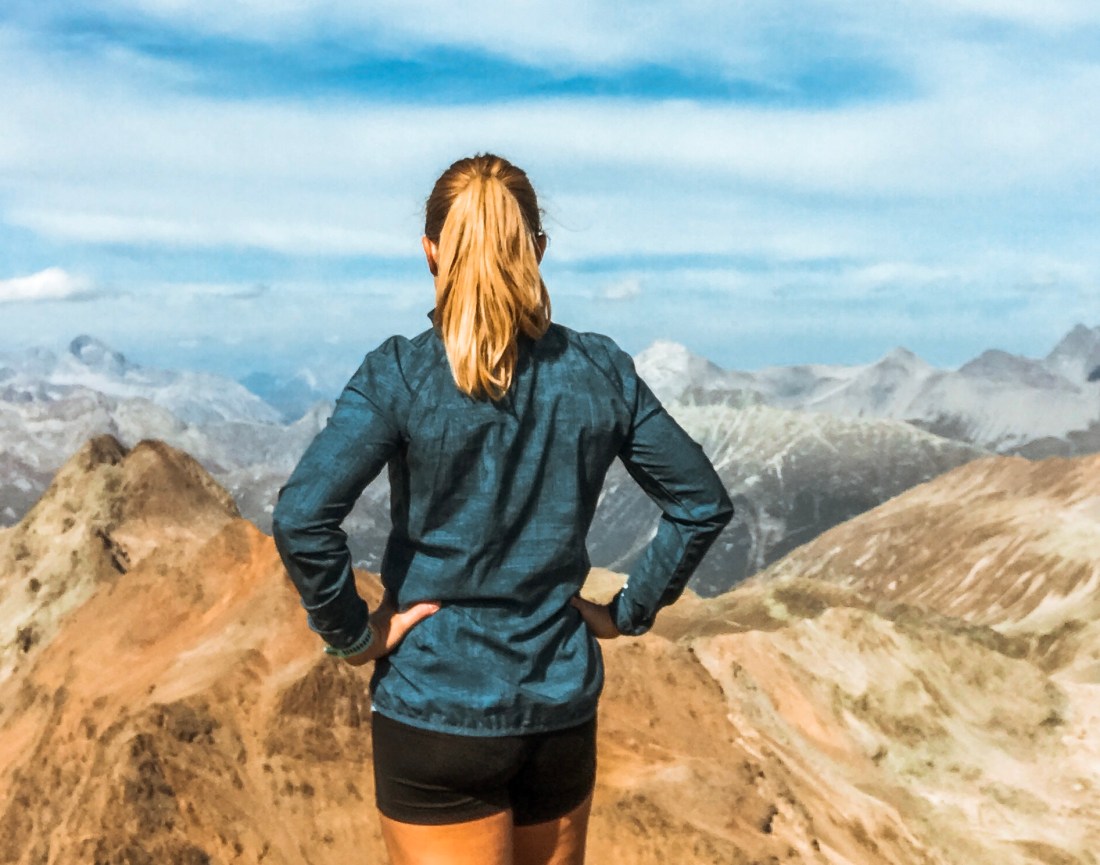
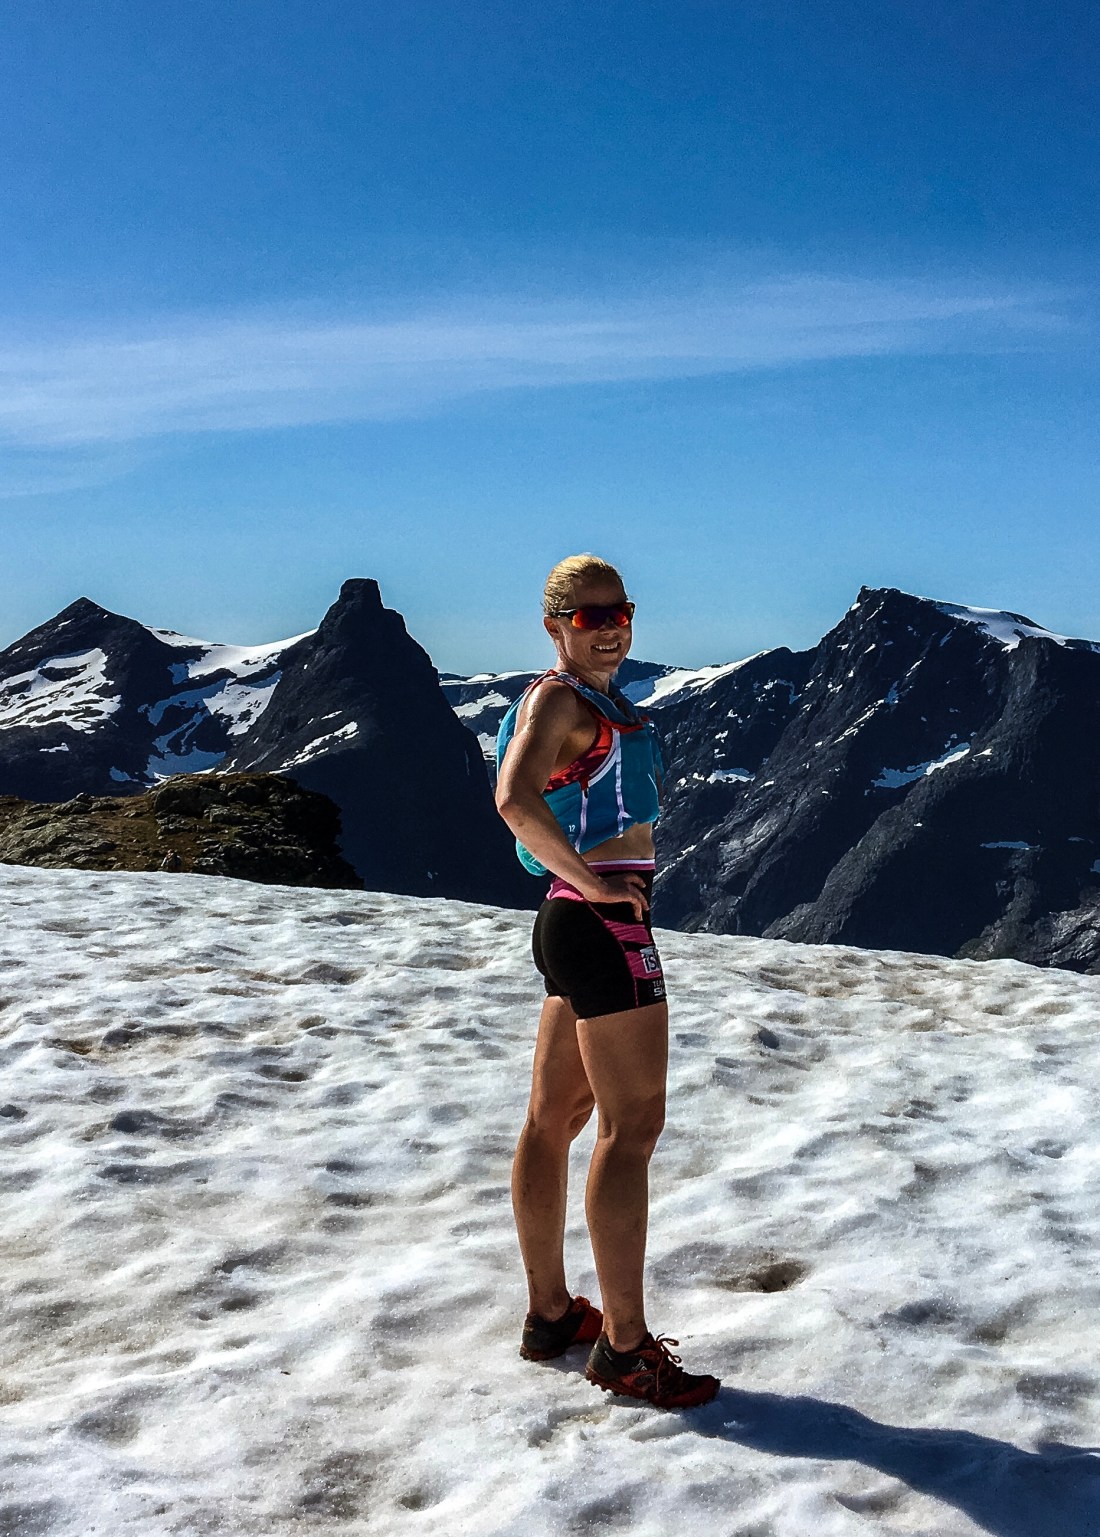
At the beginning of the run to Rif. Nuvolau with Mount Averau at a distance.
The first kilometer is pretty easy, only ascending about 80 meters, while the next kilometer is more varied also with some steeper sections. The third kilometer is steep before you get one pretty chill kilometer, even with some downhill and new views as you run around the Averau. The last four hundred meters up to the cabin will make you sweat again as the excitement builds for reaching this amazing location. When I arrived last time, the sun was about to set while a guy was playing guitar and the hikers who were booked for the night arrived. I stayed as long as I could while still being able to do the descent in daylight, and decided to book a bed for next time.
Rifugio Nuvolau
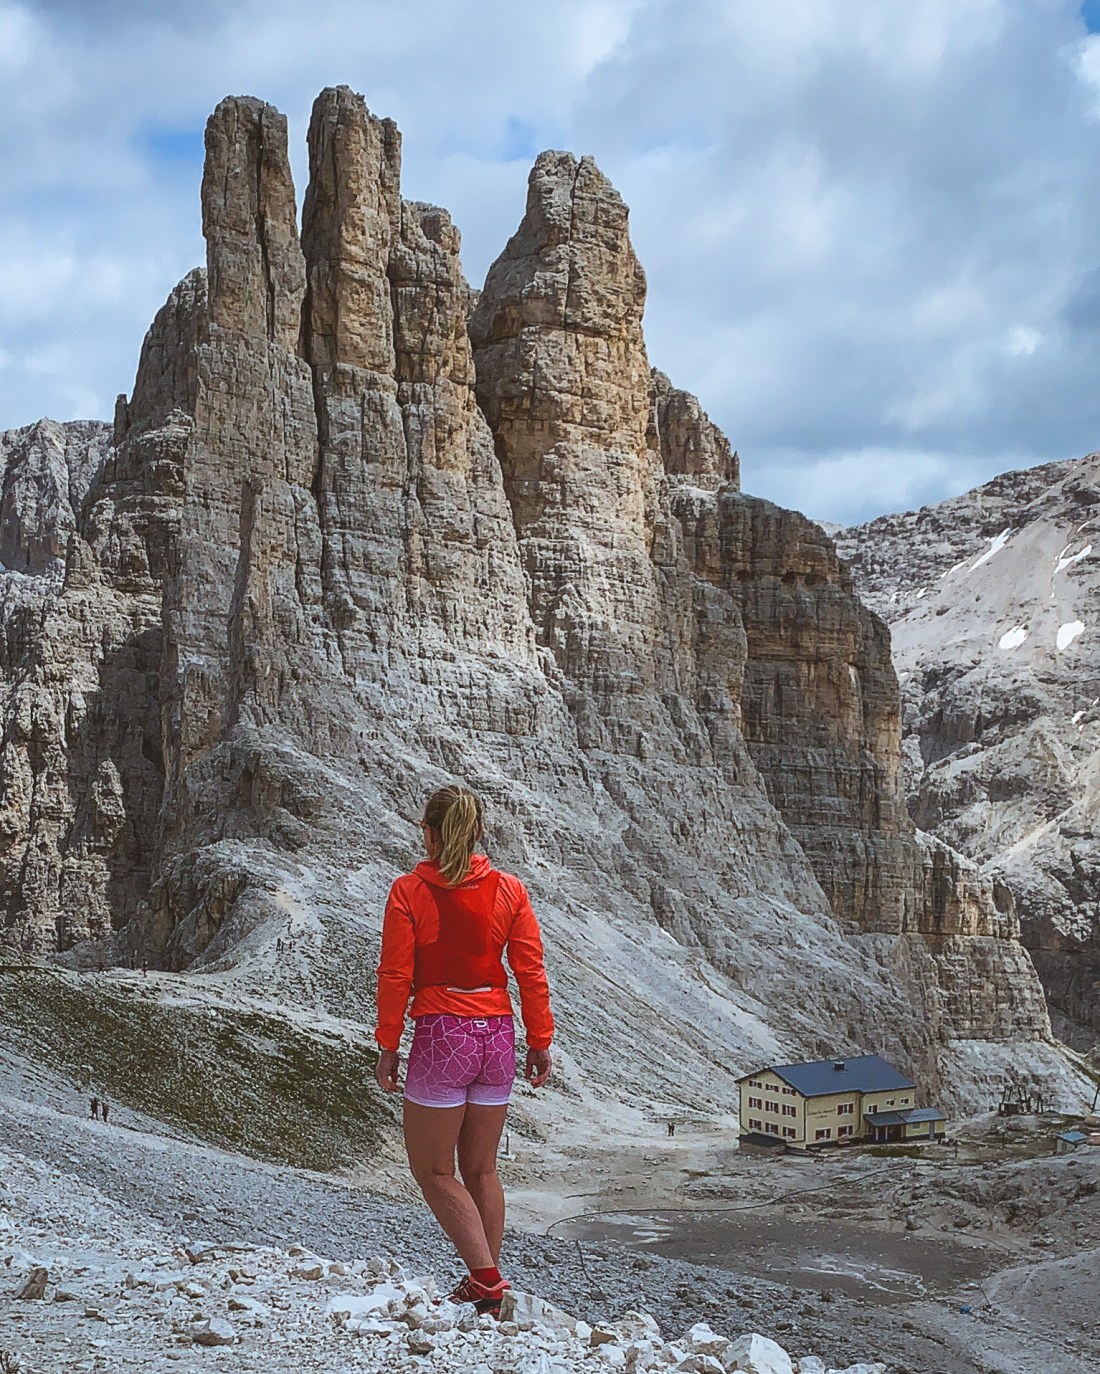
From the Nuvolau you have great views of the famous Five Towers, popular for mountain climbers. If you have the time, you can return via the towers, by taking a right turn at Rifugio Averau (400 meters from Nuvolau) and continue on trail 439 until you meet trail 440, which will take you back to your starting point.
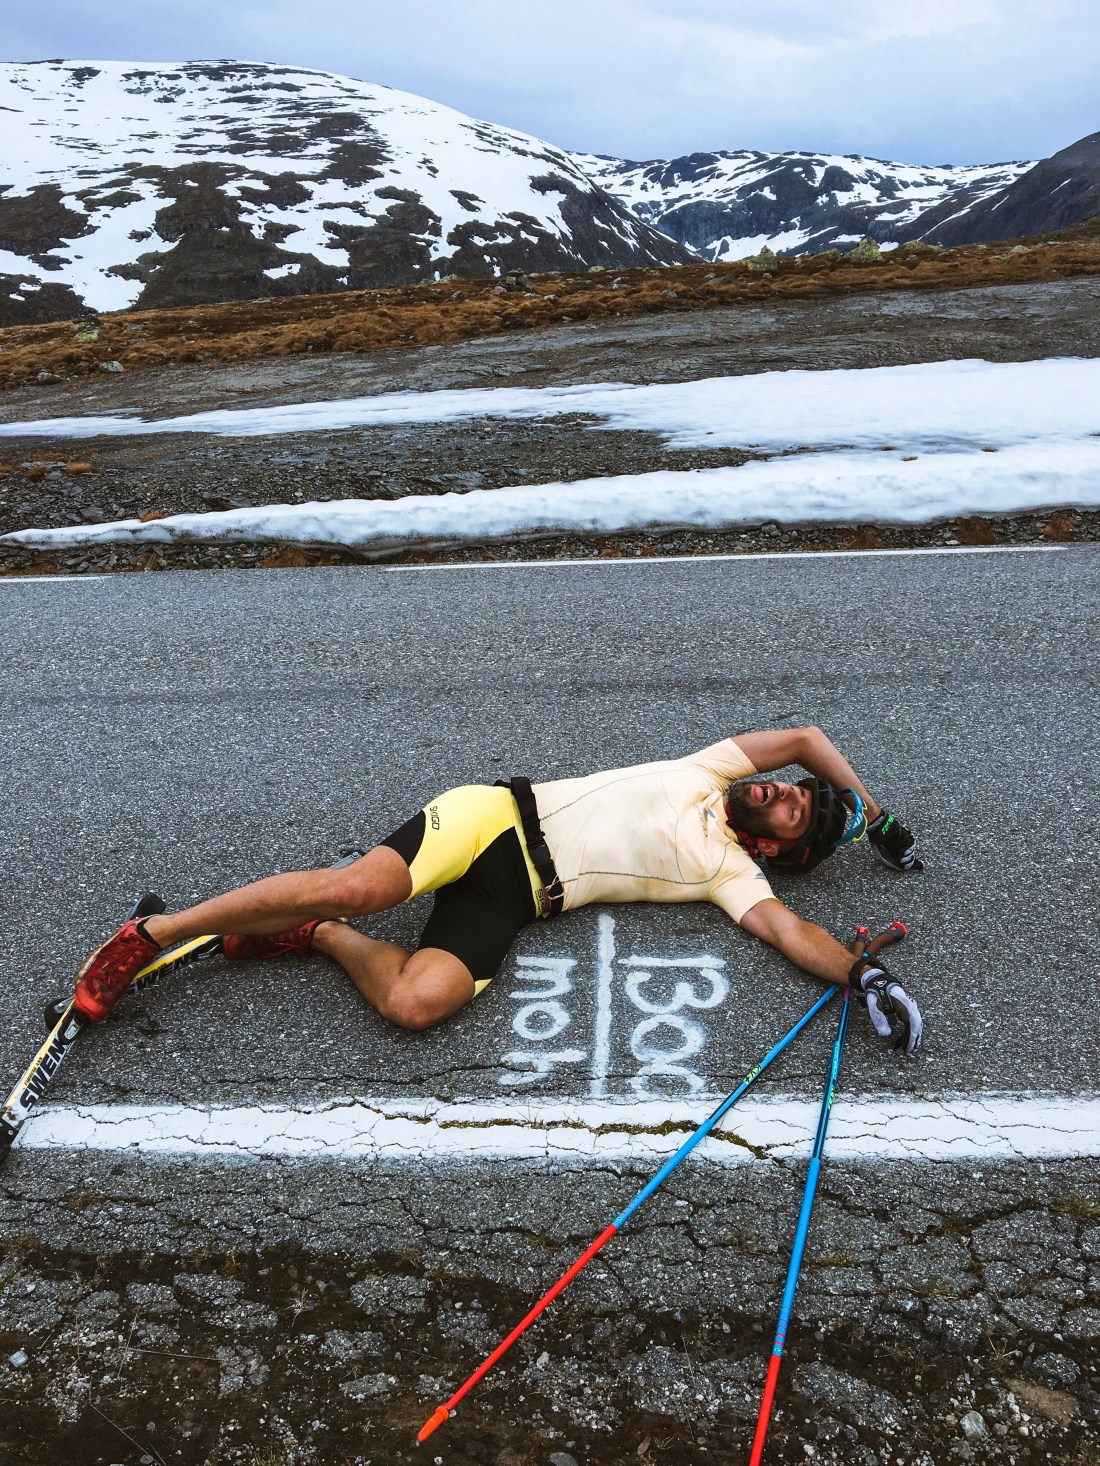
This summer I registered for Rosengarten Skymarathon in the Dolomites. This 45 km race around Rosengarten, is a no-brainer if you love the Dolomites, and you may even have run part of the track if you have been to Seiser Alm. Approaching the event I was struggling with plantar fascitt and had to withdraw from the race. However, as my friend, Barbro, was going to run and my foot could do some running, I got to explore the area anyway.
Easy start of the run.
When planning my long run I was eager to reach the amazing Vajolet Towers as well as testing a part of the race track and cheer for Barbro. I managed to combine both and looking back, this is one of the coolest runs I have ever done as it includes easy flow, unique landscape and views, some scrambling, a cozy mountain hut and a landmark like the Vajolet Towers.
The Run
I started the run from Kölnerhütte, the top of the König Laurin chairlift, which you hop on at Malga Frommer Alm (parking available). Of course, there is always the opportunity to start from Malga Frommer Alm, but the chairlift saves you about 600 meters of ascent and time you can rather spend in the higher altitude.
Rotwandhütte
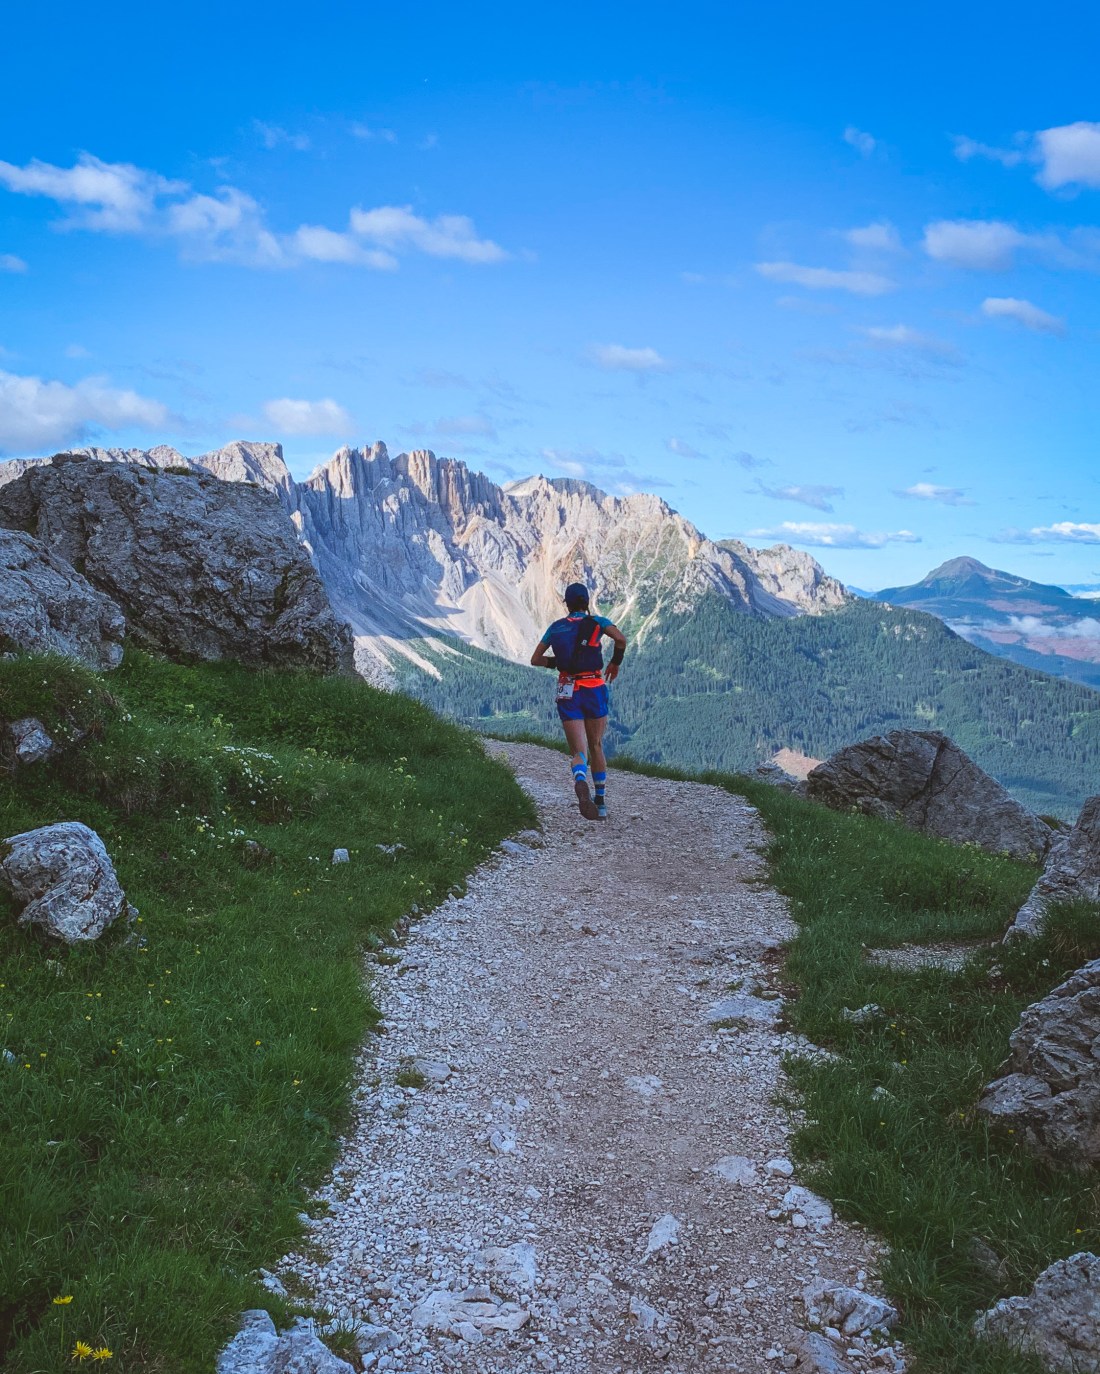
From Kölnerhütte you run the Rosengarten Skymarathon track along trail 549 towards the Rotwandhütte. This is an easy trail, which allows you to focus on the amazing views. Your first refueling opportunity is the Rotwandhütte at 5 km. Leaving the hut, the climb towards the first pass starts and the run gets more demanding with technical downhills and uphills as you continue towards Rifugio Vajolet. This is where you leave the Rosengarten Skymarathon track in favor of a fun scramble up to Rifugio Alberto Primero, which rests at the feet of the Vajolet Towers. On a busy day, you can hear the adrenalin screams from the mountaineers climbing the towers.
Vajolet Towers and Rifugio Alberto Primero
After a rest at the hut, take a short detour towards the Santner Pass for a better view of the towers before you head back down towards Rifugio Vajolet. Pay attention as you are approaching Rifugio Vajolet for an alternative trail on your right, which will take to in the right direction towards Pas da le Colonele. If you miss the trail and find yourself at Rifugio Vajolet, don’t worry, just return on the same trail, and take the next right turn to get on path 550 towards Pas da le Colonele and the steep descent to Kölnerhütte.
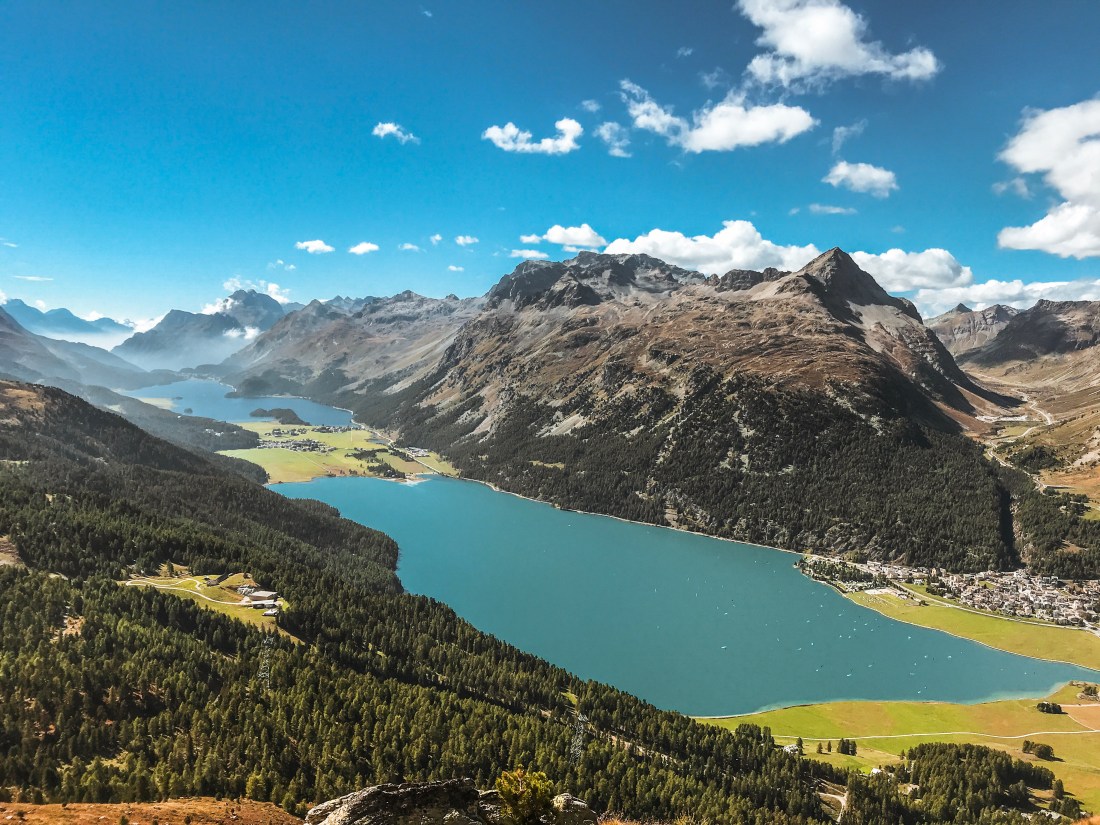
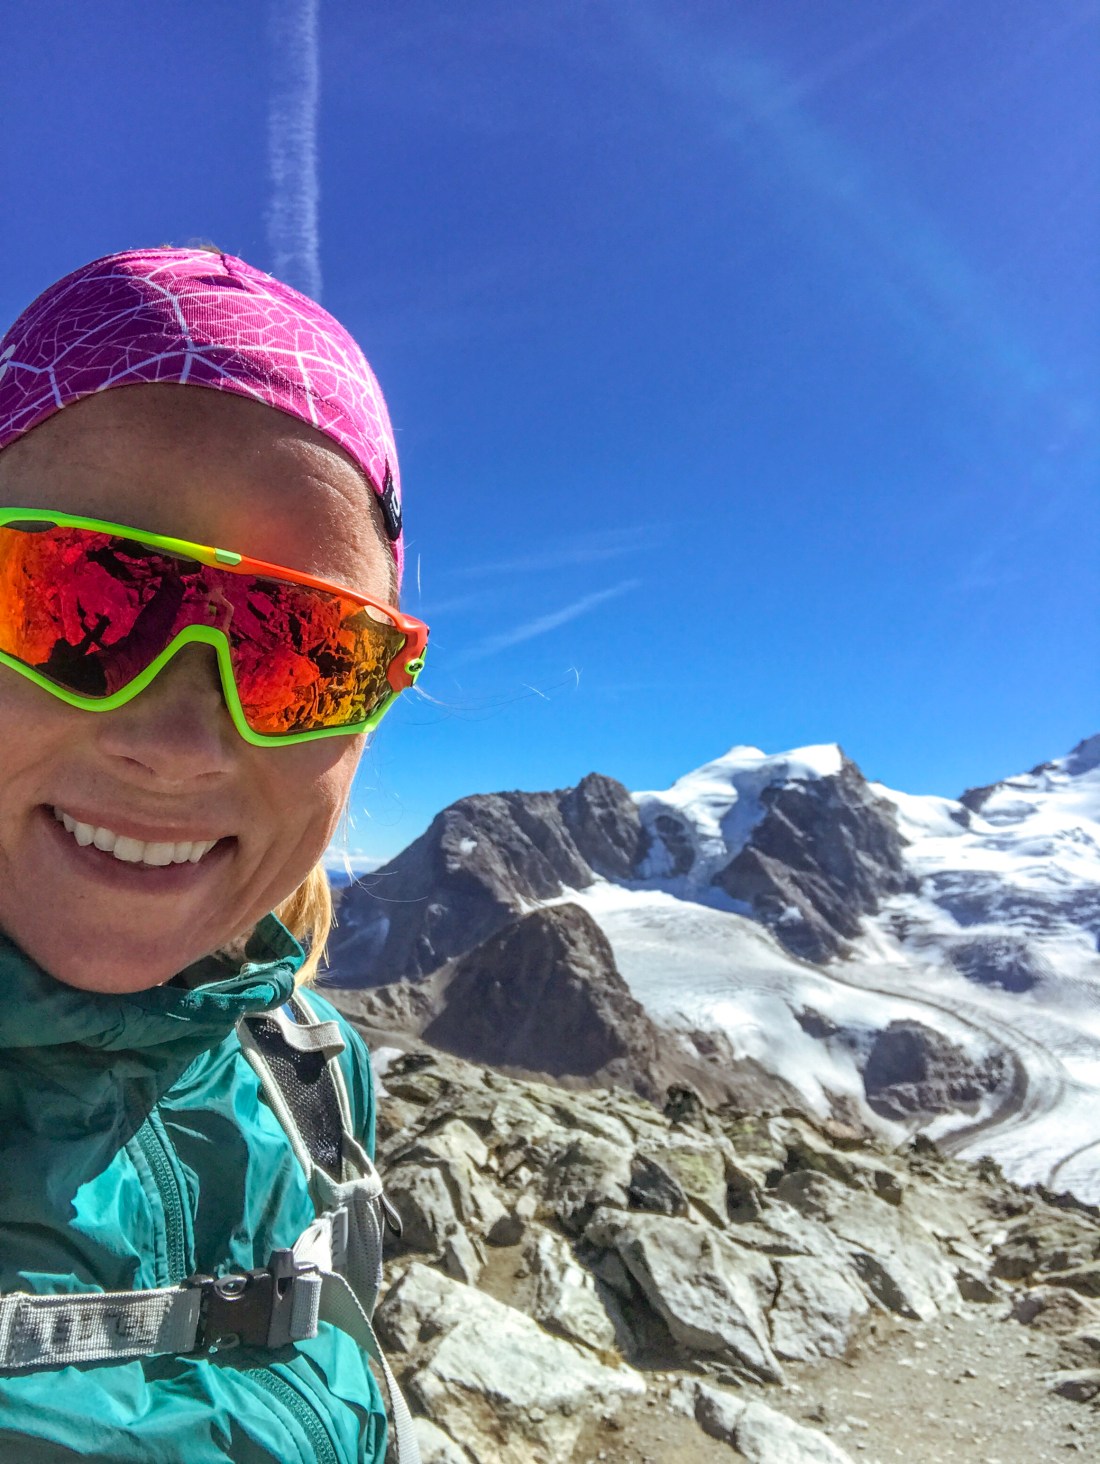
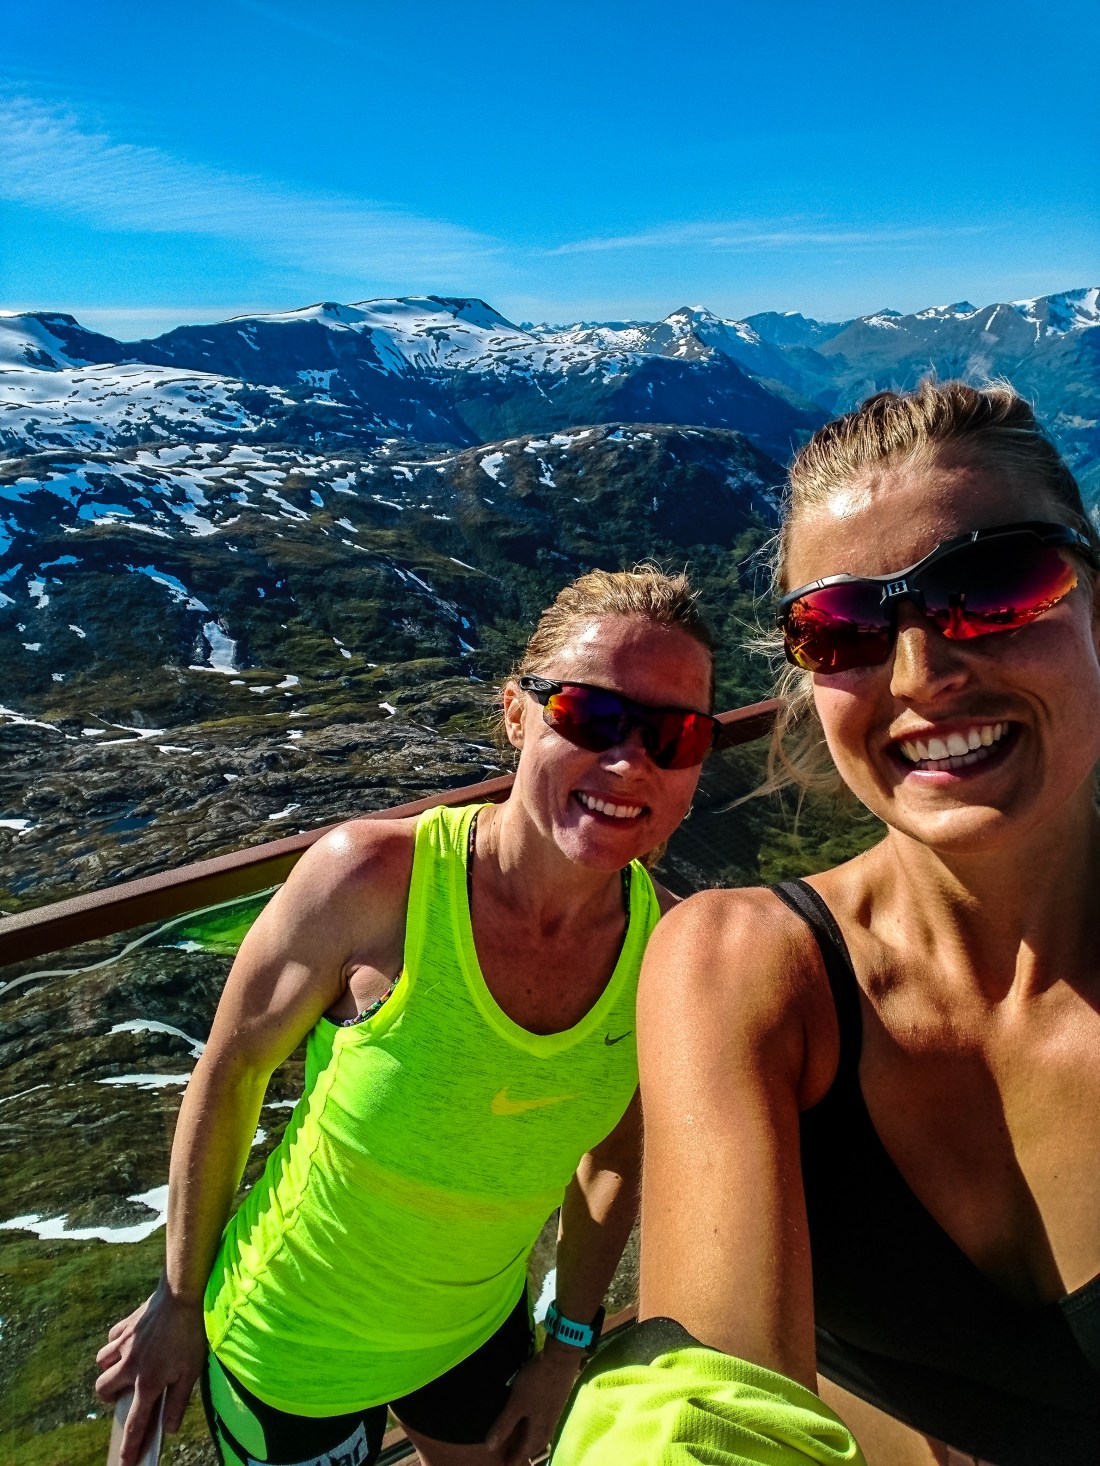
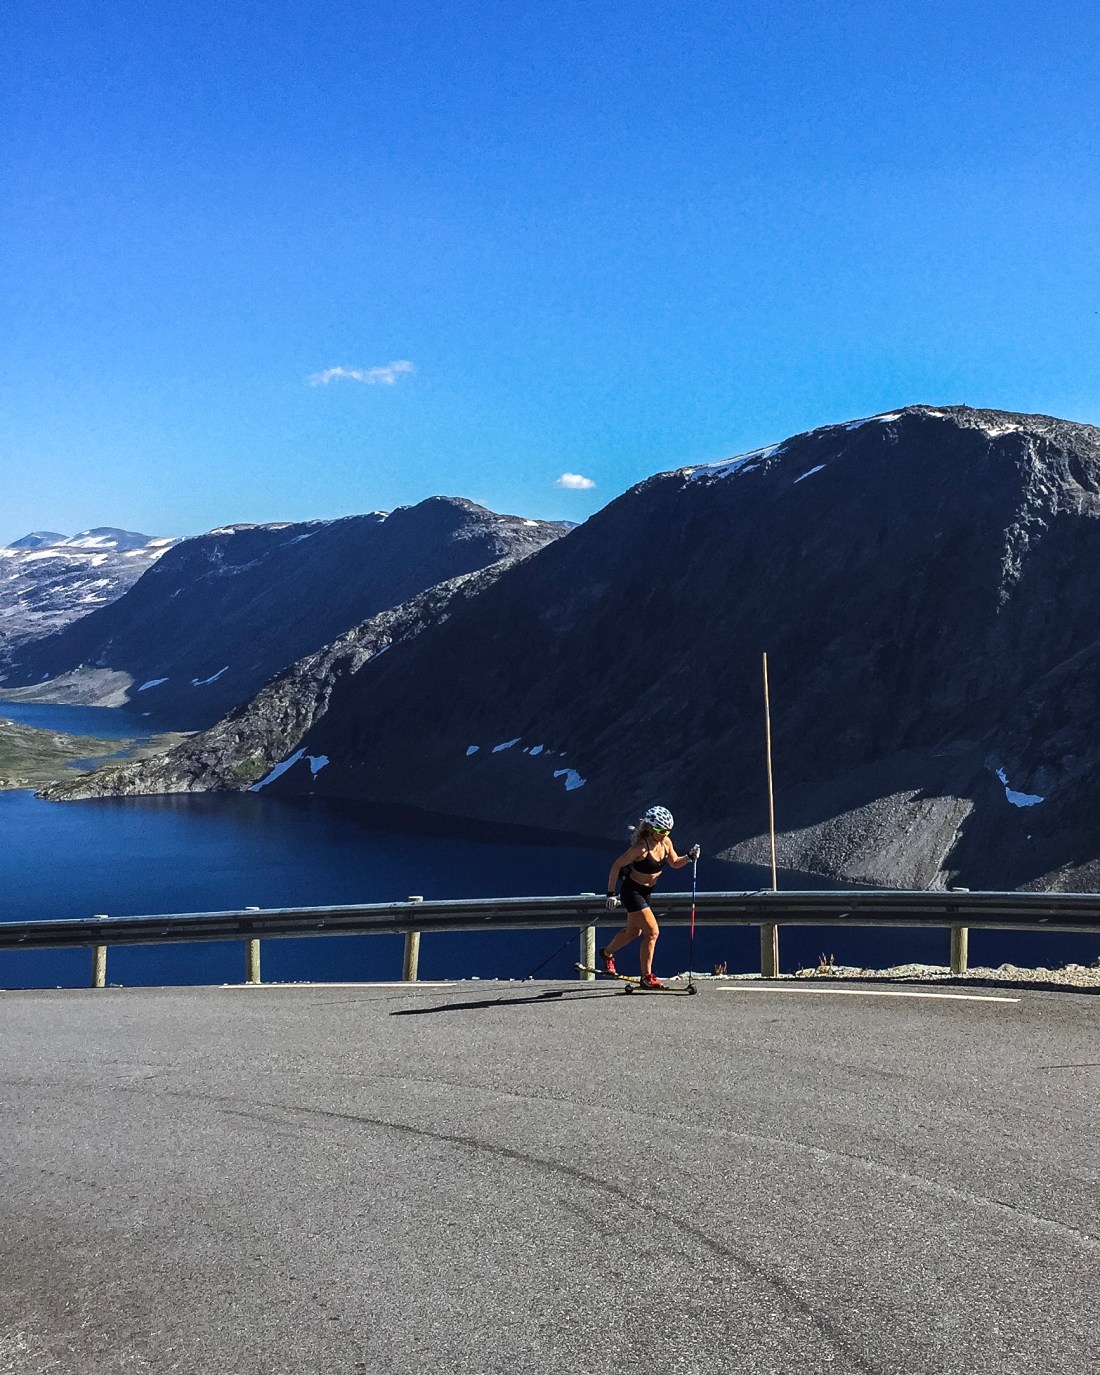
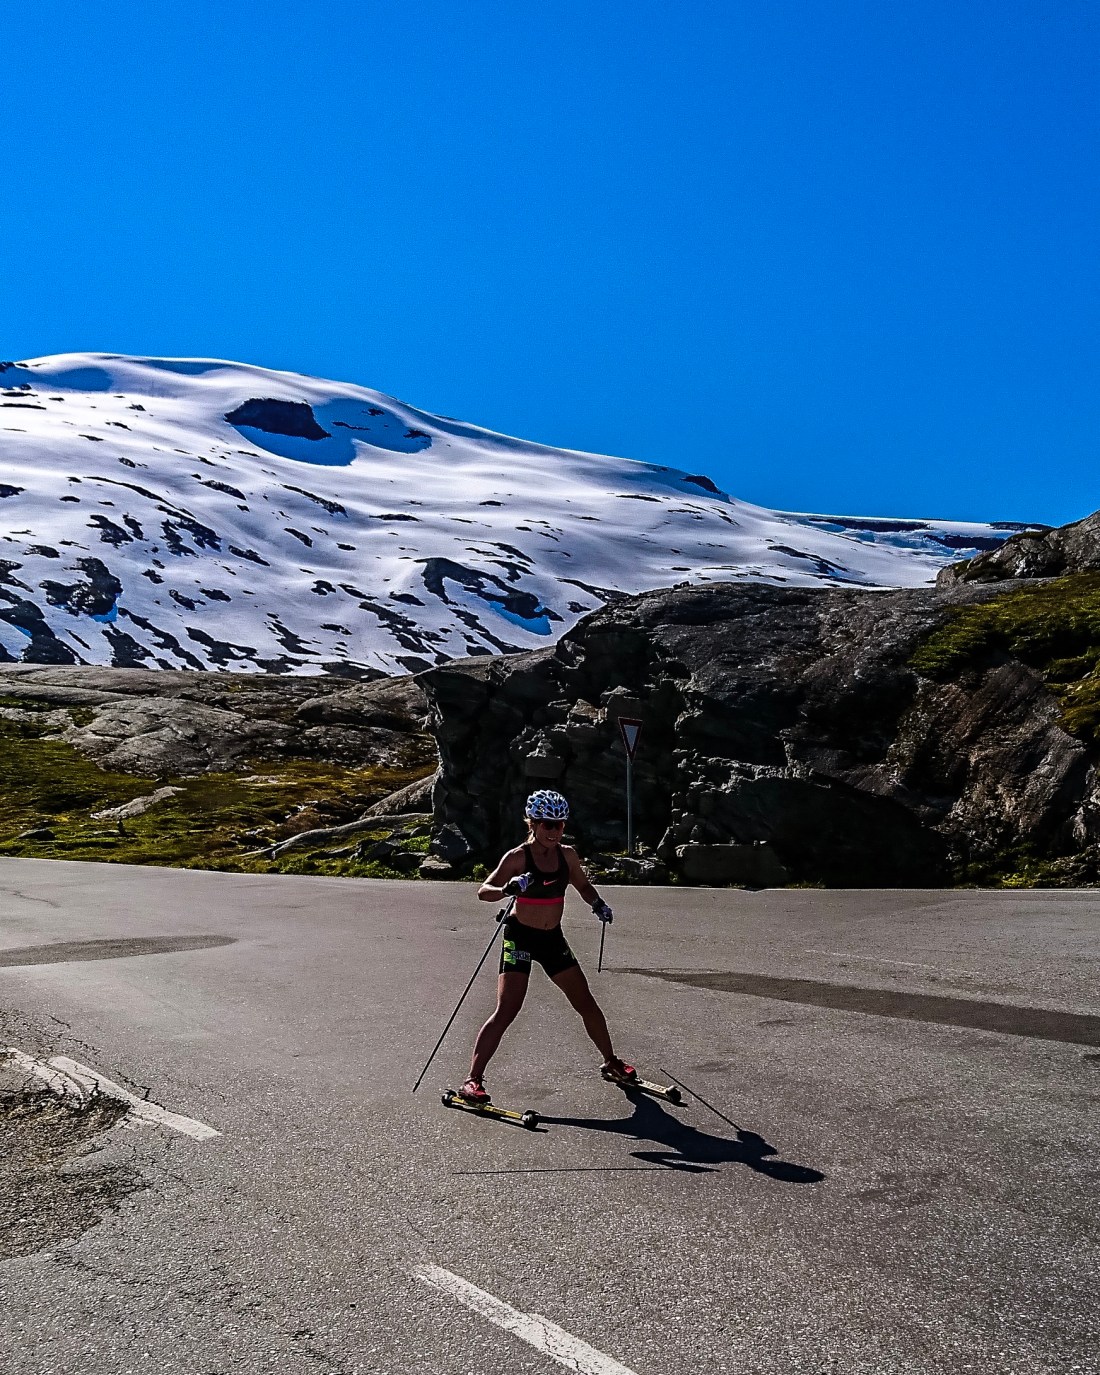
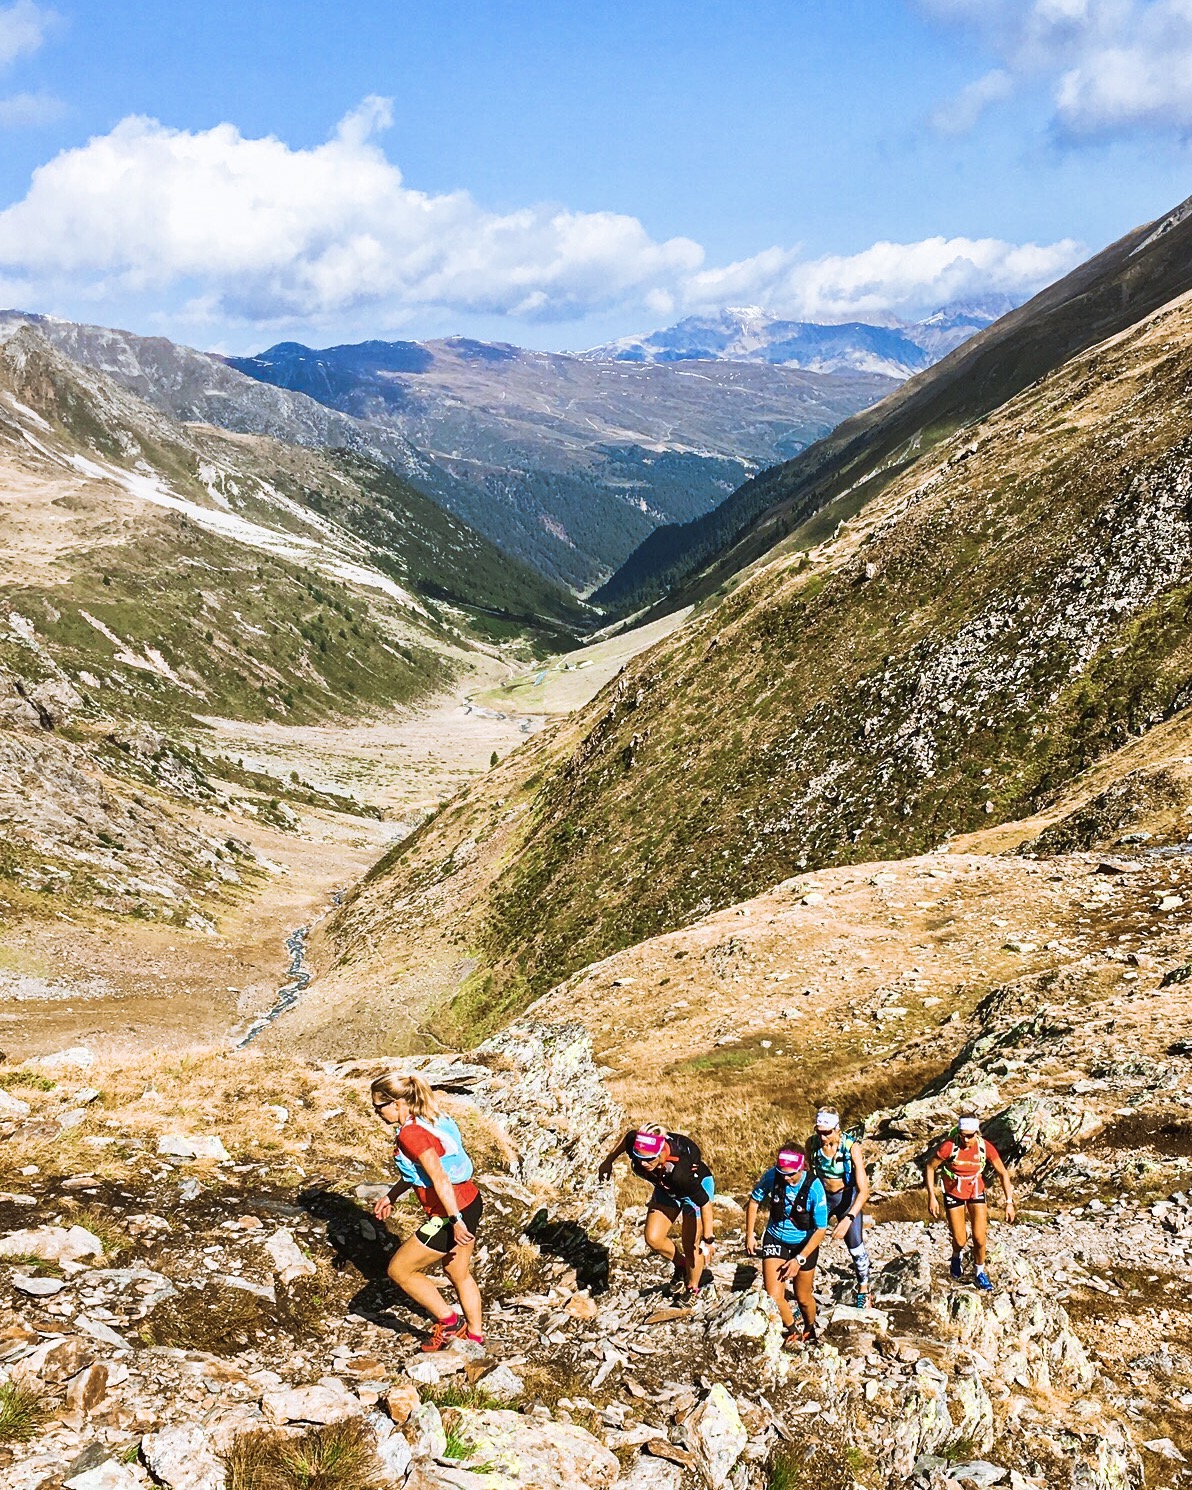
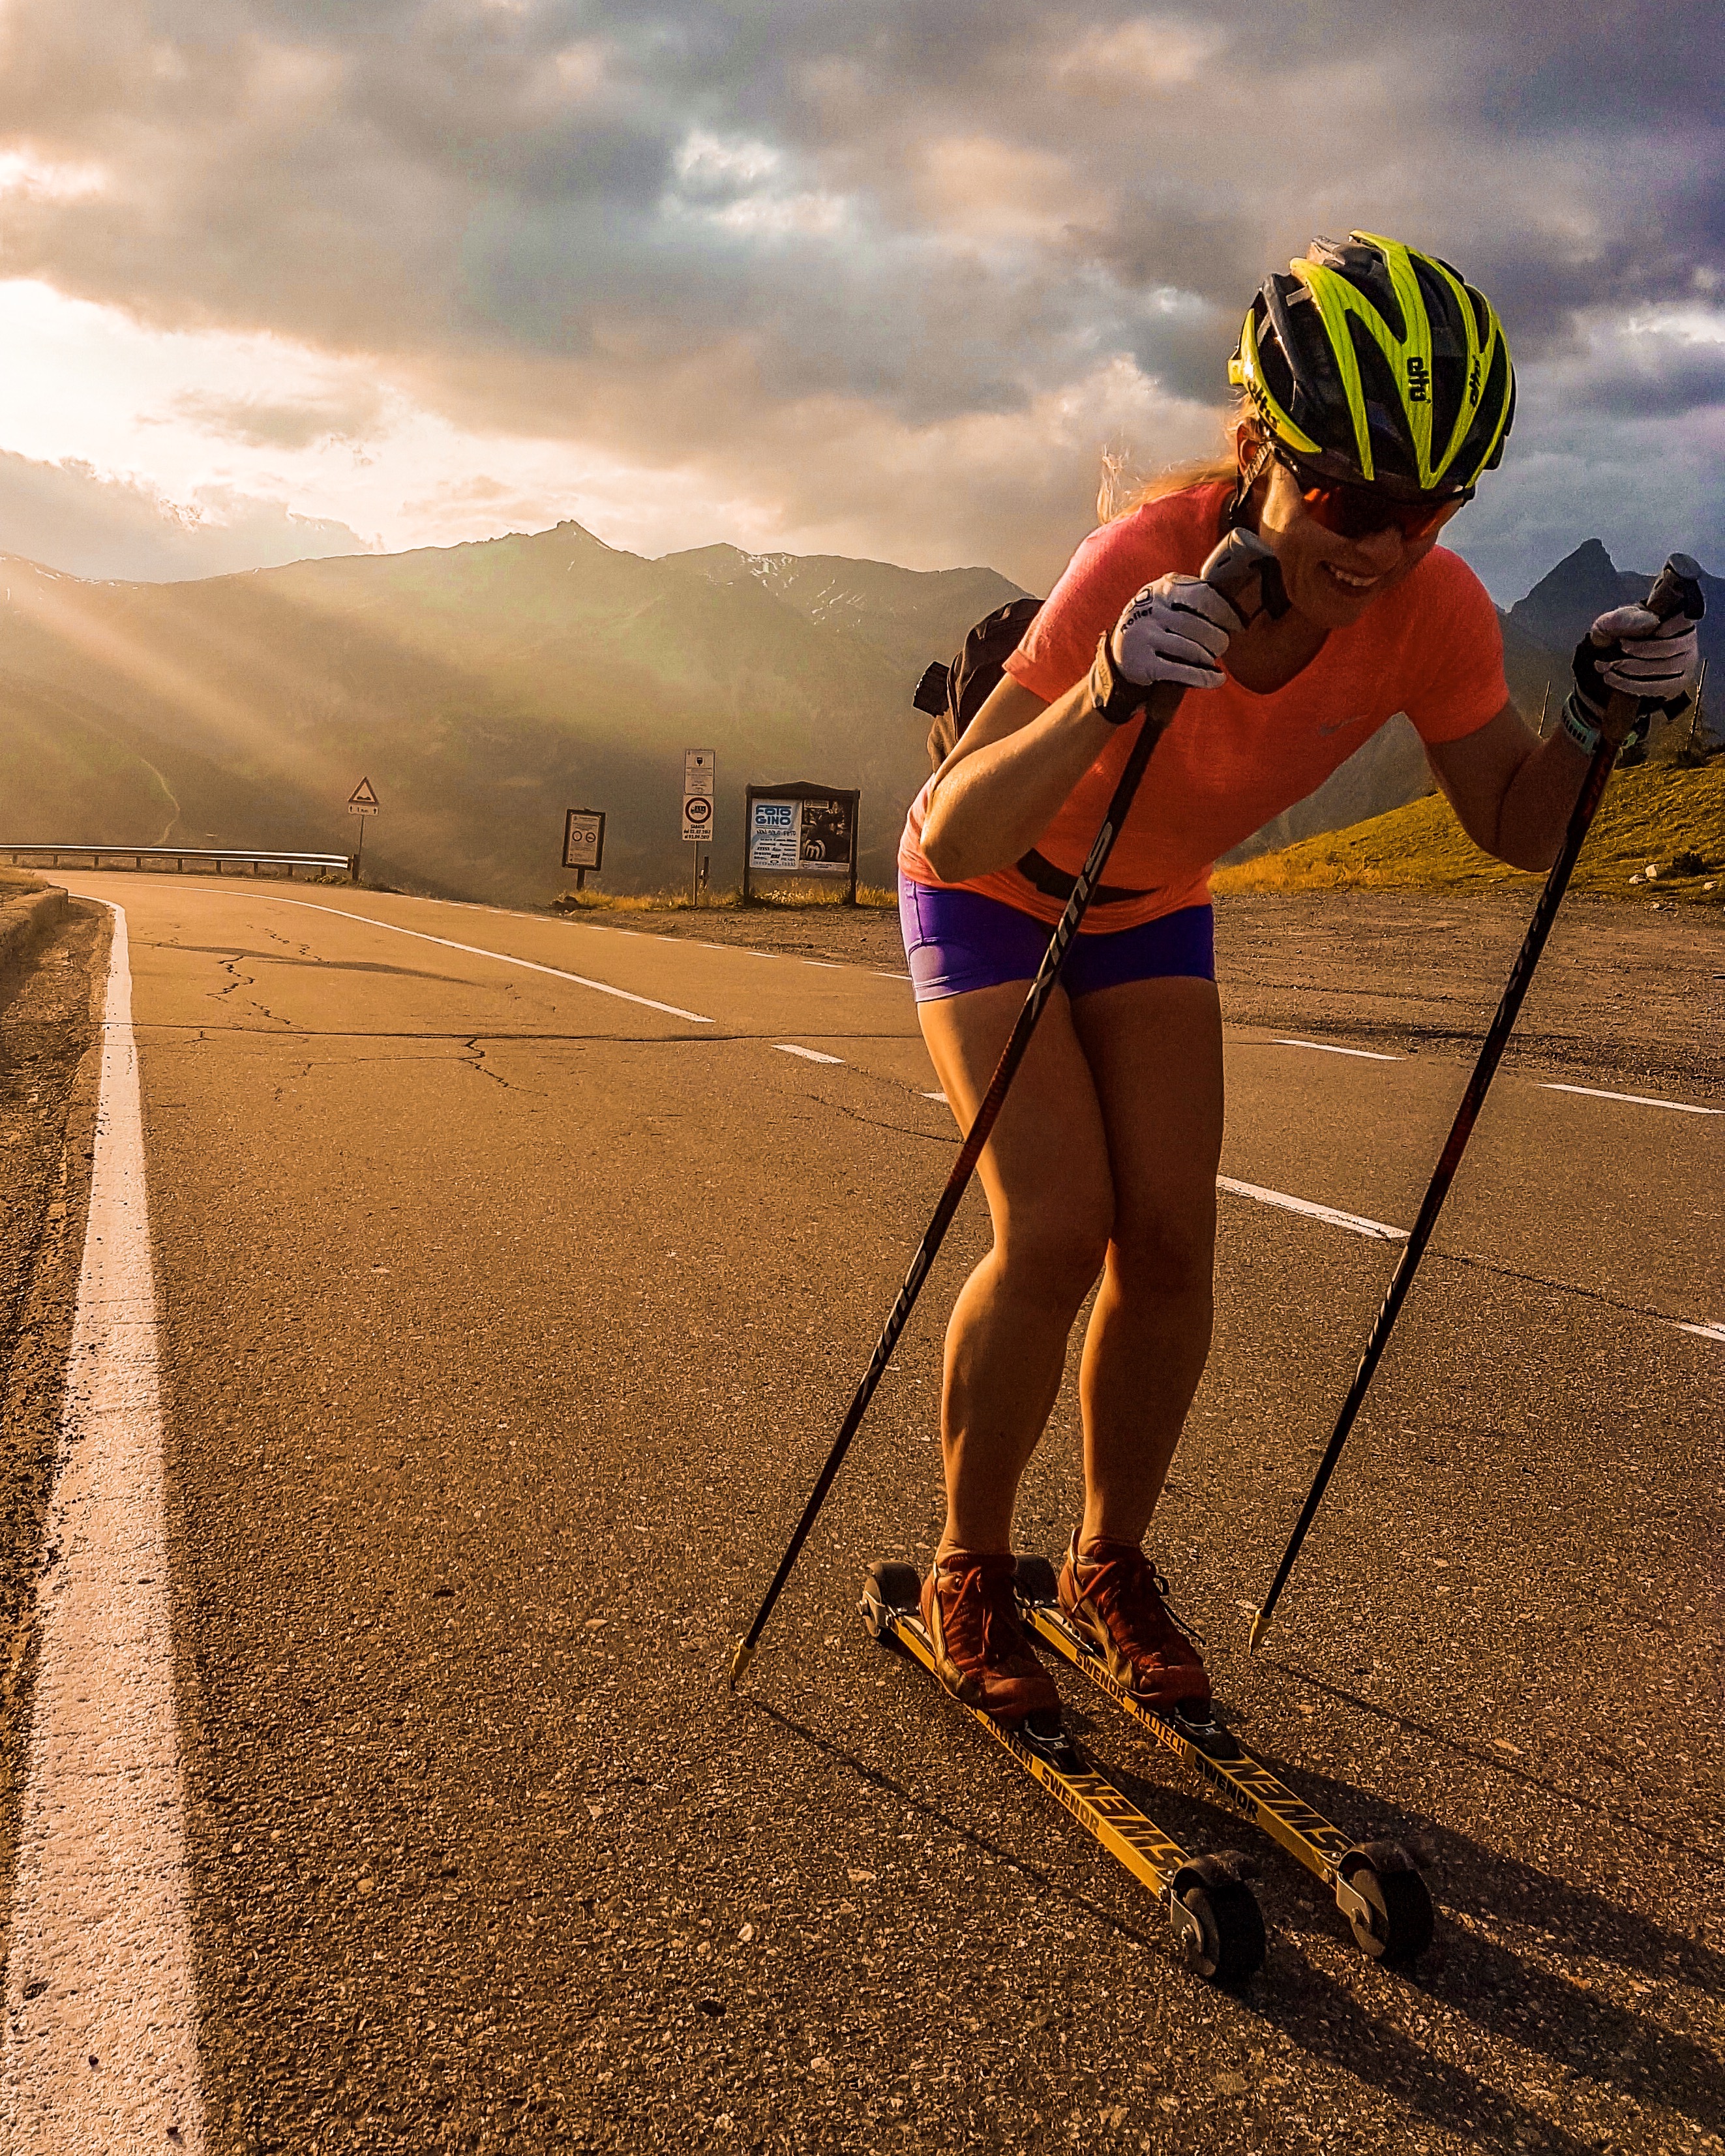
Last summer was a nightmare for seasonal allergies in Norway. During indian summer, I dreamt of fresh air and mountains, and apparently there is no better place to breathe than in St. Moritz. I came across some cheap tickets to Zürich and started planning my trip immediately. I had my eyes on Pontresina, a village in the Engadin valley, close to St. Moritz. The overly luxurious vibe of St. Moritz didn’t appeal to me, and I assumed Pontresina would be a better option as it has frequently been used by national XC-skiing teams for training. The main purpose of my trip was to run in the Engadin mountains, but I also wanted to use roller skis as alternative training.
When doing my research, I came over the the Swiss trailrunning website alpsinsight, which really is trailrunners’ heaven and a one stop shop for trail running resources when in Switzerland. I also bought their book, Run the Alps Switzerland, which guided me to two of my runs in Pontresina, and has now caused me to book another trip to Switzerland this year. Alpsinsight was also the main trigger for me to start trailspotting.no, hoping to inspire others as alpsinsight has inspired me.
So, let’s run Switzerland!
Piz Languard view
The Trails
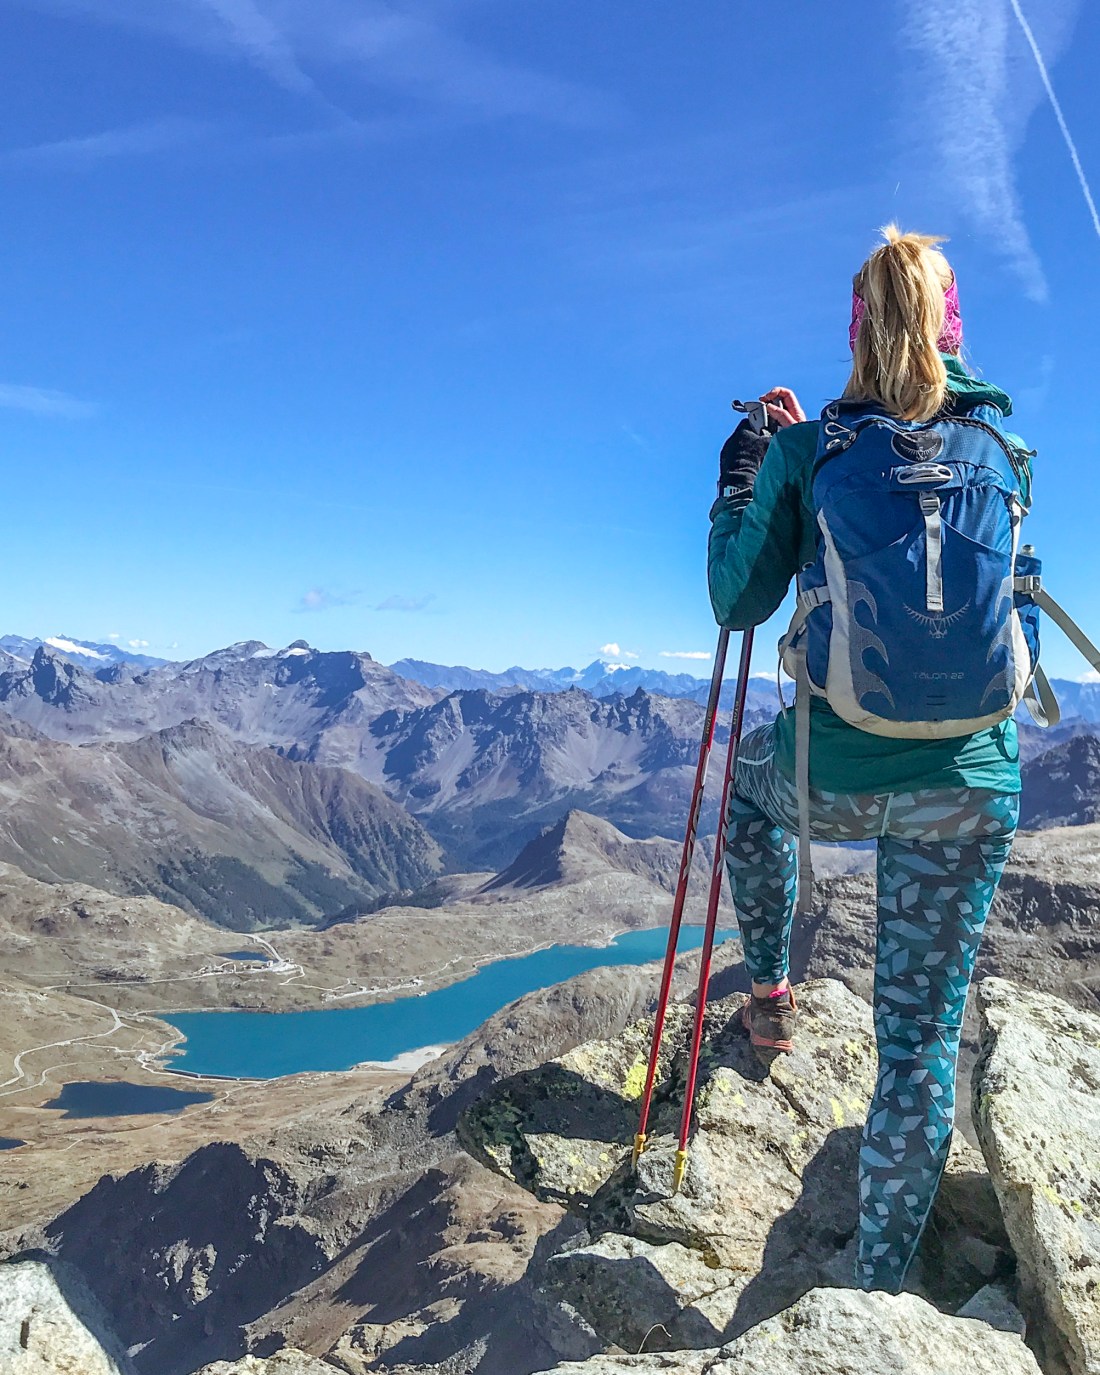
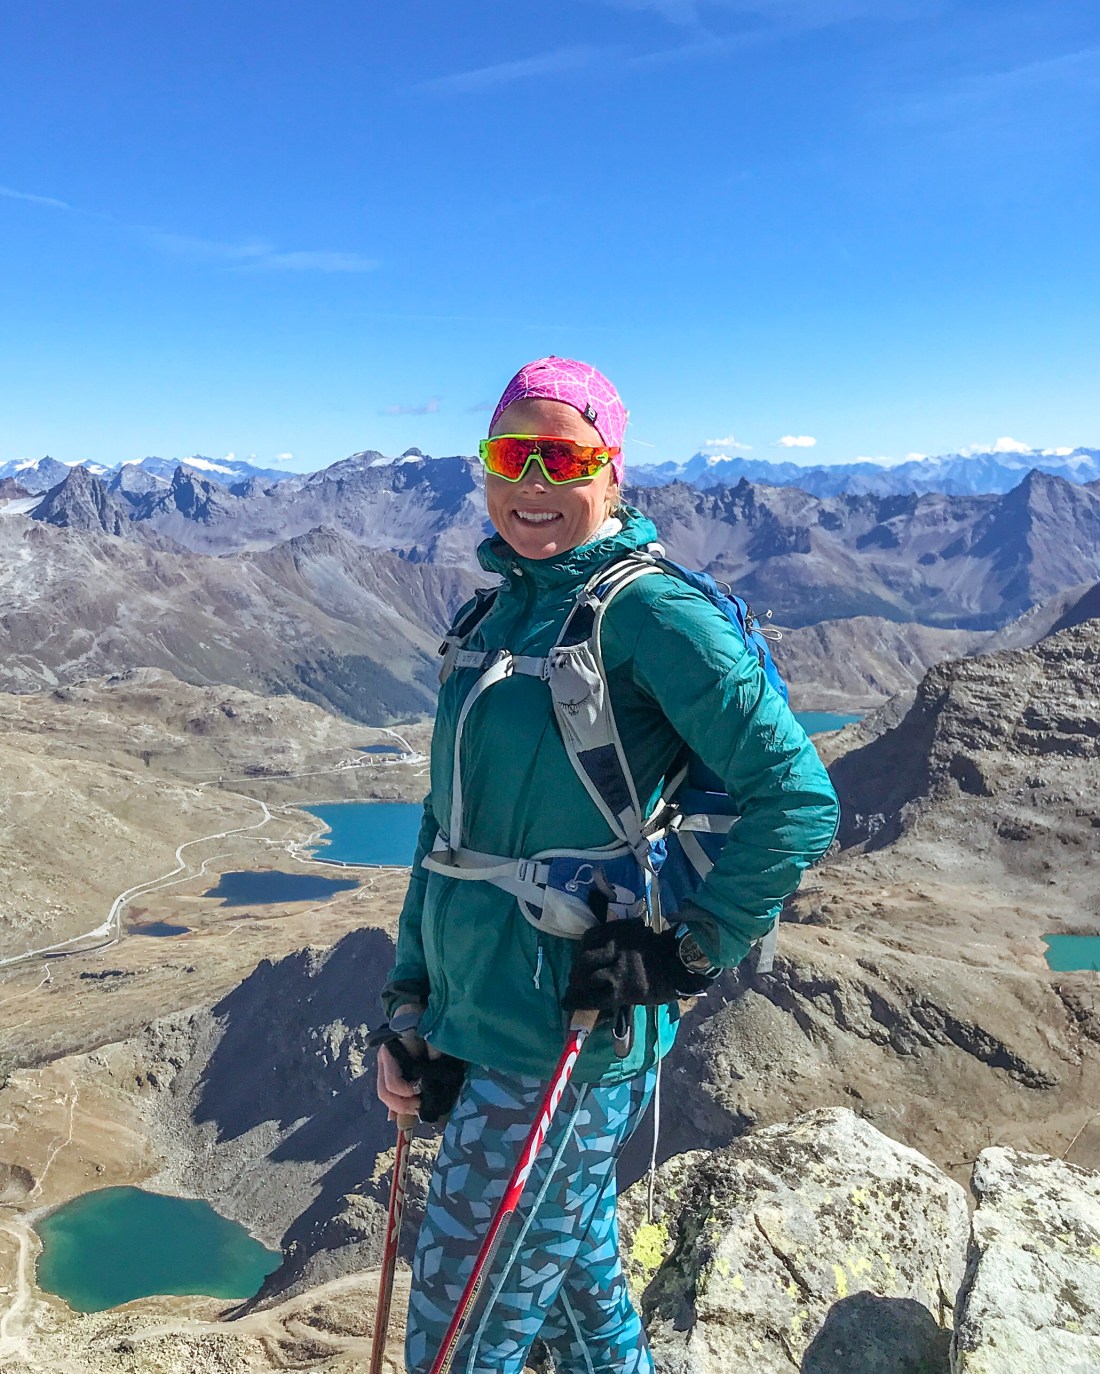
Piz Languard, 20 km
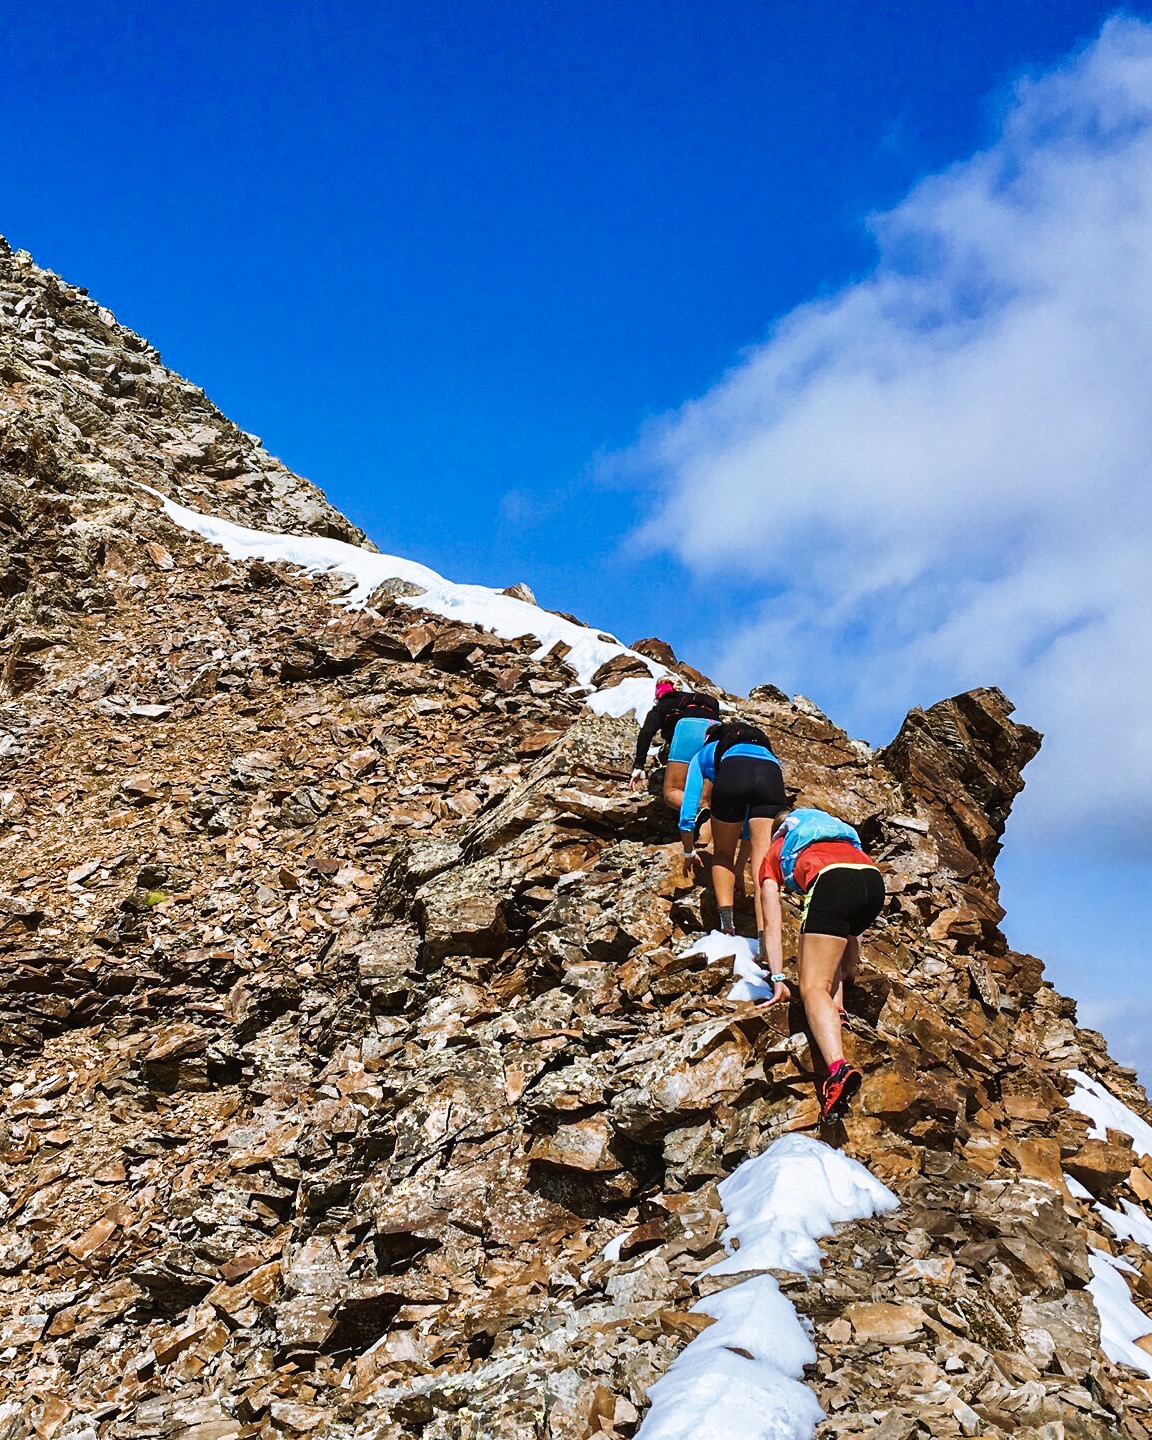
I choose to run the Piz Languard trail on my first day in Pontresina as I was really eager to tick off a 3000+ peak. The trail started practically outside my hotel, from the Santa Maria church in the centre of Pontresina and switchbacking up through the forest I quickly gained elevation and a fantastic view of the Morteratsch glacier on the other side of the valley. I even met an ibex.
I made a quick stop for hydration at the cozy Paradis hut to linger over the glacier view from the sunny terrace, before I continued into the Languard valley. Reaching the lake, I lost track of the trail, as I thought it followed the shore of the lake, which it didn’t, and I had to return to the junction that I missed. After a short steep climb, amazing flowing trails take you towards the last climb towards Georgy’s hut, and then to the peak at 3262 m.a.s.l. The view from the summit is simply amazing, especially in the autumn sun, so make sure you have time to take it all in, before descending to Georgy’s hut to refuel.
Refueling at Georgy’s hut
After the first steep descent, the flowing trails take over and you feel like you could run forever. But there is still another hut to visit, the Segatini hut. Make sure you bring cash, so you don’t have to limit yourself, as I did, and can spend some time enjoying the view of the Engadin valley from the terrace before taking on the last descent. If you want to spare your knees, you can skip the last part of the downhill by taking the chairlift back down to Pontresina. Off-season, the fare is commonly included in your hotel travel pass.
Another pit stop at Segatini hut
Further description of the Piz Languard run on alpsinsight here.
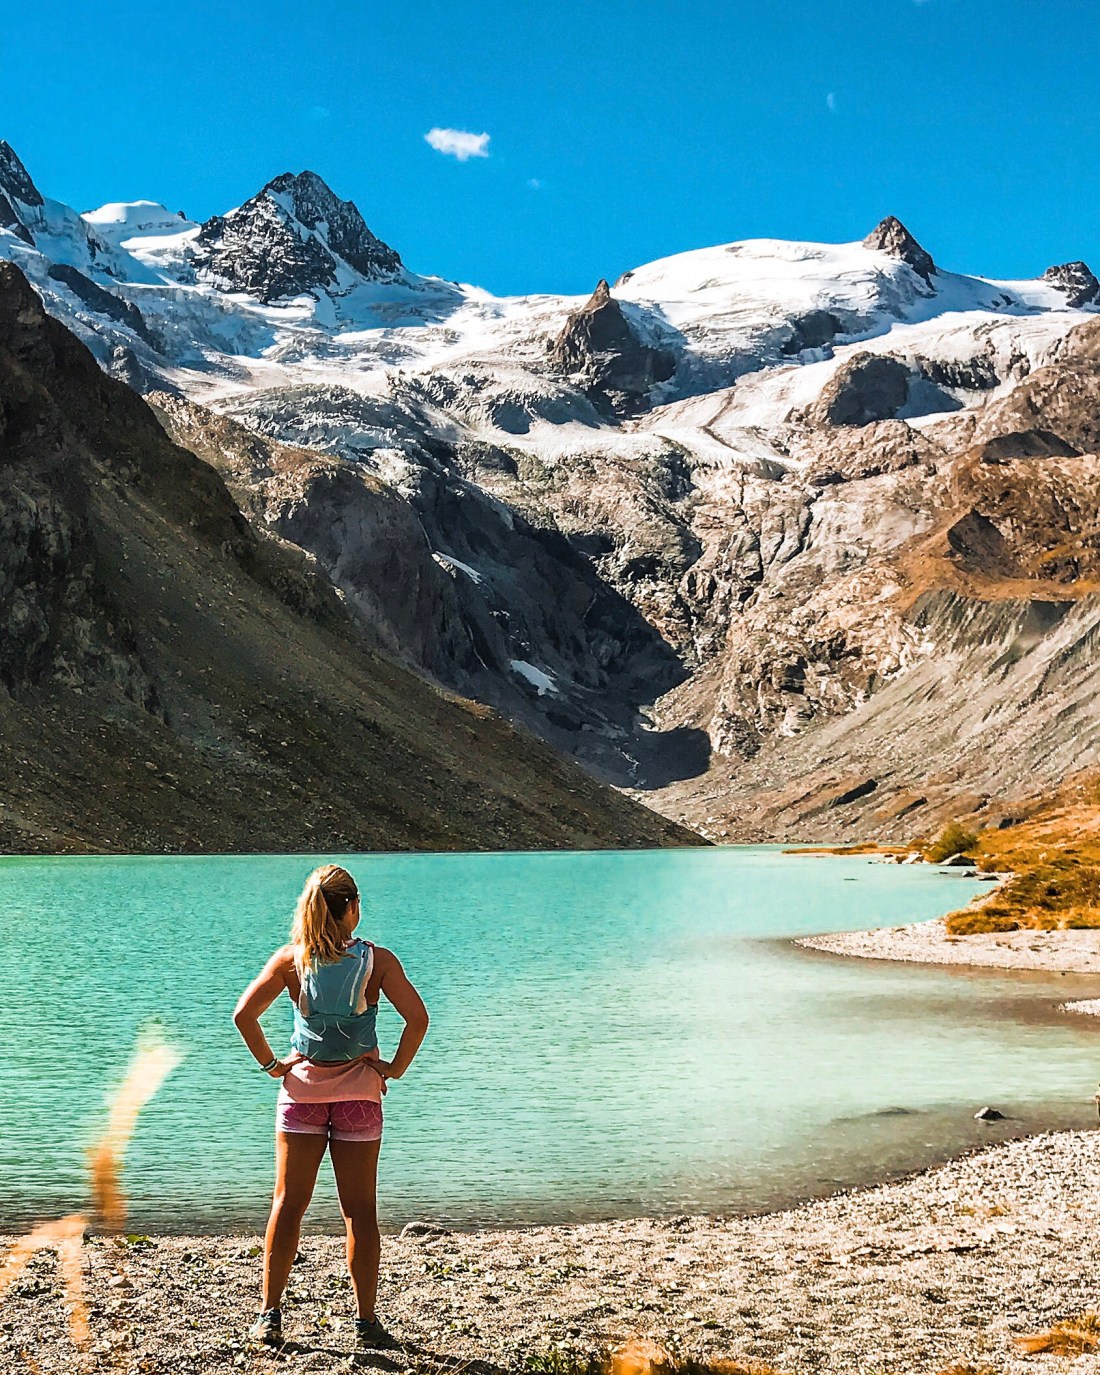
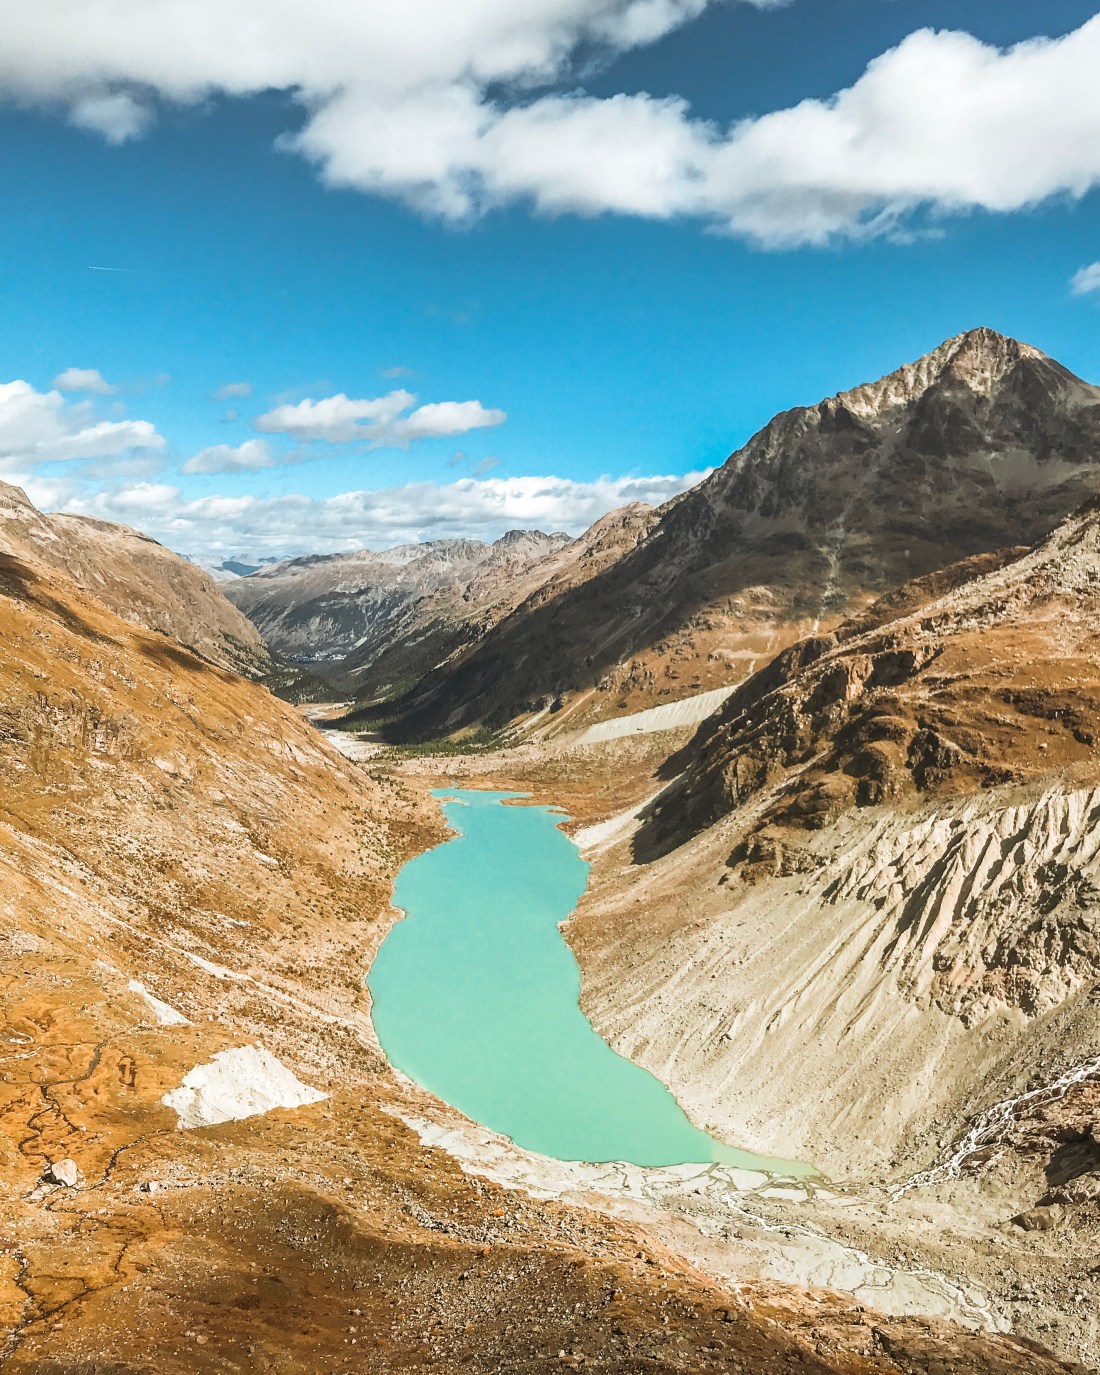
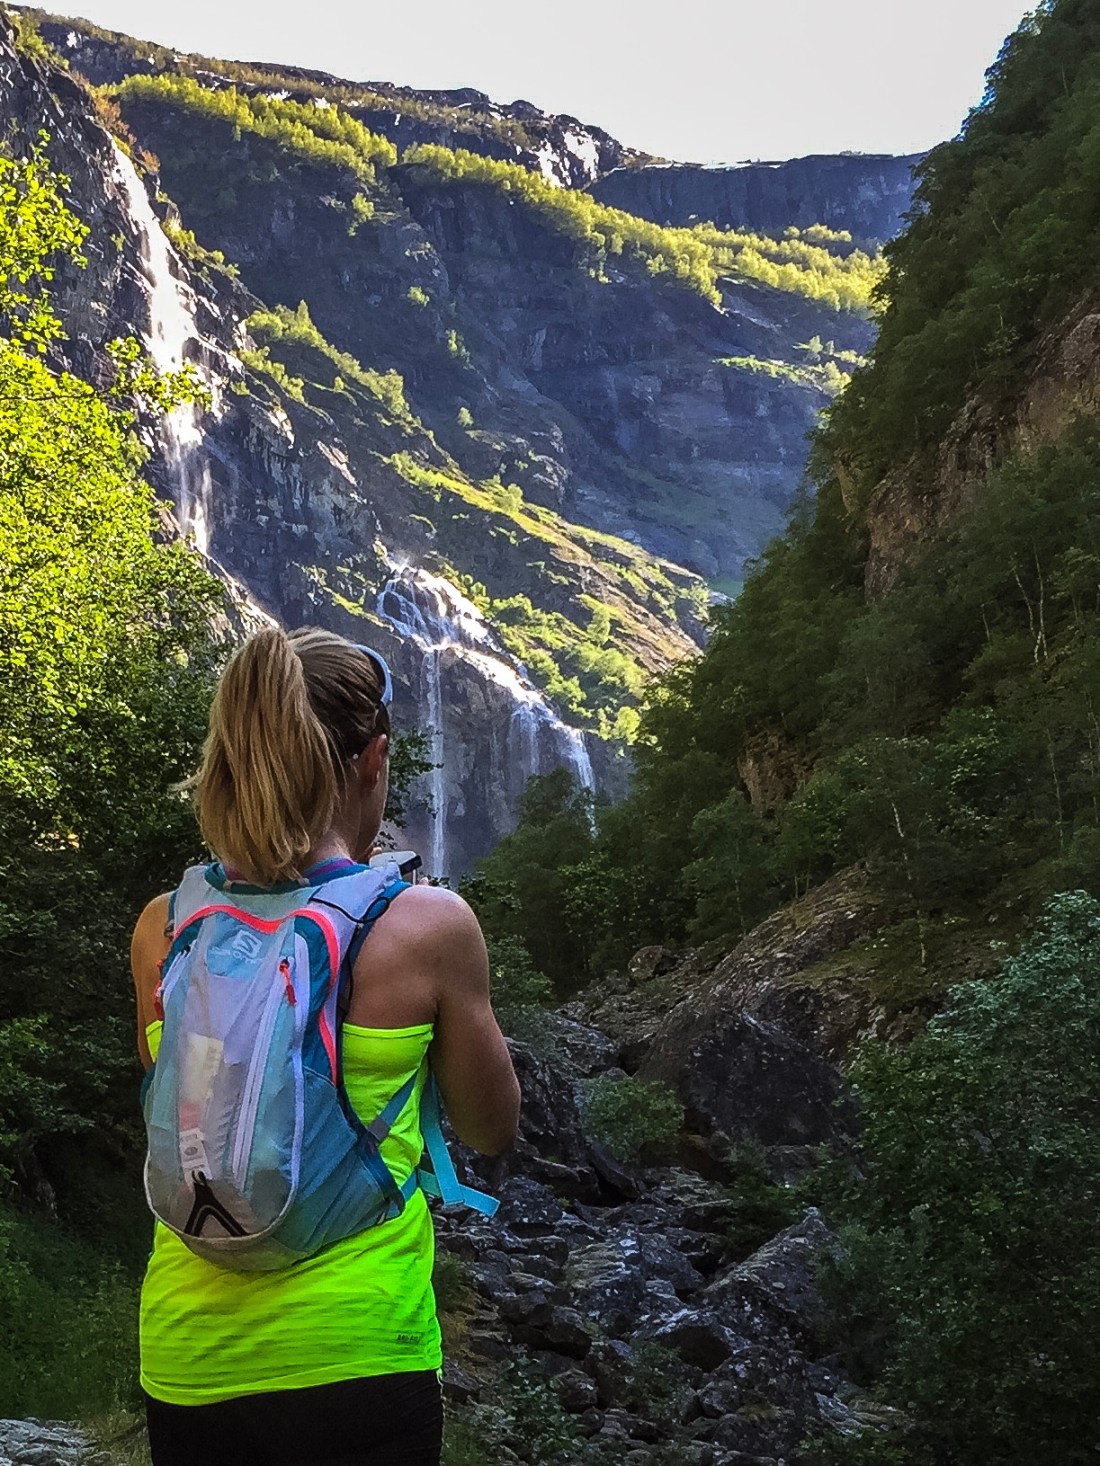
I had huge expectations before embarking on this long run, and I can safely say they were met. Starting off from the train station in Pontresina, you get an easy warm up running almost flat for several kilometers along a beautiful river. As during the Piz Languard run, you have several opportunities to refuel, so take advantage of this and skip carrying too much water. The first hut is at about 7 kilometer. Passing the hut, the trail becomes a little more technical until you reach the stunning glacier lake Lej da Vadret. Take time to linger, because this place is truly magical.
My favorite spot in Engadin
Rosegtal view from the climb towards Chamanna Coaz
Leaving the lake it gets steeper. After the climb you may take a short detour to the hut, Chamanna Coaz, to refuel on their cake and get the glacier view up close. You can also book at sleepover at the hut. The next seven kilometer are easy flow, with some technical sections, and after about 22 kilometer you are at the highest point of the run, where you can also stop to refuel at a hut before starting on the descent. This is where the second coolest thing about this run happens, you turn a corner, and then WOW – the view of the Engadin lakes!
The trail eventually takes you into the forest again, and even a short climb, before a steep downhill to the Pontresina train station. Shortly before you arrive in Pontresina, a short detour of about a kilometer to a nearby peak is possible (and included in the strava link below).
Further description of the Rosegtal run on alpsinsight here.
After the long Rosegtal run, I looked for opportunities to explore more of the area without the strain of going downhill and decided to do a hike from the bottom of the Diavolezza gondola to the summits Sass Queder, 3060 m.a.s. and Munt Pers, 3207 m.a.s. Again, this is a treat for the eye with beautiful views towards Lago Bianco and the Bernina pass during the climb, and the Diavolezza glacier from the top. I recommend using poles if you embark on this climb, and if you only have the time to do one summit, do Munt Pers. And obviously, you can take the gondola to the Diavolezza station, leaving you with only 200 meters of elevation to run.
Hey, its Engadin, and the famous lake in St. Moritz, where you can spot world class runners on their easy runs, is a short run or a train ride away from Pontresina. In St. Moritz you can also find a track for speed work, if that’s on your agenda. For more trail runs, check out the Piz Lunghin run featured on alpsinsight.
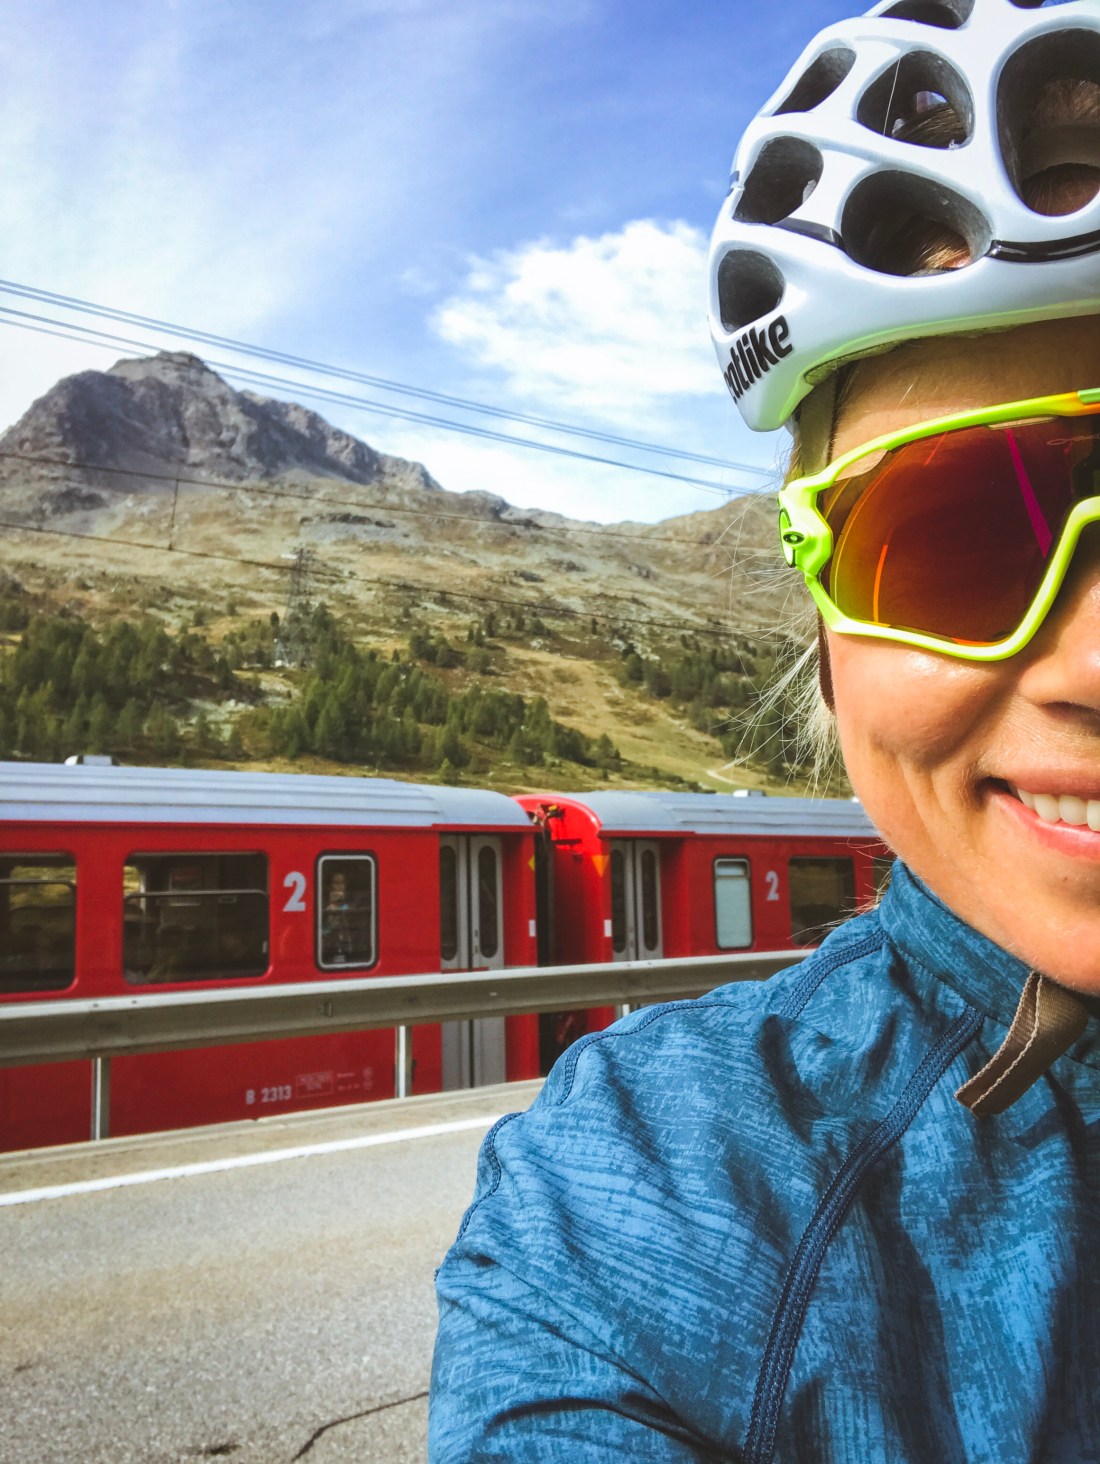
Bernina Rollerskiing
I tried to find some cycle paths suitable for roller skis towards Samedan, where I had been told one could do rounds around the airport. However, I stumbled upon gravel paths and decided to go towards the Bernina pass instead. I was told that it was not allowed to use roller skis on this main road, but from having cycled there a few years ago, I considered it relatively safe and gave it a go. And it truly was a great option for roller skis. Due to a bike race going up on the other side of the pass, part of the road was closed for traffic, but the police let me pass to go up on roller skis anyway. At the top I turned and returned down for the not so steep downhill the first about 5 kilometer, then I took the train back to Pontresina. The train journey is part of the famous Bernina Express which is on many tourists’ itinerary when visiting Switzerland.
I stayed at Hotel Rosatsch, which at the time of booking seemed to provide most for the money as well as ticking of the boxes of location and comfort. I had a big room with breakfast and four course dinner included for about 530 Swiss francs for five nights, which, as mentioned above, also included a travel pass providing free access to local trains, busses and most lifts and gondolas. On my radar war also Hotel Müller, which you could also check out.
Between runs
Obviously, for luxury brands shopping, you head off to St. Moritz, but if you are more into sports clothing and equipment, there are plenty of sports shops in Pontresina. In Pontresina I also spent a lot of time hanging out at café Gianotti, on the main street in Pontresina, not far away from Hotel Rosatsch.
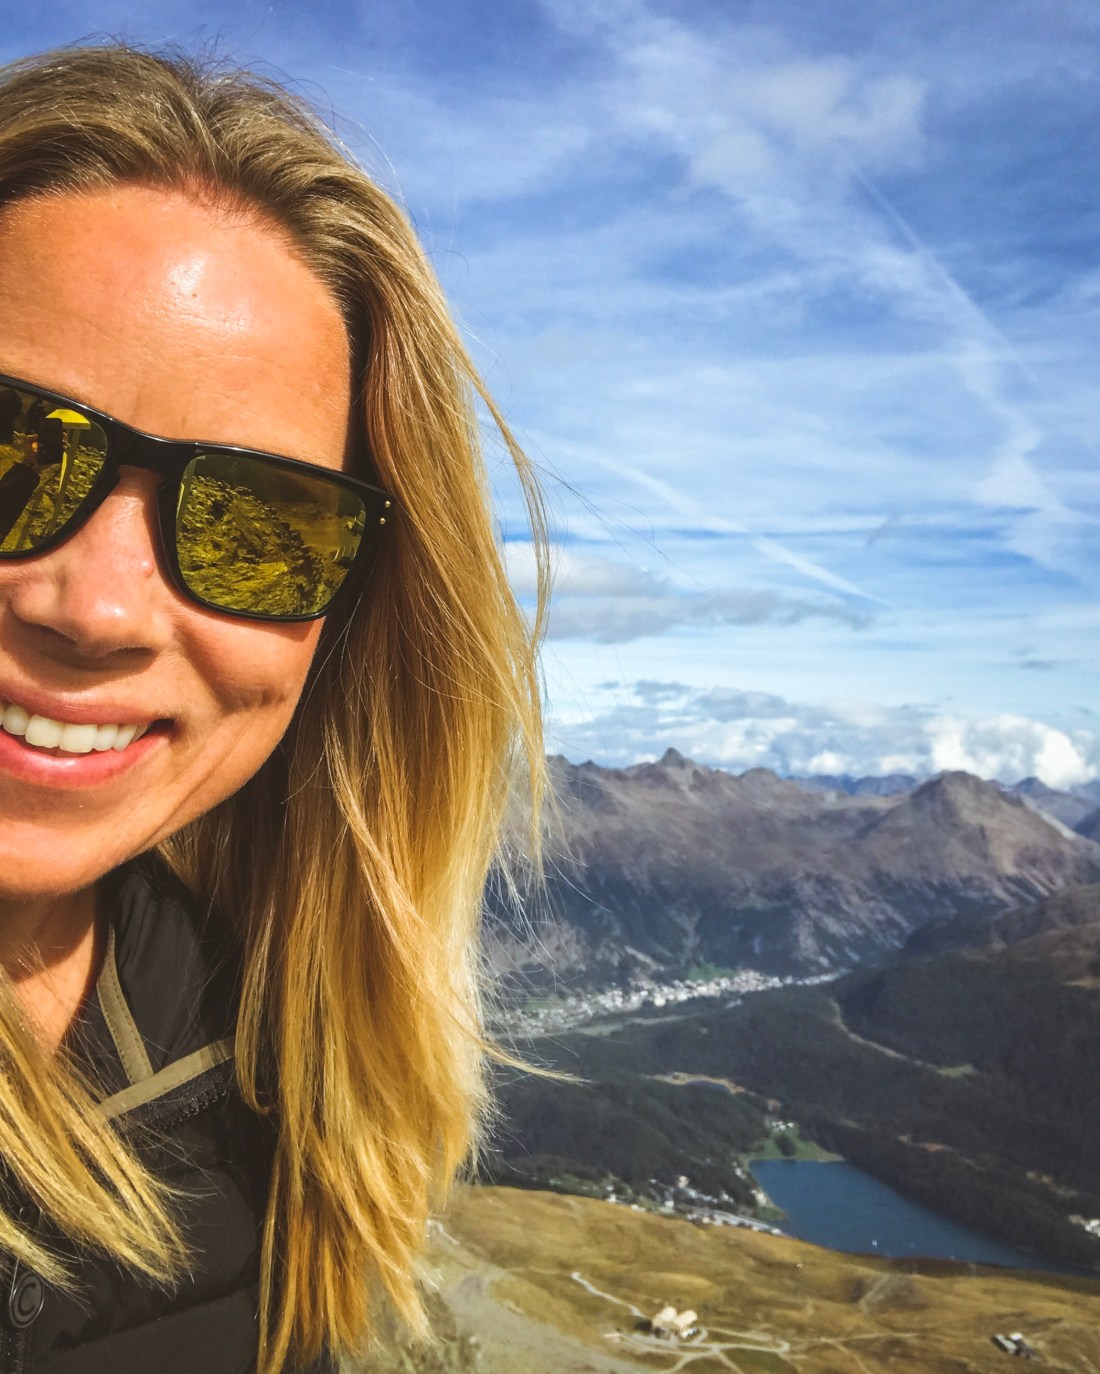
If you have a travel pass, I recommend to do an afternoon excursion to Piz Nair, at 3057 m.a.s., it is a short walk from the Piz Nair gondola station, where you can also grab refreshments or something to eat while enjoying the view.
View of the St. Moritz lake and Pontresina from Piz Nair
How to get there
Not only can you easily reach Pontresina by train, but it is also a train ride you will enjoy from the beginning to the end. While traveling by train in Switzerland is quite expensive there are often deals/discounts to be had if you book early.
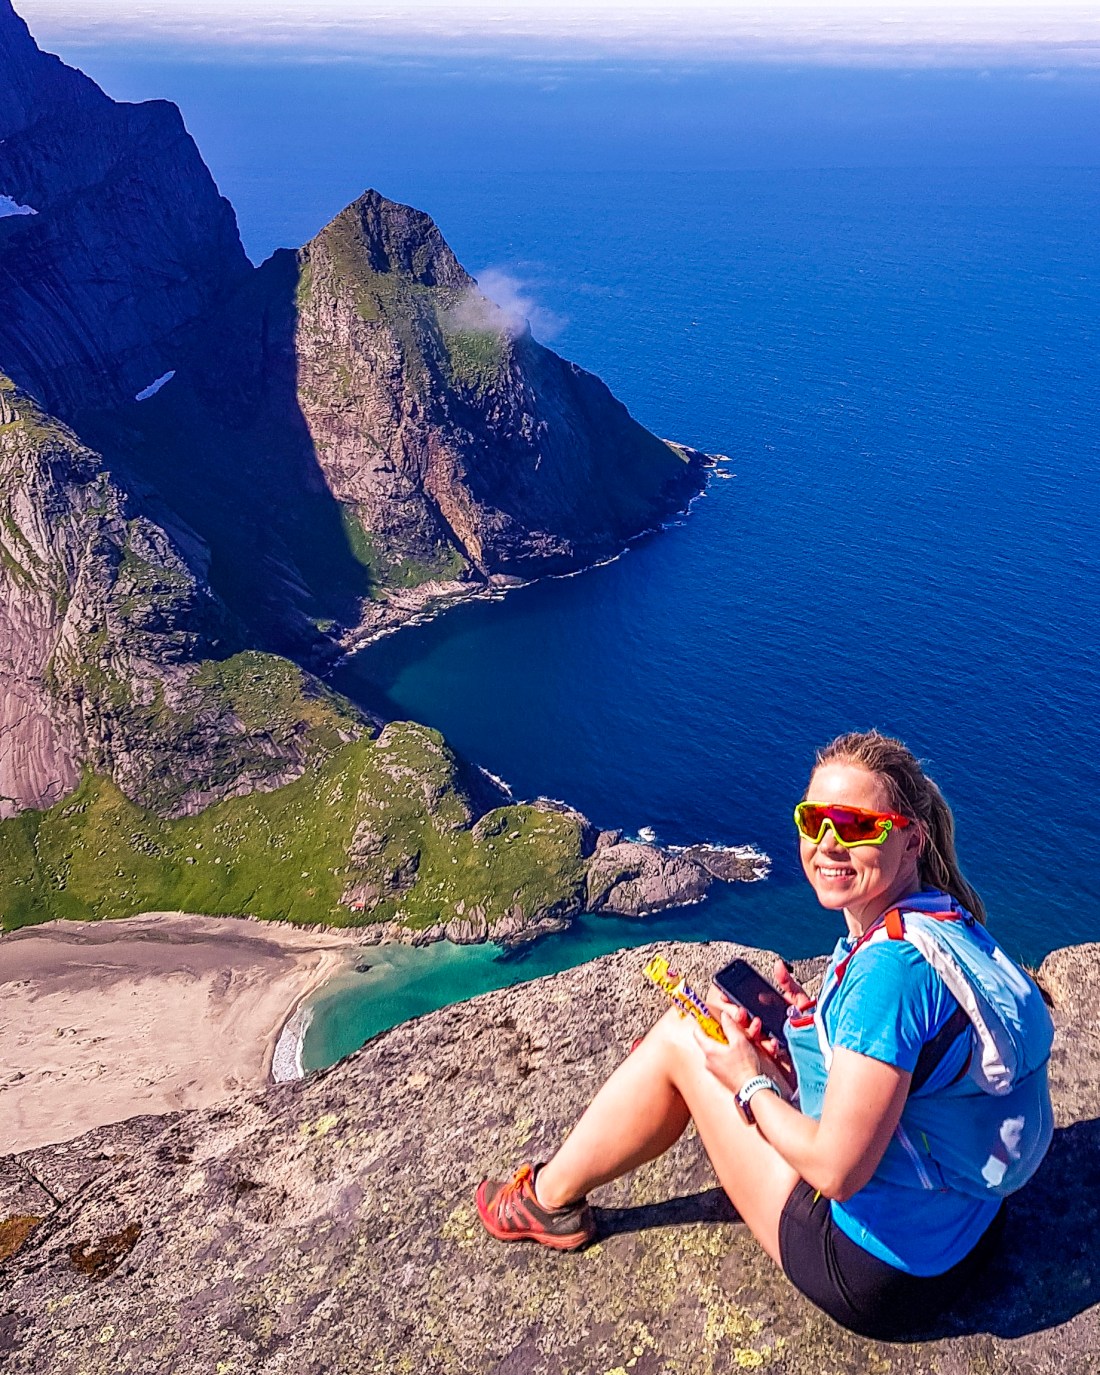
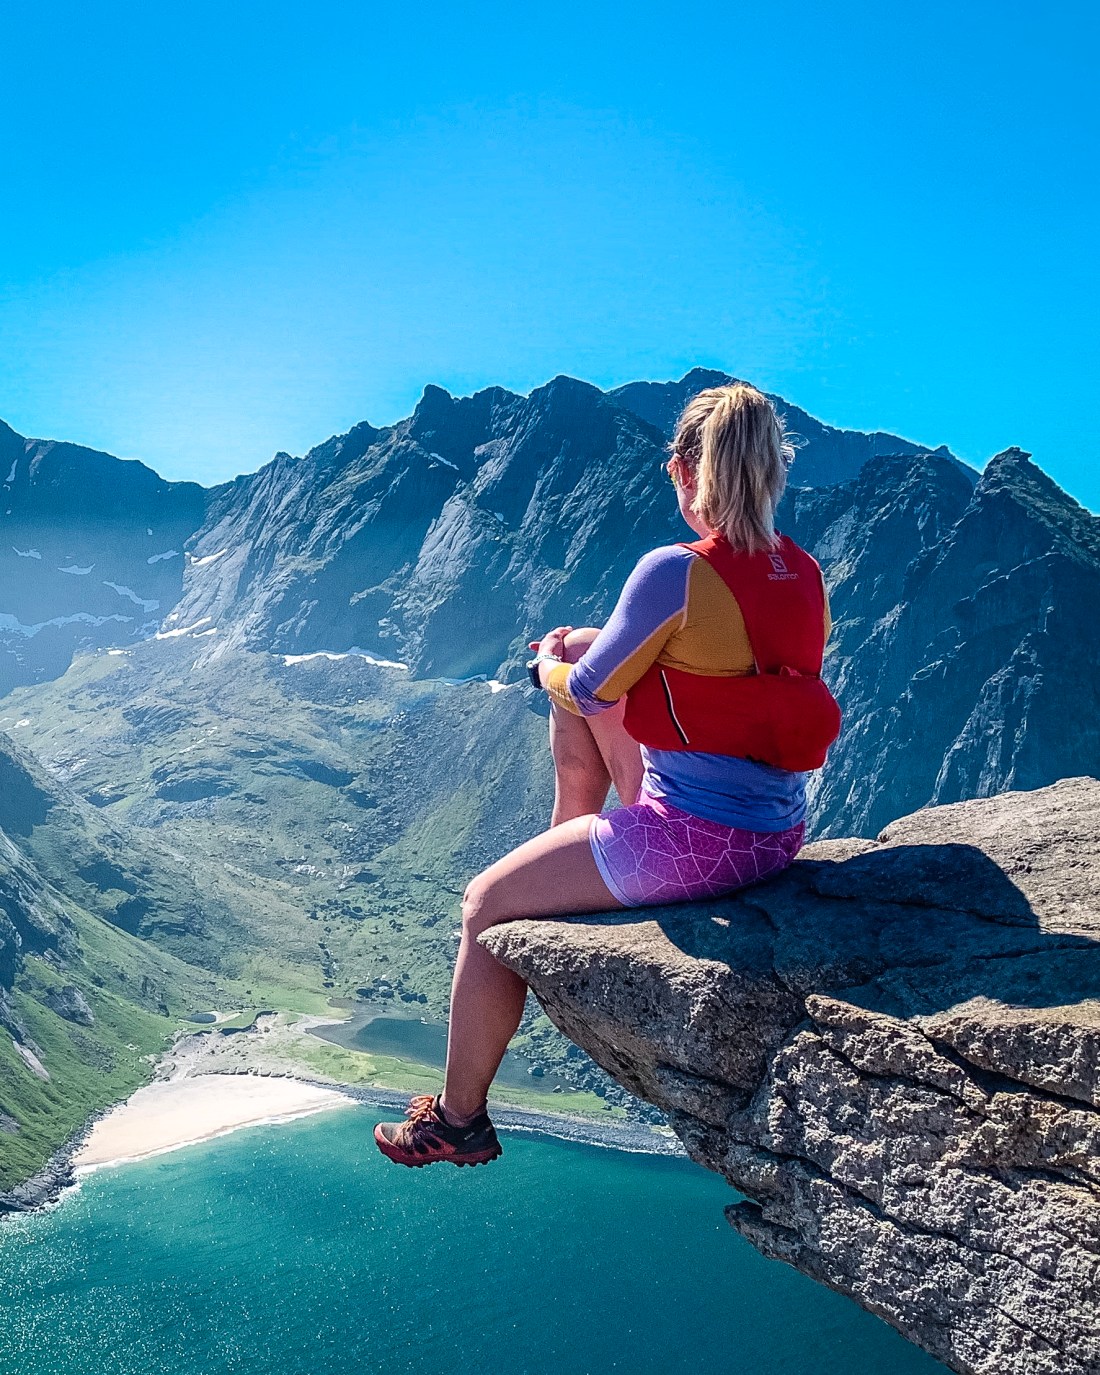
In light of the raising fame of the archipelago of Lofoten, and its toll on the nature, I have been in doubt as to whether I wanted to add to that by inspiring you to go to this incredibly beautiful part of Norway. However, I can’t not share some of the beauty Lofoten has to offer to those of you who prefer active vacations. What I can do, is to encourage responsible travel, to leave Lofoten the way you found it, because, believe me, you will want to go back! If in doubt as to what this means in practice, read Lofoten Code of Conduct.
For general information on Lofoten, go to lofoten.info. Another site that I found very useful is 68north.com. For Norwegian readers I recommend getting Kristin Folsland Olsen’s book, “Lofoten, 68 flotte turer i verdens vakreste øyrike”.
Gramming break on our way to Himmeltinden
HIGHLIGHTS
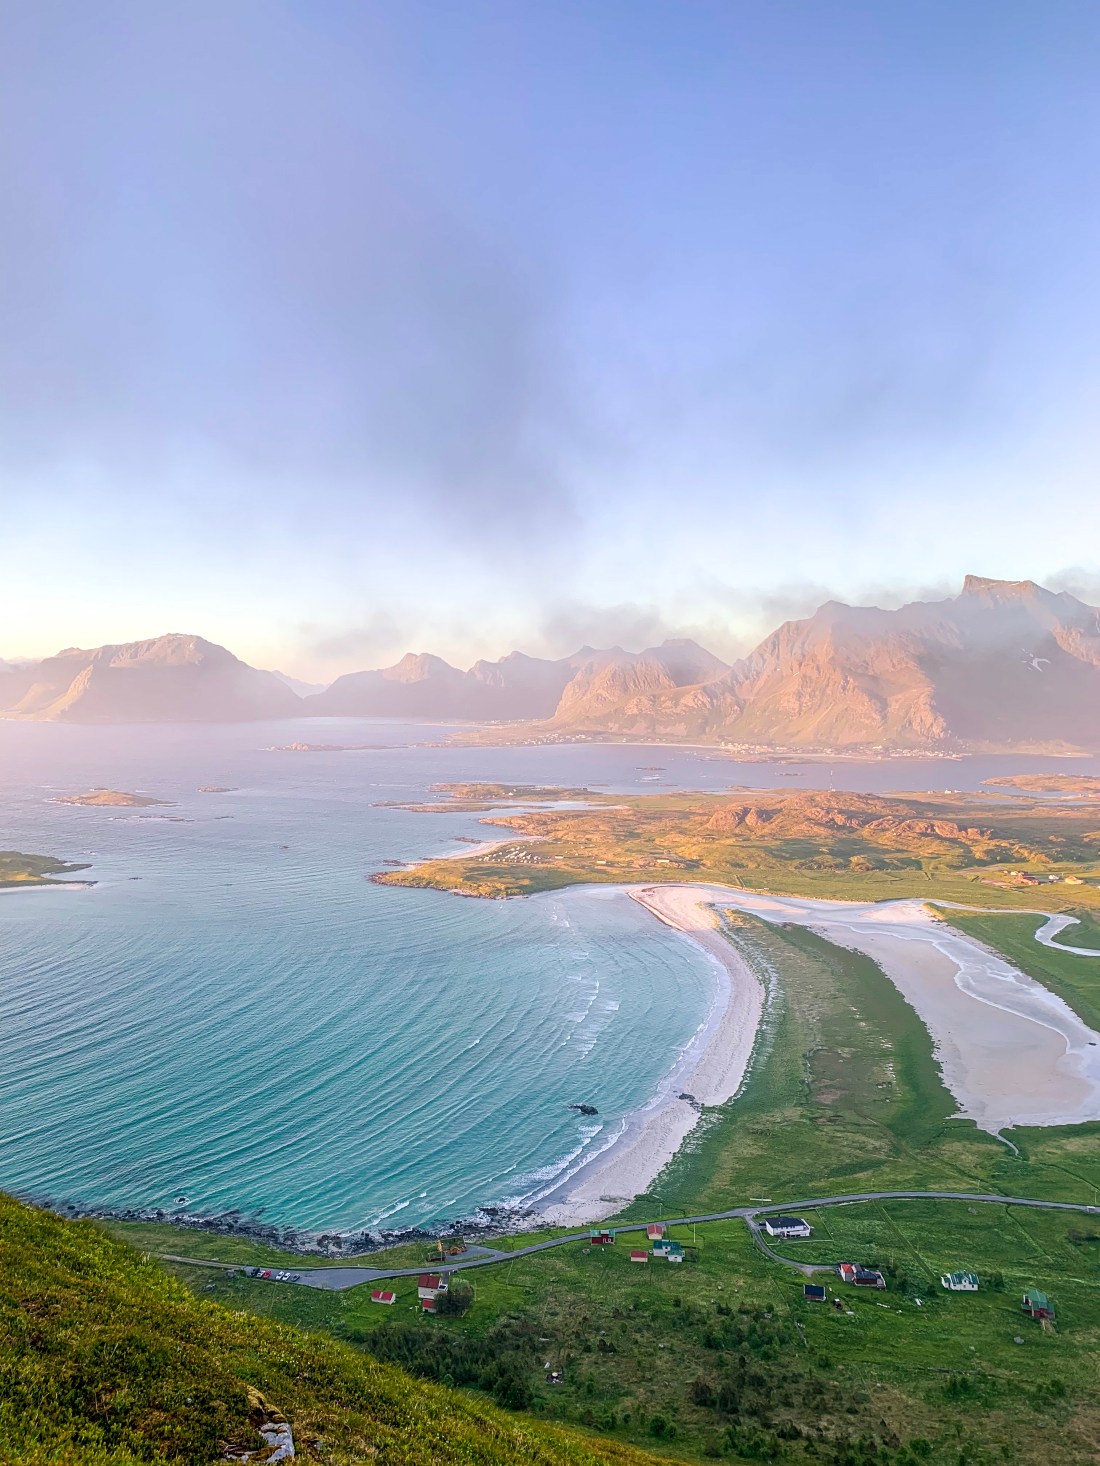
Enjoying the midnight sun from Røren
The hippie vibe at Haukland beach
Evening chill outdoors at the “rorbu”
Sunbathing at the Helvetestinden summit
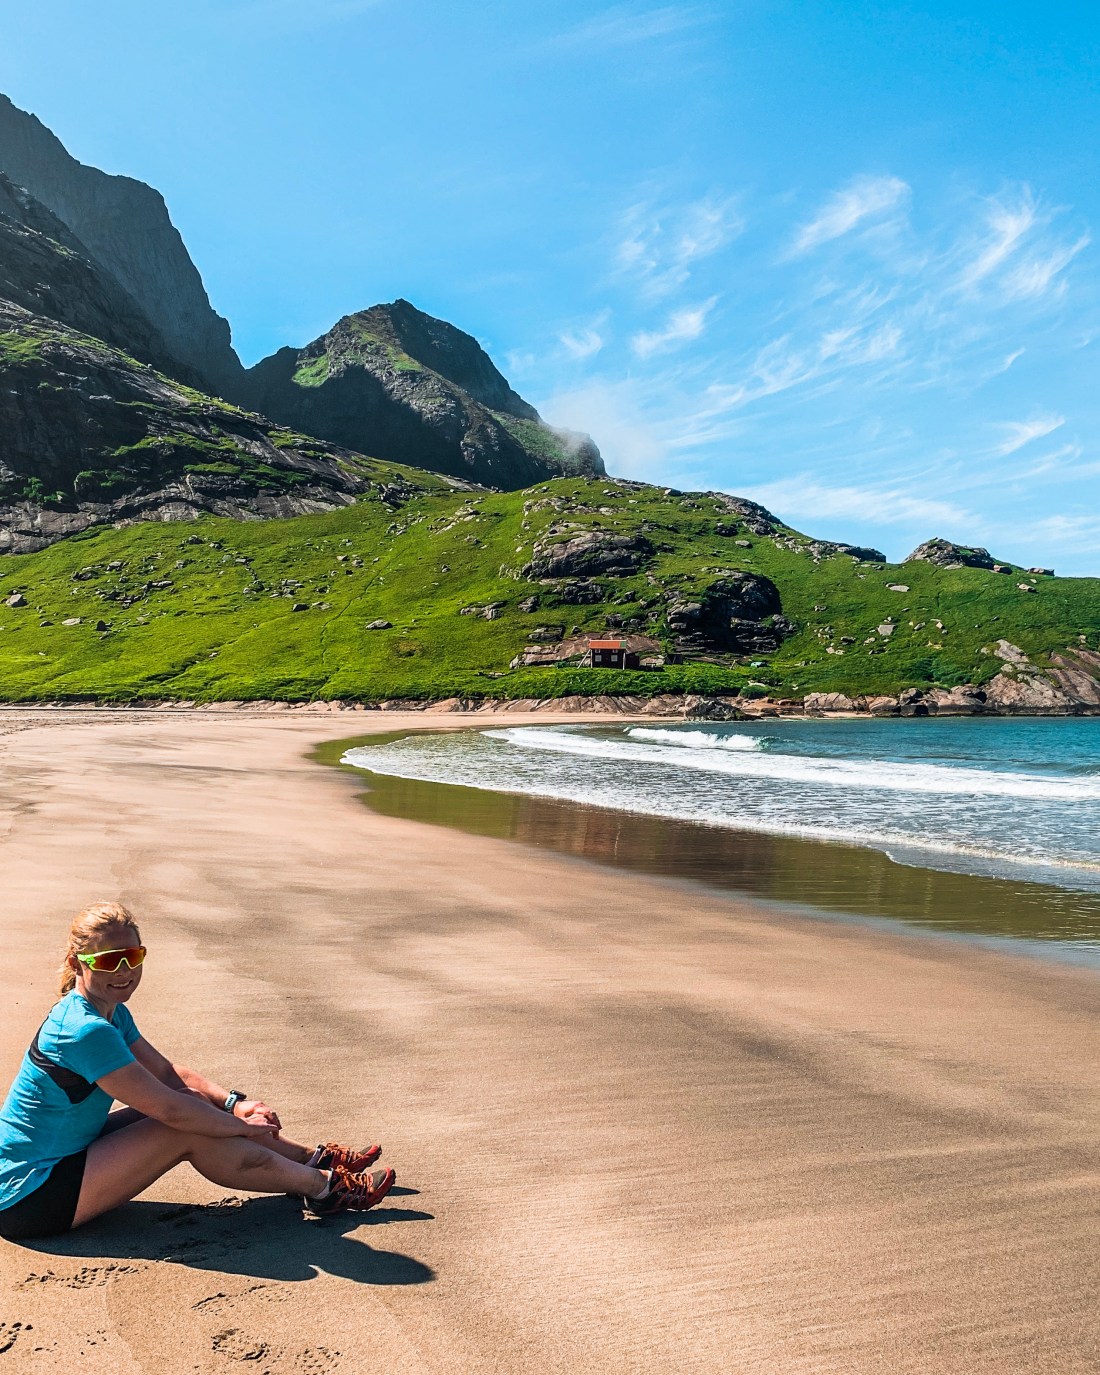
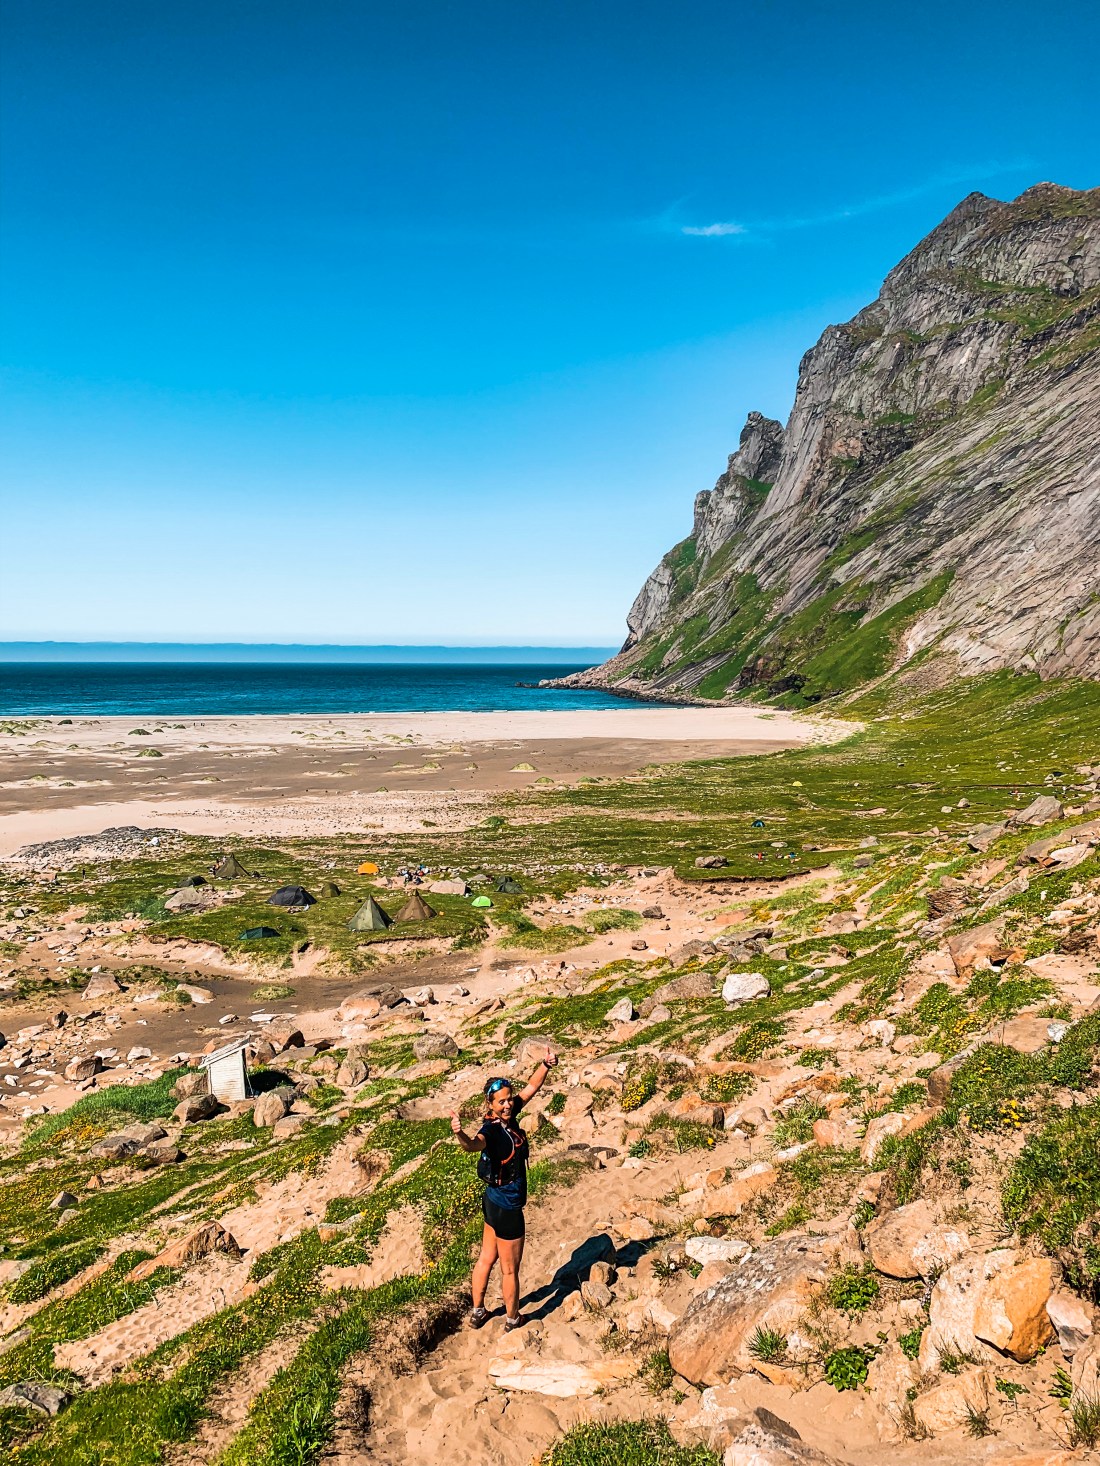
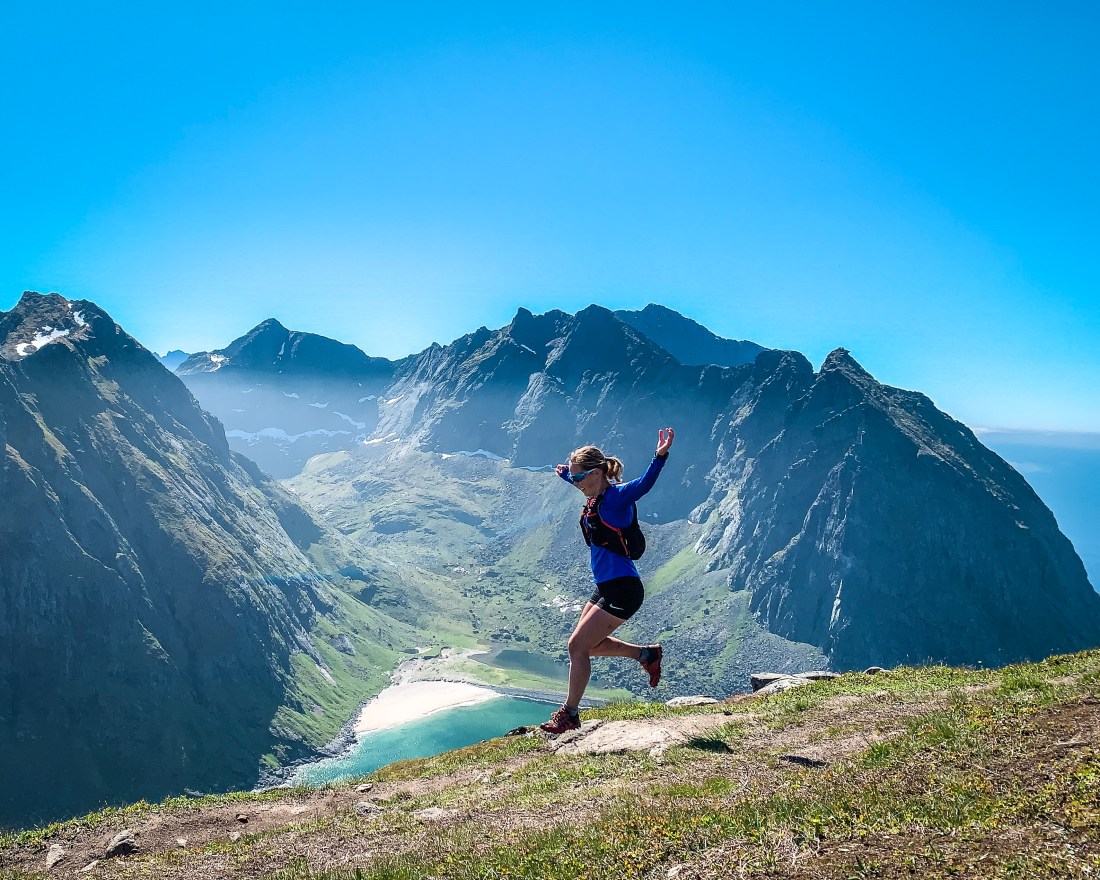
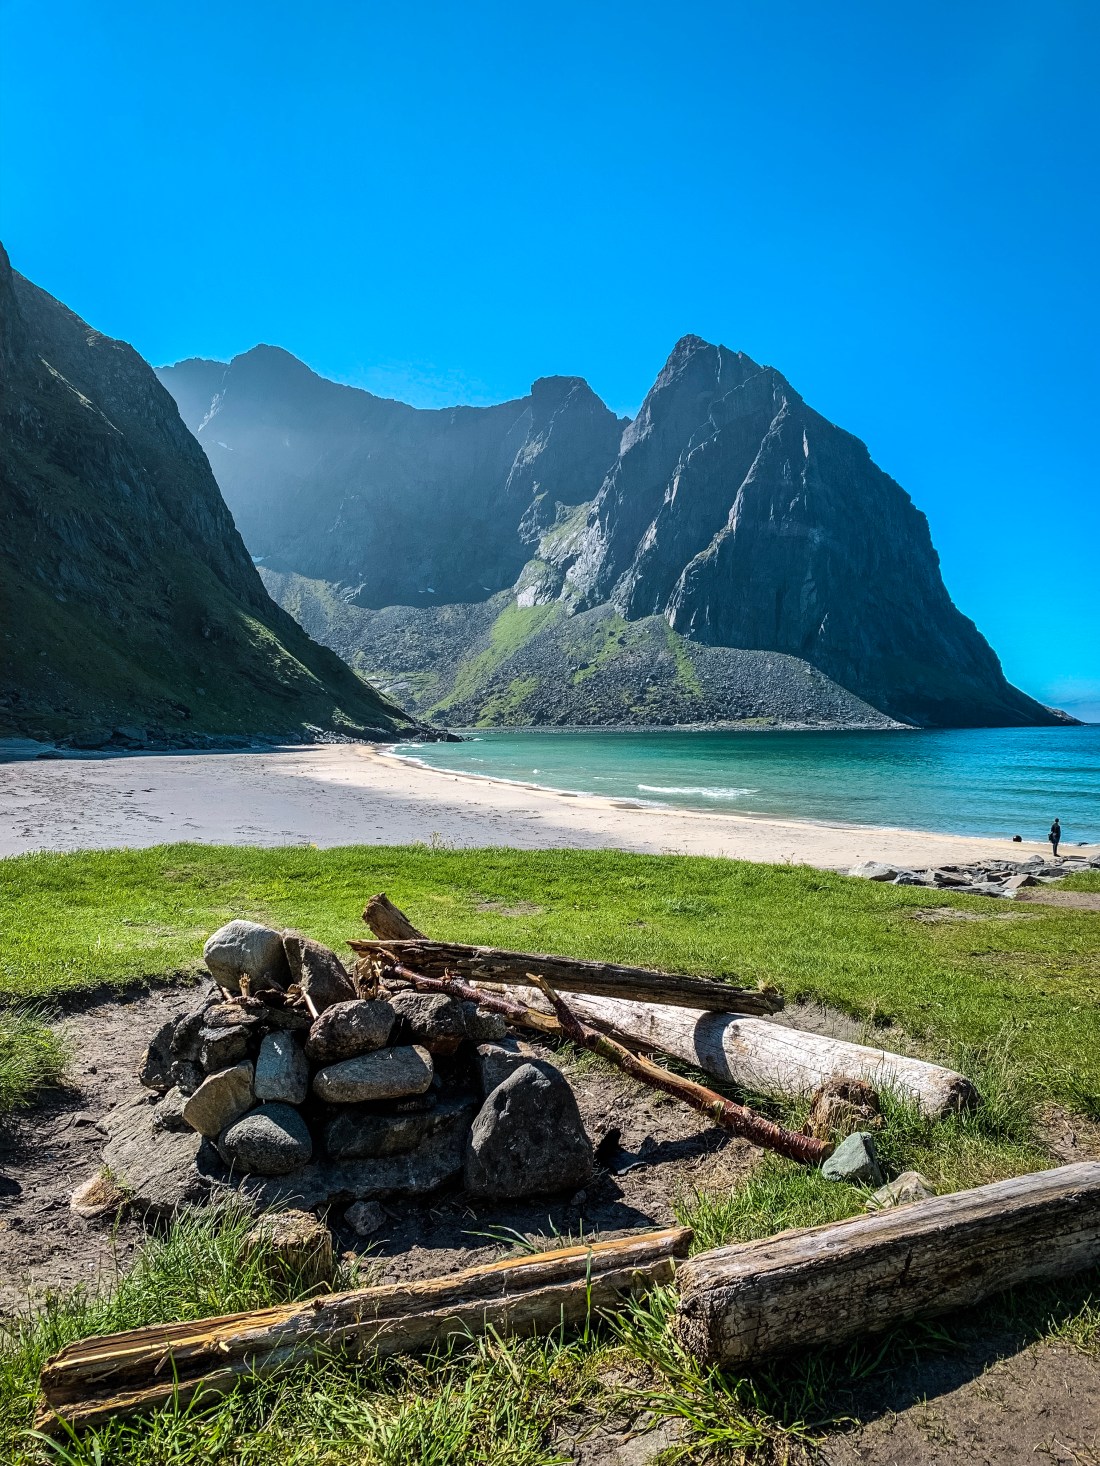
Chilling at Kvalvika beach after running up to Ryten
Bunes beach
Trailrunning/hiking
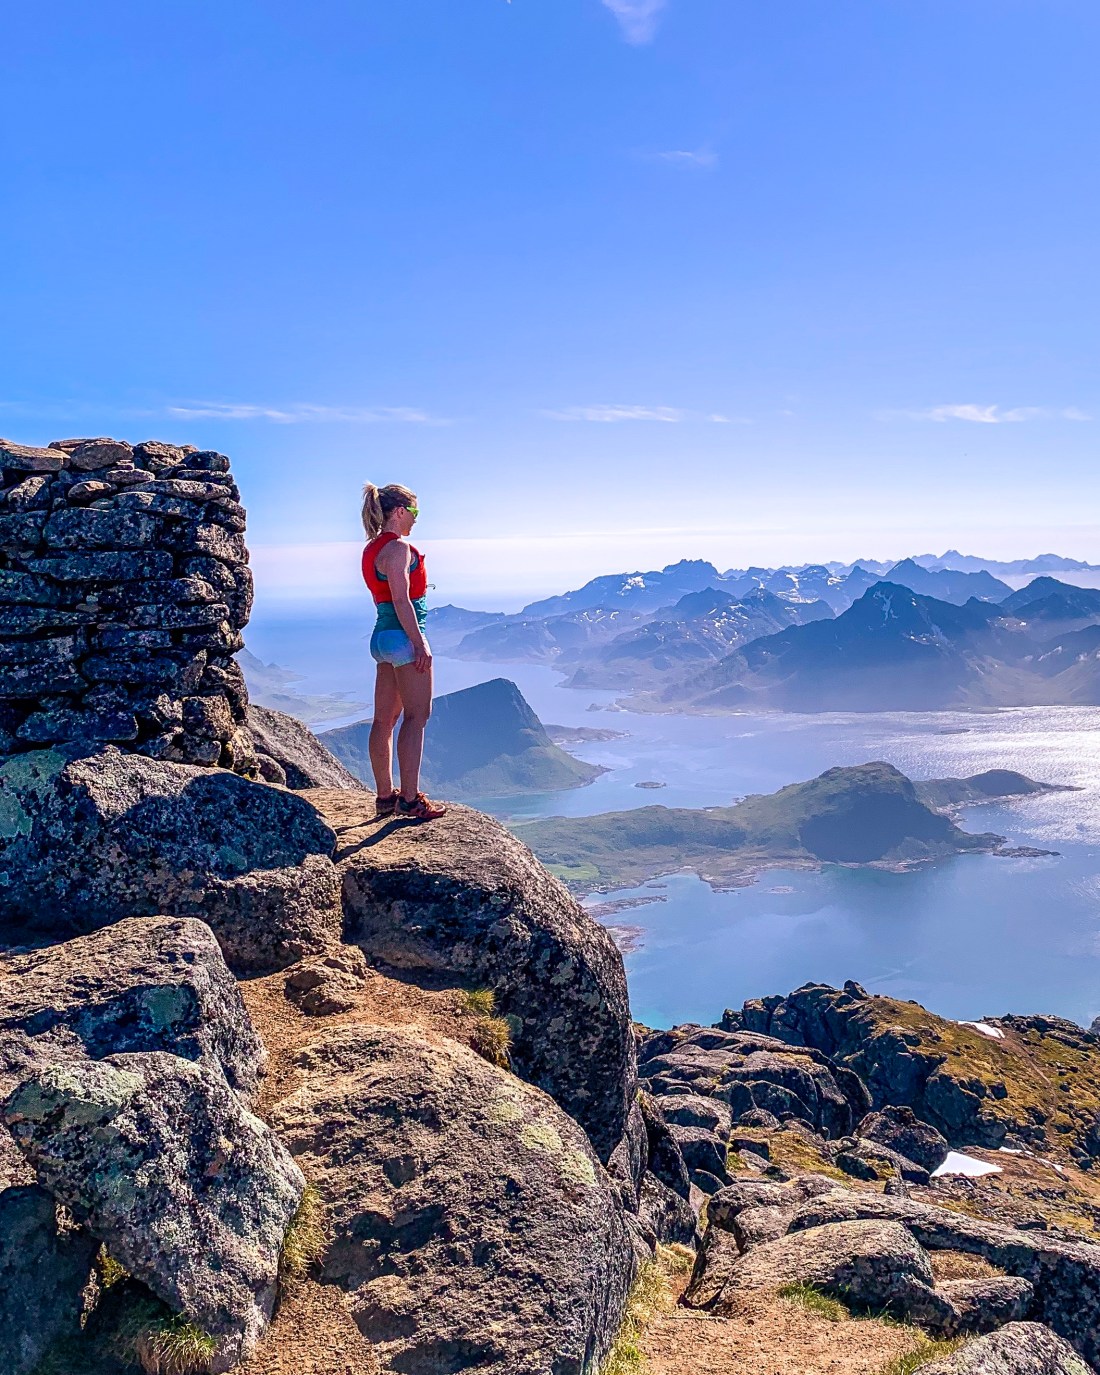
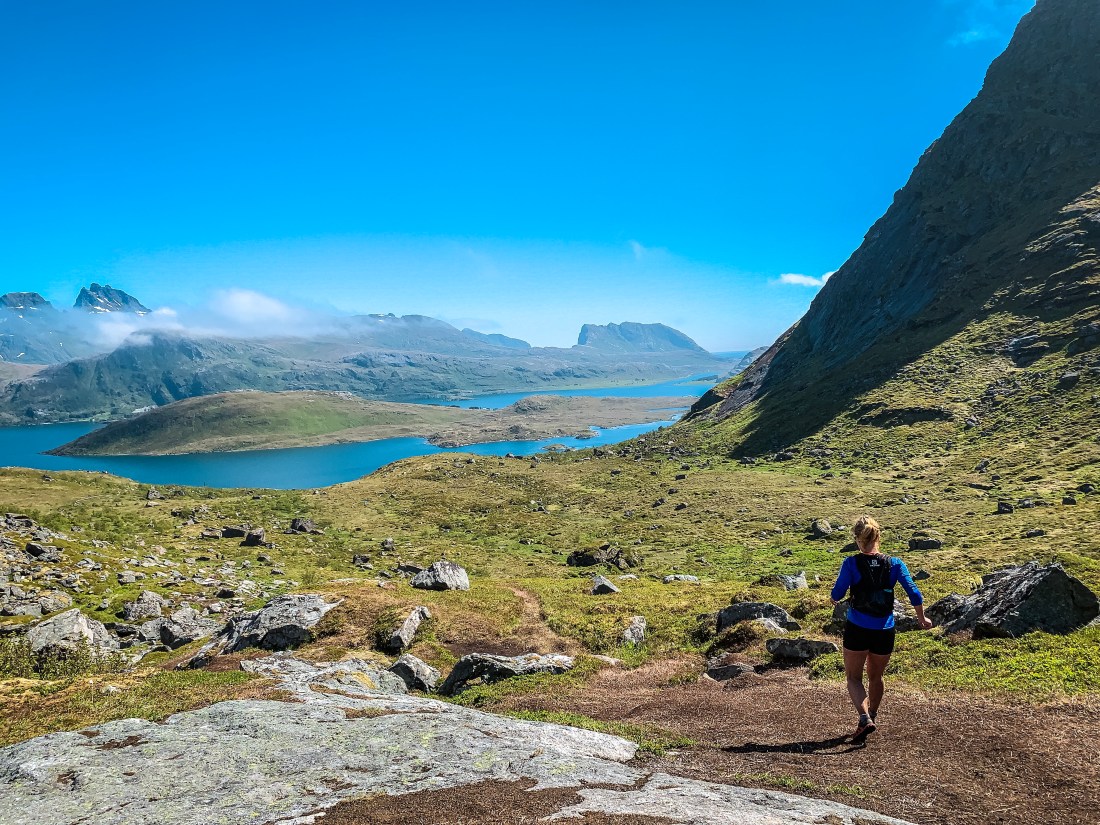
My travel buddy, Kaja, and I both prepared well in advance and made individual lists of summits we wanted to include in our itinerary. Luckily, we had made the same picks. In addition to the runs we were able to tick off, we had Værøy and Reinebringen on our list. Værøy we had to leave out due to logistics and the limited time we had available. Reinebringen was closed for trail construction (to reopen during July 2019).
None of the summits below will let you down, however, no hike/run in Lofoten probably will.
Himmeltinden and Haukland beach
Arriving at Haukland beach, your first thought may be to skip the summit and stay at the beach. I promise you, chilling at the beach after your run, will feel even better.
Himmeltinden
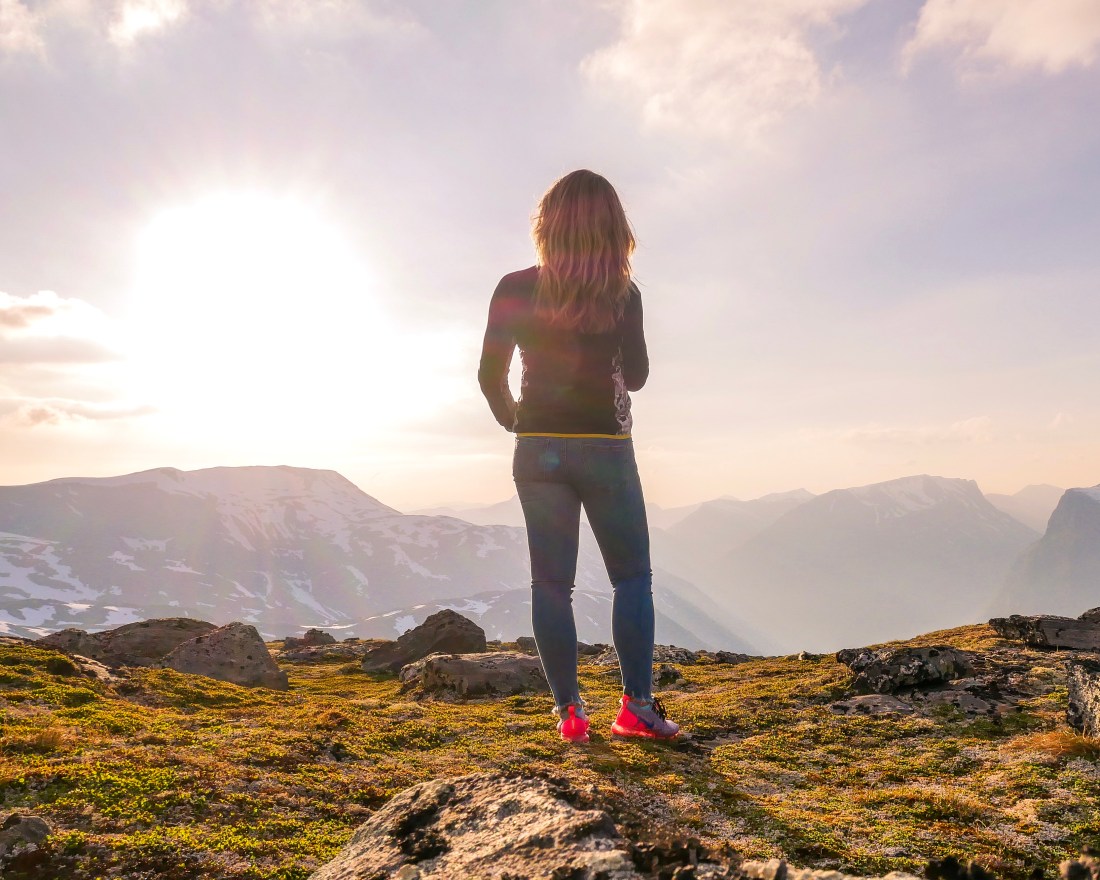
Himmeltinden was the highest summit of our Lofoten trip with its 964 m.a.s. The trailhead is across the Haukland beach parking, just before driving into the Uttakleiv tunnel. The four kilometer trail to the summit has runable sections as well as steeper parts and amazing views already from the beginning. Enjoy the exceptional views at around 700 m.a.s. before taking on the last part of the climb. Bring a dry shirt and some warm clothes to make yourself comfortable at the summit. And, if you can, go for the sunset/midnight sun experience!
Gravel in some of the steeper parts may cause you to slip, so take it easy downhill. And don’t forget bringing a towel for a dip in the ocean after the run!
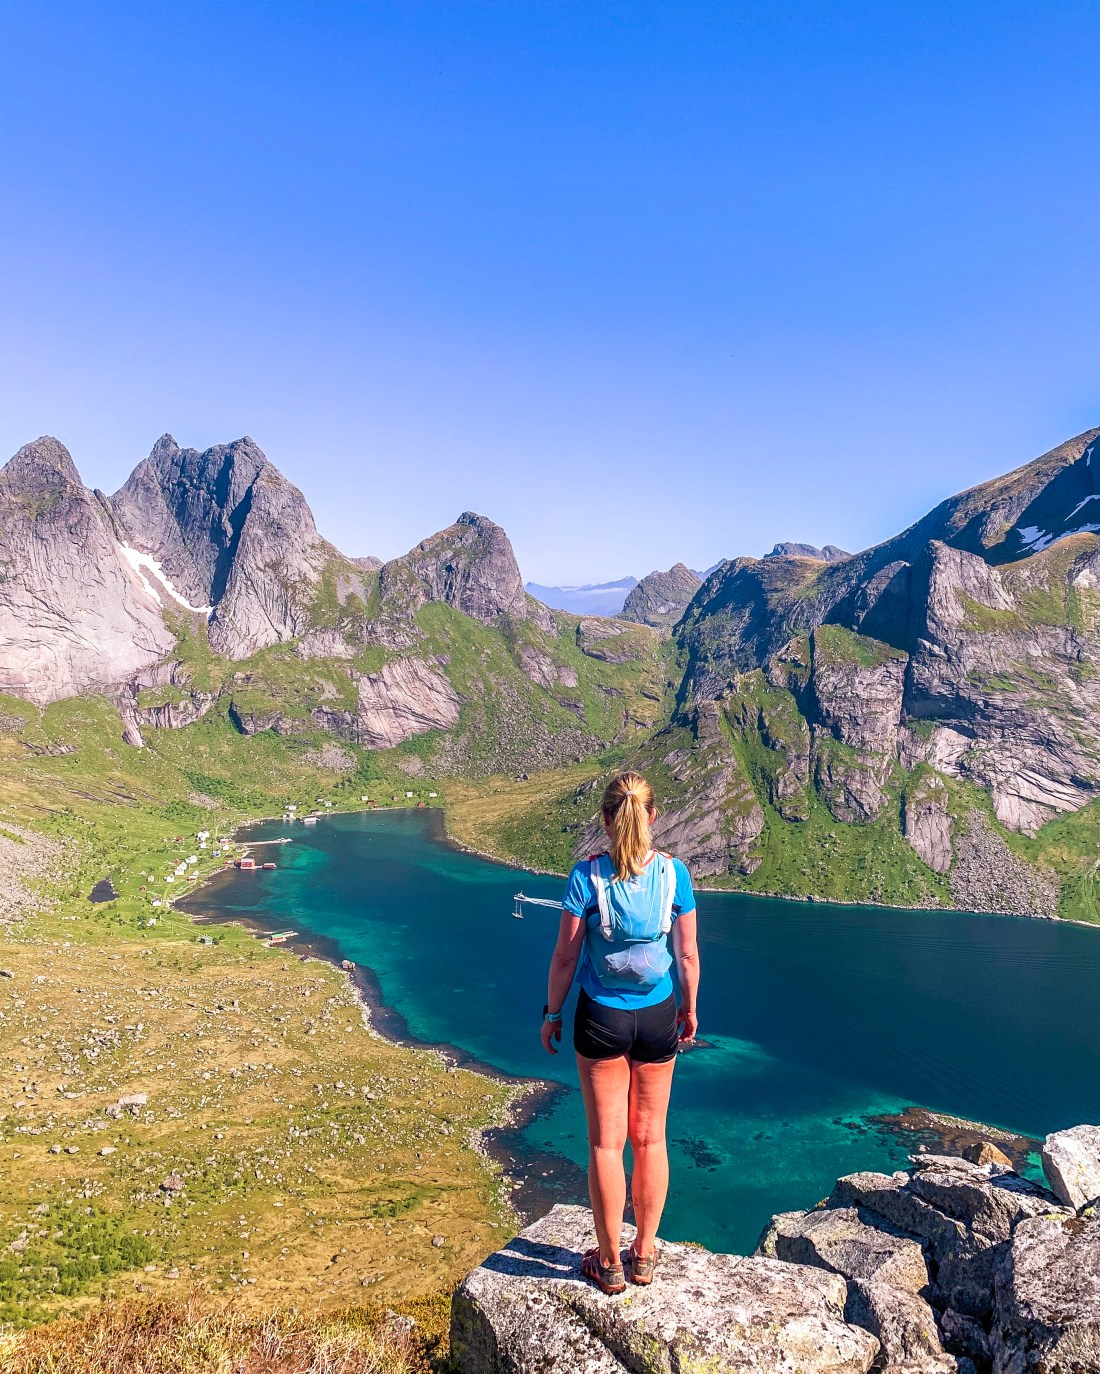
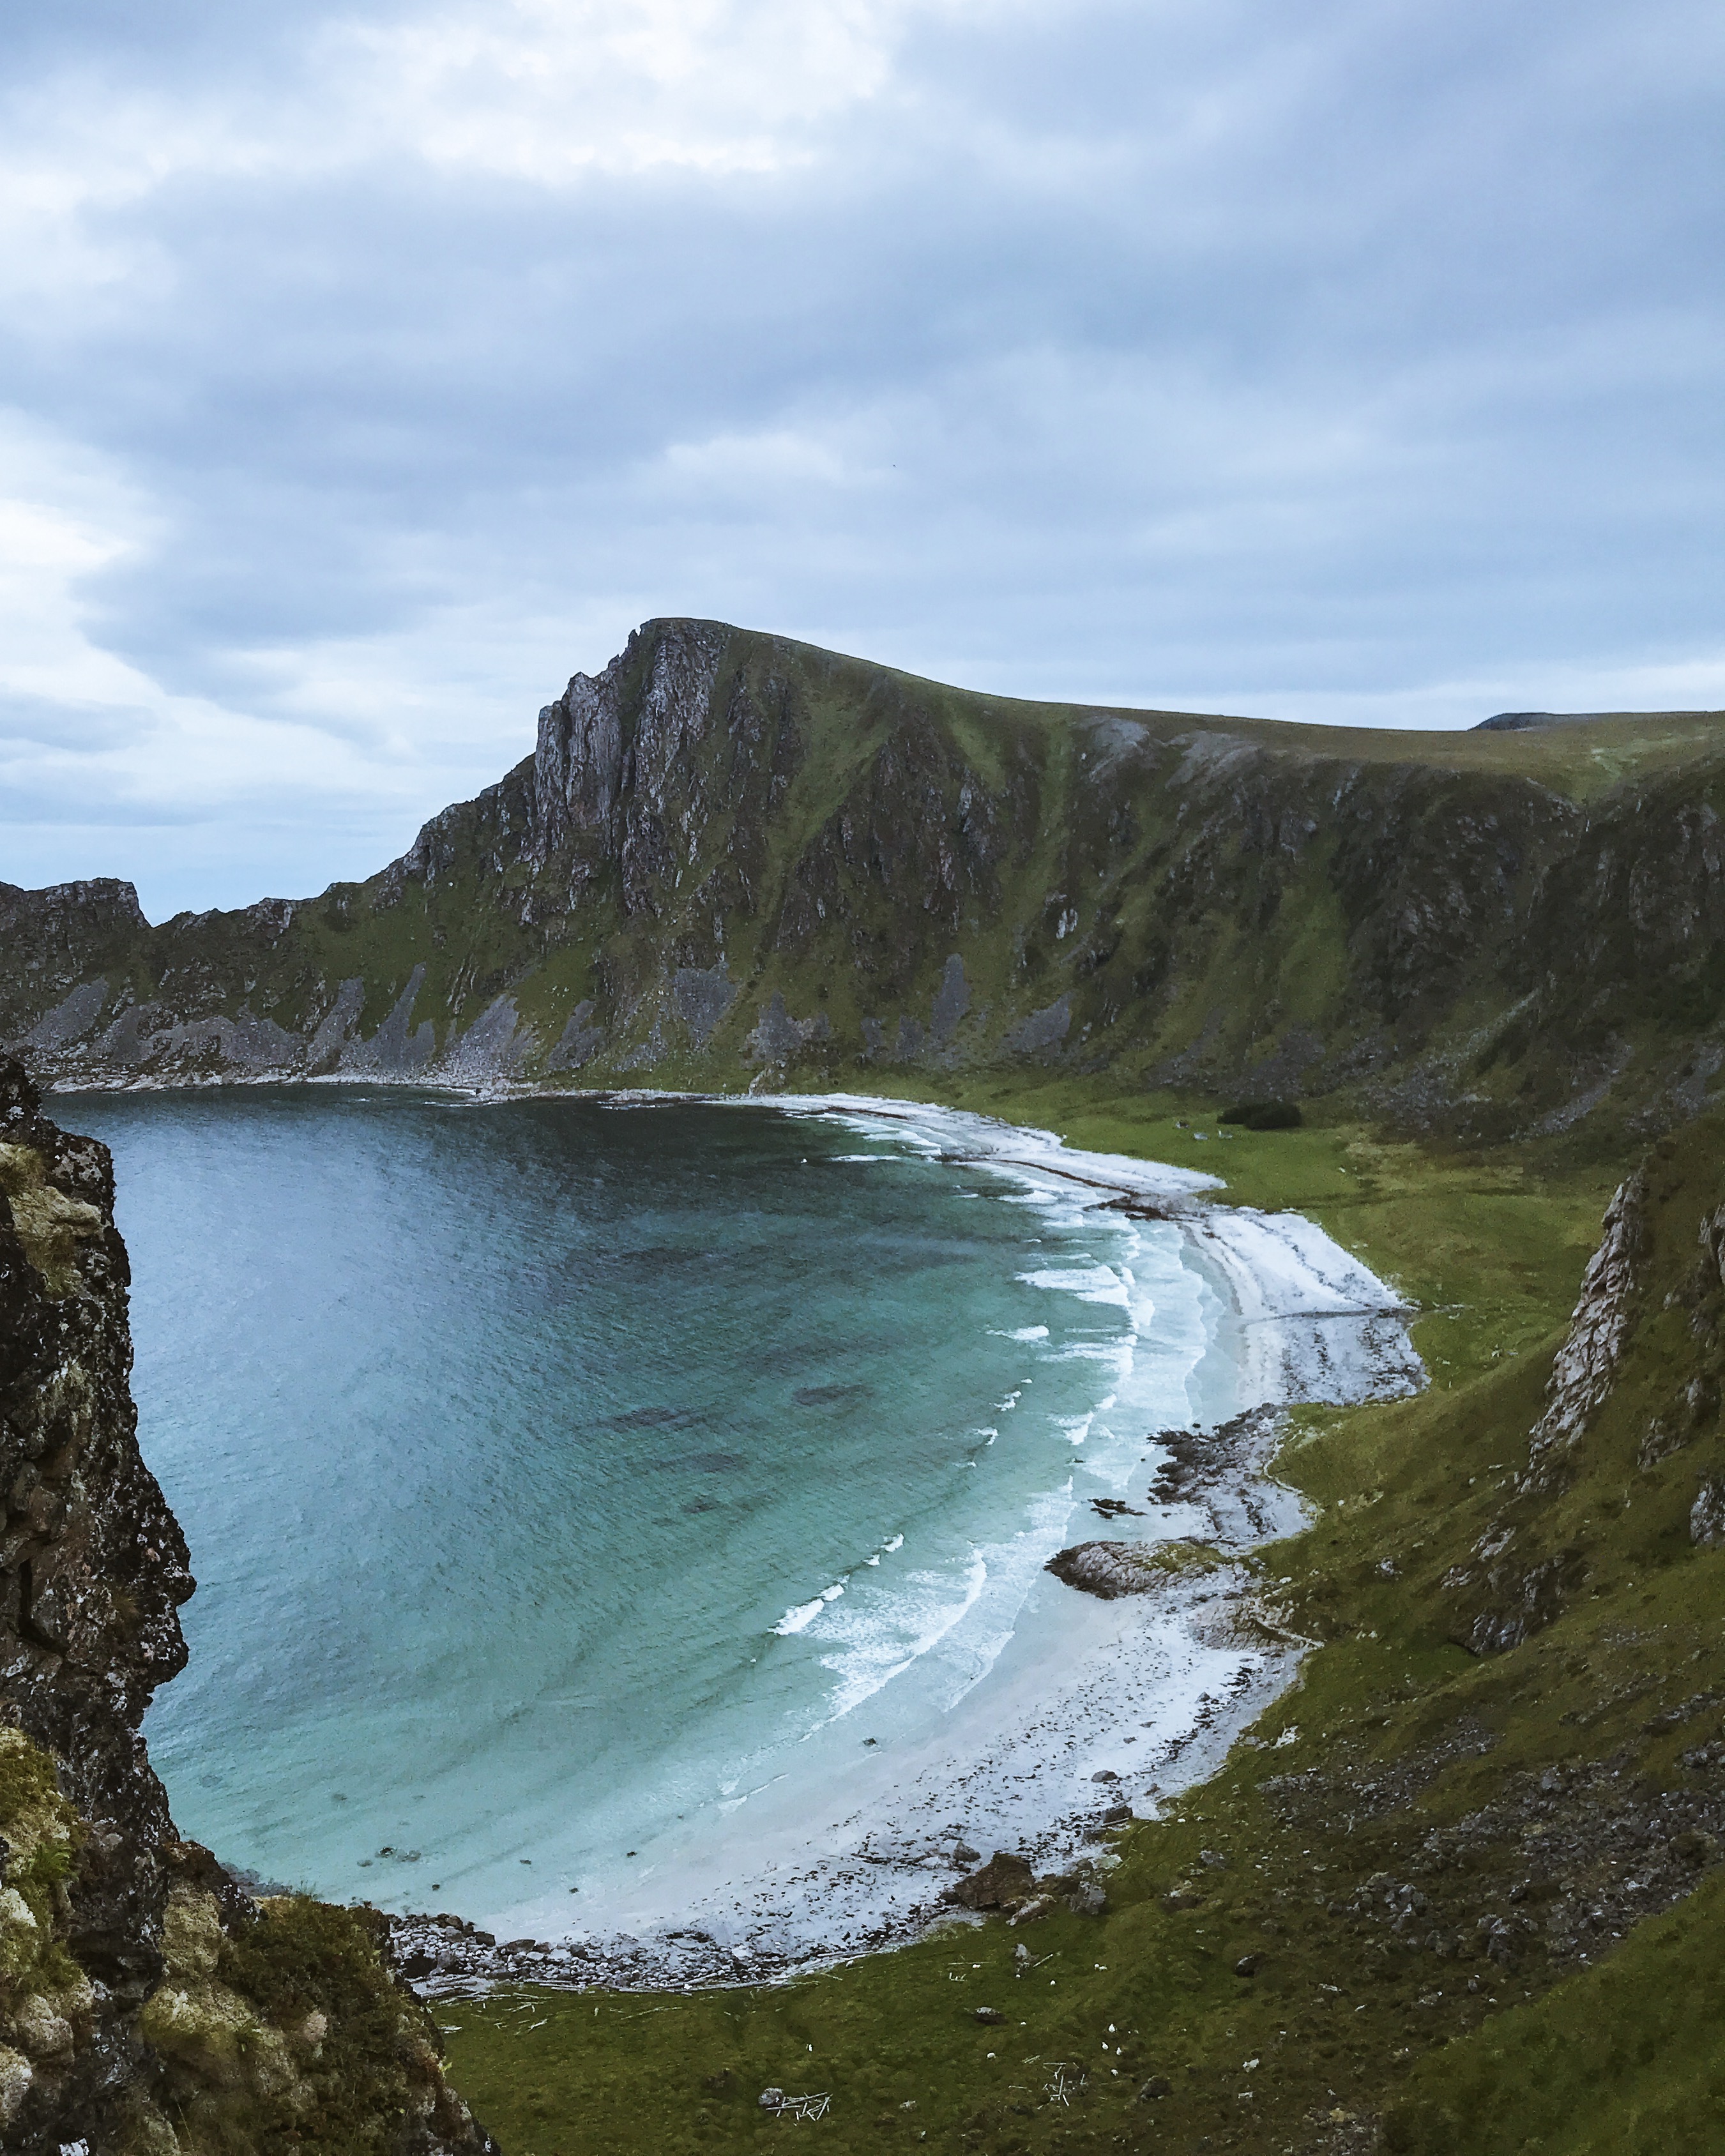
Another great summit/beach combination is Helvetestinden and Bunes beach. To reach the trailhead, you need to take a 20 minutes boat ride from Reine to Vindstad. Go here for the schedule.
Kjerkfjorden view
Once you reach Vindstad, the initial two kilometers are practically flat before you have to tackle almost 600 meters of elevation gain divided on the last two kilometers. Don’t miss the gramable spot and a peek into Kjerkfjorden at around 500 m.a.s. before the last climb. Again, bring what you need to stay comfortable at the top of Helvetestinden, 602 m.a.s. and take time to enjoy the beautiful view of Bunes beach. As Himmeltinden, this hike is also great for sunset/midnight sun, provided you have the logistics settled. Also, bring enough water, as the climb does not provide any drinking sources.
All smiles at Helvetestinden
If you have the time before the boat return, don’t miss the Bunes beach, which has some funny gras bumps providing some shelter if the wind is too strong.
The final summit/beach combination to tick off in Lofoten is the insta-famous Ryten and my favorite beach, Kvalvika. We starten our run from Torsfjord, but you can also start from Bergland, Medvold or Marka. Ryten, with its 543 m.a.s. is more runable than Himmeltinden and Helvetestinden. Most of the initial two hundred meters of elevation gain, you loose before the ascent really starts just before you reach Kvalvika beach. Stay on the wooden paths provided and enjoy the amazing views as you climb toward the instagram spot at 500 m.a.s. Although this spot is the purpose of the hike for many, don’t miss the peak and the enormous plateau of Ryten. This is where I want to return with a tent next year!
Ryten classicLofoten euphoriaKvalvika beachReturning to Torsfjord
Again, if you have the chance, go to Ryten to enjoy sunset/midnight sun. In any event, bring a towel and take some time to chill at the peaceful Kvalvika beach after the run.
Unless you choose any of the above hikes for your midnight sun experience, Røren is a shorter alternative, as well as a beautiful soft ground hike with surrounding hills you just want to explore running. This hike is also graced with beach views, this time it is Yttersand which provides the perfect backdrop.
You need a car to explore Lofoten. If you drive your own from the south, I recommend taking the ferry from Bodø to Værøy or Moskenes, and return by taking the ferry from Svolvær to Skutvik (only in the summer). Continuing from Skutvik towards Trondheim or Oslo, you may include another favorite spot of mine, Manshausen, which makes for a perfect roundtrip, if you ask me. Another option would be to explore Tysfjord. If you have a lot of time available, I would suggest continuing from Lofoten via Vesterålen and Andøya to Senja.
If you arrive by plane, the most convenient airports are Leknes and Svolvær, however, flights here tend to be quite beautiful. Since you in any event need to rent a car, your best option is to fly into Bodø, take the ferry to Moskenes and rent a car there. Another great alternative is to fly to Evenes, from where it will take you about 2:30 to drive to Svolvær.
Where to stay
There are so may great accommodation alternatives in Lofoten. Although not being a camper, I would definitely love to go camping in Lofoten. We stayed at Sakrisøy Rorbuer, which we really enjoyed, in particular due to its quiet location near Reine, but not in Reine and for the deli/restaurant across the street. Sakrisøy was also a bit cheaper than other “rorbuer” we considered. I suggest you choose accommodation near your hiking targets in order to avoid much driving (roads are narrow and with heavy traffic during high season).
I recommend to go in June before the summer vacation starts, or in September. The fall is supposed to be the best time to go, even if there is no midnight sun. And of course, if you like mountain skiing, go in the winter as well!
In these days xc-skiers are flocking to Sognefjellet for summer skiing. I really can’t think of any better place to be this time of the year when the sun is shining. It is not just about the skiing, the surroundings are out of this world beautiful, and if you are lucky with the conditions you can even skate on the morning crust all the way up to Fanaråken (2068 m.a.s.) or to other surrounding peaks. Staying at Sognefjellet for multiple days skiing twice a day is not for everyone, and I like to combine 2-3 days at Sognefjellet with a few days in Aurland on my way up, and a couple of days at Beitostølen on my way back to Oslo. Beginning of June is the perfect timing for this road trip, as the roads over Aurlandsfjellet and Valdresflye are open and there is usually sufficient snow for skiing at Sognefjellet.
If you have a week to spend in June, this is what I would do:
Friday
Drive to Aurland
Saturday-Monday
Take inspiration from Training Camp in Aurland and make sure to include a bicycle ride over Aurlandsfjellet to Lærdal and back and a run up Aurlandsdalen. Drive to Sognefjellshytta in the evening catching the sunset, via Øvre Årdal and the beautiful Tindevegen or via Sogndal and the equally beautiful Lustrafjorden.
Nærøyfjorden, Aurland
Tuesday-Friday
Stay at Sognefjellshytta for easy access to the track, which starts right outside the cabin. The track is usually prepared for classic and skate twice a day, in the morning and the afternoon, and, depending on the amount of snow, is about 5-7 km long. Consider bringing your mountain/randonee skis if you want to explore more of the area, or take advantage of the morning crust for some off-track skating.
Drive to Beitostølen Friday afternoon, just in time to make a stop at Bakeriet i Lom for some carbo loading before they close for the day. If it’s your lucky day you catch a spectacular sunset when driving over Valdresflye to Beitostølen.
Saturday-Sunday
One of my most beautiful roller ski workouts I had at Beitostølen, starting from the village and rolling up to Valdresflye. The surroundings are hard to beat and the traffic not too bad if you start in the morning.
Finish off your training road trip with a run over Besseggen. Go for an early start from Gjendesheim in order to make the return by boat from Memurubu (if you are too slow, you just have to run back as well). This is the most legendary hike in the Norwegian mountains with a spectacular ridge section providing an amazing view of Gjendevatnet and Jotunheimen. Starting from Gjendesheim in stead of following the pack with boat to start from Memurubu, you get the ridge and most of the trail for yourself.
If a shorter run is more to your liking, go for Bitihorn, which is closer to Beitostølen and can be done in an hour. There are several trails to Bitihorn, the link below takes you to the peak from the south.
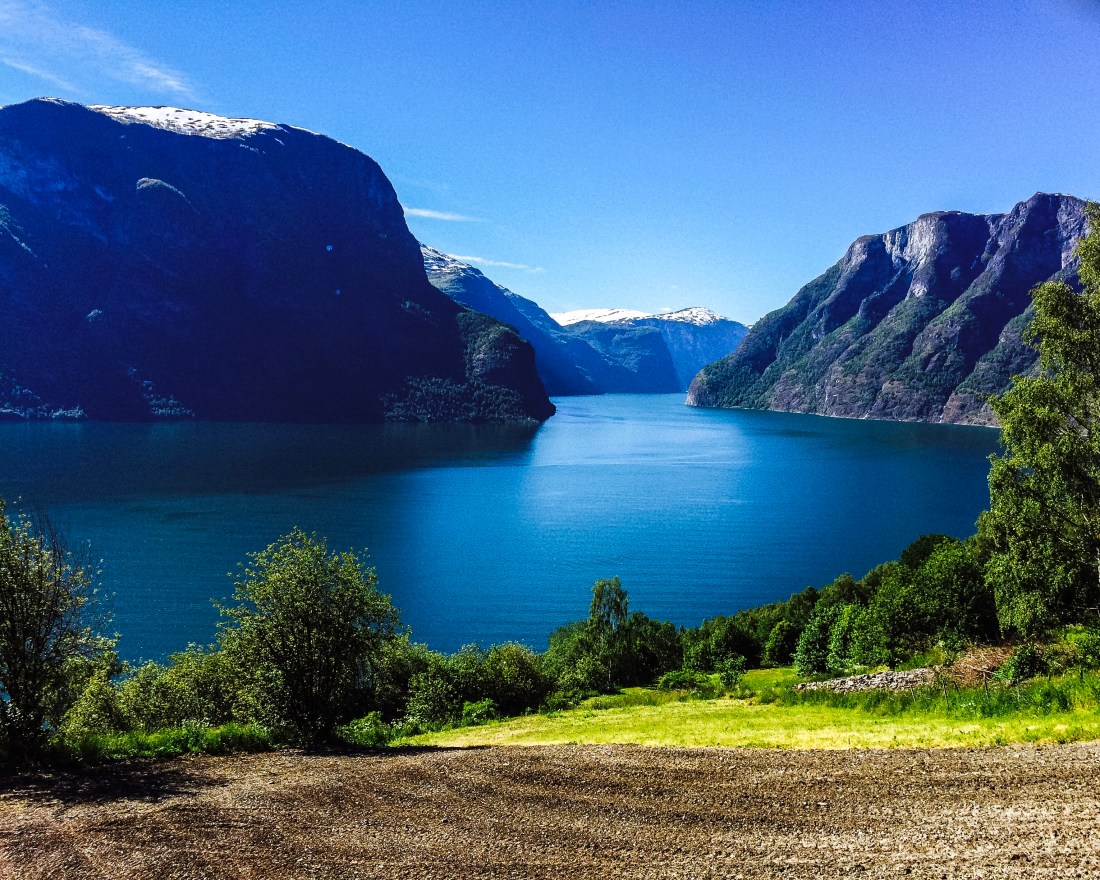
Have you ever been to Aurland? This tiny little village in the UNESCO world heritage area around Nærøyfjorden, not far away from much more overcrowded and famous Flåm, makes the perfect site for a multisport endurance training camp with a view. Aurland is also hosting one of the world’s toughest competitions, Aurlandsfjellet Extreme Triathlon, AXTRI, which takes places in August every year.
The best time to visit Aurland is between the opening of the road over Aurlandsfjellet, usually end of May/beginning of June, and the start of the summer vacation at the end of June. During this time you may get the chance to experience the “freezer” effect of the snow banks along the scenic mountain road without the crowds. Here you will find suggestions for different workouts (roller skis, bike and running), in addition you may want to explore the fjord by kayak or swimming.
Aurlandsfjellet in June
Highlights
Lunch break at the terrace of Marianne Bakery & Café
The fjord view
The mountain road, especially when the snow banks are high
The Aurlandsdalen run
Aurland – Lærdal on road bike
This mountain road from Aurland to Lærdal is one of the 18 Norwegian Scenic Routes and the bike leg of AXTRI. When you take on the Aurland mountain by bike you will start to understand why AXTRI is considered one of the toughest competitions in the world with more than 3000 meters of elevation gain divided on 98 kilometers, and the highest point on the course at 1320 meters above sea level. However, this ride is as beautiful as it is tough, with spectacular views of the fjord and often tall snow banks along the road on the mountain plateau and should be on any rider’s bucket list.
SStegastein view point
Remember to stop at the Stegastein view point (at about 600 m.a.s.l.) about half way up the first climb. If you are not up for the full distance, you can of course make the turn at any point of the course, and, unless you are checking it out for the race, skip the last flat 10 kilometers from Aurland to Vassbygdi.
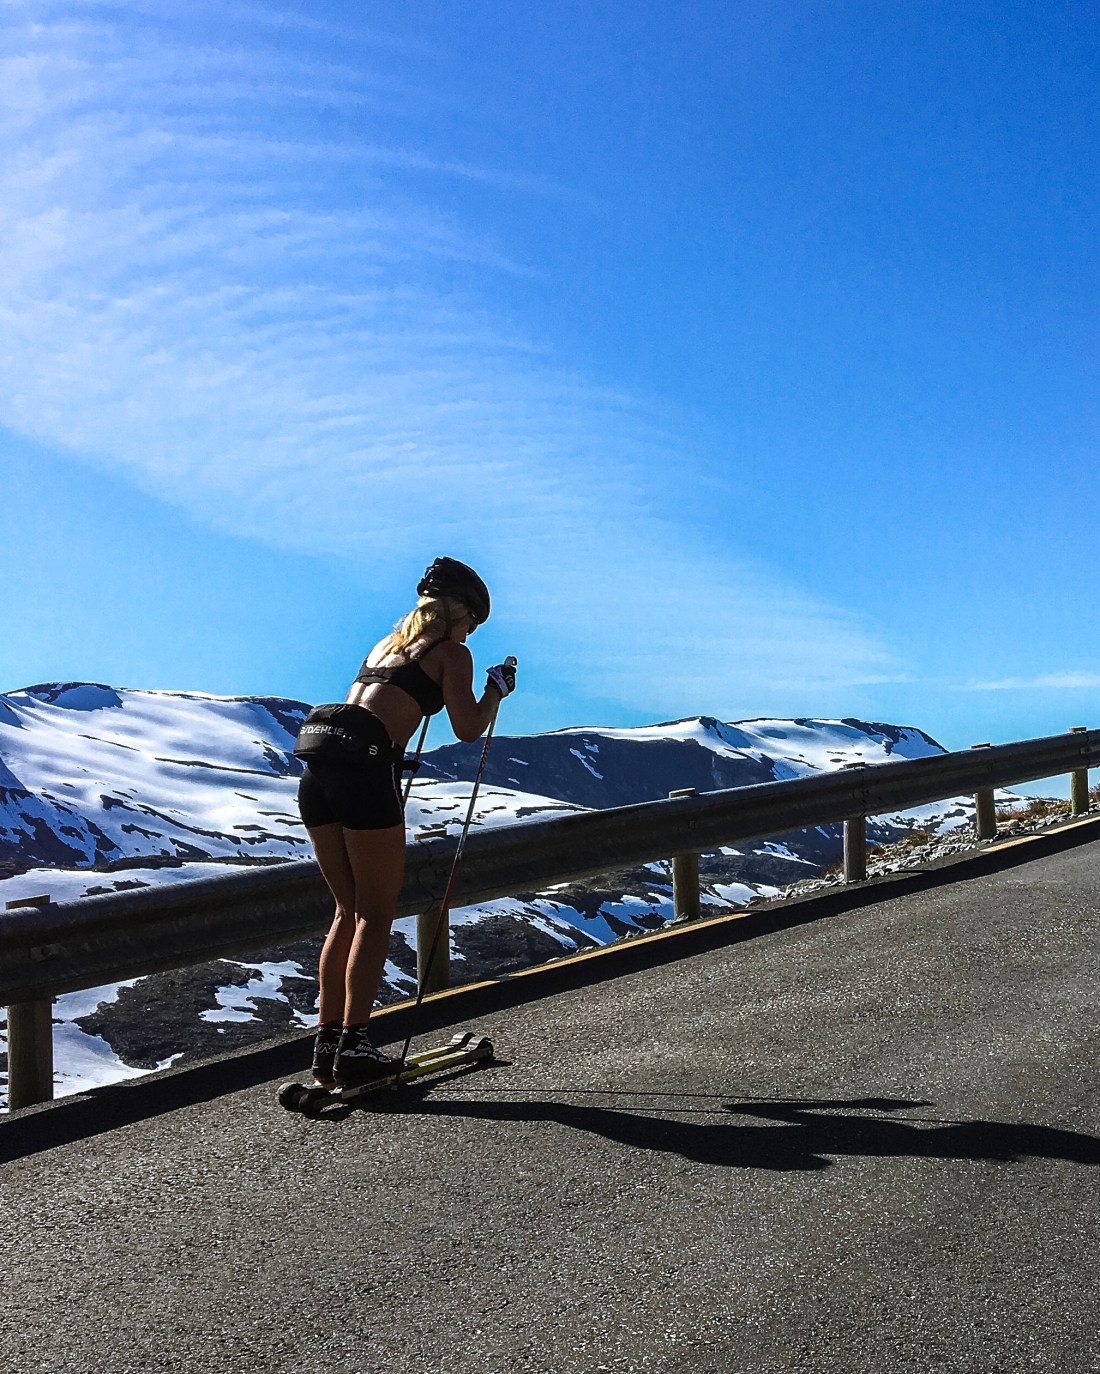
Another favorite workout when in Aurland is of course to take on the mountain climb on roller skis. If you don’t have a second car or a support car, you can bring a bike and drive up, leave the car at the top, and ride down to start you roller ski workout. A second option is to roll up only to the Stegastein view point and ask any of the tourists or the tourist busses for a ride down. You should not by any chance roll down the narrow hairpin turns as the traffic can be quit heavy between Aurland and Stegastein.
Give it to the Vasaloppet-junkies!
The roller ski workout follows the same road as the bike workout, thus the views are as amazing, and is great for long intervals.
If you prefer a flat roller ski workout, make it a sightseeing to Flåm. From Flåm you can continue into Flåmsdalen and the starting point of “Rallarvegen” a gravel road popular for mountain biking taking you all the way to Haugastøl on Hardangervidda.
One of the highlights when visiting Aurland is to run up the Aurland valley. This almost 20 kilometer long trail is very popular to do as a one or two-day hike in the opposite direction (downhill) and is also the running leg of AXTRI. This is a truly amazing run taking you through a steep, narrow and wild valley with a lot of history, giant waterfalls and with about 1100 meters of elevation. Please note that due to a recent rockslide the trail should not be used until it has been secured. Please contact local tourist information before you plan to run/hike this trail.
You will find the trailhead is in Vassbygdi, about 10 km from Aurlandsvangen. You can leave your car at the trailhead and return by bus from Østerbø, the end point of the trail (plan your run according to the bus schedule). At Østerbø you can buy refreshments after your run.
The run to the peak, Prest (1478 m.a.s.), is a great 4.6 km (return) trail run for a short afternoon or evening workout. The well marked trail is soft with great views. The most spectacular view of the fjord is actually from below the peak, at about 1360 meters above the fjord. The trailhead can be found at the parking on the left side further up the road from Stegastein viewpoint.
Driving to Aurland from Oslo takes between 4.5 and 5 hours depending on the route you choose. I prefer to make it a roundtrip driving up via Ål and Sudndalen (where you can stretch your legs running up to the beautiful Hivju waterfall) and return via Hemsedal. From Bergen the drive takes about 2 hours and 40 minutes. A road trip including Aurland on its itinerary will soon be added to trailspotting.no.
Approaching Aurland from Sudndalen.
Where to stay
There are not that many accommodation options in Aurland. We have always stayed at Vangsgården, which provides rooms and apartments on the fjord just in the middle of the village. Location is excellent and the standard ok. The fjord side apartments are small, but sleeps four and the facilities for you to make your own food. There are also a few camping sites and tourist cabins to be rented in Aurland, and another hotel, Aurland Fjordhotel (not tested).
The annual girls’ road trip goes to Geiranger and Trollstigen to collect meters of climbing by roller skiing and running in these crazy beautiful surroundings. This includes one of my favorite places in Norway, Dalsnibba, a mountain top 1500 meters above Geiranger. If you like elevation gains, you may want to tag along!
Highlights of the trip
Cinnamon buns at the Bakery in Lom
Hairpin turns of Dalsnibba
Sunset at Ørnesvingen
Breakfast at Valldal Fjordhotell
Hairpin turns of Trollstigen
The view of any mountain peak in Romsdalen
Barbro and Maren taking on the final hairpin turns above Djupvatnet.
Driving from Øyer to Dalsnibba
You can of course start this road trip from anywhere, but I like to get a head start by driving up to Øyer/Lillehammer the night before. If you are traveling with only one car and want to go roller skiing up Dalsnibba, you should plan your departure according to the bus schedule, (unless you, like we usually do, plan on asking tourists for a lift down to Geiranger). If you have two cars (and can fit everyone in one), the easiest logistic is to leave one car at the top (with warm clothes) and drive one car down to Geiranger.
First stop of the trip is Bakeriet in Lom, about two hours from Øyer. This is probably the most famous bakery in Norway and worth the trip to Lom alone. Here you grab a coffee and what your heart desires of baked goods. I usually grab a cinnamon bun to stay and a sandwich, muffin and another cinnamon bun to go. You will need carbs for this road trip, so don’t be shy! If you wish to spend more time in Lom, there will soon be more information on Lom at trailspotting.no.
After another 90 minutes drive from Lom you will arrive at Dalsnibba (there is a 150 NOK toll road fee per car to drive up to Dalsnibba). Dalsnibba is also the finishing point for this first day’s challenge, which is rollerskiing from Geiranger going up the 1500 meters of ascent to Dalsnibba.
Rolling Up Dalsnibba
Barbro finishing her Dalsnibba climb in 2017.
Of course you can take on this climb cycling or running as well. In June every year (in 2019 on the 8th of June) there is a race event from Geiranger to Dalsnibba, called “From Fjord to Mountain“, where you can choose between running or biking, or do both.
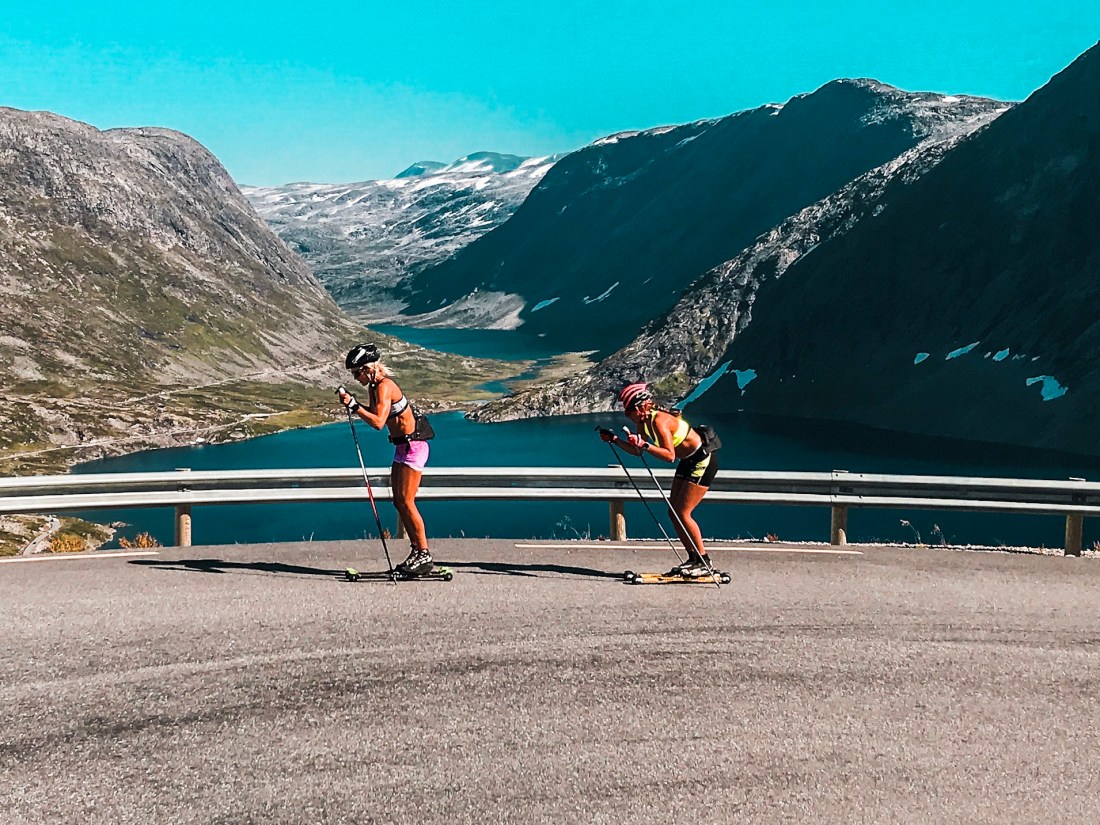
We have a thing for roller skiing mountain passes and with 1500 meters of elevation gain divided on about 21 km, the Dalsnibba climb is one of the toughest ones out there, and the equivalent of for example the Stelvio pass in Italy (which due to the higher altitude may feel tougher). You will be driving down from Dalsnibba the same route as you will roll up, giving you the chance to prepare for what to come. Arriving at your starting point, you will find Geiranger buzzing with tourists, some of which have never seen roller skis before.
Kicks allowed.
The first part of the climb quickly takes you through hairpin turns to amazing views of the fjord and Geiranger. You may want to stop at Flydalsjuvet, about 4 km from Geiranger to do some gramming. The mid part of the climb has less curves and after about 7 km the landscape opens up and you will see the climb ahead of you as well as beautiful old farmhouses, waterfalls and mountains. After about 16 km you reach Djupvatnet which is at its most scenic when covered with cracks of ice. In the morning and late evening it is possible to go roller skiing on the road along Djupvatnet and towards Grotli, but it is not advisable with the daytime traffic. From Djupvatnet there is another 6 km of nice hairpin turns and fantastic views before you reach Dalsnibba, and probably enjoy the applause from the tourists.
Driving down to Geiranger from Dalsnibba allow time for a refreshing dip in one of the streams just after Djupvatnet and some photographing in the kind afternoon light. If you haven’t already, make a reservation at Brasserie Posten in Geiranger, and enjoy one of their pizzas before a short stroll in Geiranger, which is now much calmer after the departure of all the cruise ship tourists.
We always stay at Valldal Fjordhotell, which has a great breakfast buffet, good beds and a calm and nice atmosphere. There are also other options in Valldal, which is conveniently located between Geiranger and Trollstigen. The drive from Geiranger to Trollstigen is one of the 18 Norwegian Scenic Routes and you will do the first part of this route on your way to Valldal, which takes about one hour including a short ferry between Eidsdal and Linge. Make sure you allow time for a quick stop at Ørnesvingen, a cool view point above Geiranger on the toad to Valldal, providing you with a view of the fjord, Geiranger and the “Seven Sisters” waterfall.
Driving from Valldal to Trollstigen
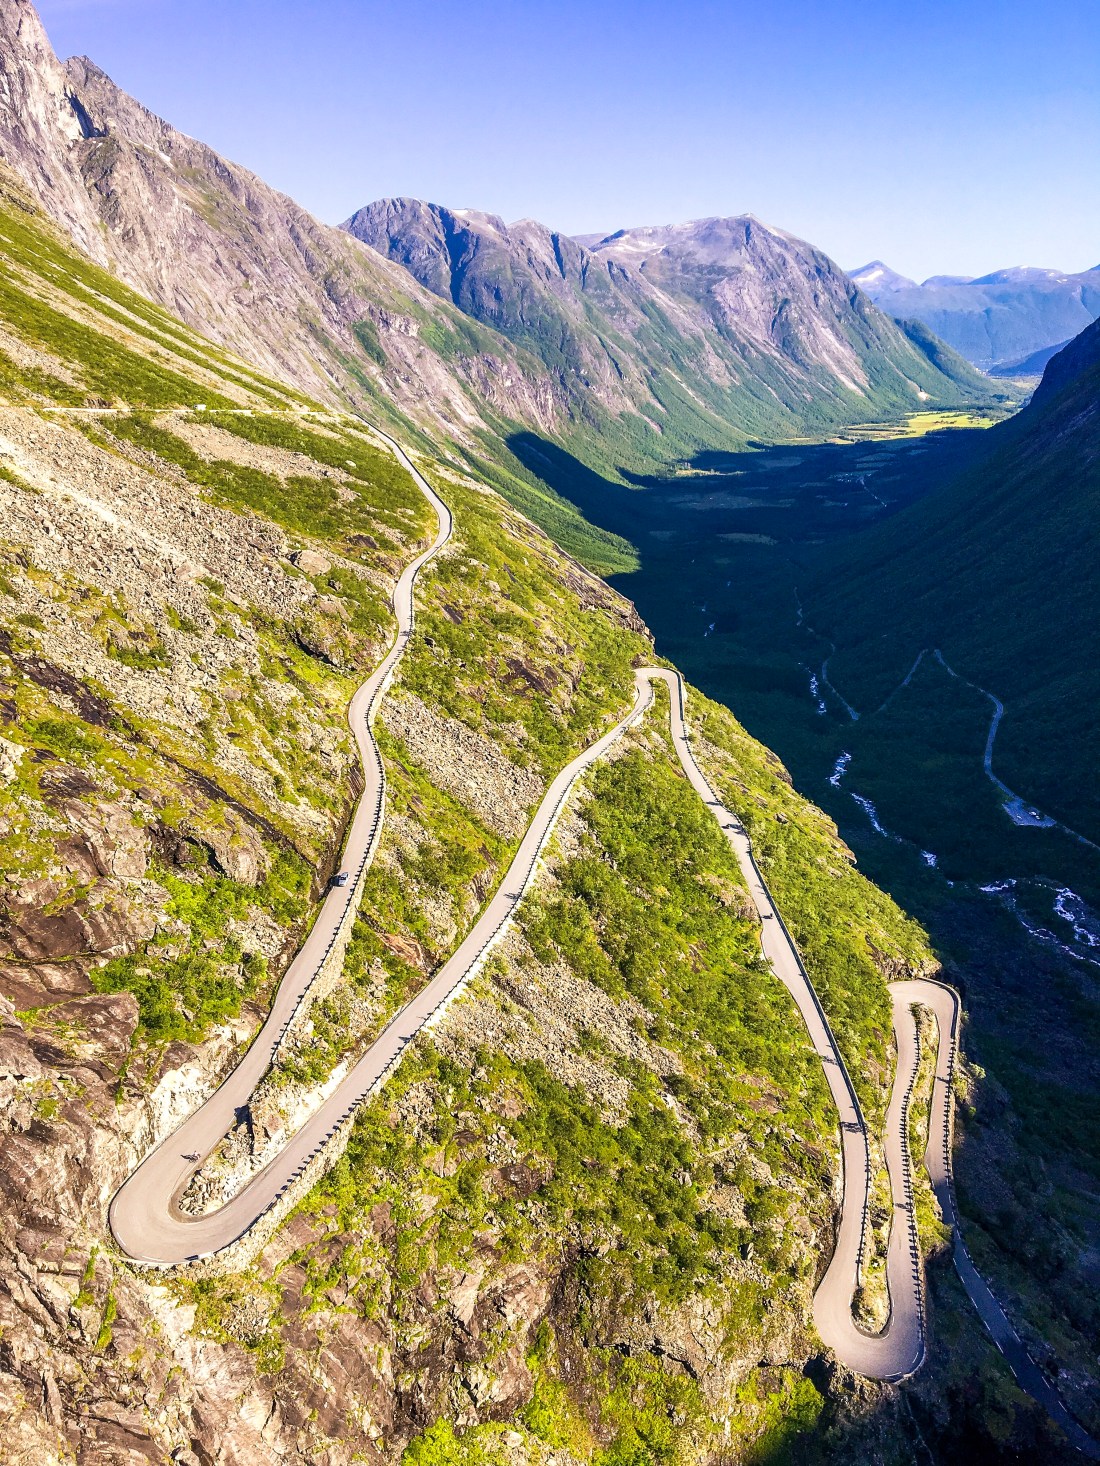
Trollstigen view point.
Next day you should have an early start. The hotel usually start putting out the breakfast before the scheduled opening, and you may want to ask to come early, depending on your choice of activity this day. You will be provided with two options here. If you want to do the Romsdalseggen hike, you need to be in Åndalsnes for the bus at 9:30 (or 10:30 Saturdays peak season). The drive to Åndalsnes is about 1:30. If you are not doing the express version of this road trip and have some more time, I would suggest adding one night in Åndalsnes after Valldal, and take the Romsdalseggen hike the next day. This will allow for a stop at Gudbrandsjuvet view point and more time to truly appreciate the scenic drive from Valldal to Trollstigen. Of course Trollstigen is more famous, but the drive up to the Trollstigen pass from the south side is also worth taking in (and I of course dream rollerskiing up also from this side one day).
Store Trolltind
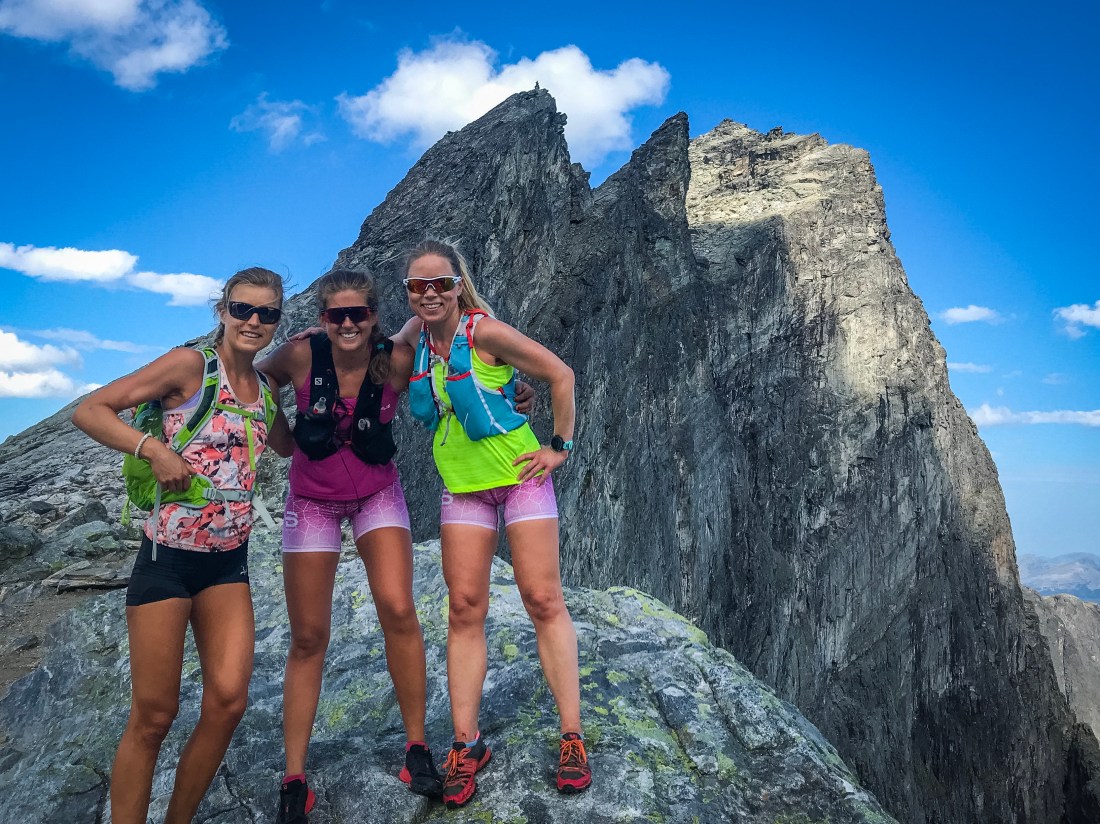
Barbro, Maren and me at the ridge where we had made the wrong turn.
One of the mountain runs we have explored is the peak, “Store Trolltind”. With 1788 m.a.s.l. this is one of the highest peaks in Romsdalen and with steep climbs and a lot of stone and exposed areas, a hike which may be characterized as pretty hard. The views from the top and from Bruraskaret will be worth it though.
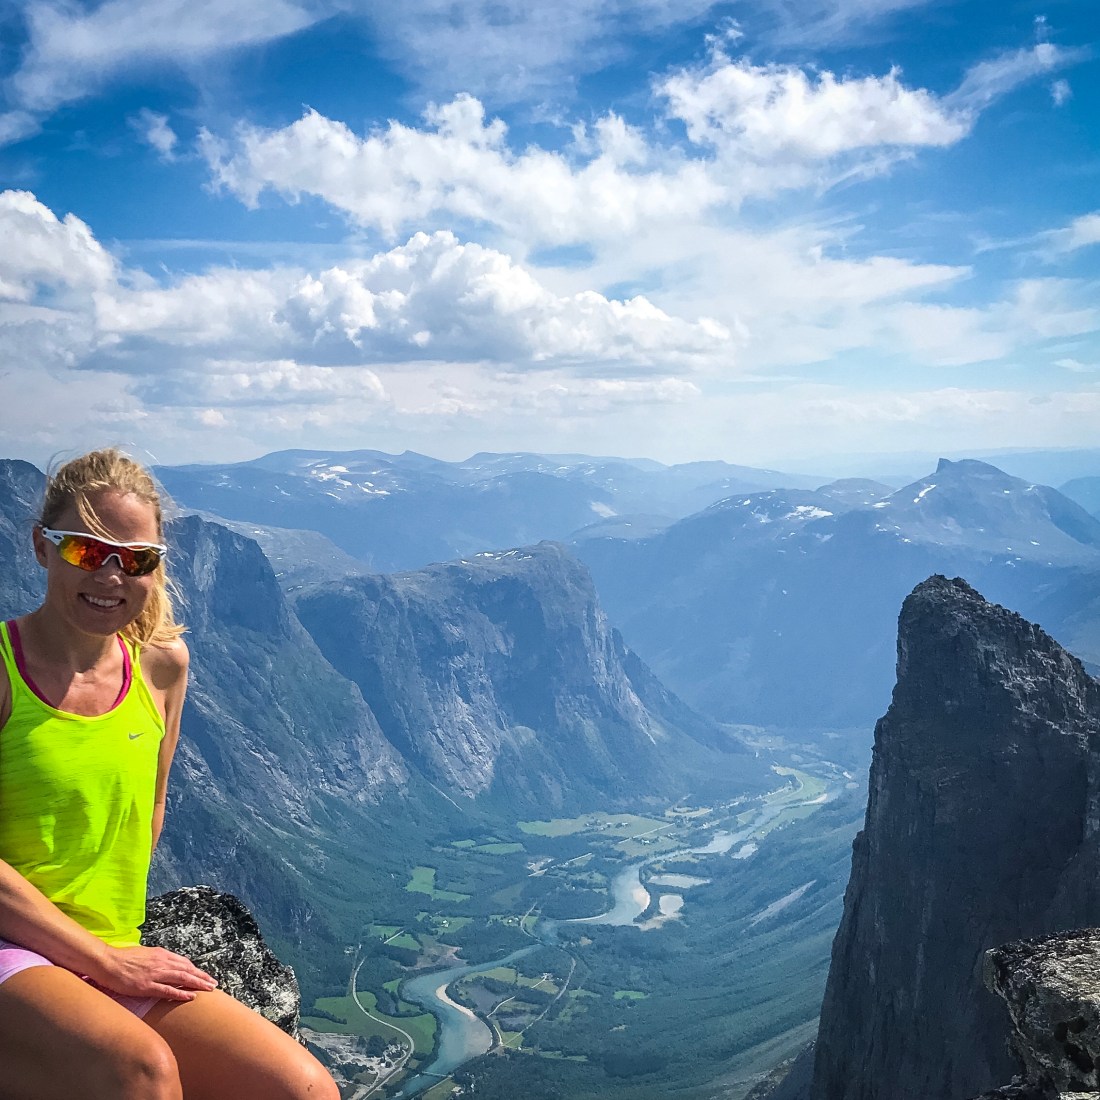
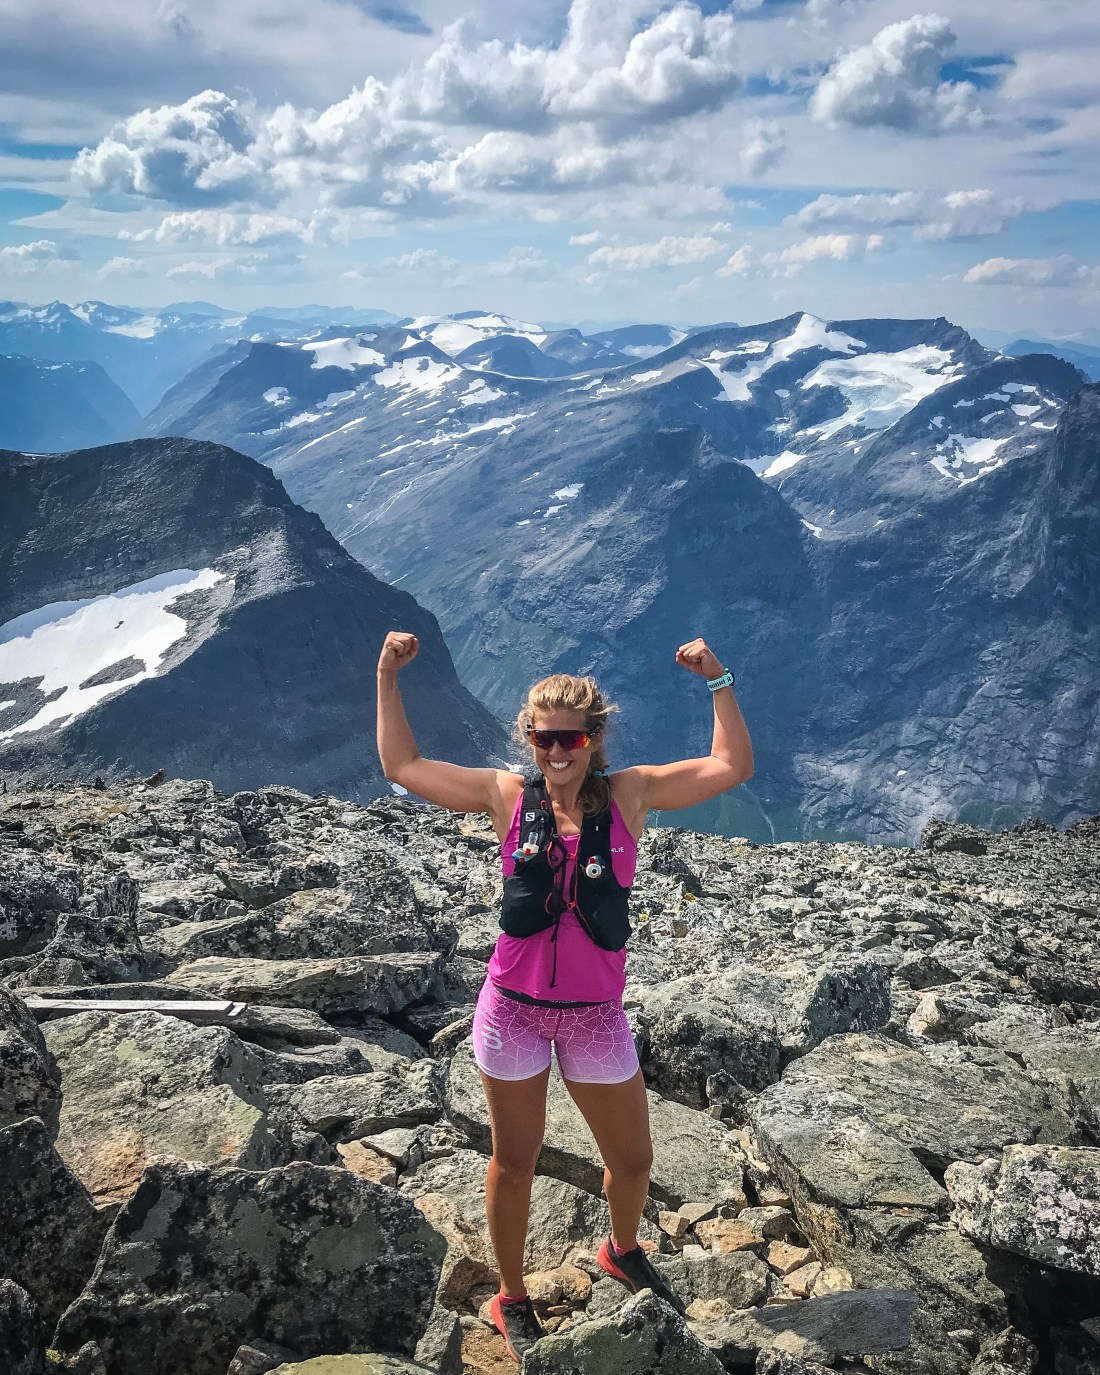
At Store Trolltind, 1788 m.a.s.Maren at the top!
You will find the trailhead at Trollstigen. Already from the start the climb is steep and you will have great views of the Trollstigen plateau and its surrounding peaks behind you. After about two km there is some sort of a junction where you should keep left (you will see from the strava link provided that we went right on our way up, which turned out to be wrong). After about 4.7 km (if you made the right left choice at 2 km) it is easy to go wrong and take too much height. Everyone we met did the same mistake, which, if you do not go all the way down again, easily make you traverse through a very difficult terrain to get back to the trail. Have a look at the strava link and make sure to take the right path to your left, which is the one we returned on. Additional guidance may be found here (Norwegian). The most fun, and also the most challenging part, comes after Bruraskaret, where you have the view of the famous Trollveggen. A helping hand may be useful at some difficult passages. This turned out to be a hike/run very different from our expectations, although a very rewarding one in terms of the spectacular views at the top.
Romsdalseggen in the obvious choice of run/hike when in the Åndalsnes/Trollstigen area and has become very popular over the last years thanks to successful promotion from the local tourist agency. This is a one-way hike, where you should take advantage of the bus from Åndalsnes to the trailhead. Booking in advance is recommended.
Surrounded by mountains on Romsdalseggen.
Once at the trailhead try to get ahead of the pack to avoid being slowed down by queues on the narrow trail. It get pretty steep immediately and continues up, up, up for about 3.5 km, where you can enjoy great views of Romsdalen and the surrounding mountains. If you are lucky, there may even be some snow left on the plateau. Before continuing on the Romsdalseggen trail towards your right, you may choose to explore Blånebba to your left. Continuing on the Romsdalseggen trail you are more or less done with the ascents with the exception of a few exposed climbs along the ridge. If you skip Blånebba the 1200 meters of descent over about 6 km starts after about 5 km on the trail from your starting point. Since the trail passes the famous viewpoint Rampestreken (at 537 m.a.s.) the trail gets pretty crowded the last few kilometers down to Åndalsnes.
The second challenge of the day is the Trollstigen climb on roller skis. You may of course choose to tackle the climb by bike or try out the trails that take you to the Trollstigen plateau. Compared to the Dalsnibba climb, the Trollstigen climb is like a sweet dessert, and, if done after the traffic has slowed down in the evening, feels like the perfect way to finish off a day of great climbs. We usually start from Trollstigen Camping, about 9.5 km from the Trollstigen plateau. Again, if you have two cars, take one down to the starting point and leave one at the top. If not, ask someone for a lift or plan it by the bus schedule.
Instagramming at a random waterfall in Trollstigen.
The first couple of kilometers provide a nice and easy warm-up for the climb, where the hairpin turns make out the last 4-5 kilometers and takes you through a beautiful scenery close to spectacular waterfalls on your way to the top. The view points designed and restaurant at the top designed by Reiulf Ramstad Arkitekter are worth a visit as well, and the waterfall in front of the restaurant provides great relief for tired legs.
Congratulations, you have completed 3500 meters of climb in less than two days! This provides for a nice dinner in Åndalsnes before loading up on snacks for your way home. A fast and convenient place is Spiret Spiseri at Tindesenteret.
The fastest way back to Øyer/Lillehammer or Oslo is via Dombås and E6, which is about 3 hours and 20 minutes from Åndalsnes to Øyer and takes you past Trollveggen, where you can visit Trollveggen visiting center (if open). If you have an extra day or two, it is worthwhile staying in Åndalsnes for additional adventures!
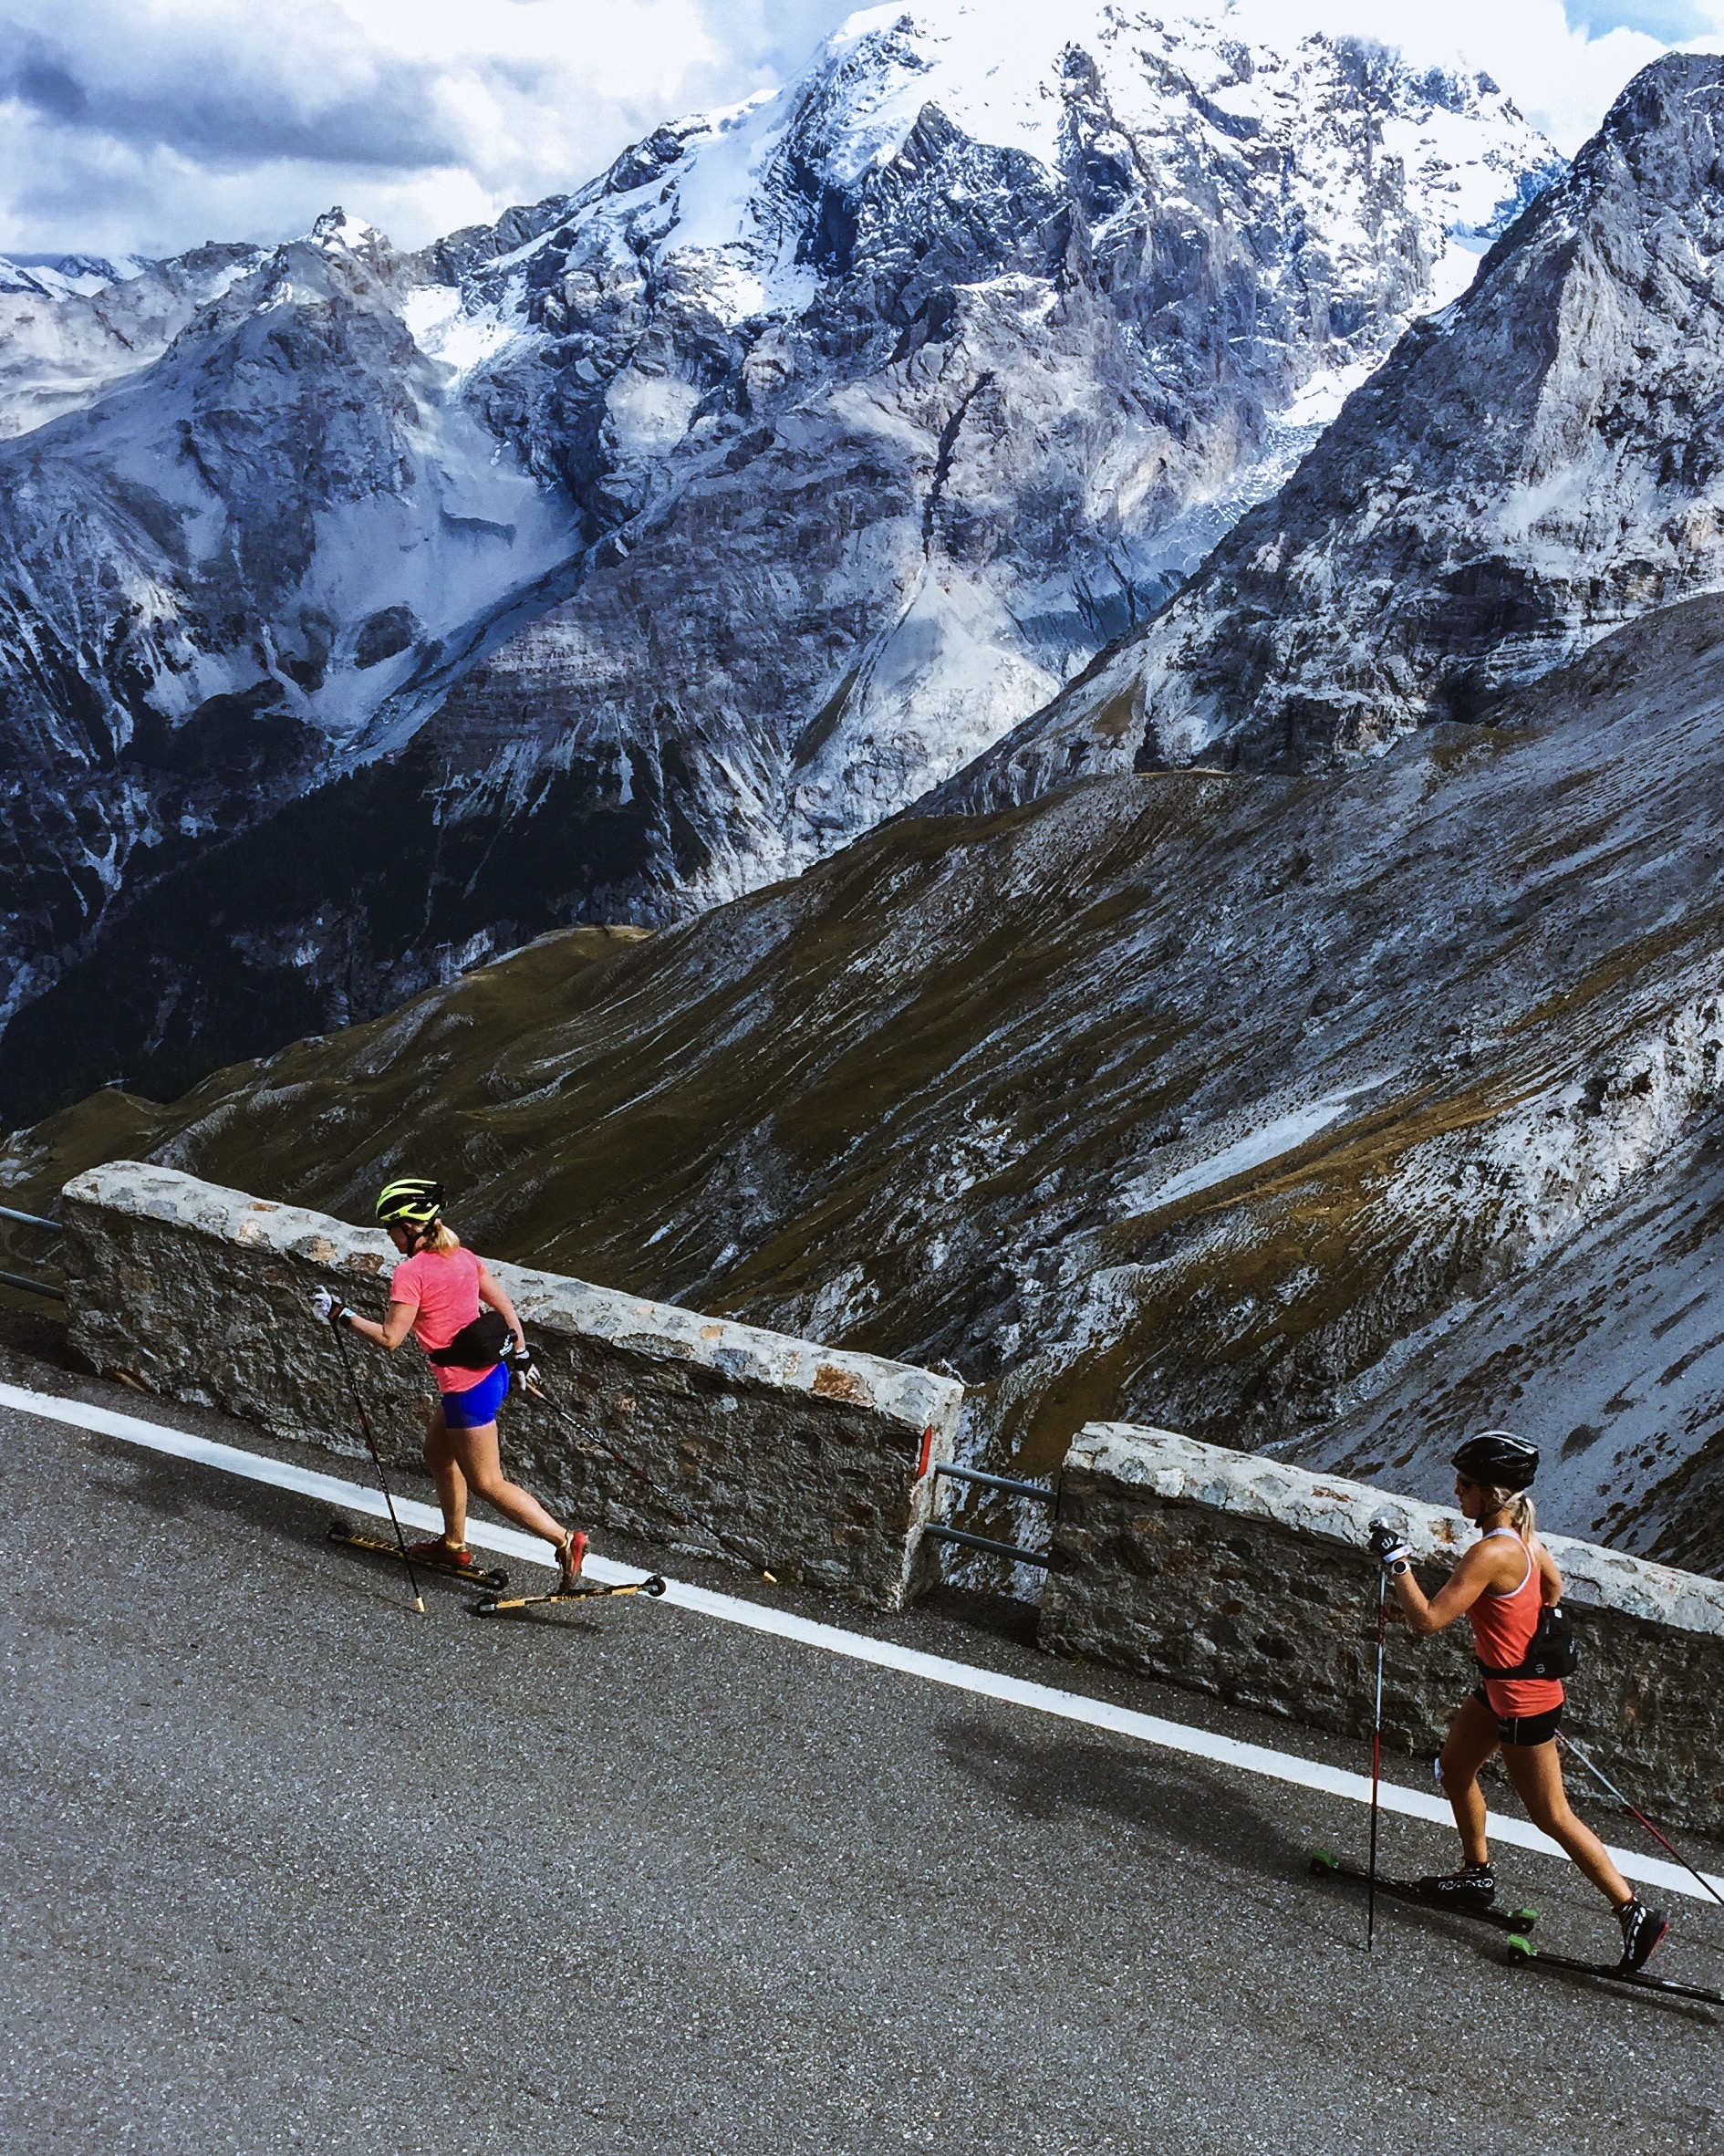
Seiser Alm and Livigno are both beloved destinations for cross country skiing athletes of all levels. These two Italian alp villages complement each other in terms of character and facilities and make a great combination for a training vacation/camp. While Seiser Alm is quiet (and out of this world beautiful) and has amazing trails and scenery for running, Livigno is more of a happening place with (tax free) shops, cafés/restaurants and the best roller ski and biking opportunities.
Here you will get the details of the training we did during a 9-day September training camp as well as some alternatives tried out over the years. The purpose is to guide you to the best locations for performing various sessions, such as interval training and long low intensity sessions. Non of us being top level athletes, our choice of activities has been guided by a desire to explore the beautiful surroundings as well as obtaining great workouts. You may (and should) of course use the information provided to tailor your activities to your own level of fitness and purpose of the trip.
Seiser Alm meadow.
Please note that both Seiser Alm and Livigno are high altitude destinations and your performance will be affected. In short this means you should go slower than you normally do on low-intensity activities and avoid doing much high intensity training, especially the first 3-4 days, and when introduced, preferably low threshold. More on high altitude training here (Norwegian). It is not uncommon to feel dizziness after a high altitude workout if you go too hard and you may not get full benefit of the rest of your training camp.
Day 1 – Seiser Alm (arrival day)
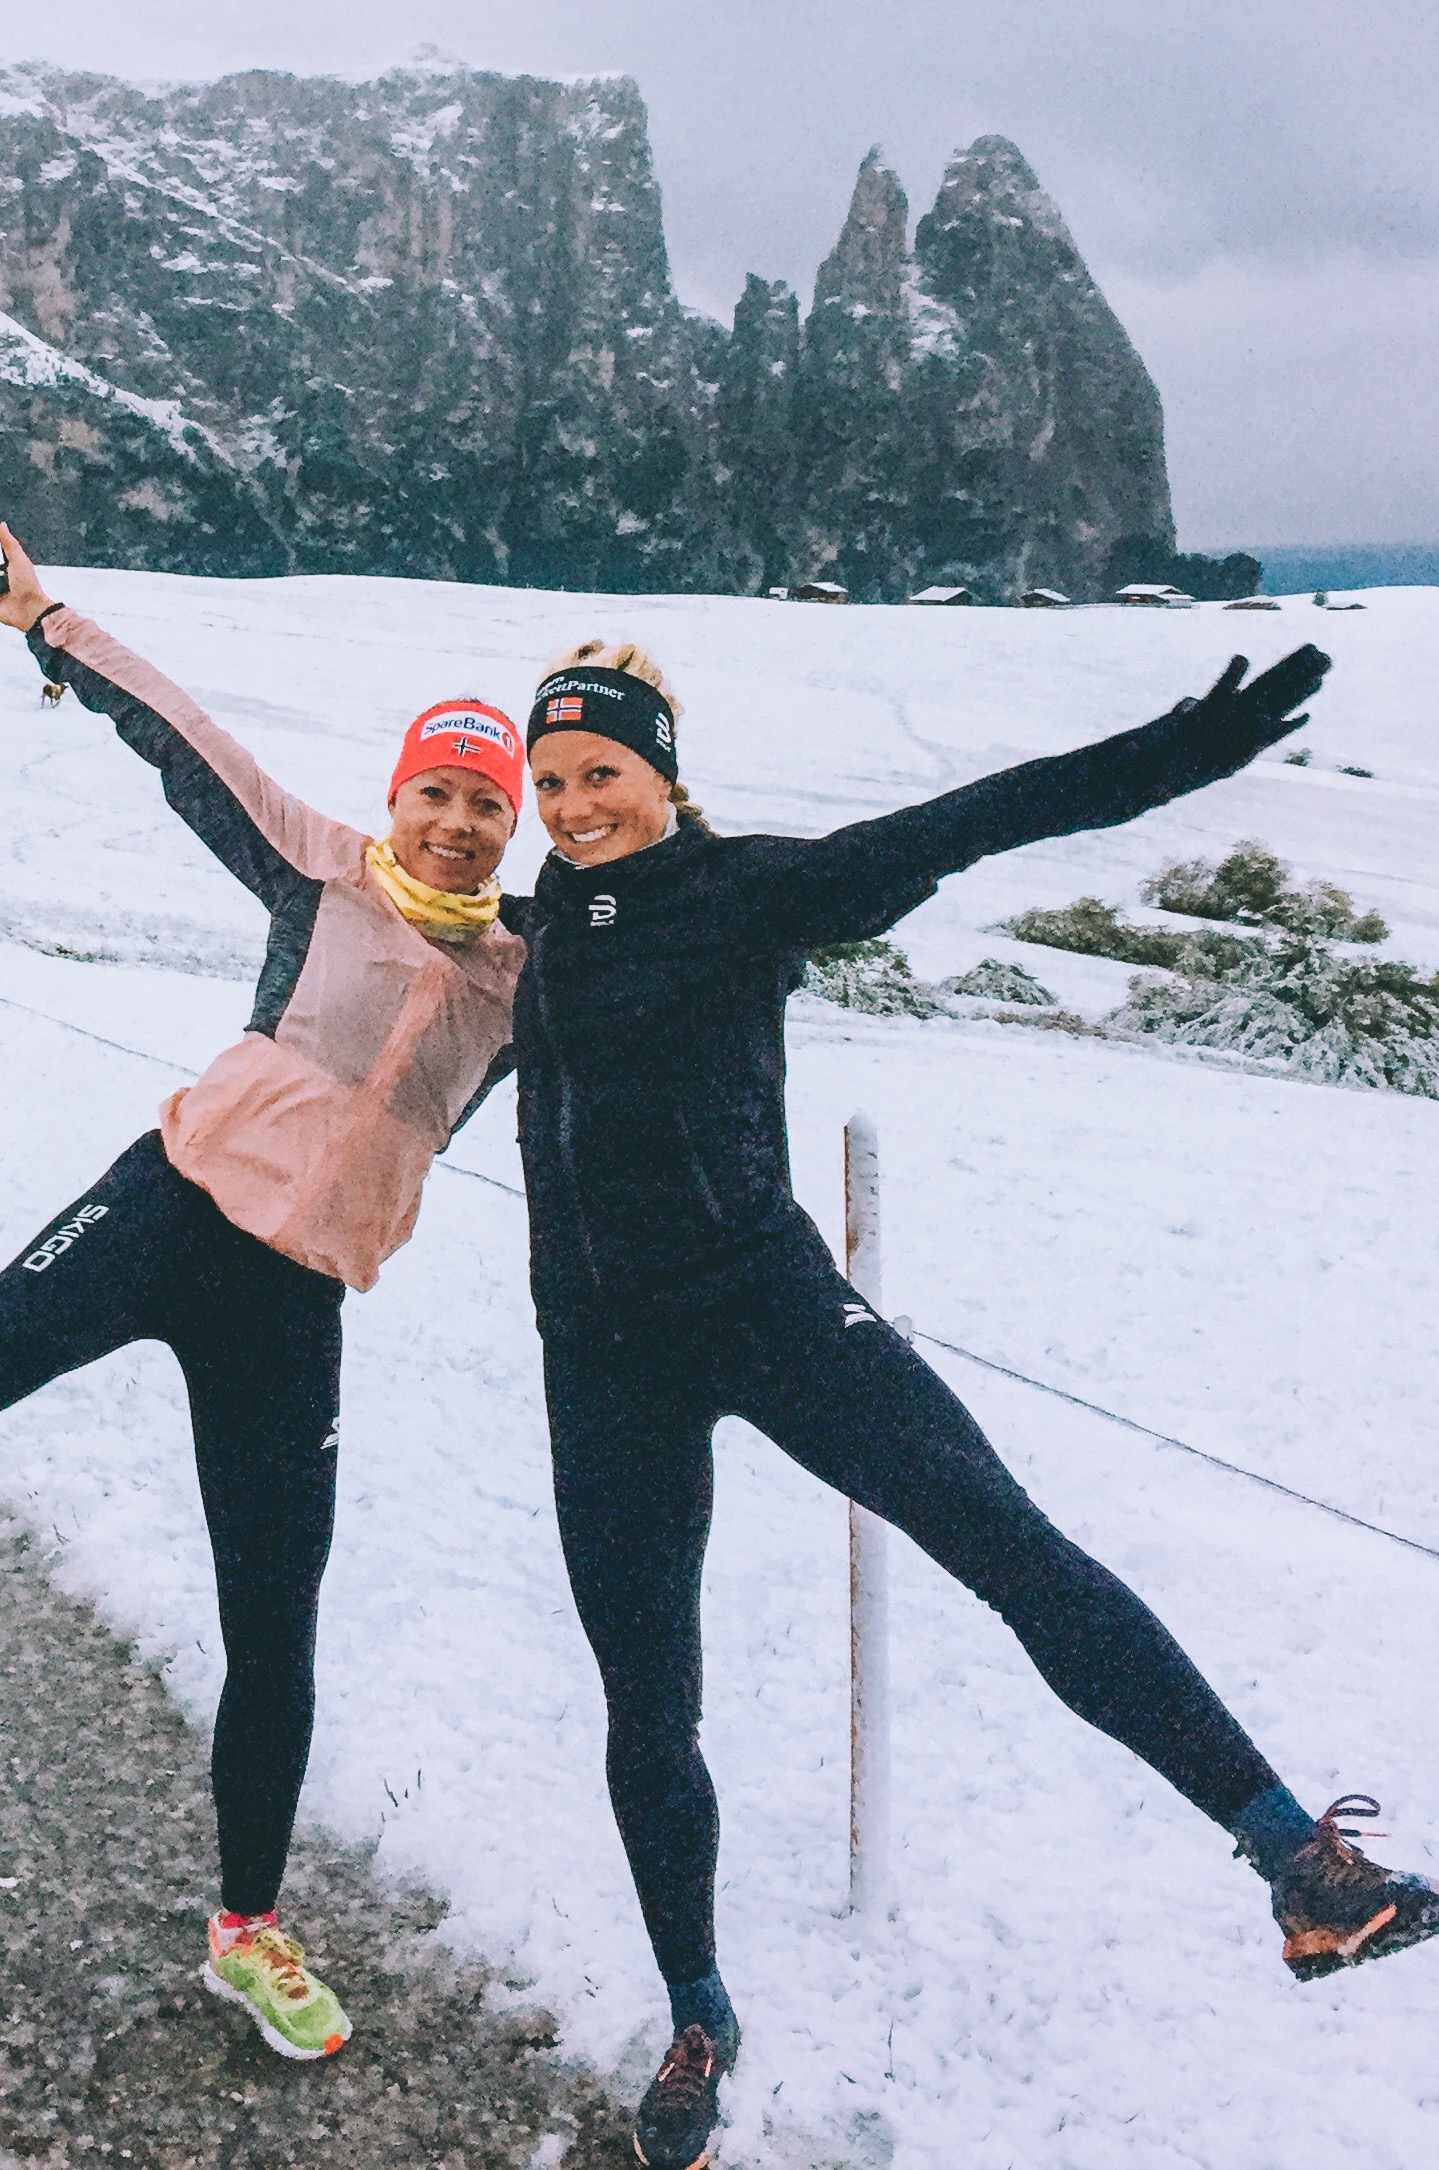
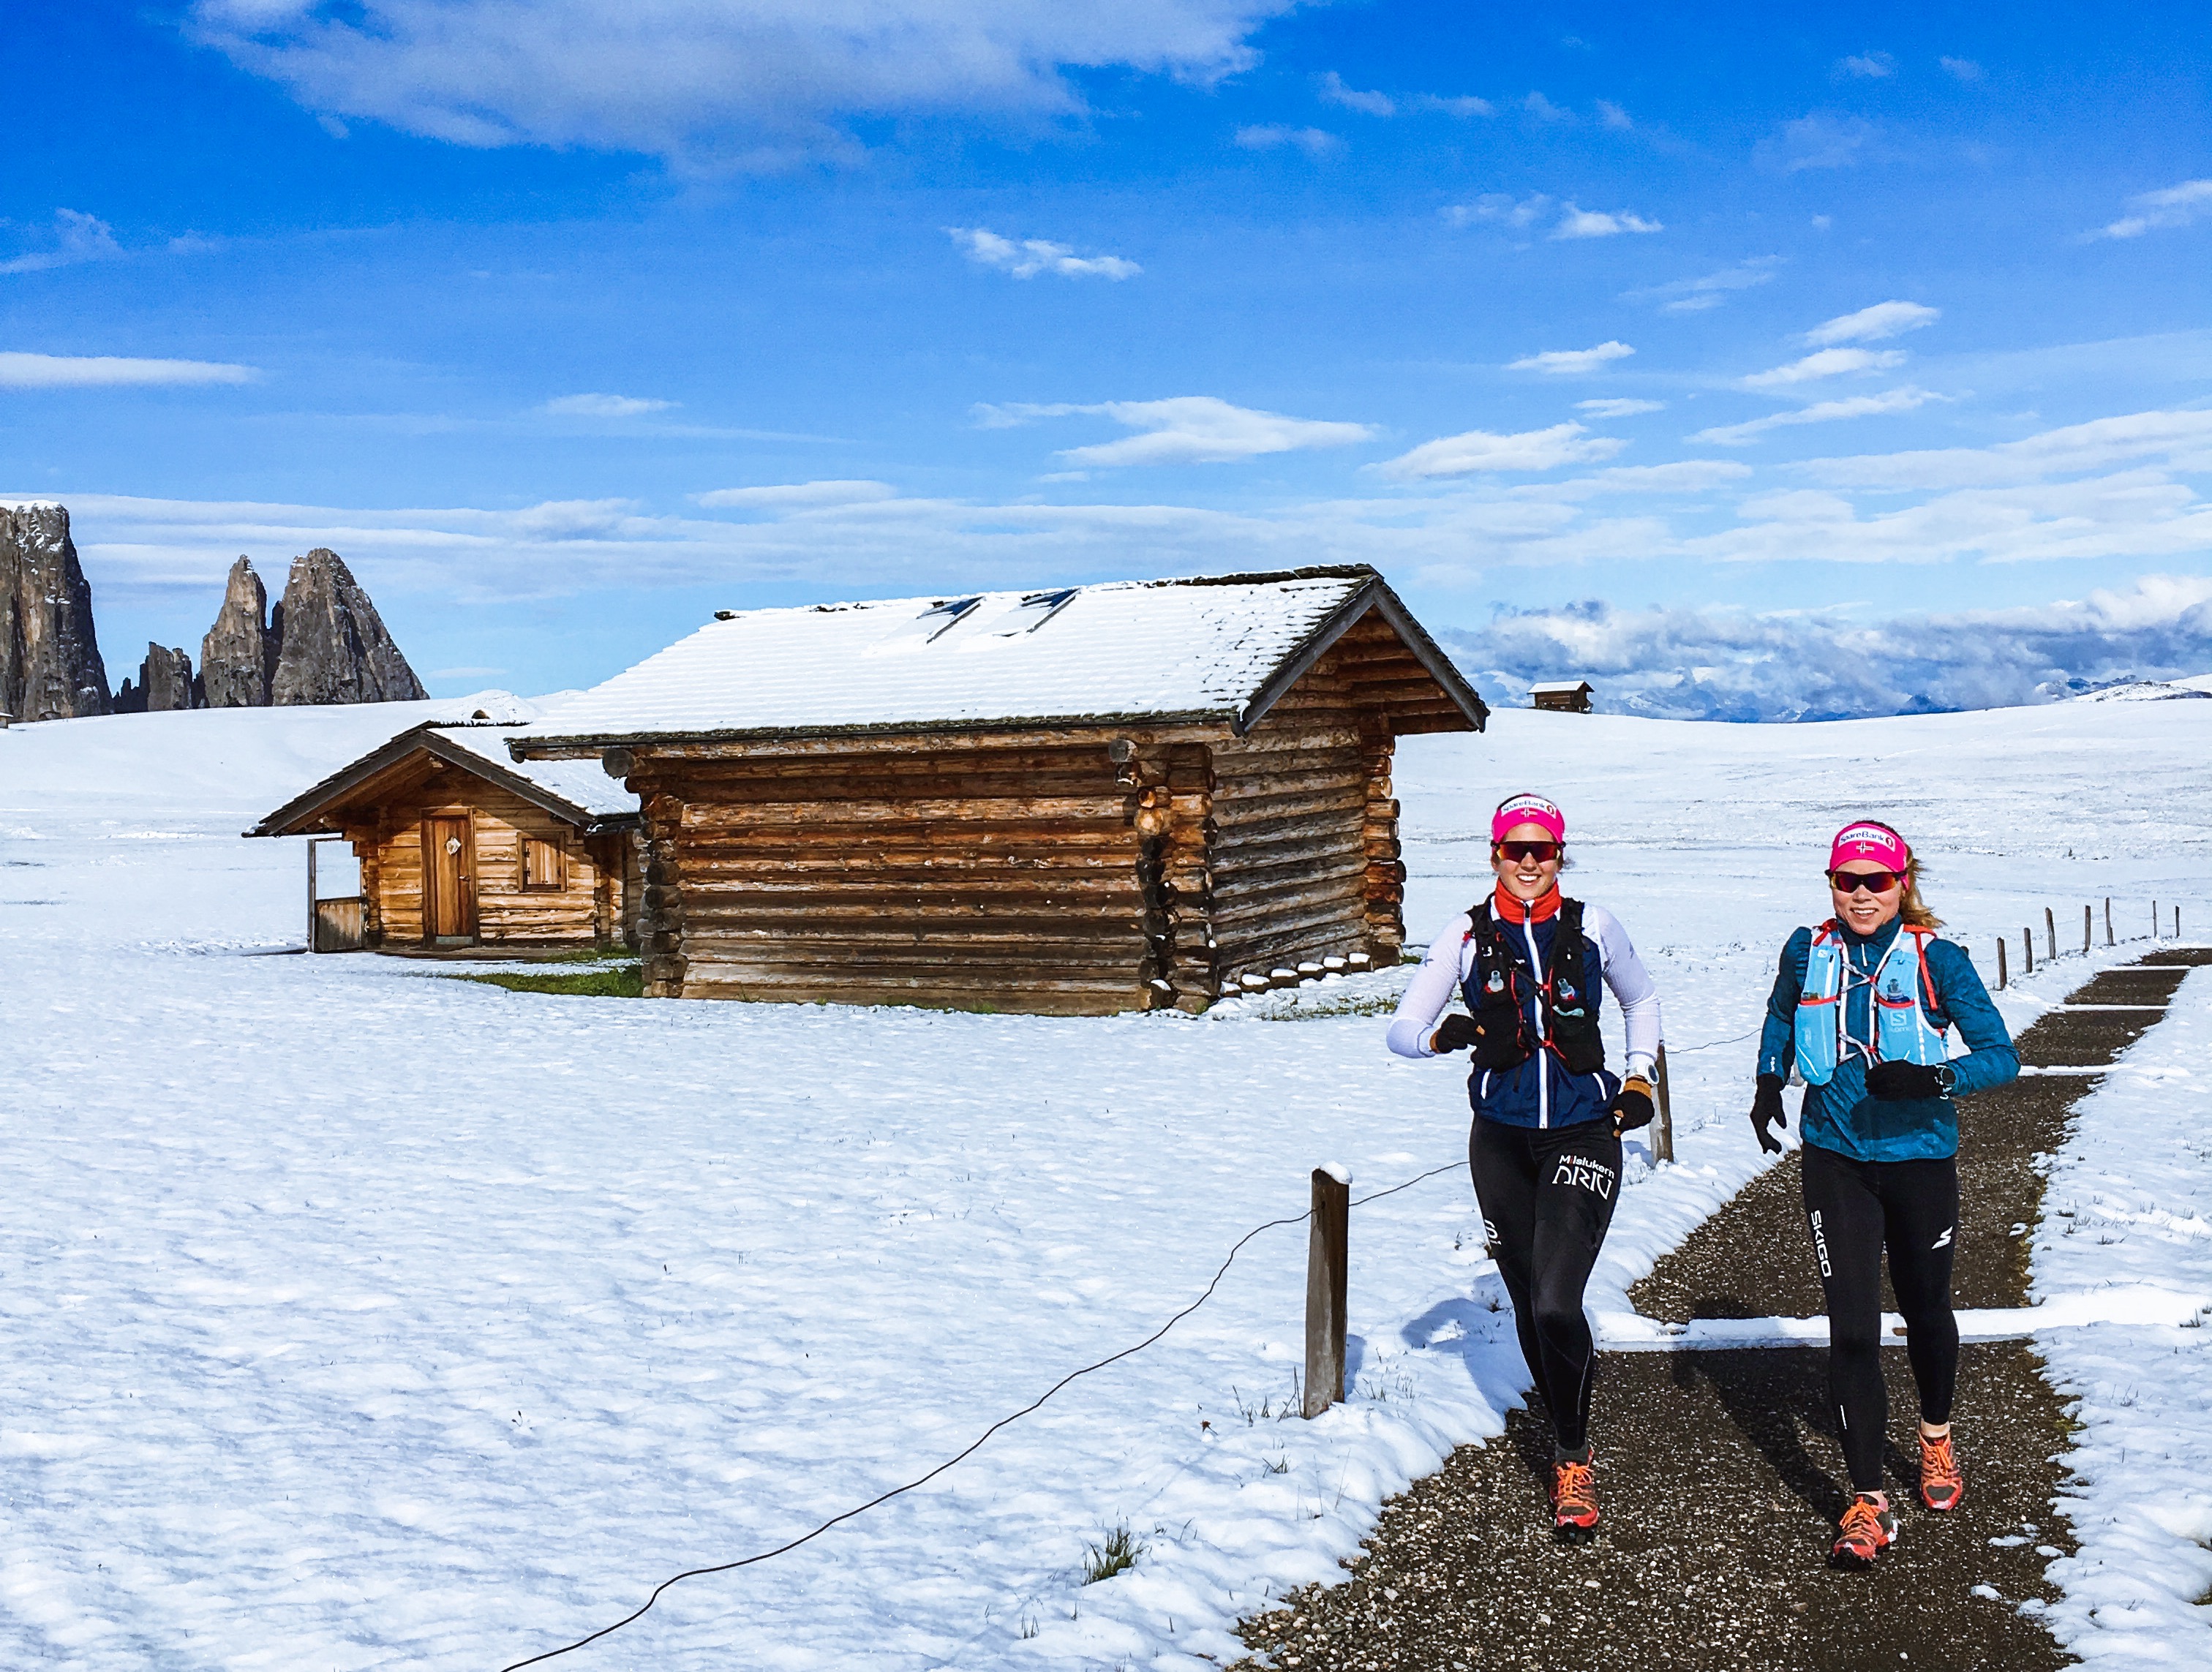
We started our camp in Seiser Alm. You can read more about Seiser Alm, including accommodation recommendations, here. Traveling to Seiser Alm from Norway (or any other place requiring you to fly) usually takes almost a day and you are lucky if you arrive by sunset. We arrived just in time to stretch our legs by doing a short and easy jog on the meadow which was covered with a thin layer of wet snow. That’s the thing about Seiser Alm. Its location more than 1800 meters above sea level means weather and temperatures change quickly and you can experience snow even during summer months.
Waking up on our first full day in Seiser Alm, the meadow was still covered in snow, but the sun was shining and we chose to go for the planned long run taking us over the Denti Rossi to Rifugio Alpe di Tires and the Schiliar/Schlern plateau. This is a beautiful long run which is always on my itinerary when in Seiser Alm. We started out running in snow, but by the time we were back on the meadow a few hours later summer temperatures had arrived. Take time for an espresso at Rifugio Alpe di Tires and lunch at Rifugio Bolzano
In the afternoon we took the bus down to Kastelruth and did an easy uphill roller ski session. You can also do the same hill workout by taking the cable car from Seiser Alm to Seis, which adds about 140 meters of ascent. The climb has been used for tempo stages during Giro d’Italia and has a profile great for interval training on roller skis and beautiful views.
On our third day we put on the roller skis again and took the cable car to Seis for an interval session. After warming up from Seis to Hotel Valentinerhof we did 7×6 minutes low threshold classic technique.
Bulaccia with a view of Sasso Lungo and Sasso Piatto
Our second session of the day we explored Bulaccia, the northern meadow of Seiser Alm, running with poles in the soft afternoon light. Some of us took the cable car going down to save the legs.
The highlight of our stay in Seiser Alm was the long run around Sasso Piatto and Sasso Lungo. I would say this is the running equivalent to Sella Ronda on bike, providing you with amazing views of the Dolomites from so many angles. We took the bus to Saltria (about 5-10 minutes from Compatsch) and the Florian chair lift to Williams Hütte, from where we started our run 2100 m.a.s.l. and clockwise around Sasso Piatto/Sasso Lungo. We stopped for lunch at Rifugio Sasso Piatto and continued to Rifugio Alpe di Tires and returned to Compatsch through the Denti Rossi pass. This is truly an amazing run, which of course may be divided in several parts if you are not up for the full length of it. You can also extend the run by either adding the climb to the peak of Sasso Piatto or/and continue over the Schiliar plateau after Rifugio Alpe di Tires.
The obligatory part of the transfer from Seiser Alm to Livigno is the mother of all roller ski workouts, the Stelvio climb. If you don’t have a support car, the practical way to do this session is to drive to the top of the Stelvio pass and take a bus down to your preferred side of the pass, either the Prato side or the Bormio side, leaving the car with warm clothes etc at the top. Each climb is great, with spectacular views and, if you can’t go easy on it, exhaustion guarantee. During this camp we did the Prato side, starting from Gomagoi at 1280 m.a.s.l., providing about 1500 meters of ascent and 18.5 km to the top of the Stelvio pass as 2575 m.a.s.l. We chose to tackle the climb by doing an interval session of 5×20 + 10 minutes below lactate threshold.
Please note that the bus service on the Bormio side is only available in July and August. You may contact the bus service Perego for information. For bus down from Stelvio on the Prato side, go here.
If you prefer to conquer Stelvio on bike, you can rent a bike at Mapo Bike in Valdidentro (a few kilometers from Bormio). If you want to stay a few days to explore the area and perhaps tackle Stelvio running, skiing and biking, one of my favorite hotels in the Alps is just next to Mapo Bike, Alpen Hotel. Personally I had my best session in Stelvio running up from Bormio.
Livigno is roller ski mecca with an extensive network of cycle paths protected from the traffic as well as mountain passes where you can work on your O2 levels and return safely by bus if you don’t want to ski down or have a support car. On our first day in Livigno we chose to do an easy flat roller ski session to recover from the Stelvio challenge.
Livigno also has a tremendous network of trails for running as well as mountain biking. There is no limit other than your fitness level as to where you can go, and even if I have visited 5-6 times there are new trails to explore. Our favorite trail for short recovery runs is the trail just above the centre providing you with great views of Livigno. You can enter the trail directly from several places in the village or my preferred entry at the south end of the village, where you can also find parking.
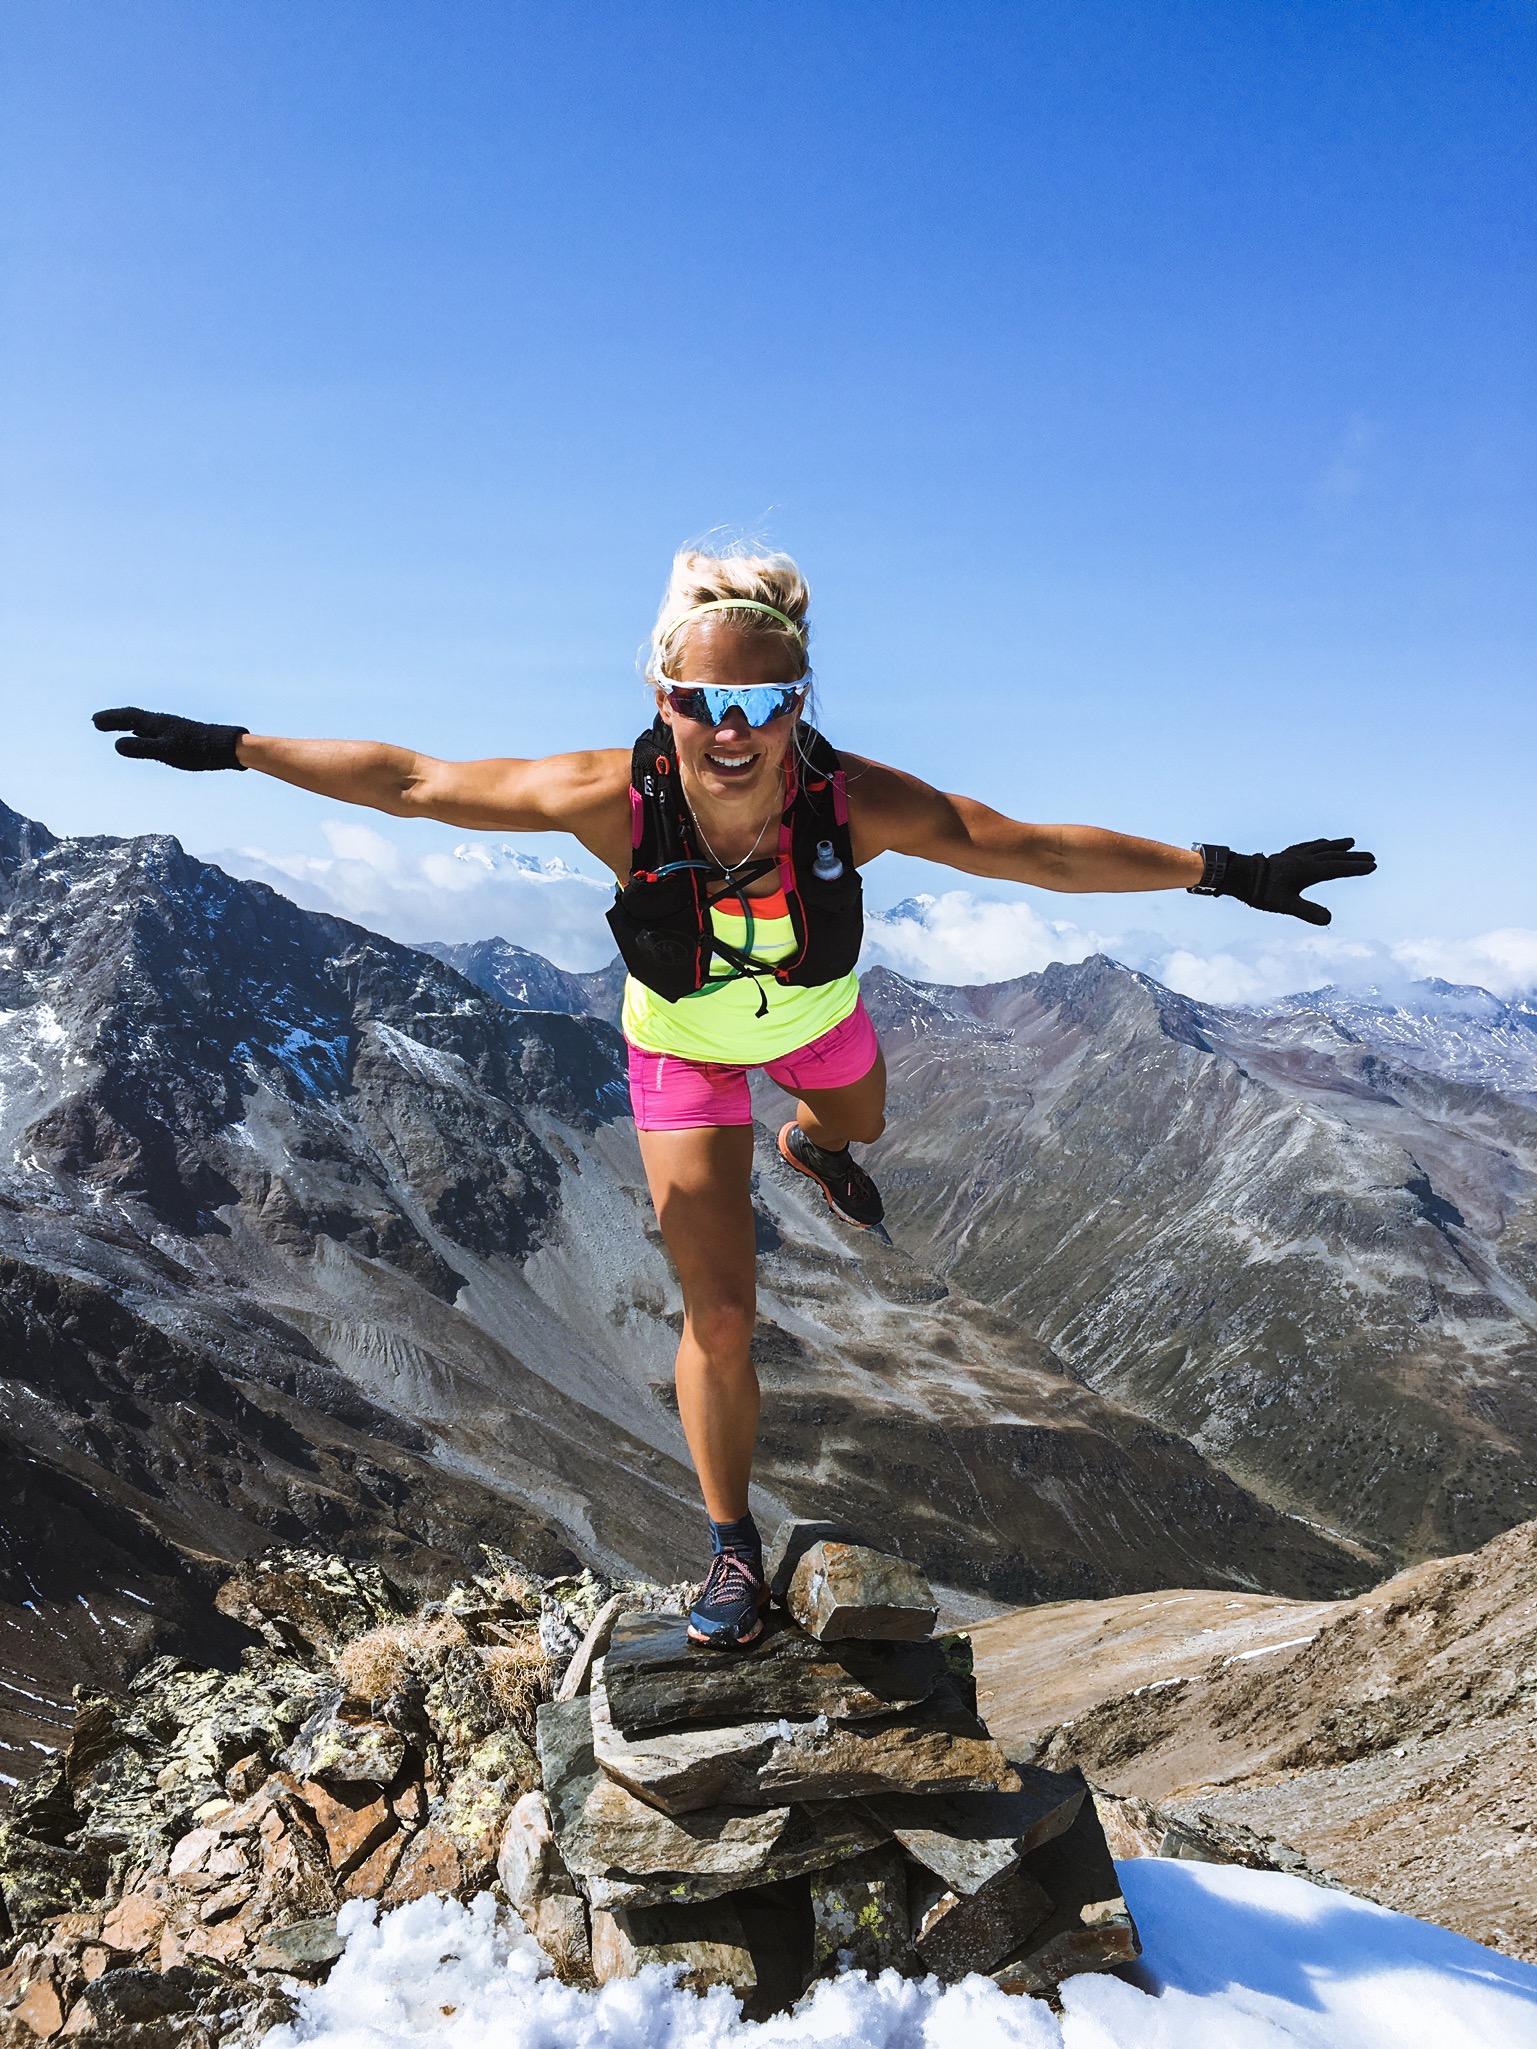
After a “rest” day it was time to do a longer session again and we decided on a run that would take us to a +3000 meter peak, Corna di Capra. We chose to drive to the trailhead just south of the village (you can also run directly from the village). Although containing a lot of ascent this run also has long runable sections and truly beautiful surroundings as well as the added satisfaction of reaching the peak at 3016 m.a.s.l.
For an alternative long run you can take the cable car to Costaccia from the city centre and run south along the ridge following trail 162 and then 157 passing Causello 3000 and Involt dali Resa before descending back to the city centre.
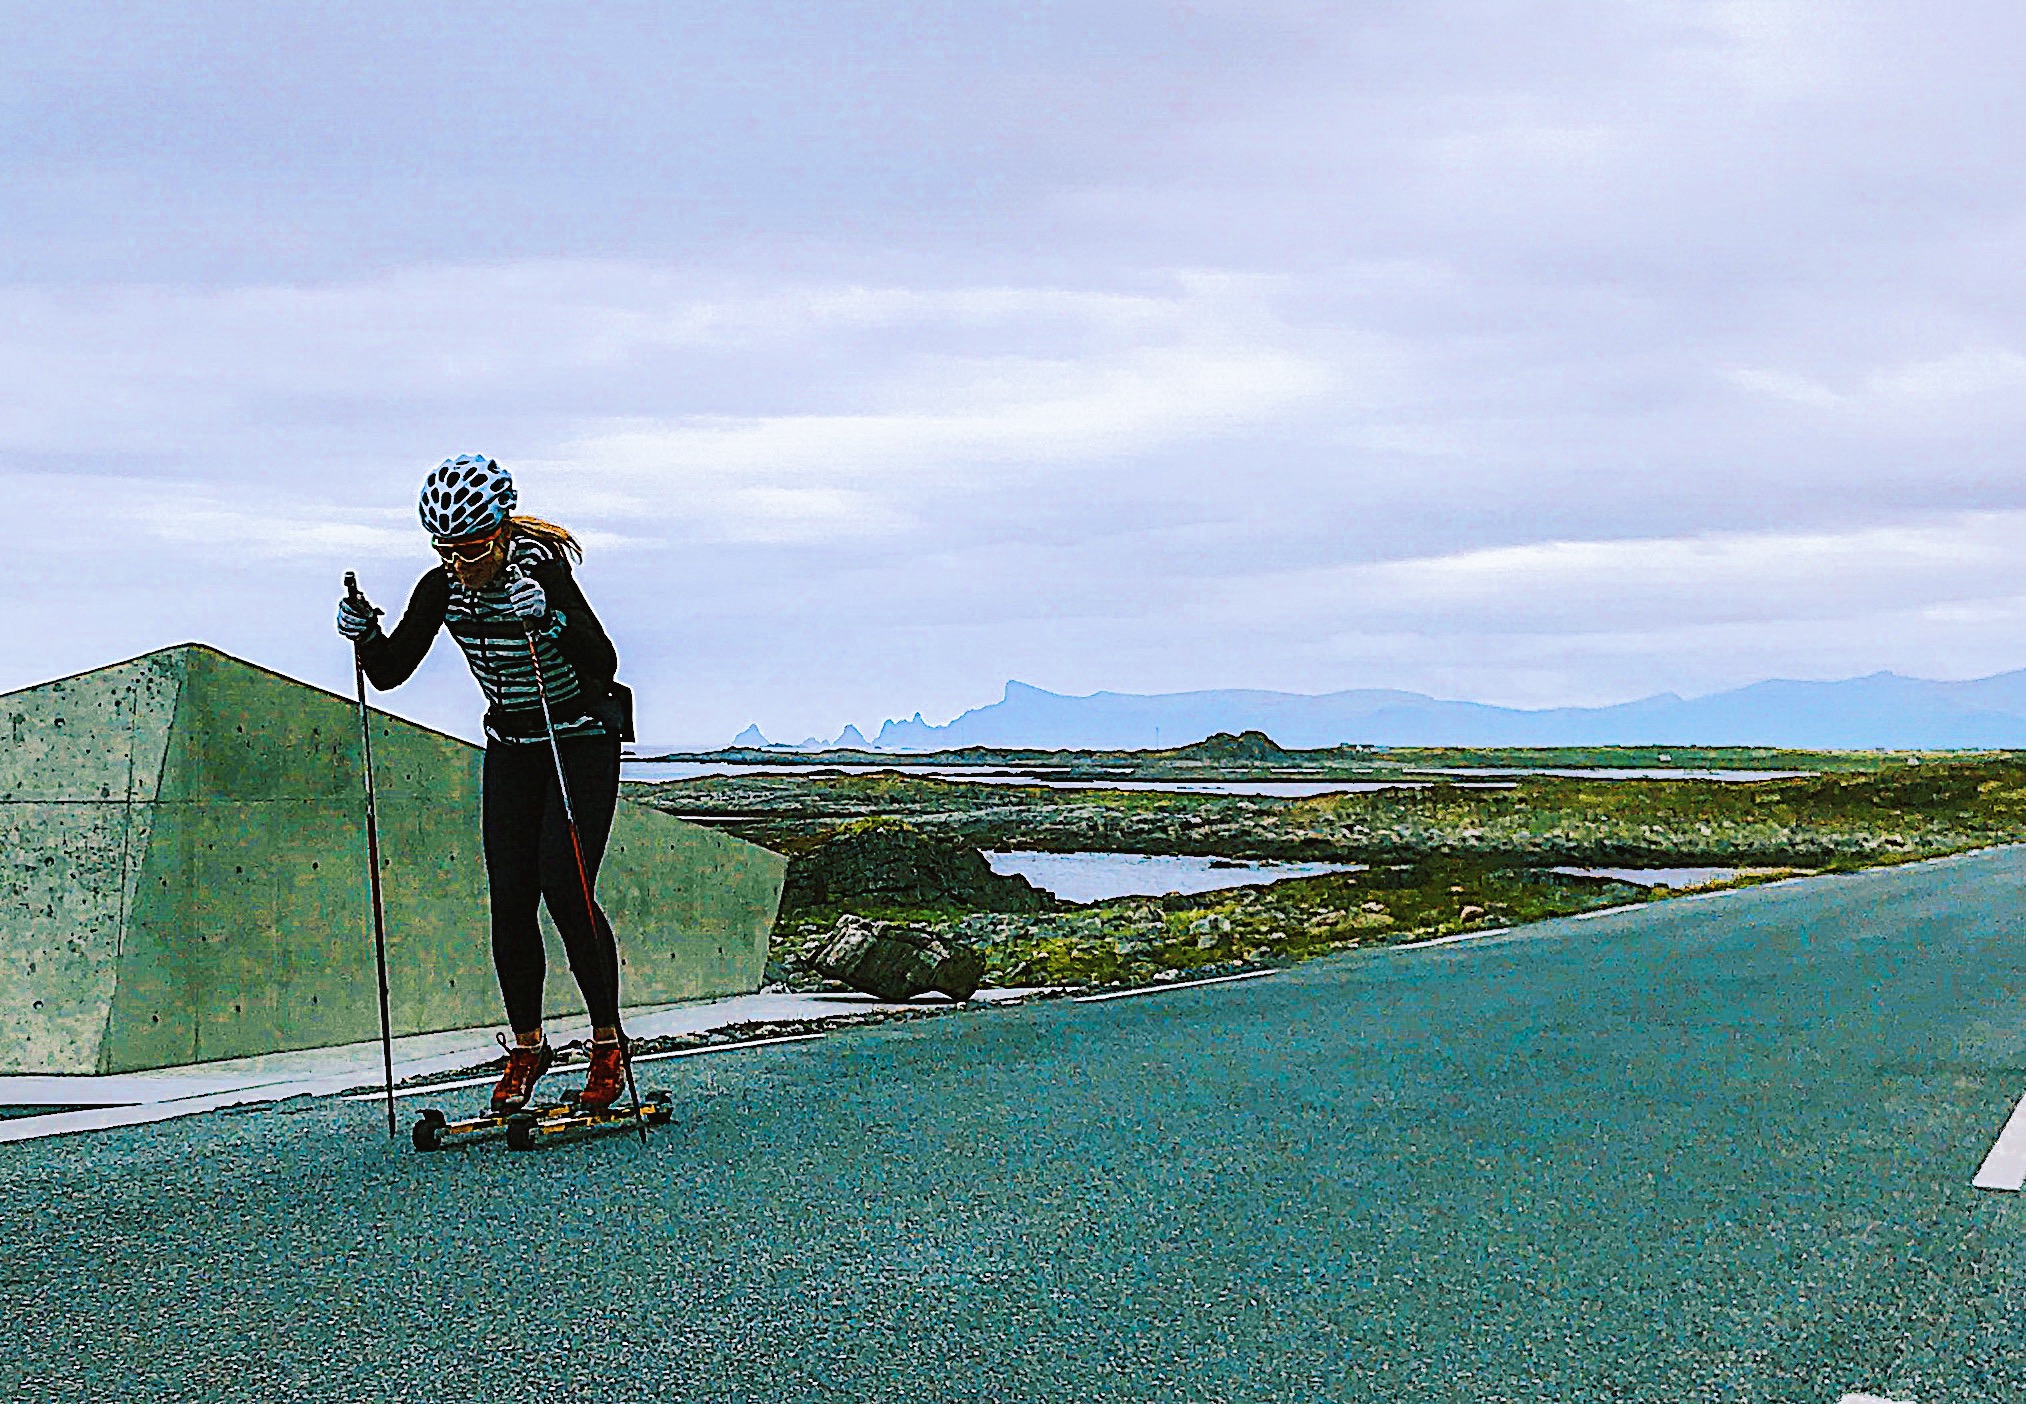
Our second workout of the day was a double poling session, which included the climb up to Passo Eira. From Passo Eira you can take a free bus down to Livigno (check the schedule in advance). As an alternative to the Eira ascent you can also roll up to the Forcola pass.
Towards the end of a training camp like this adjustments to the training plan may be adequate due to energy levels, strain on legs or other reasons. For some, including me, that meant replacing a running session with yet another roll to Passo Eira, this time using kicks and not just double poling. In the afternoon we did a strength session.
Last full day in Livigno and the training plan said low threshold running in Val Federia. Low on energy and with the rain pouring down, I chose to go easy on the trails instead. However, Val Federia is great for this kind of effort and having done a similar workout in 2016, I still have the appropriate Strava details to guide you. To reach Val Federia you can either drive to the parking provided at the trailhead, or run from the hotel as warm-up. Remember the altitude and go easy!
When in Livigno my choice of hotel is Hotel Larice, which is one of several hotels forming the Bivio Life Livigno group, where you can find Hotel Bivio (often used by the Norwegian national team) and Alpen Village Hotel, which specifically caters towards training groups of all sports. Larice is a small eco boutique hotel with amazing atmosphere, great rooms, personal service, superb breakfast and the best location. I love to hang out in the coffee bar out front in between training sessions.
My three favorite restaurants are all in or close to Hotel Larice: The burger restaurant Why Not, in via Botarel (across the street from Larice), Focolare, the pizzeria next door, and the restaurant at Larice, which serves sushi as well as Italian dishes.
Cycling in Livigno
Livigno has an amazing downhill bike park (never tried) and is often used for training camps by top level athletes of both road cycling and mtb. Bikes can be rented from several bike shops in Livigno. If you are into climbs and mountain passes see the strava link below for a beautiful ride my friend Maren did, going from Livigno over Passo Eira to Bormio and up to Passo Stelvio and via Passo Fuorn back to Livigno. Another alternative is the course of the ICON ironman triathlon taking place in Livigno in August, which takes you up to the Forcola pass, into Switzerland to climb the Bernina Pass before going down to St. Moritz and Zernez and via the Fuorn, Stelvio and Foscagno passes back to Livigno.
Munich, Zürich and Innsbruck are convenient airports to fly into if you would like to combine Seiser Alm and Livigno. Innsbruck makes for a shorter drive, but often you have to accept transfer flights to get there. You will need to rent a car.
Munich Airport – Seiser Alm: 3:30, Zürich Airport – Seiser Alm: 4:30 and Innsbruck – Seiser Alm 1:45. Munich Airport – Livigno: 4:30, Zürich Airport – Livigno: 3:15, Innsbruck – Livigno: 2:45. The drive from Seiser Alm to Livigno is about 3 hours.
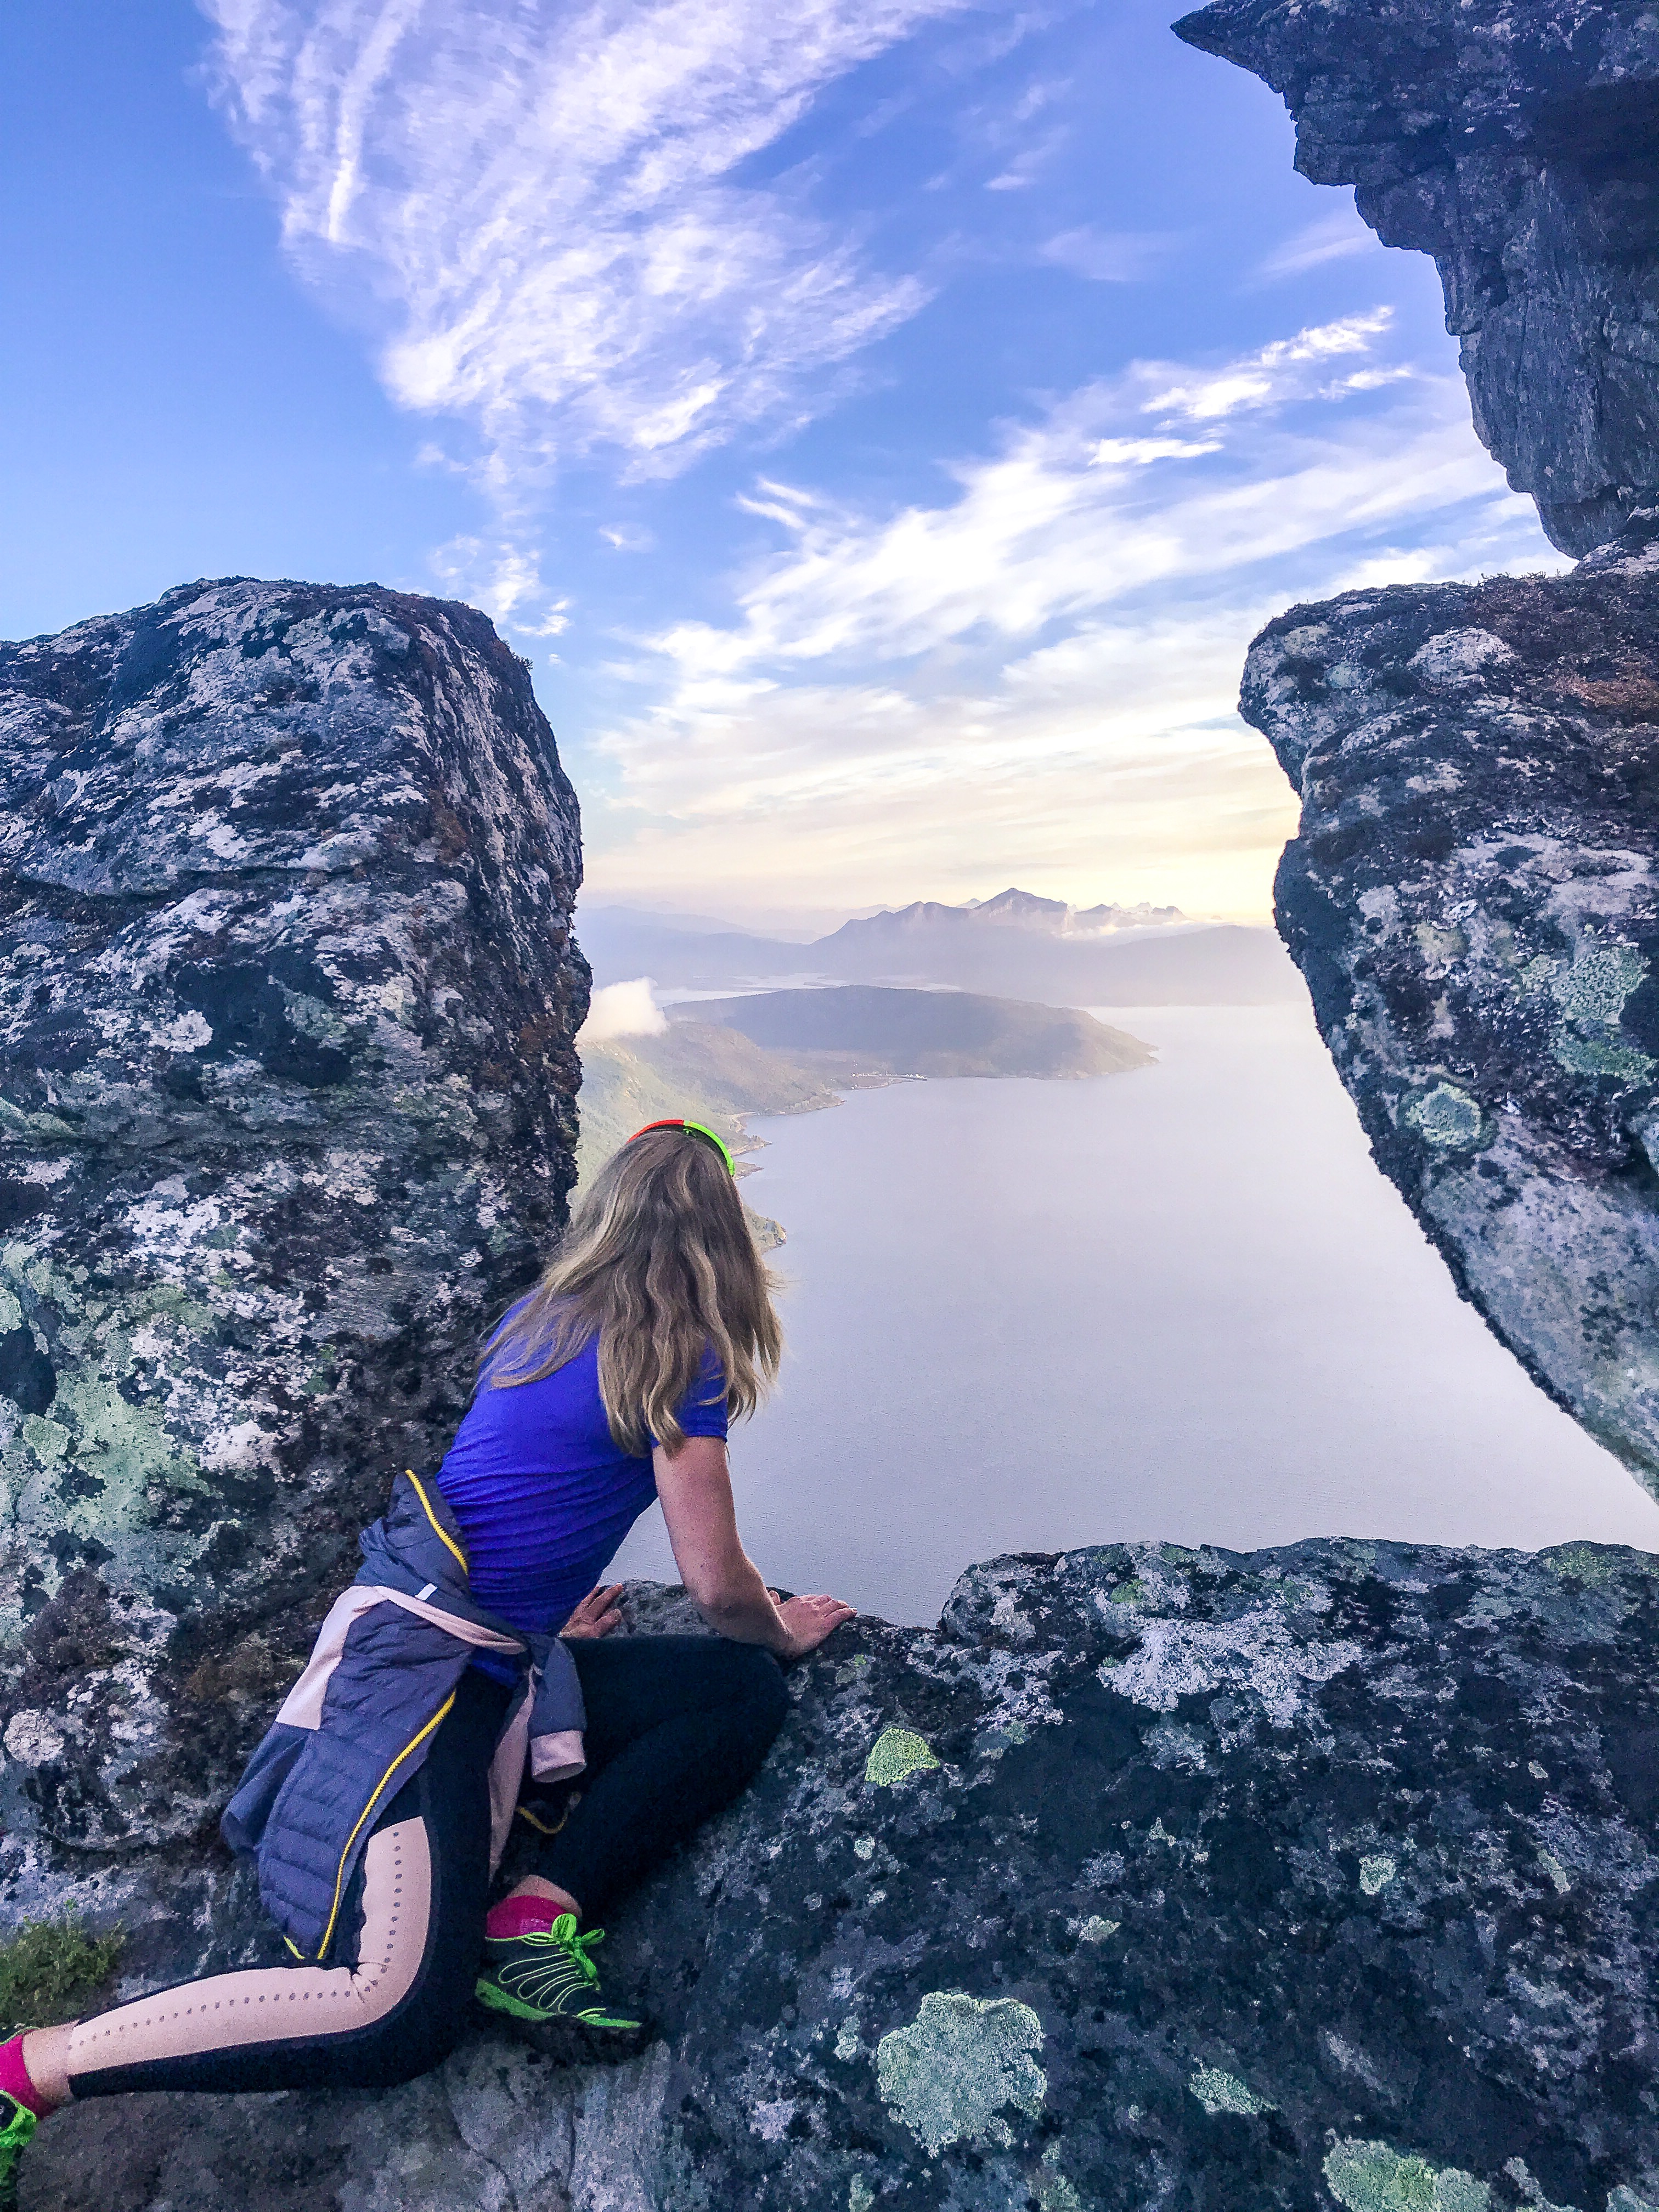
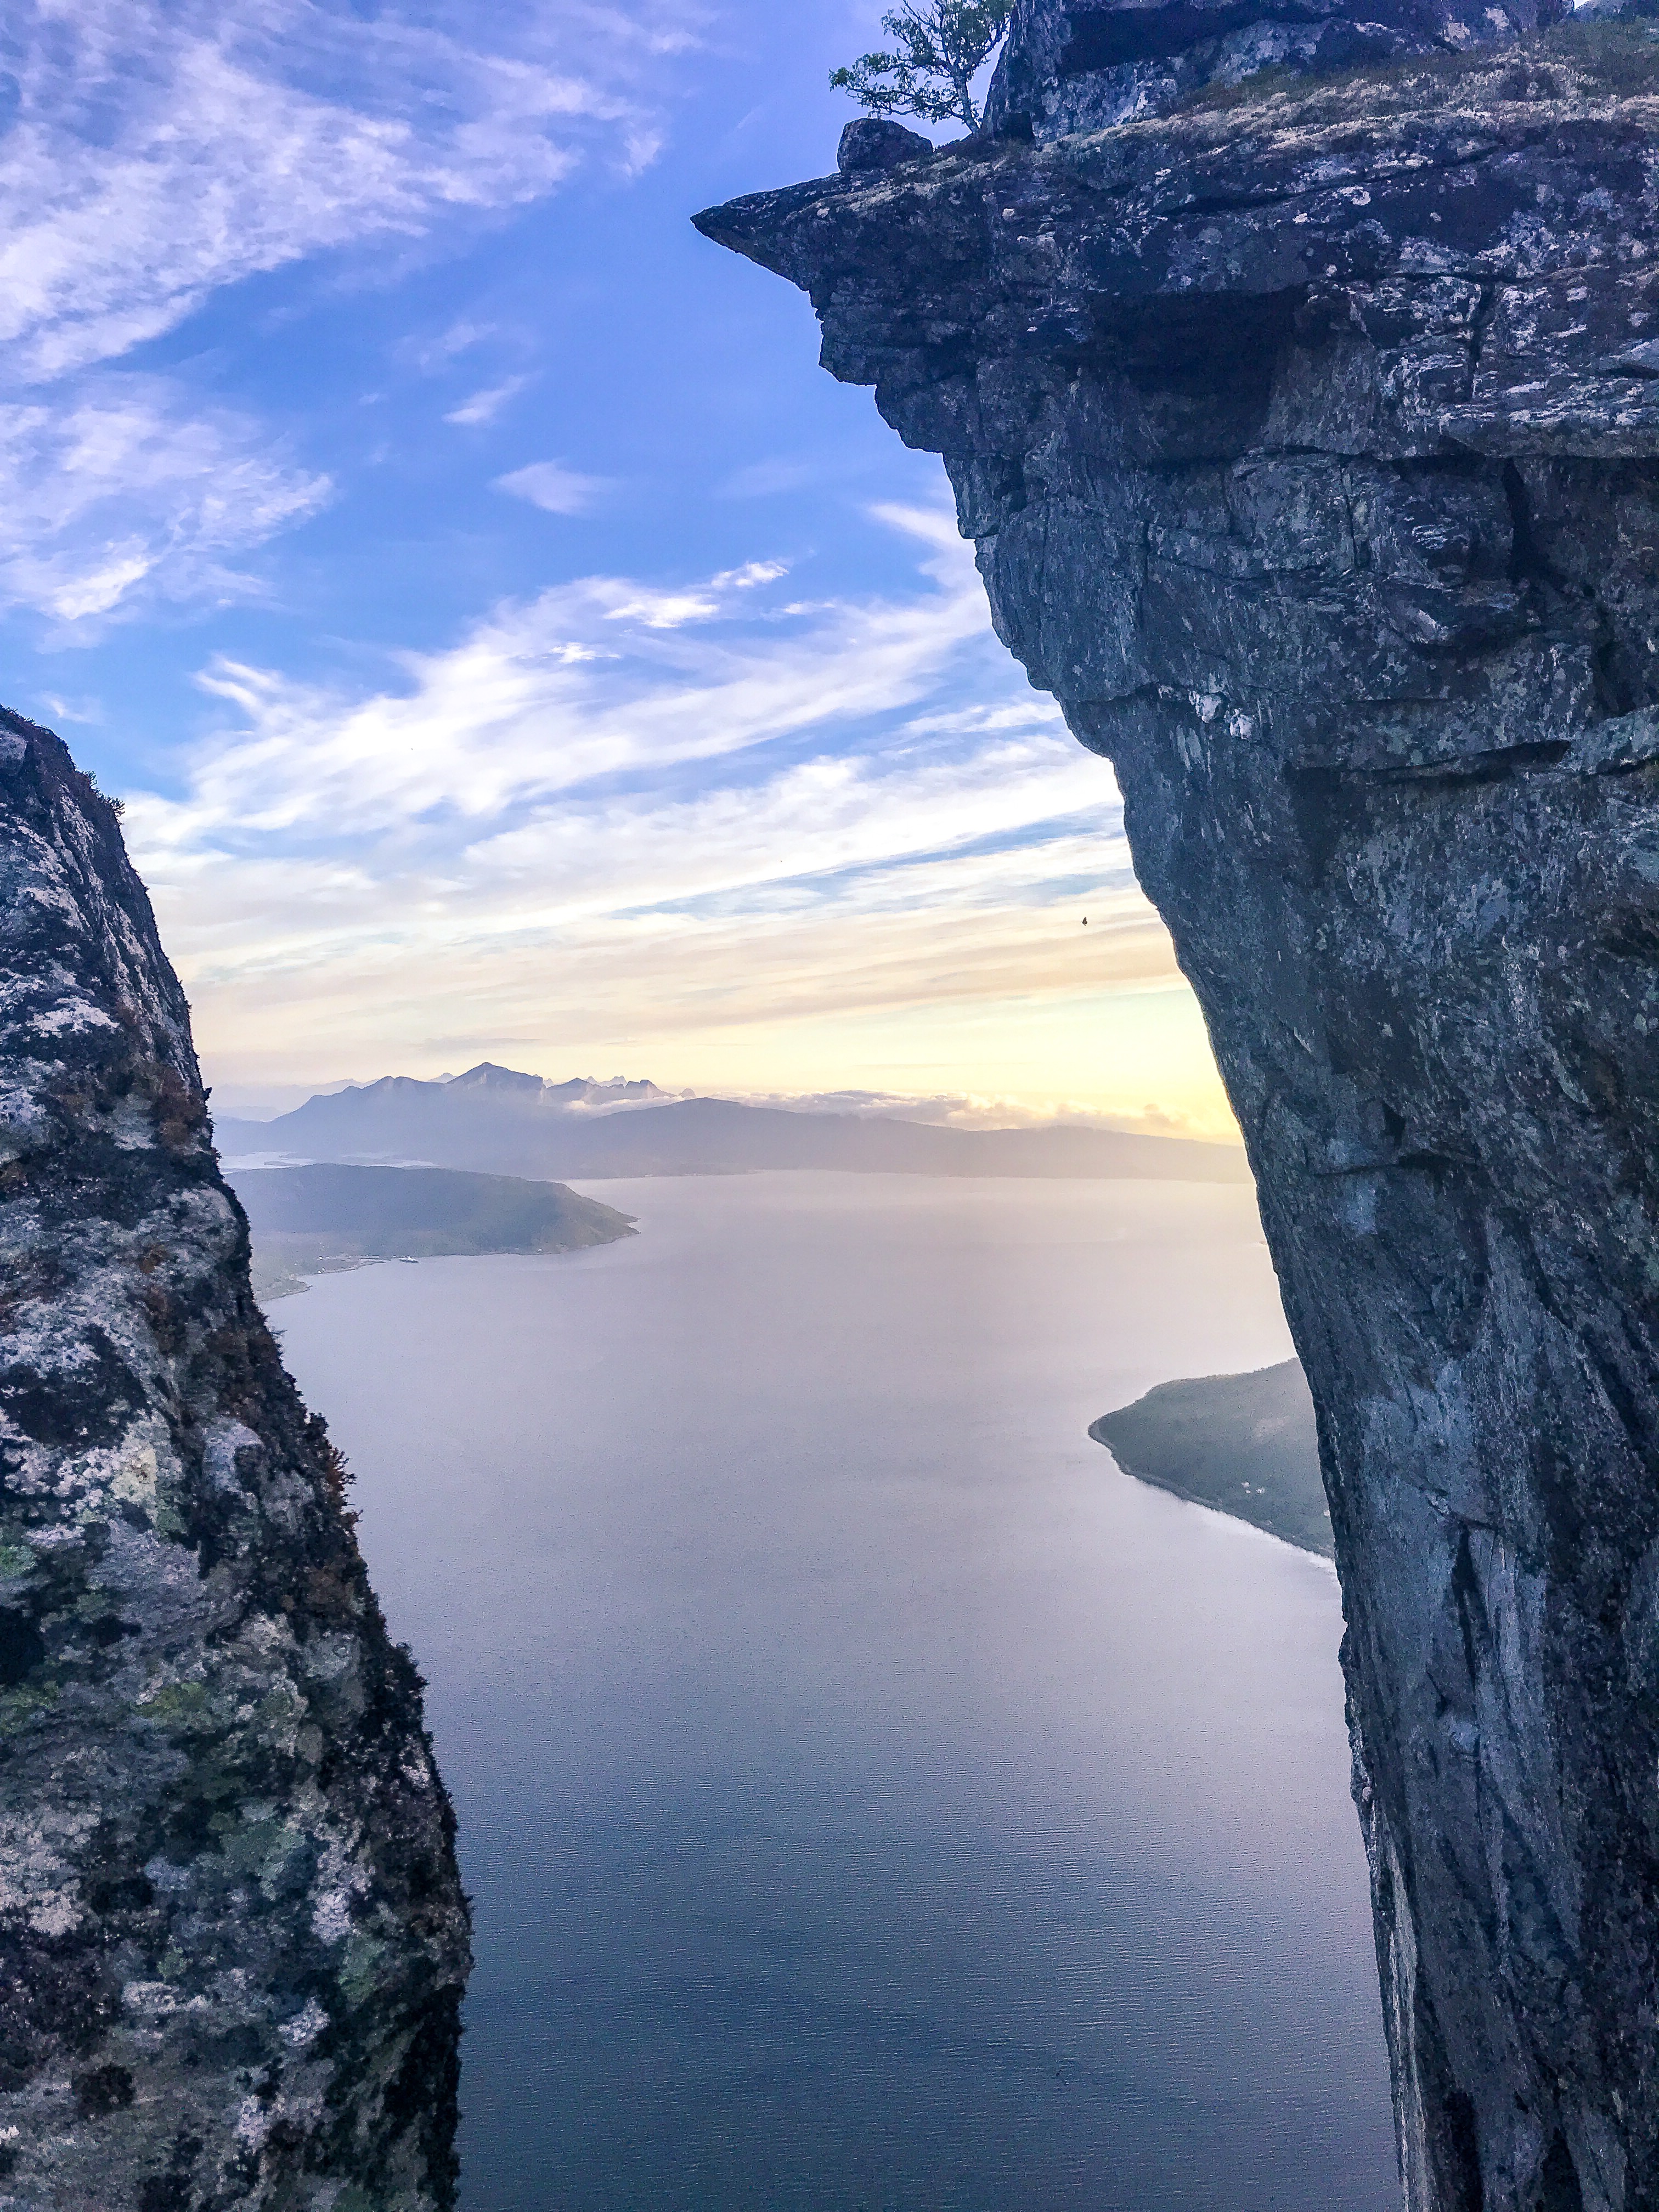
I have been looking so much forward to sharing these two “secret” hikes with you. Well, the first one, Kjerna, may not be so secret to the locals, but for sure many of you have already passed by without knowing that you just missed the northern equivalent to the insta-famous Prekestolen and Trolltunga.
Kjerna
Kjerna seen from west.
When I was a child I used to go fishing with my grandfather in the fjord under Kjerna. The tale goes that one day it would fall down, so I was always a little bit scared it would happen as we passed by. Recently I learned that this was not something my grandfather came up with. Movements around Kjerna have been monitored during the years, however without raising any red flags yet.
Kjerna from east watching the sun go down. This was at about 10pm mid-July.
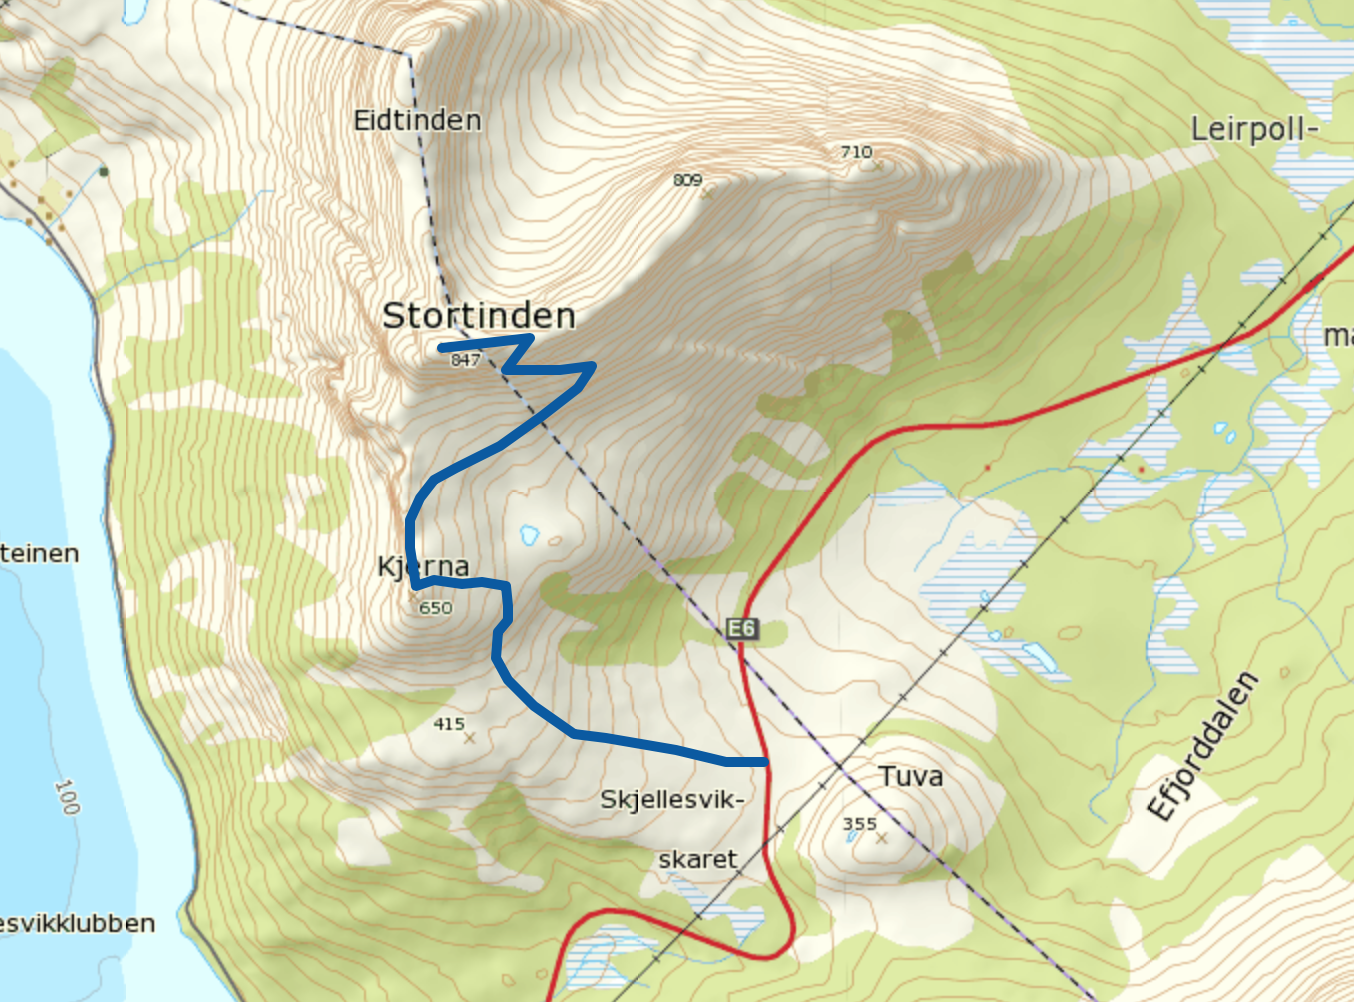
Kjerna is in Tysfjord, the municipality of the national mountain, Stetinden, accessible directly from E6. The trailhead can be found on the west side, about 9.5 km north of Skarberget, where the ferry arrives if you are arriving from the south. There is a parking space on the east side of the road (see map below and link to Strava).
Stetinden to your left.
The main reason for adding Kjerna to your bucket list is obviously the view. And it comes surprisingly cheap. The hike is less than two kilometers (each way) on relatively easy trails and with about 400 meters of elevation gain. Once at the top you have amazing views and can easily spot Stetinden looking east. If you have the chance, I would recommend to do the hike in the late evening. There is nothing like watching the sunset from the peak.
Viewpoint on the east side of Kjerna, looking south with a view of Skrovkjosen.
From Kjerna you can continue towards Stortinden or drop down to about 500 m.a.s. to take the marked trail from the pond. For more on the Stortinden hike, go here.
Running the ridge with Eidtinden and Stortinden as backdrop.
So, to something even more special to me, and maybe the most beautiful place I ever run. From the age of six, I spent the whole summer with my grandparents in Eide, a tiny place just beneath Kjerna and Stortinden, about 3.5 km drive from E6, turning left about 6 km north of Skarberget. There is a small parking about 100 meters before you reach Eide. Leave your car here and walk to the second house on your right hand. From here, walk straight up the lawn between the houses and look for the trail, which is slightly to your right when leaving the lawn walking uphill, and to the left of the cabin in the right corner where the forrest starts.
This is how you know you are on the right track. If you turn around just before you find the trailhead, this is what you see. You will leave the road between the two houses to the left in this picture.
After about another 100 meters you reach the climb which is marked with red dots. You reach the ridge (Eidskaret) after about 600 meters steep climb with 200 meters elevation gain (the last part on rocks) and get a spectacular view of Eidtinden right in front of you. Already at this point you have marvelous views towards Ofoten (south) and Efjorden (north). From here, but after having made a loop around the pond, with your back to where you came from, you go left (west). It is not easy to find the trail, but if you seek the highest point on the ridge line you will find it eventually. If not, don’t worry, the terrain is easy to run off-track as you continue as far as you please towards the end of the ridge.
The pond with Eidtinden as backdrop.
If you are as lucky as me, you may meet dozens of reindeers.
View of the ridge facing Eidtinden, Stortinden and Kjerna, with your starting point down to your right and Stetinden in the upper right corner.
View of Efjorden
Please note that this hike should not be done when it is wet as the rocks can be very slippery. Also, take note of the spot where you are leaving the marked trail (below the pond) to ensure you find the right way back down (you should not leave the path in the steep sections).
Andøya is one of the islands forming the Vesterålen archipelago. In the summer you can take advantage of the ferry connecting Andøya and Senja, which makes for a scenic road trip along the coast as opposed to the main inland route, E6.
Andøya has amazing beaches and is a great playground for road cycling, roller skiing, trailrunning and kayaking. It also offers tourist attractions such as whale safari, bird safari and the Aurora Space Ship, which unfortunately is closed down in 2019.
I was there for the amazing trails around Måtind, a much photographed peak just south of the fishing village, Bleik, and to go roller skiing along the national scenic route on the west coast of Andøya.
Måtinden, with the view of the bird island, Bleiksøya.
The Trails
The coastal trail from Bleik to Stave, which passes Måtinden at 408 meters above sea level, is about 9 km. You can also reach Måtinden from Baugtua, a trailhead starting from a parking about midway on FV976 between Stave and Bleik.
I did a return run to Måtinden from Stave beach and added a loop on the plateau behind Måtinden. From Stave most of the climb is at the beginning of the run, providing you with magnificent views of the Stave beach and village from the start and, after the first steep climb, you are rewarded with a great view of the beach Høyvika. To reach Måtinden you continue north. It is not always obvious where the path goes, but unless you are caught by the fog (as I was at the end of the run) it is easy to see where you are going and the terrain is easy and fun to overcome off-track. Once at the peak of Måtinden you have great views of Bleiksøya, a small characteristic bird island housing thousands of puffins as well as eagles.
The national scenic route along the west coast is almost flat and excellent for rollerskiing as well as cycling. I jumped out of the car at the west junction of FV974 and FV973 and roller skied the 30 kilometers to Stave beach, where we had rented an apartment (see below). After about 12 kilometer you reach the view point Bukkekjerka, and after another 10 kilometer you ski on a breakwater with the ocean on your left and the Skogvoll lake on your right. Another 7 kilometer and you reach the village of Stave while the road continues for additional 20 kilometers all the way up to Andenes, if you would like to go further.
We stayed at Stave Camping in a one-bedroom fully-equipped apartment (sleeps 6) called the Shipwreck. The location was absolutely great and if you have the weather on your side, this is the place to be for sunset/midnight sun.
The Drive
The drive from Nyksund to Stave is about 2.5 hours and 140 kilometers. You will pass by Sortland again. Please see previous post on information about Sortland. Make sure you take time to stop at the view points provided, such as Bukkekjerka (mentioned above) and, when driving to Andenes for the ferry to Senja, Kleivodden.
The ferry between Andenes in Andøya and Gryllefjord in Senja takes about two hours and runs only in the summer. You can check the schedule here.

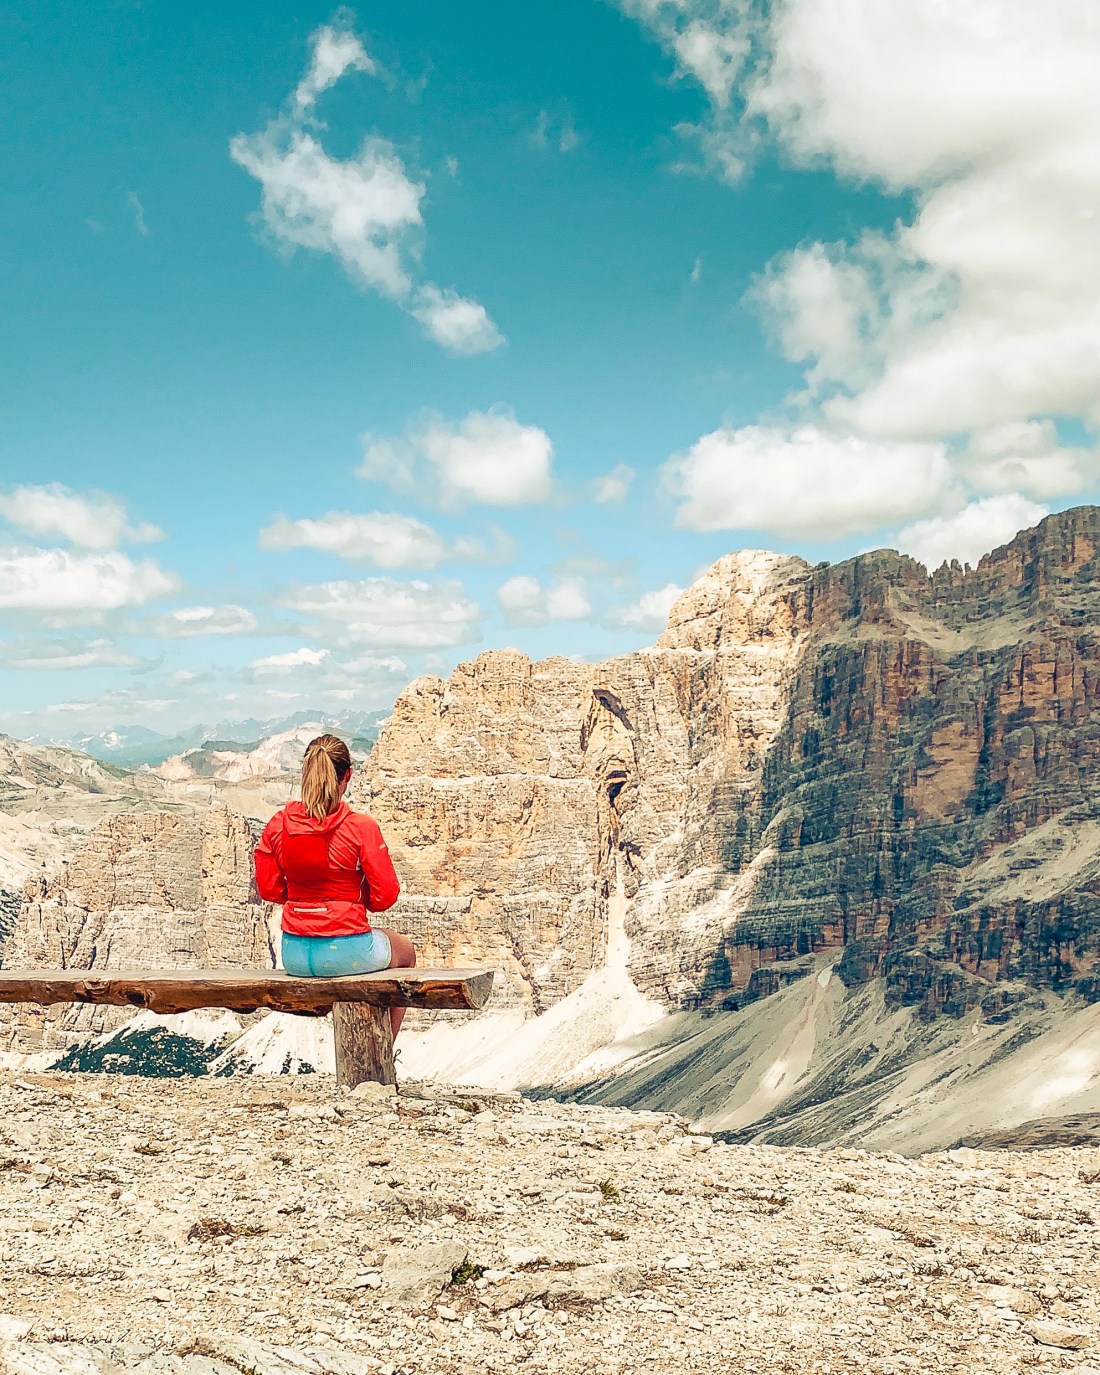
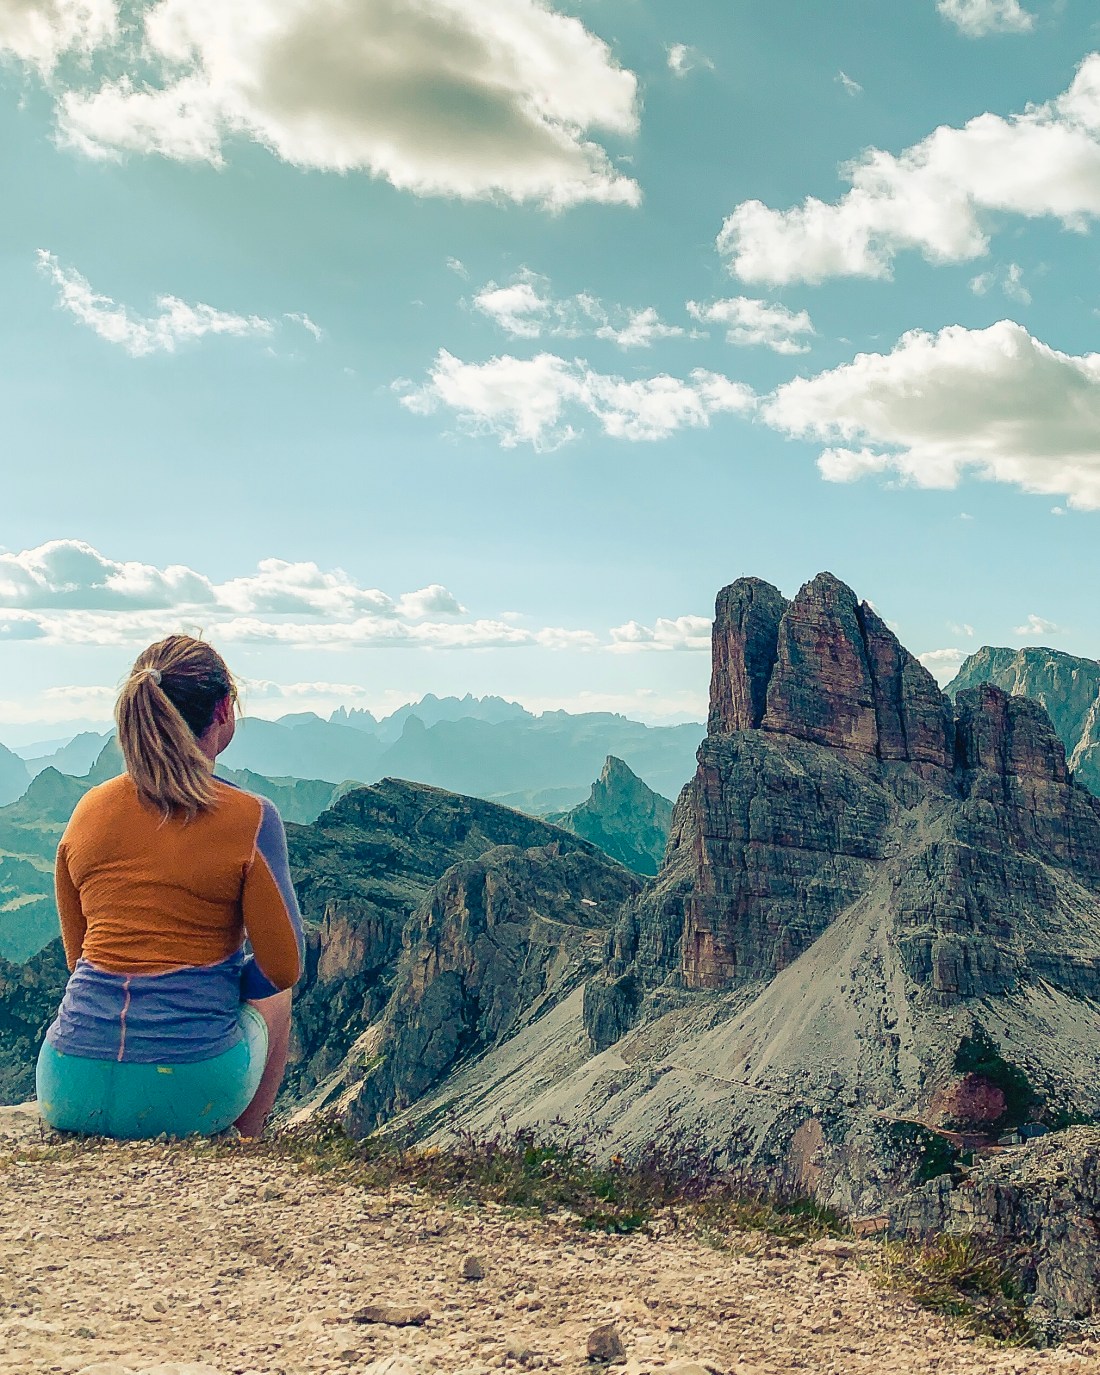 From the Nuvolau you have great views of the famous Five Towers, popular for mountain climbers. If you have the time, you can return via the towers, by taking a right turn at Rifugio Averau (400 meters from Nuvolau) and continue on trail 439 until you meet trail 440, which will take you back to your starting point.