Scenic Ascents in Geiranger & Trollstigen

IMG_2083
Dalsnibba

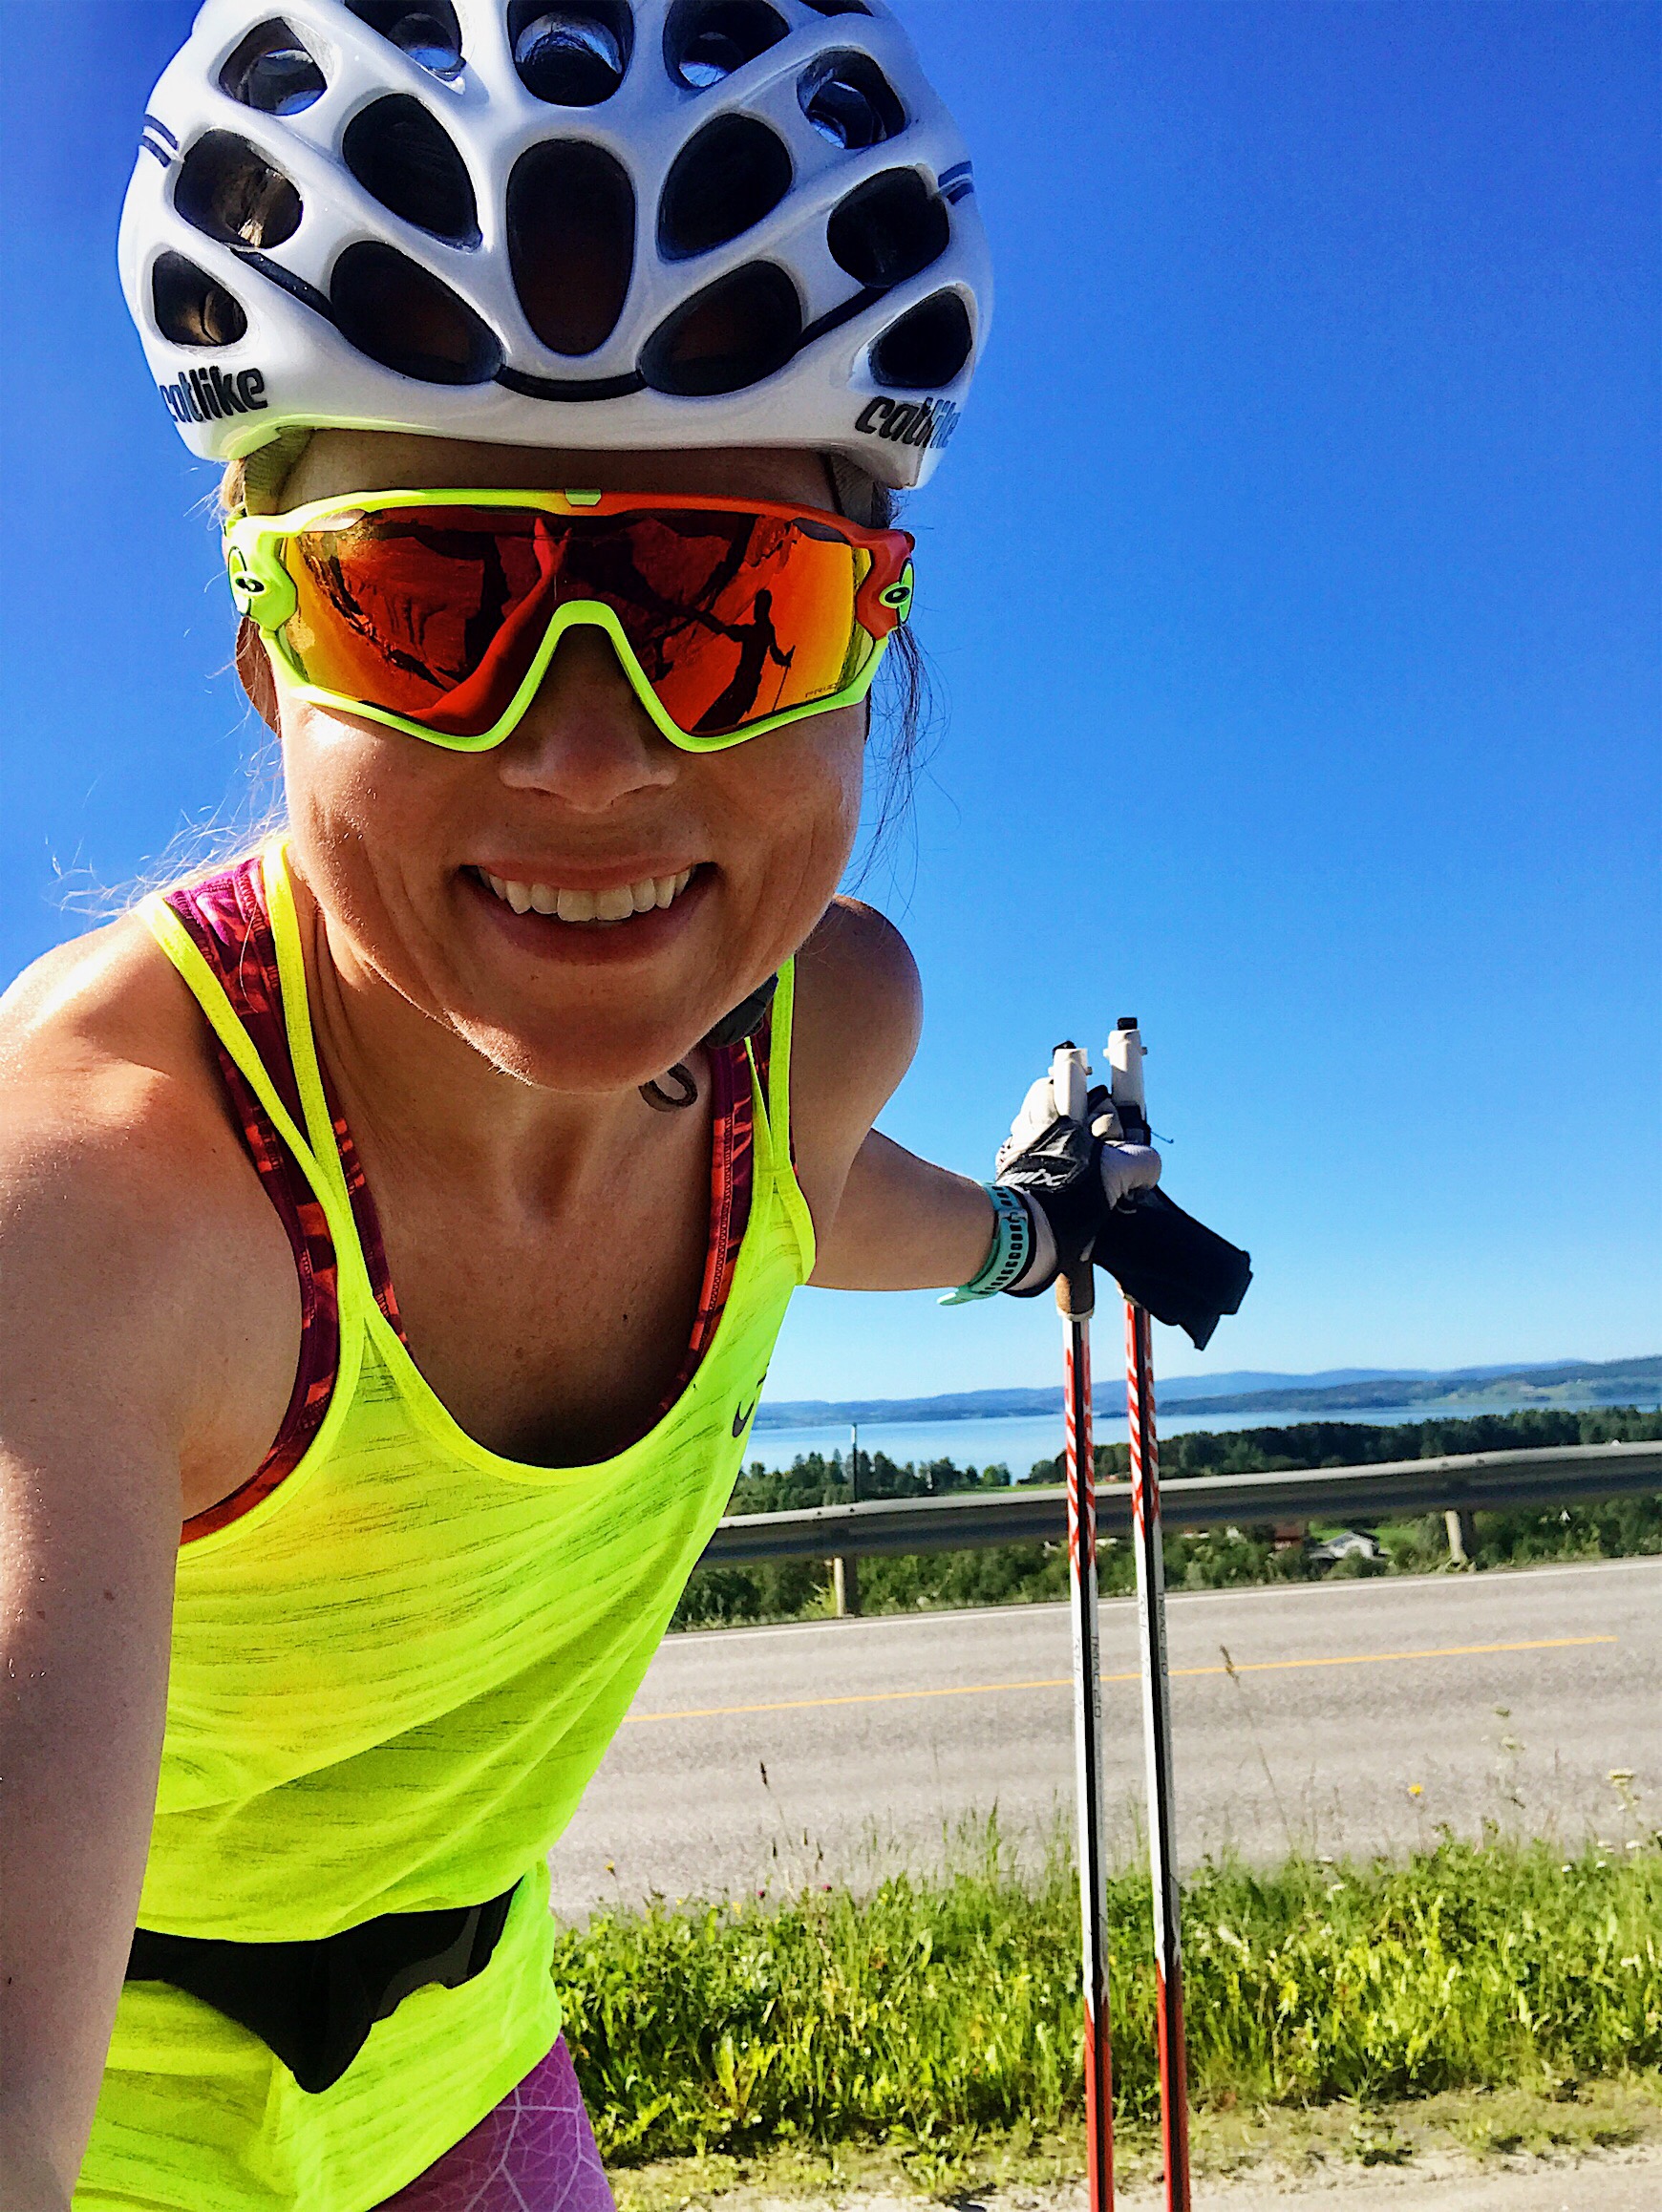
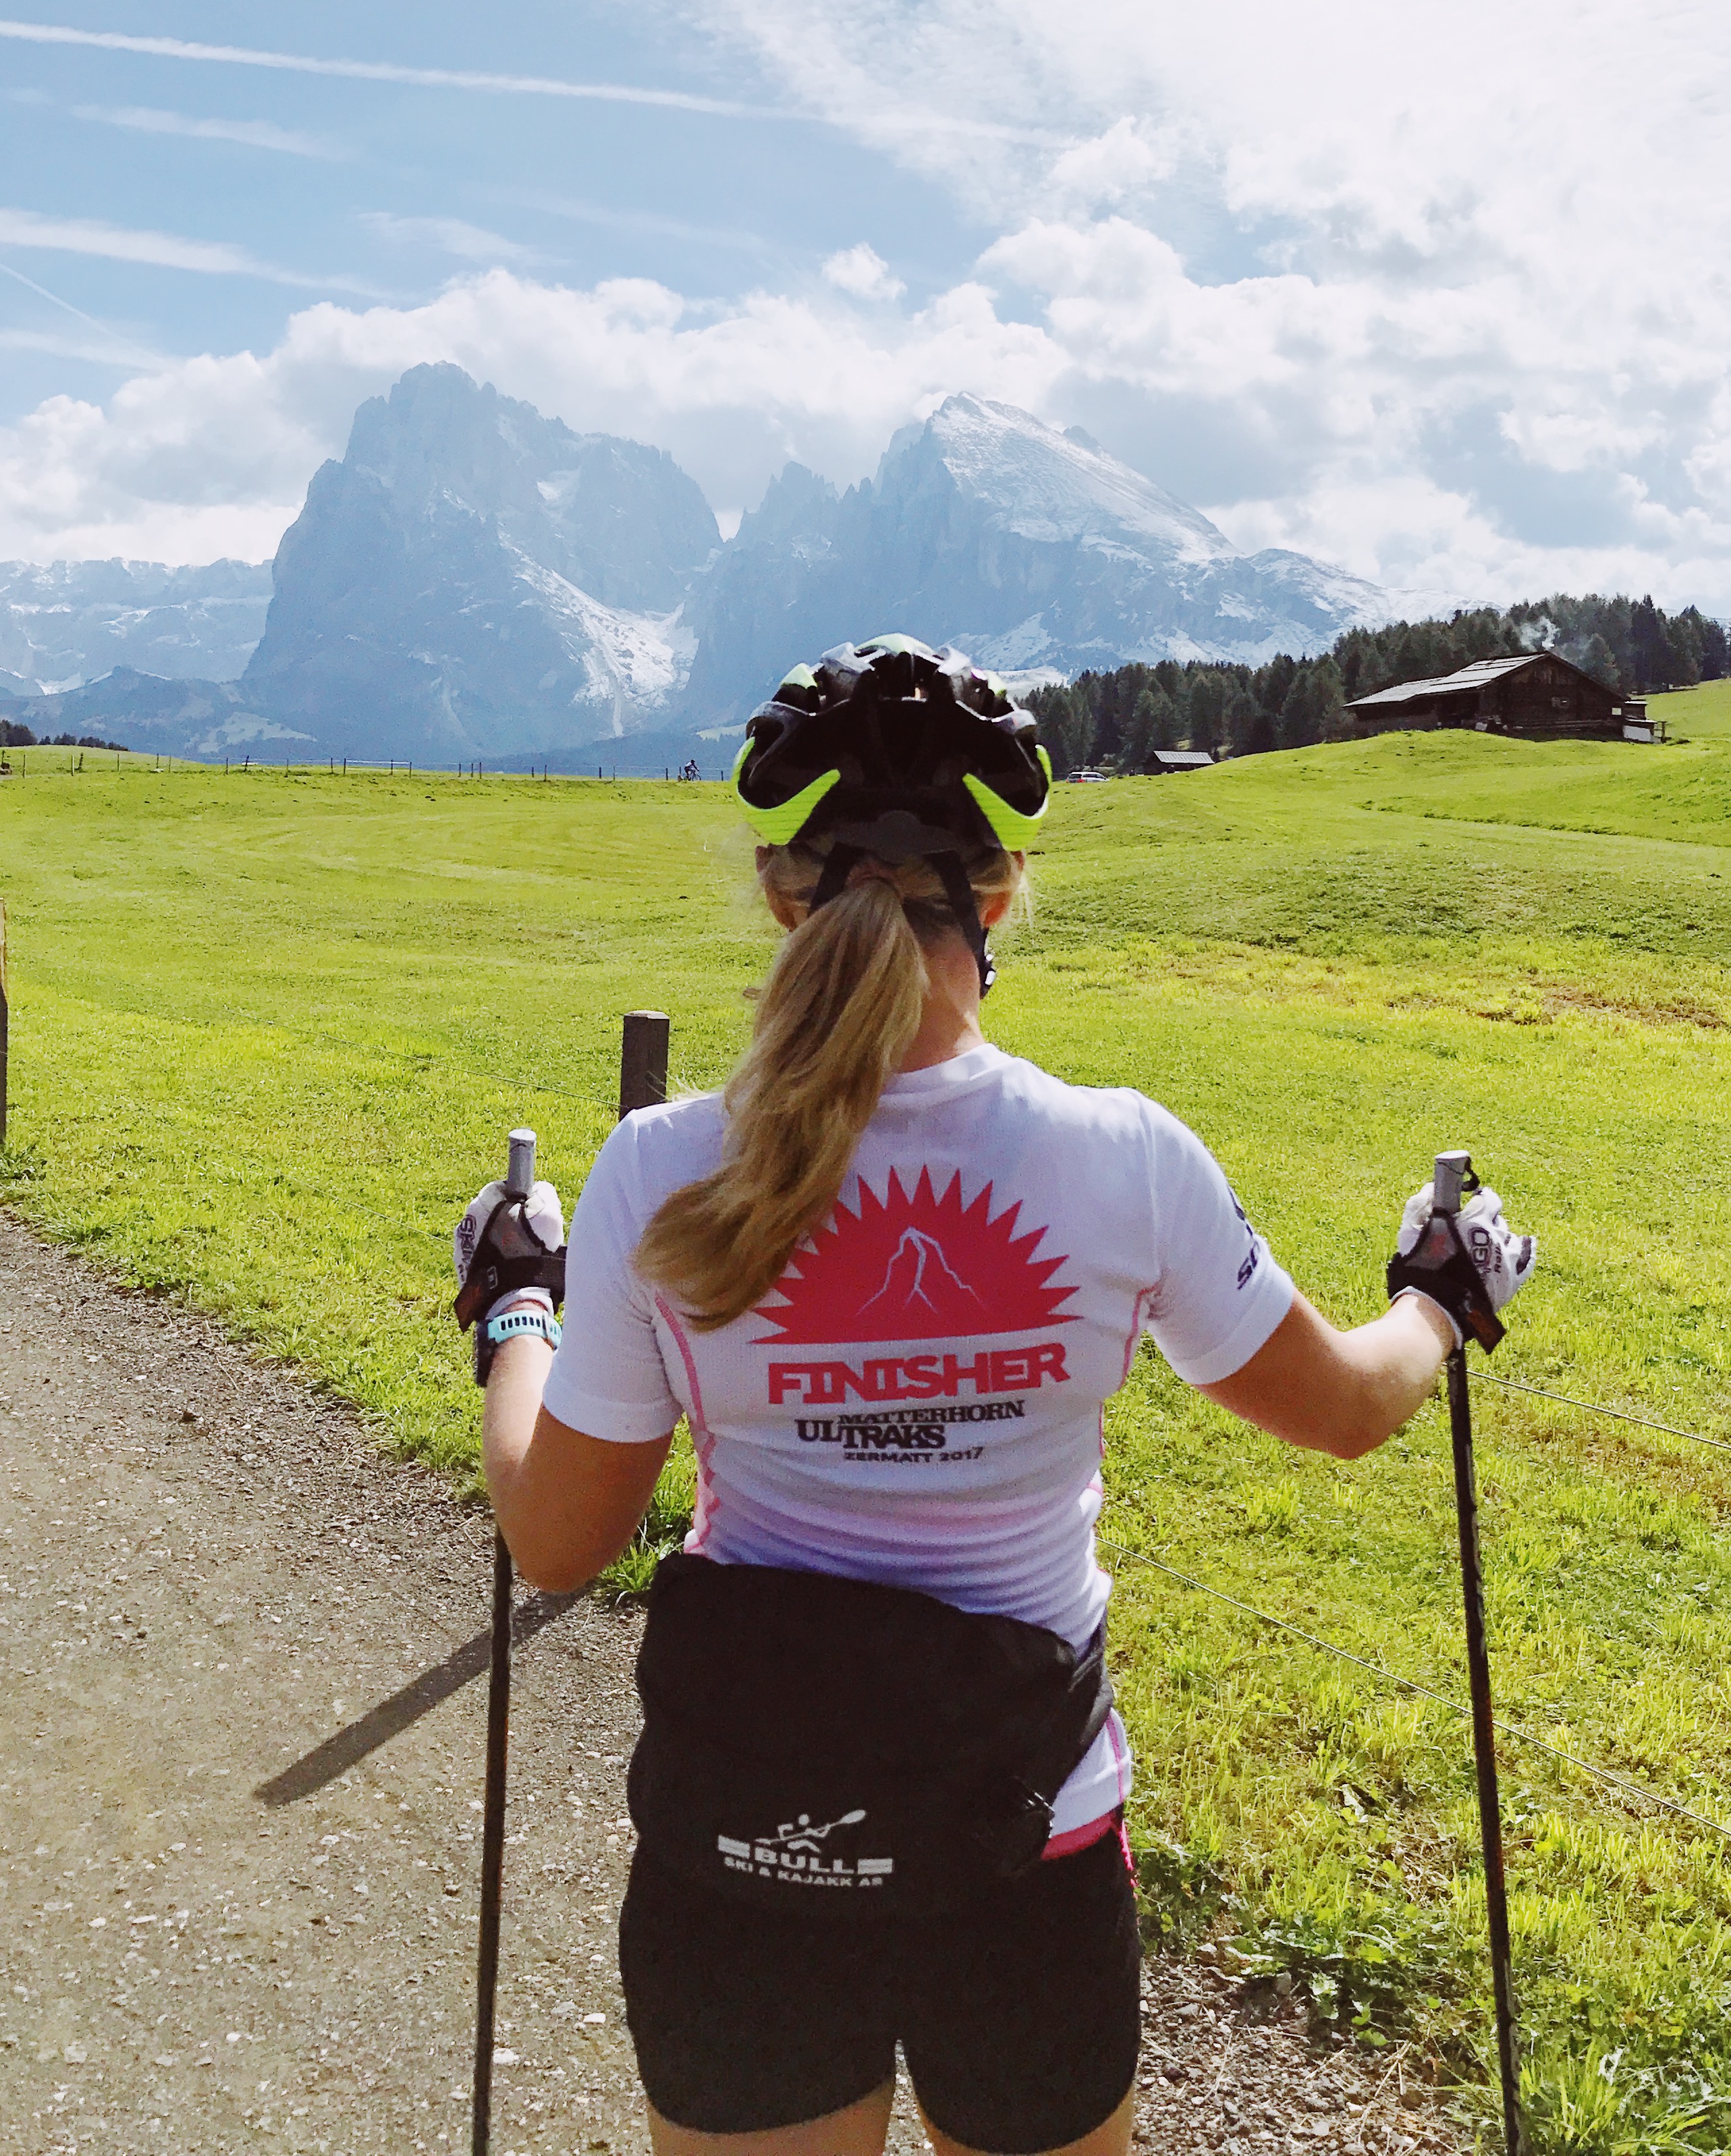
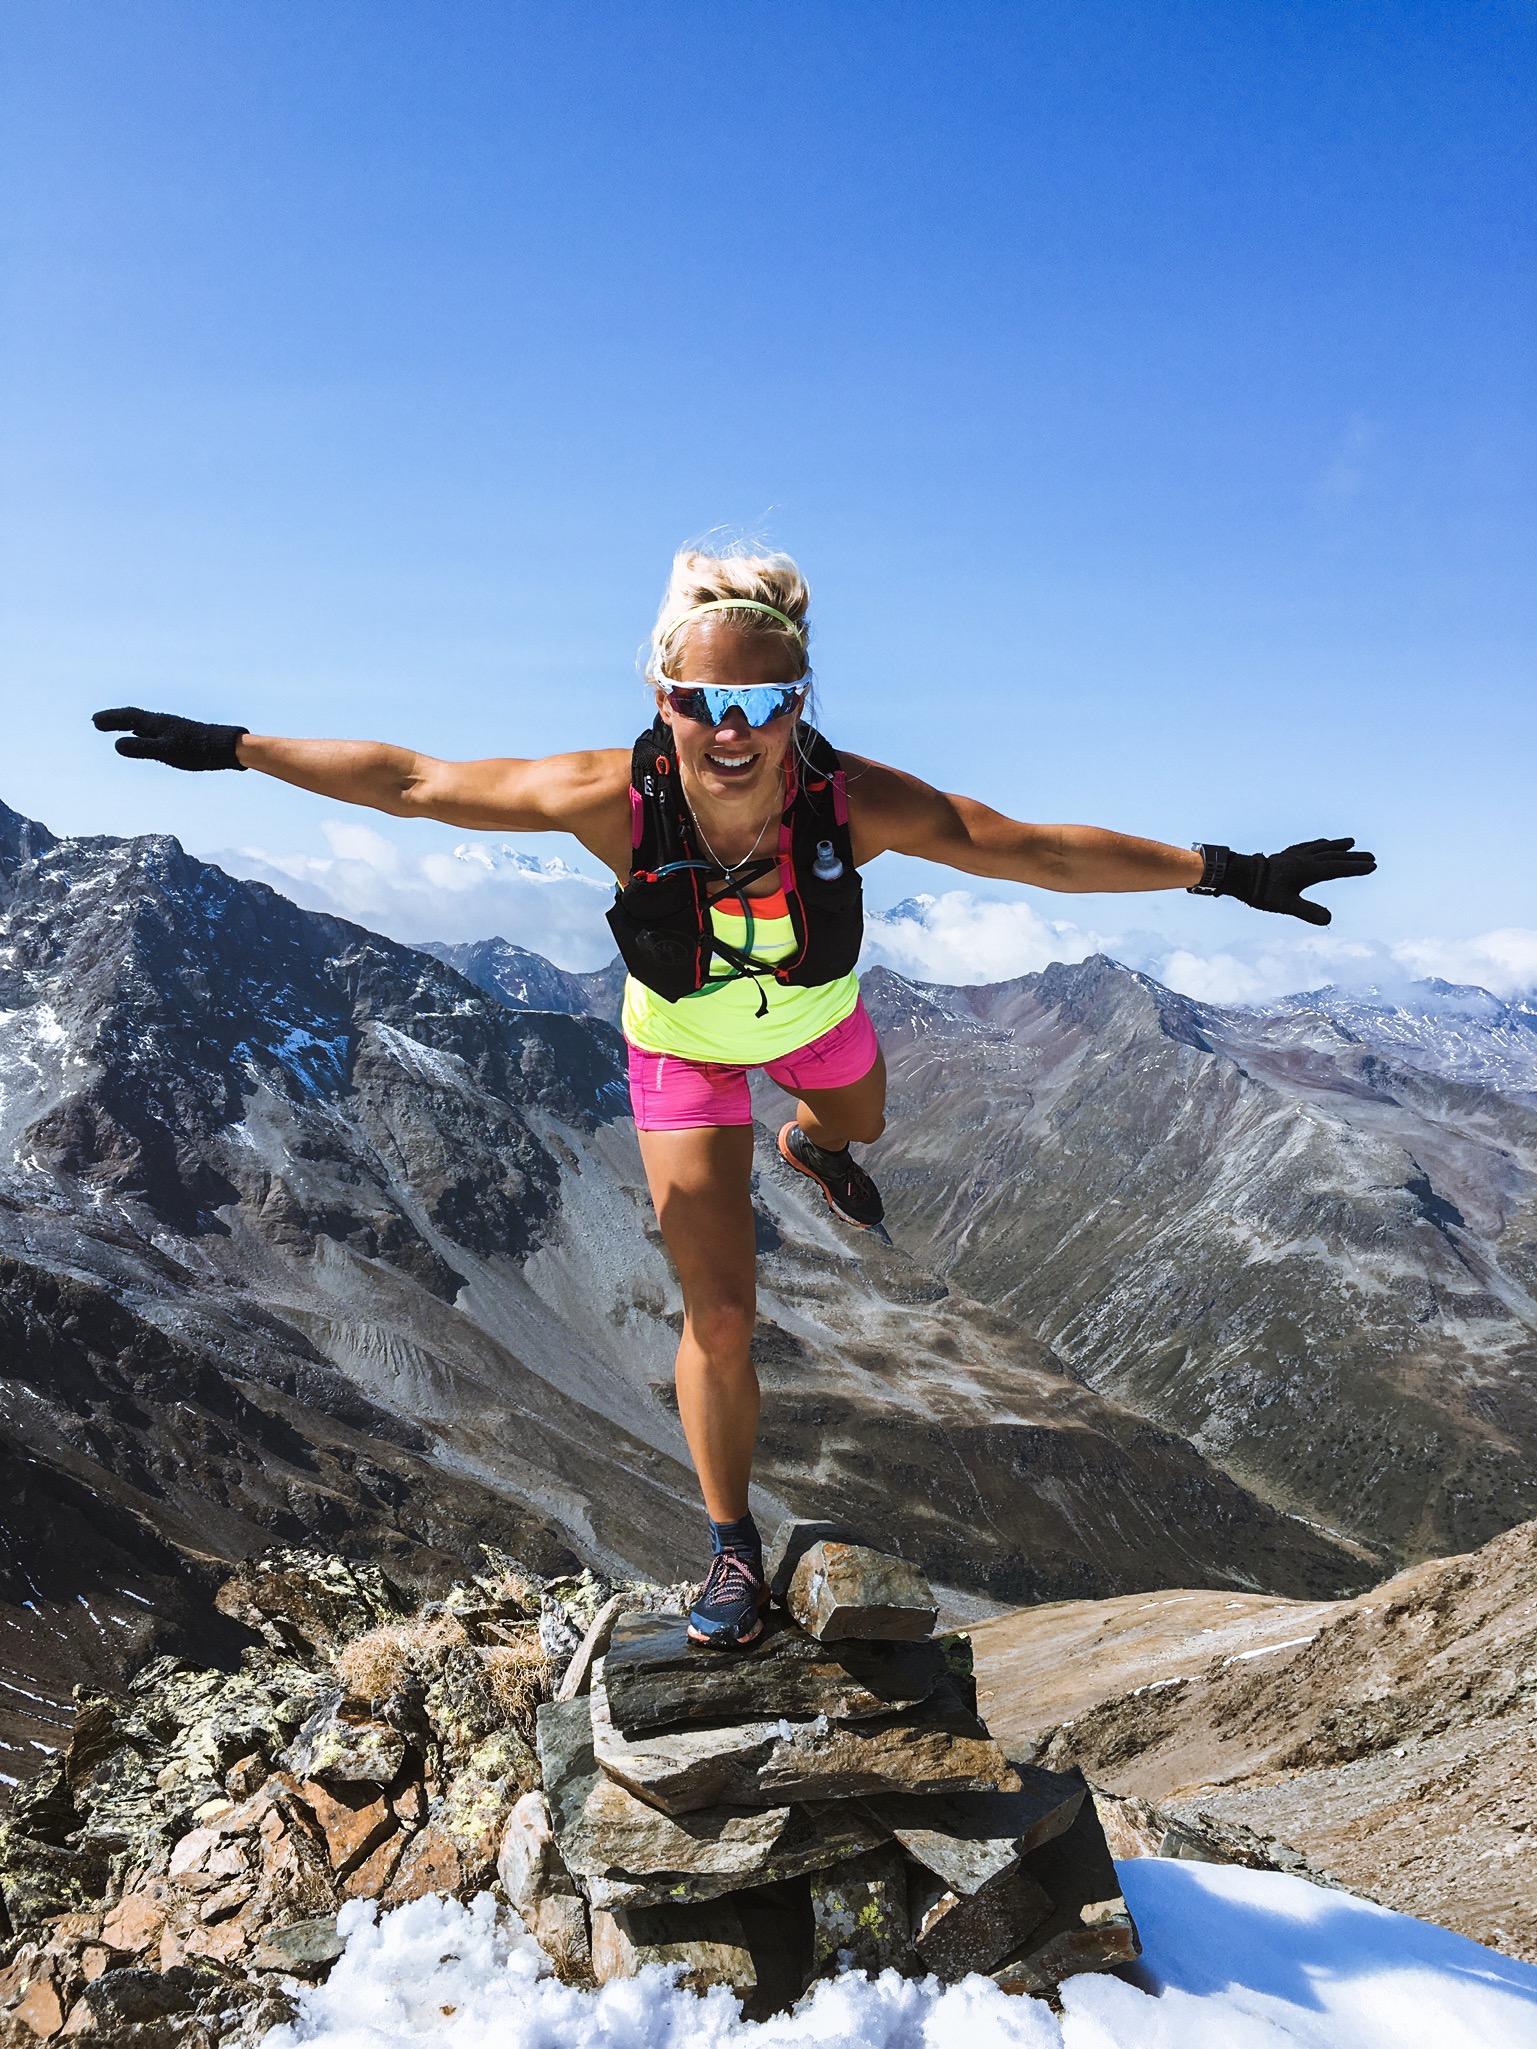
The annual girls’ road trip goes to Geiranger and Trollstigen to collect meters of climbing by roller skiing and running in these crazy beautiful surroundings. This includes one of my favorite places in Norway, Dalsnibba, a mountain top 1500 meters above Geiranger. If you like elevation gains, you may want to tag along!

Highlights of the trip

  • Cinnamon buns at the Bakery in Lom
  • Hairpin turns of Dalsnibba
  • Sunset at Ørnesvingen
  • Breakfast at Valldal Fjordhotell
  • Hairpin turns of Trollstigen
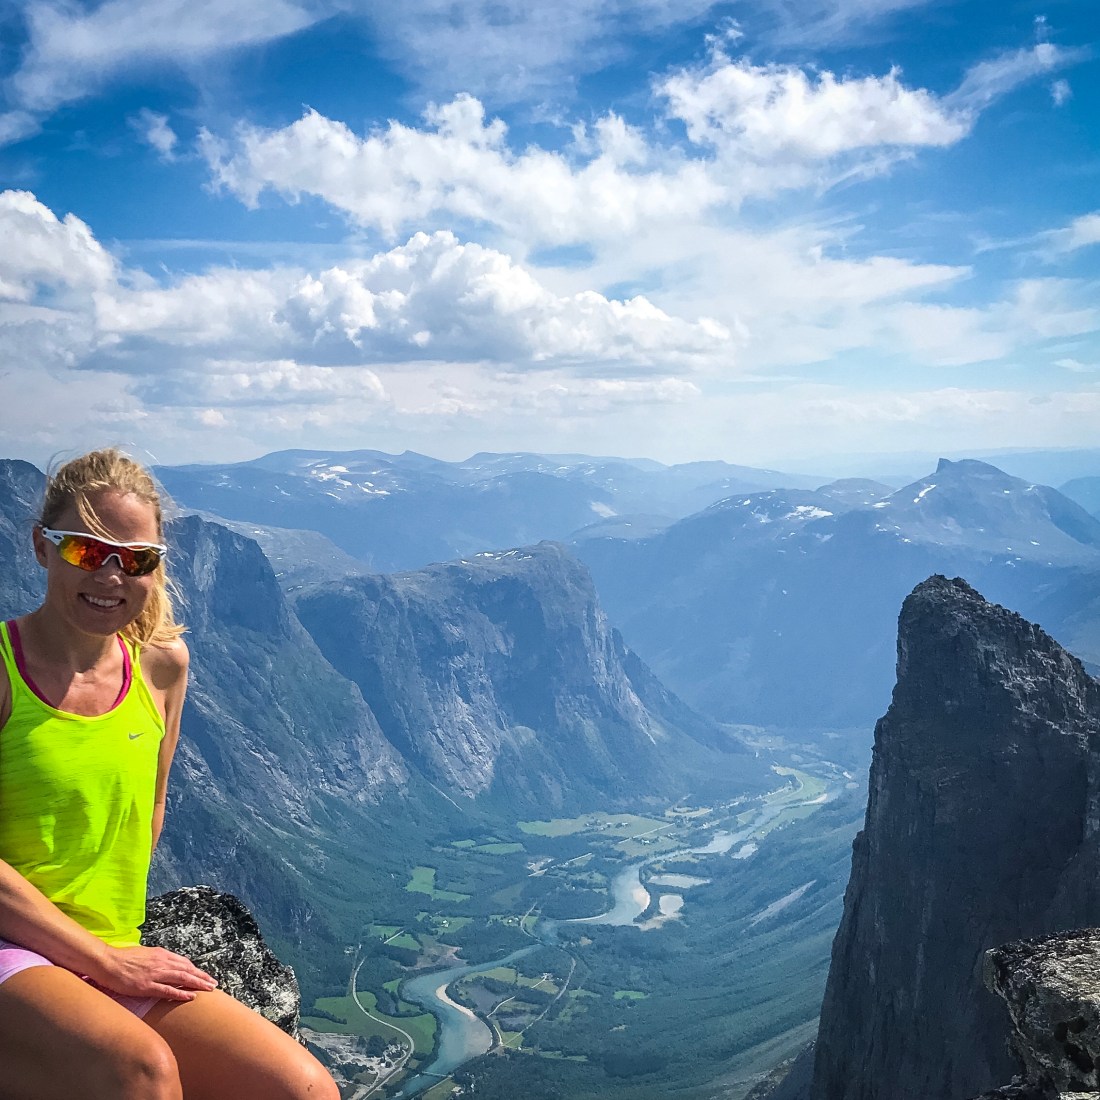
  • The view of any mountain peak in Romsdalen
IMG_1997
Barbro and Maren taking on the final hairpin turns above Djupvatnet.

Driving from Øyer to Dalsnibba

You can of course start this road trip from anywhere, but I like to get a head start by driving up to Øyer/Lillehammer the night before. If you are traveling with only one car and want to go roller skiing up Dalsnibba, you should plan your departure according to the bus schedule, (unless you, like we usually do, plan on asking tourists for a lift down to Geiranger). If you have two cars (and can fit everyone in one), the easiest logistic is to leave one car at the top (with warm clothes) and drive one car down to Geiranger.

First stop of the trip is Bakeriet in Lom, about two hours from Øyer. This is probably the most famous bakery in Norway and worth the trip to Lom alone. Here you grab a coffee and what your heart desires of baked goods. I usually grab a cinnamon bun to stay and a sandwich, muffin and another cinnamon bun to go. You will need carbs for this road trip, so don’t be shy! If you wish to spend more time in Lom, there will soon be more information on Lom at trailspotting.no.

After another 90 minutes drive from Lom you will arrive at Dalsnibba (there is a 150 NOK toll road fee per car to drive up to Dalsnibba). Dalsnibba is also the finishing point for this first day’s challenge, which is rollerskiing from Geiranger going up the 1500 meters of ascent to Dalsnibba.

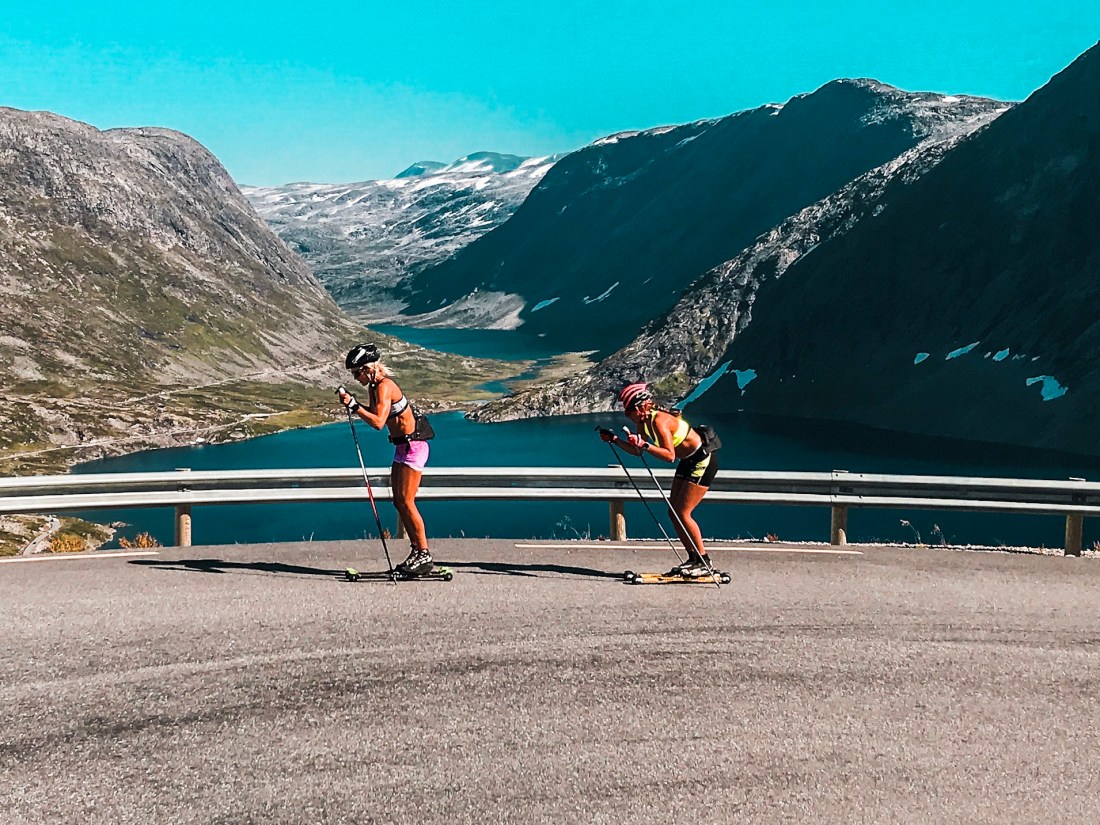
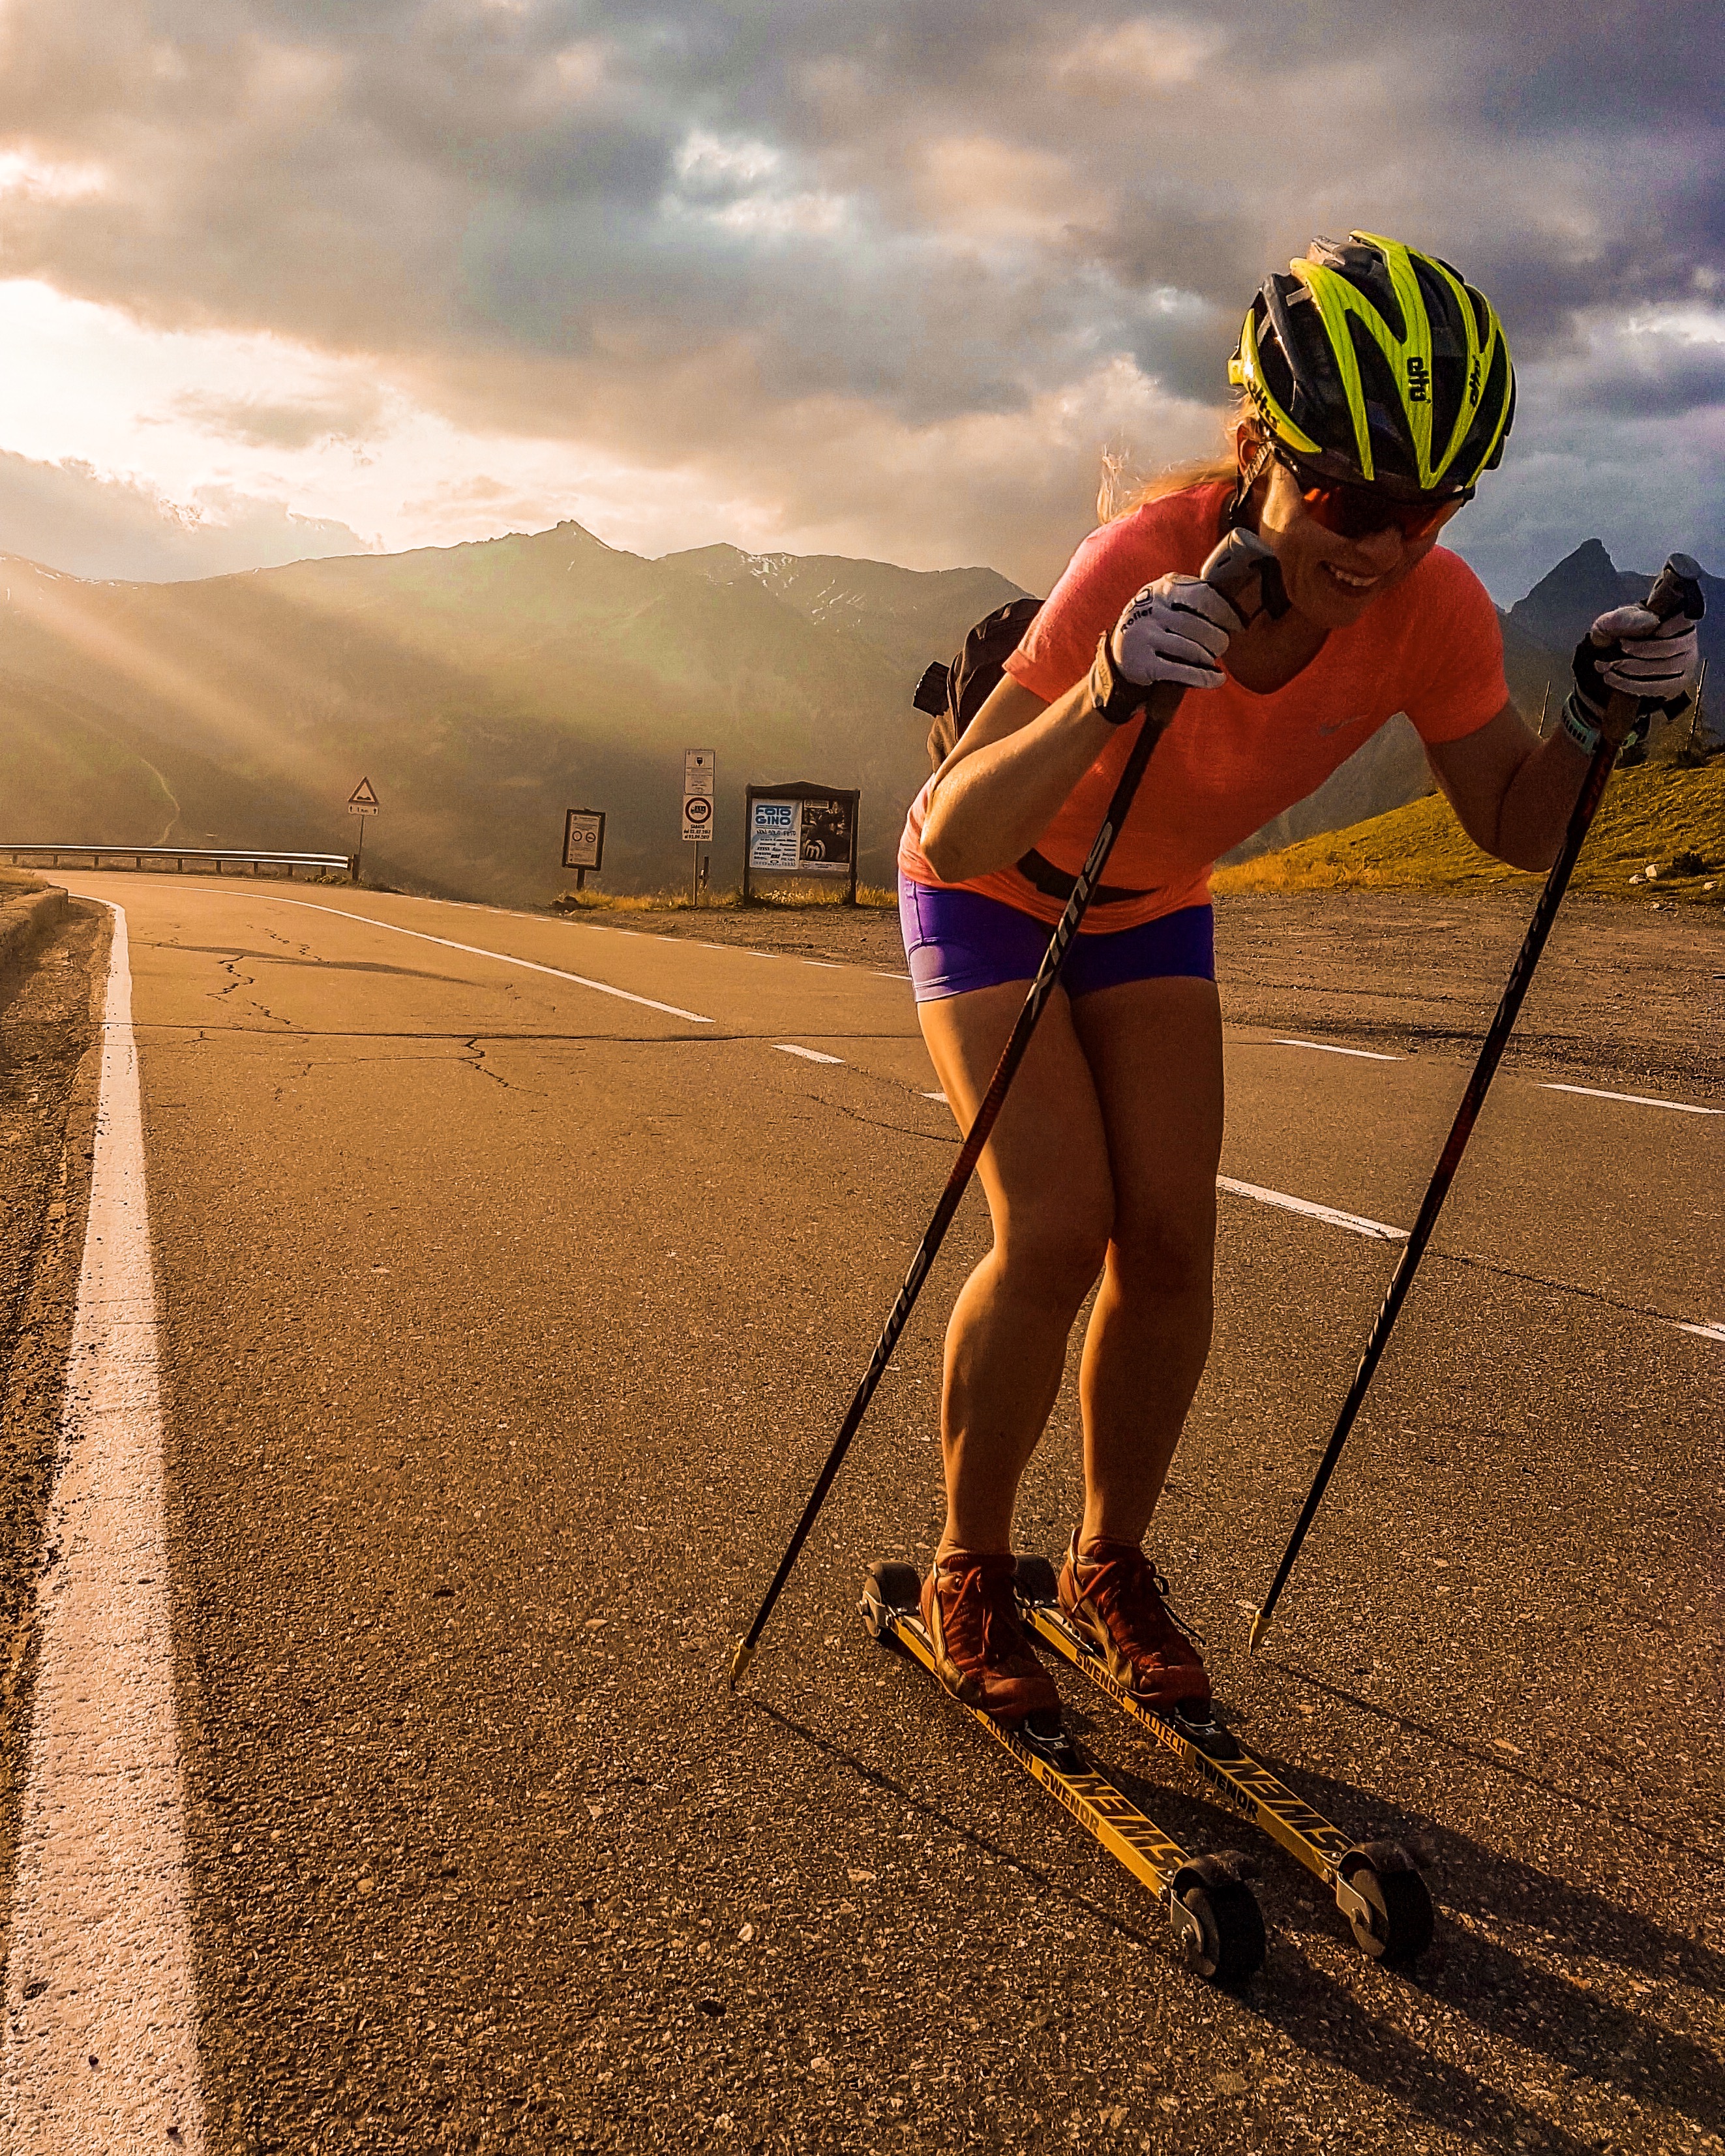
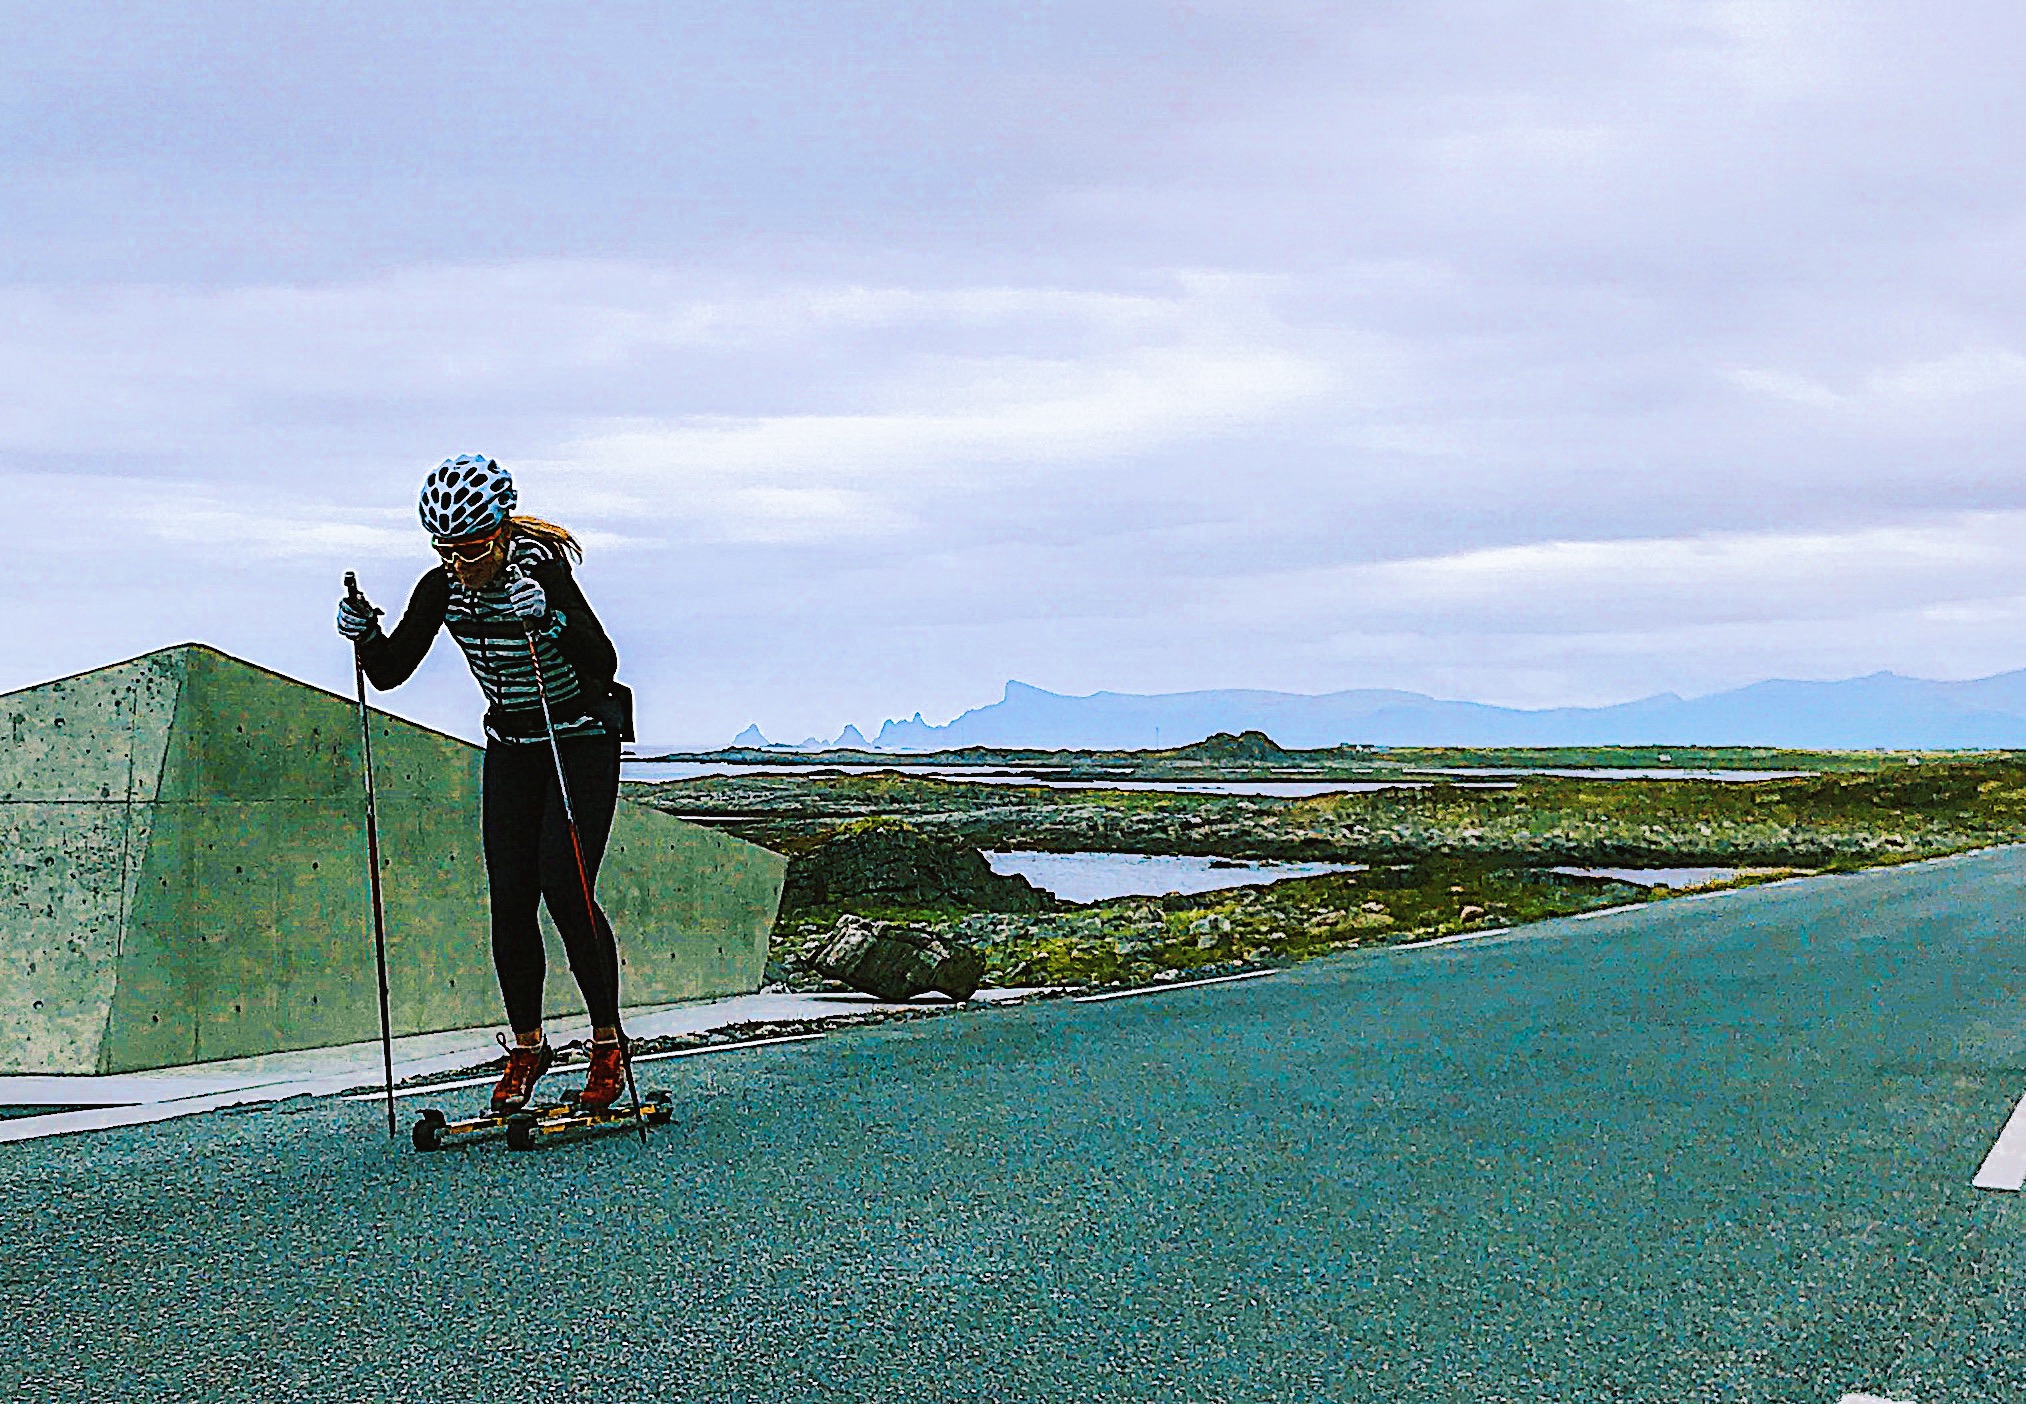
Rolling Up Dalsnibba

IMG_2044
Barbro finishing her Dalsnibba climb in 2017.

Of course you can take on this climb cycling or running as well. In June every year (in 2019 on the 8th of June) there is a race event from Geiranger to Dalsnibba, called “From Fjord to Mountain“, where you can choose between running or biking, or do both.

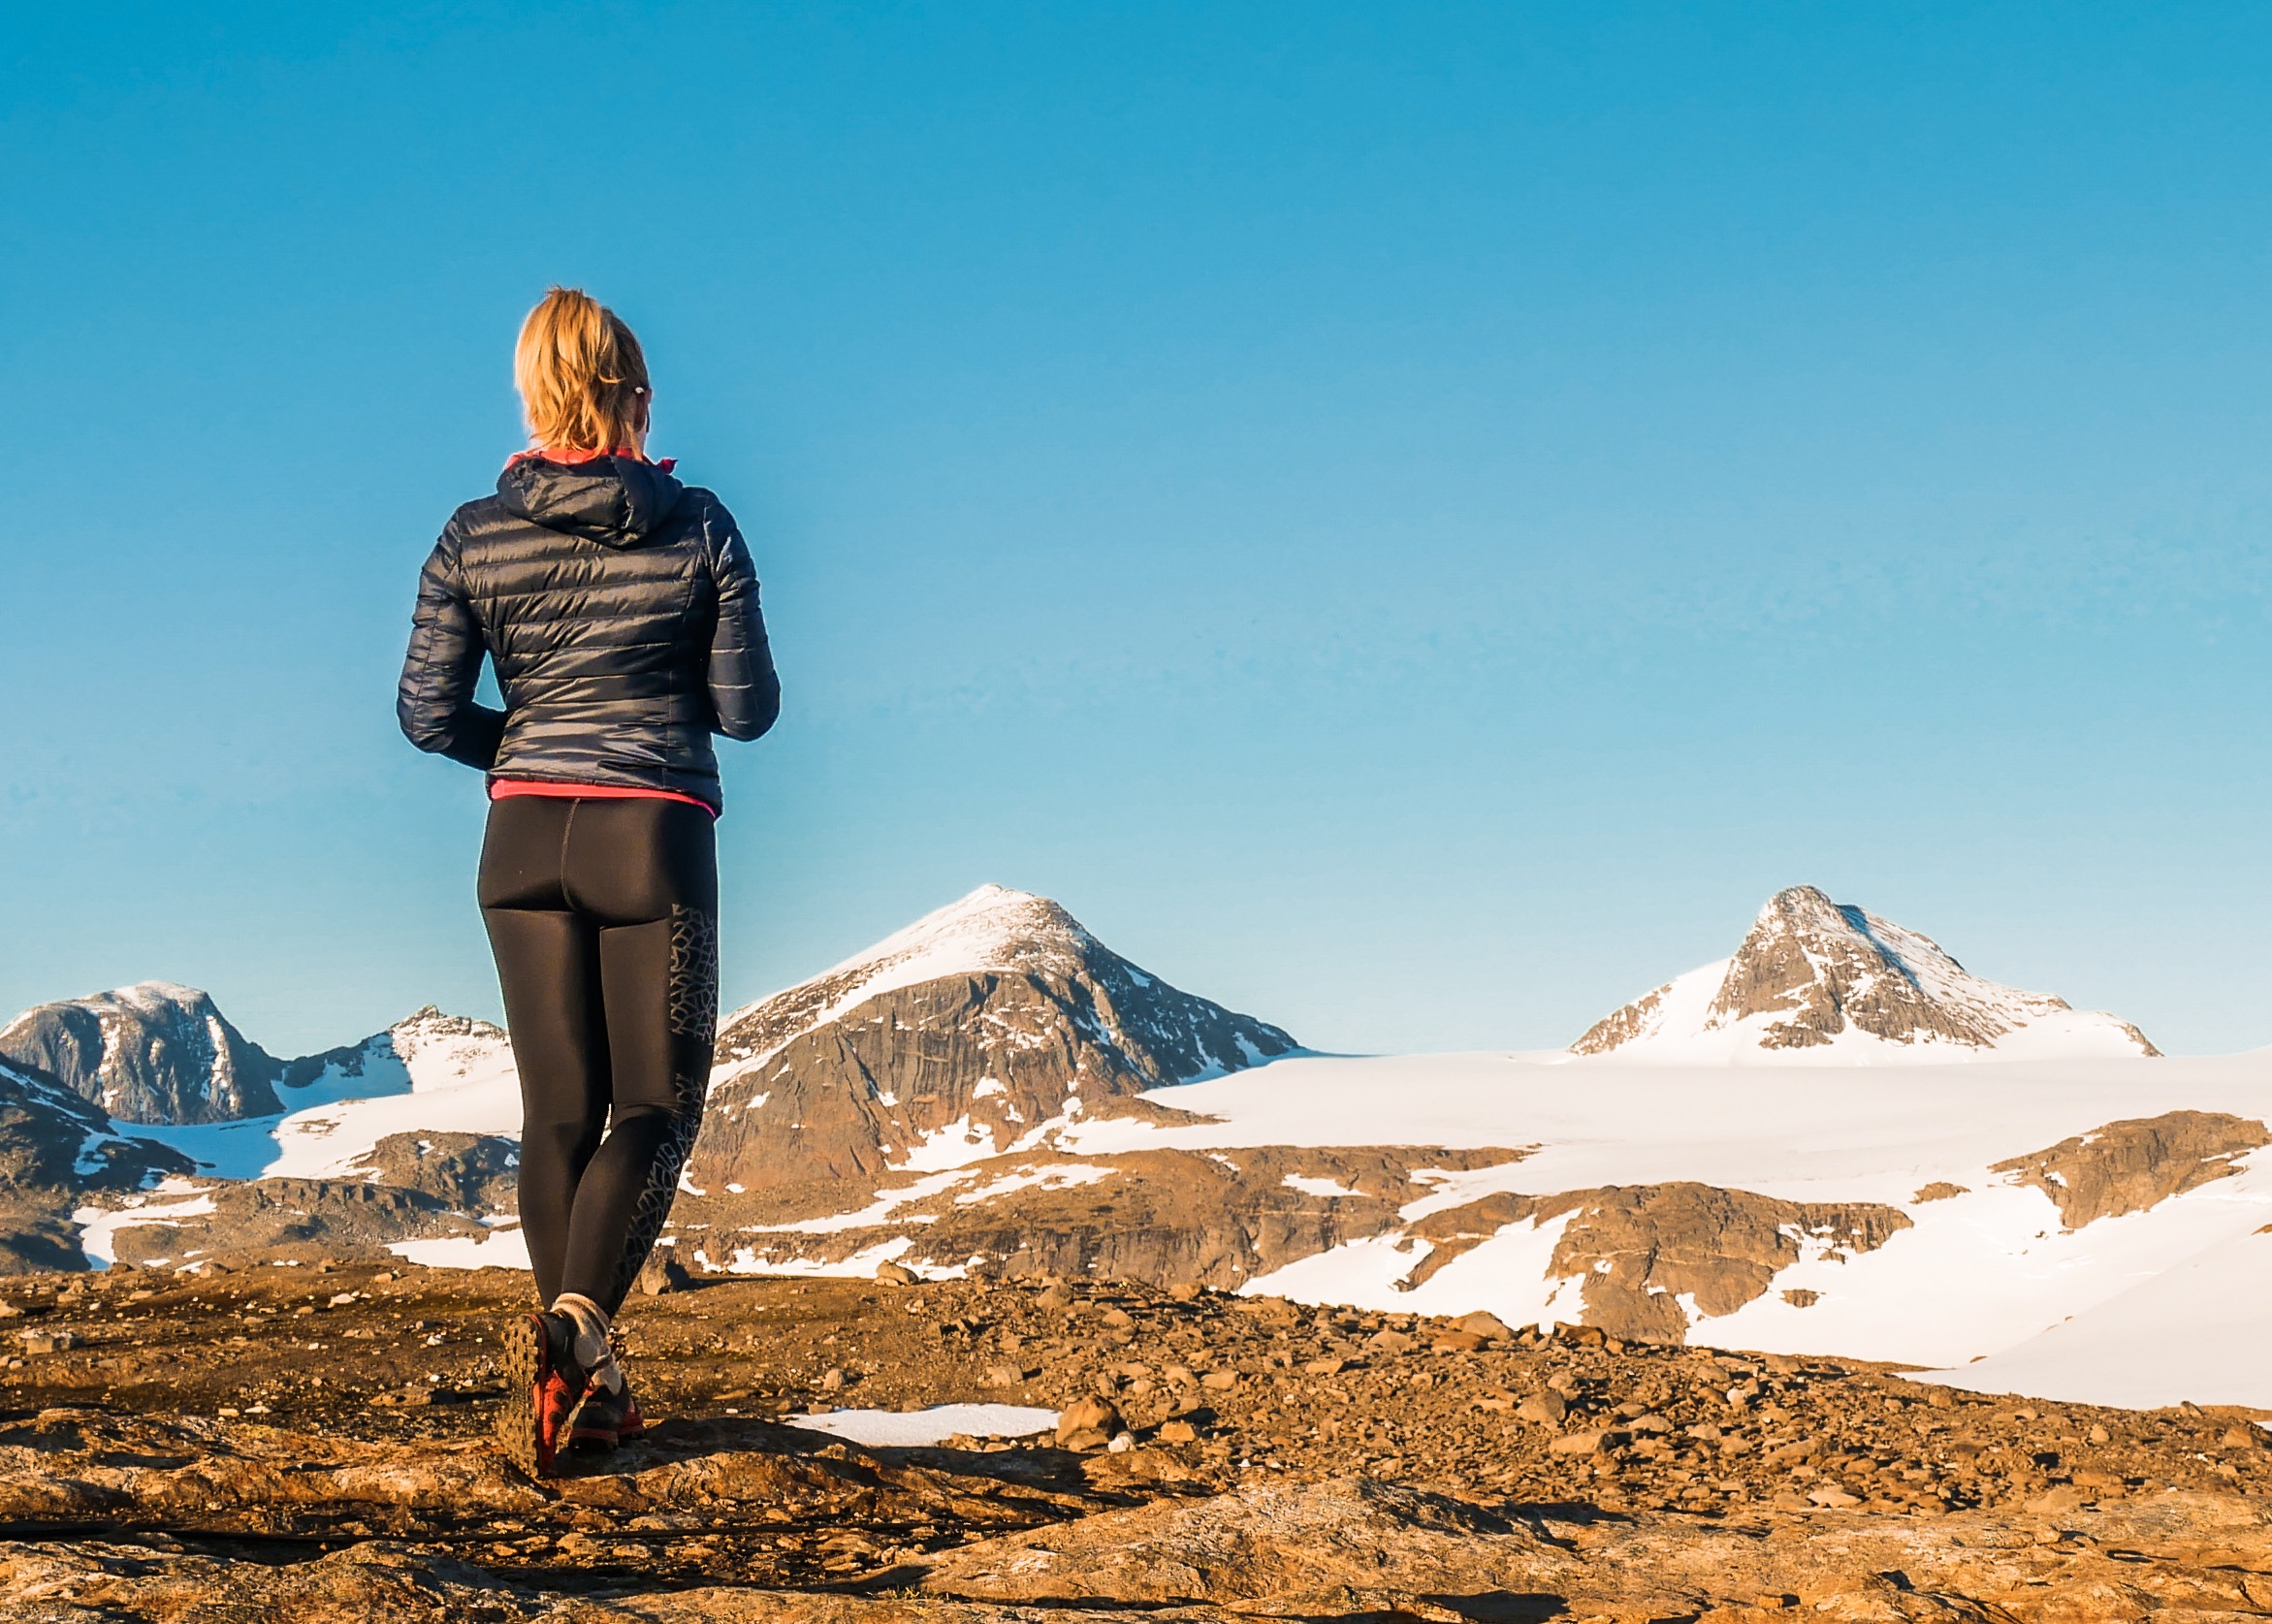
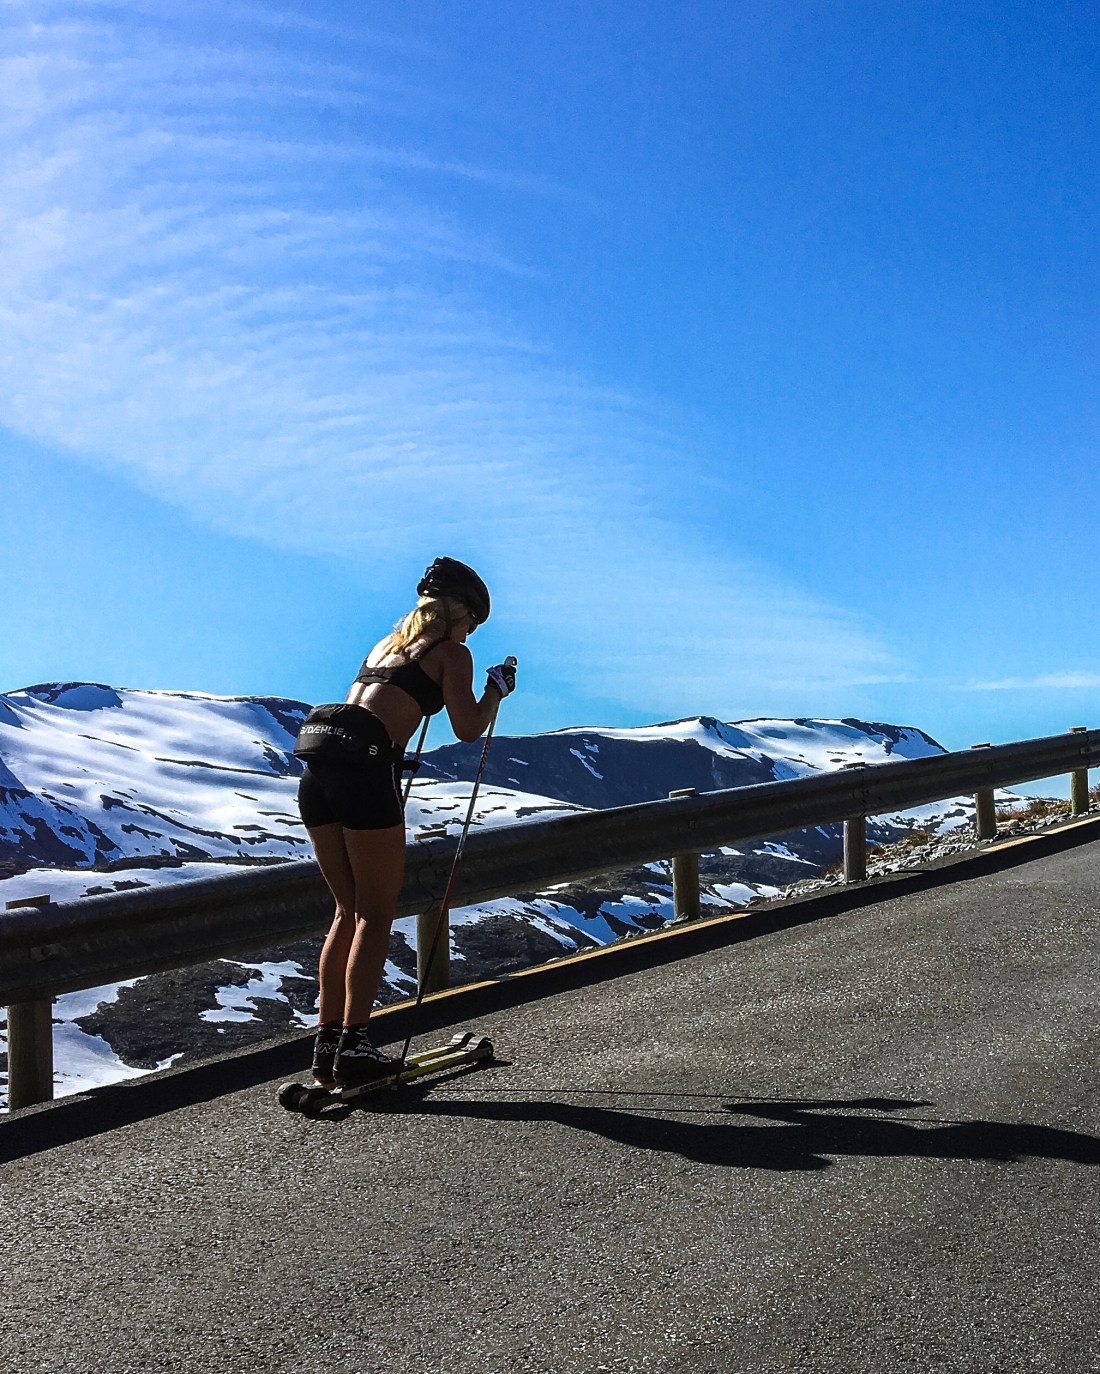
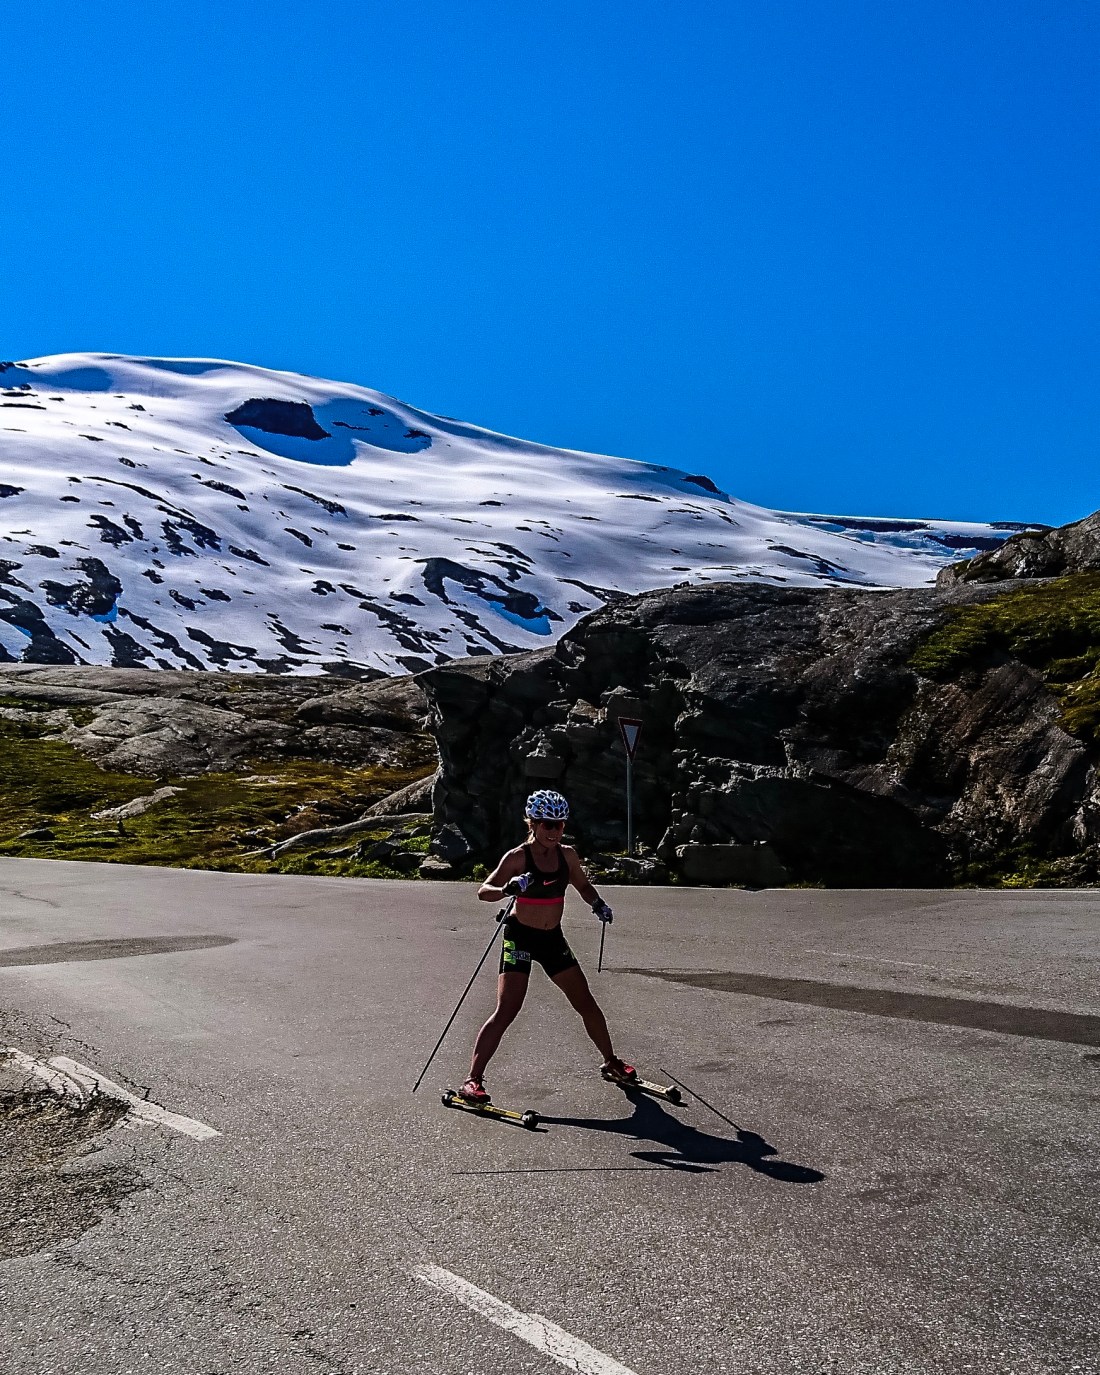
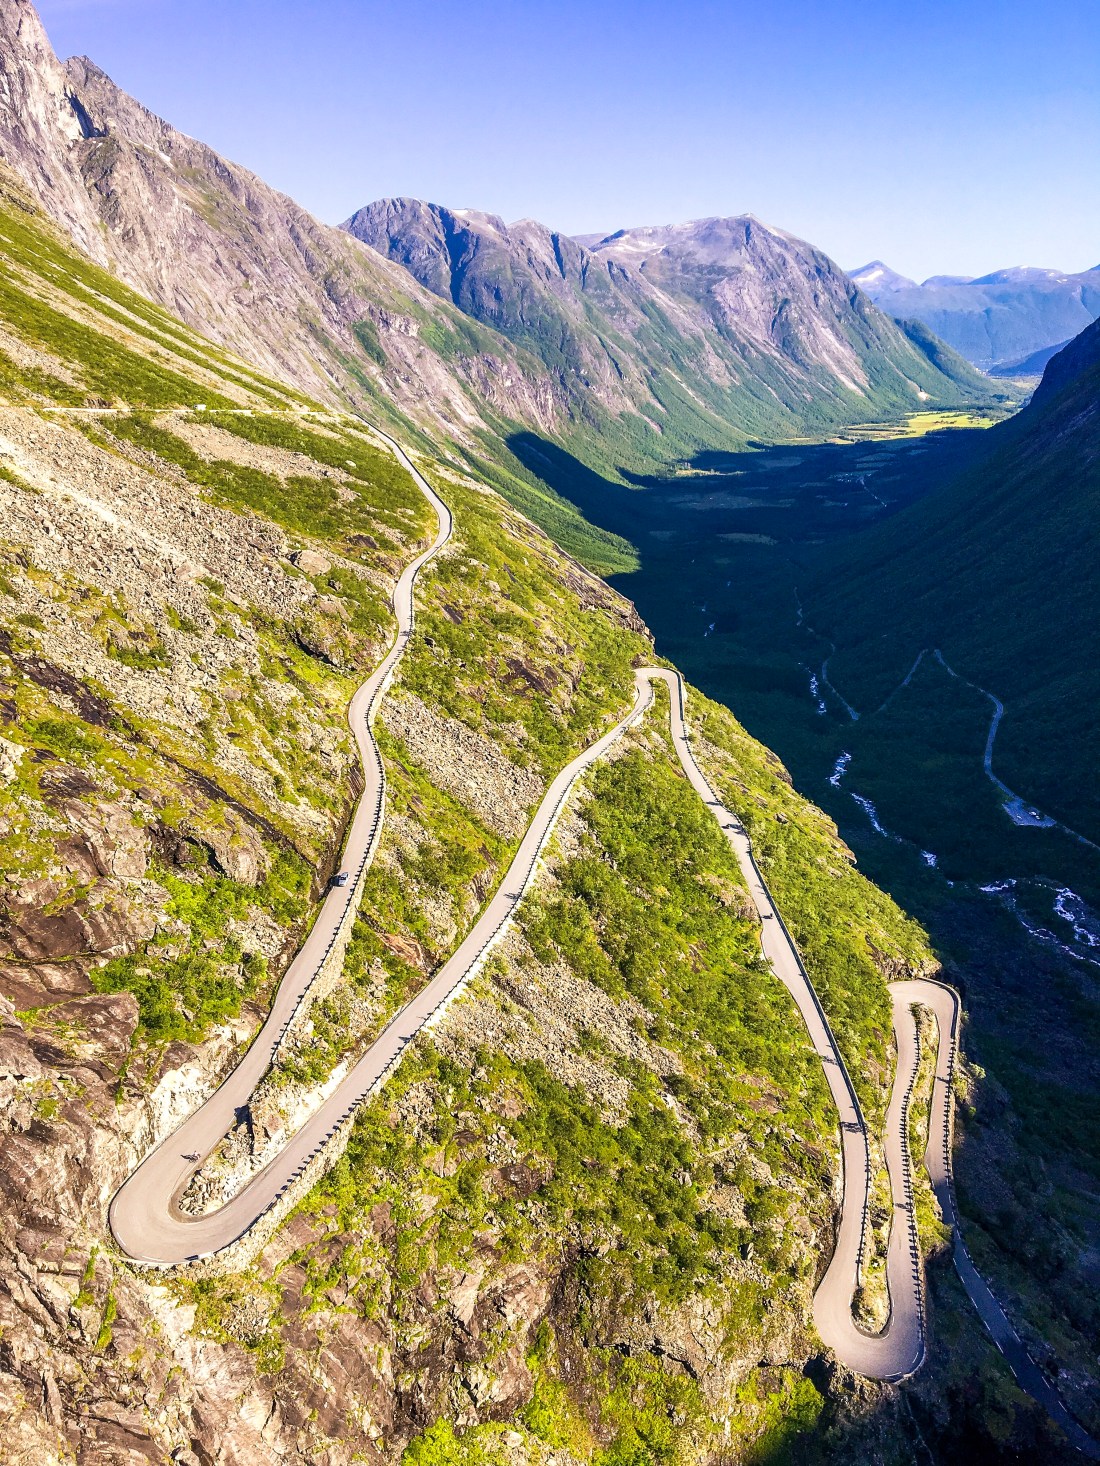
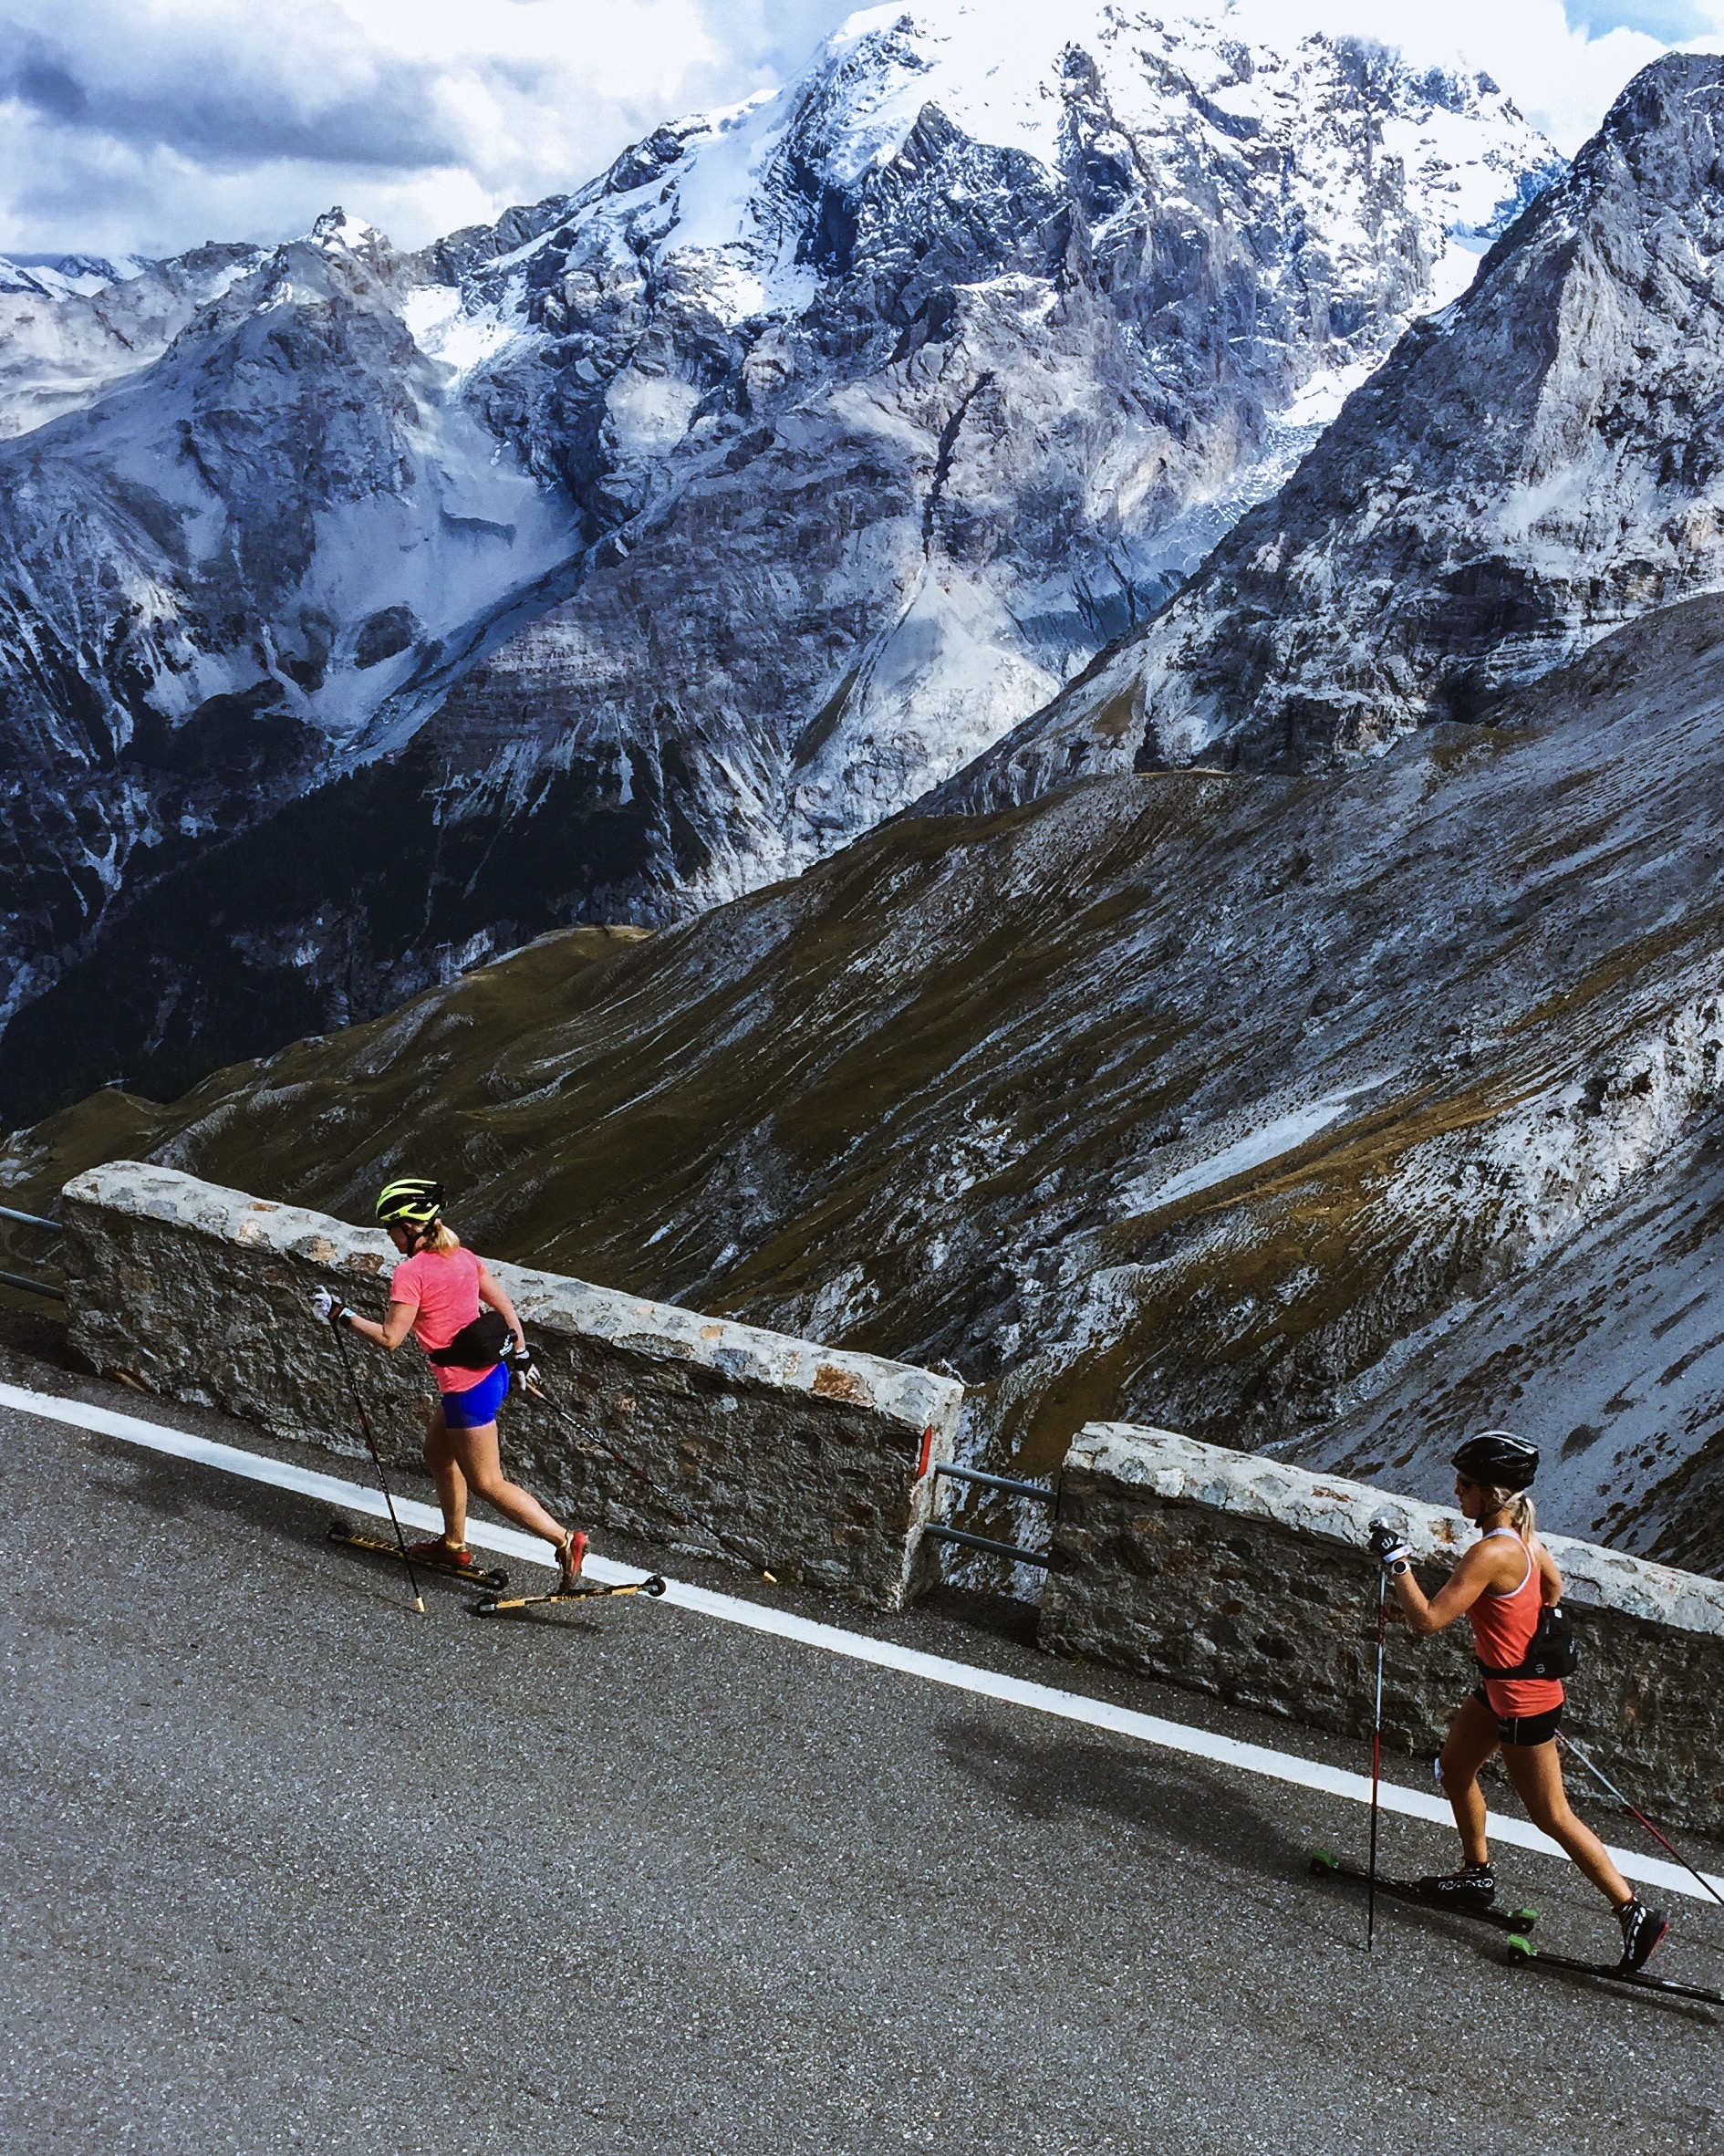
We have a thing for roller skiing mountain passes and with 1500 meters of elevation gain divided on about 21 km, the Dalsnibba climb is one of the toughest ones out there, and the equivalent of for example the Stelvio pass in Italy (which due to the higher altitude may feel tougher). You will be driving down from Dalsnibba the same route as you will roll up, giving you the chance to prepare for what to come. Arriving at your starting point, you will find Geiranger buzzing with tourists, some of which have never seen roller skis before.

IMG_3133 2
Kicks allowed.

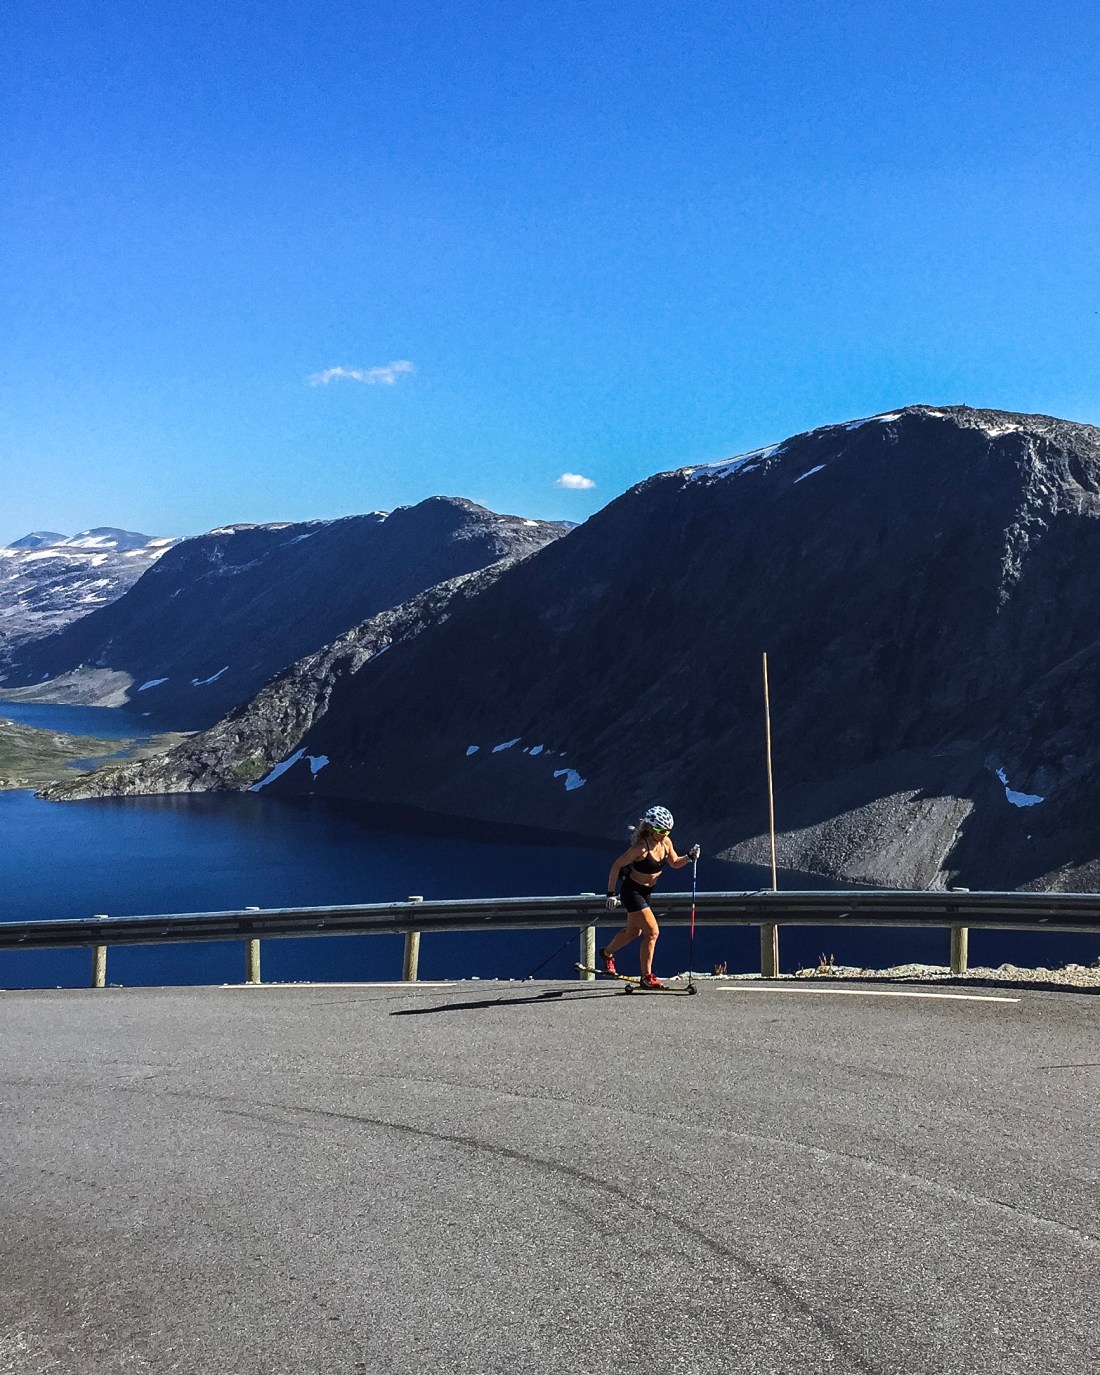
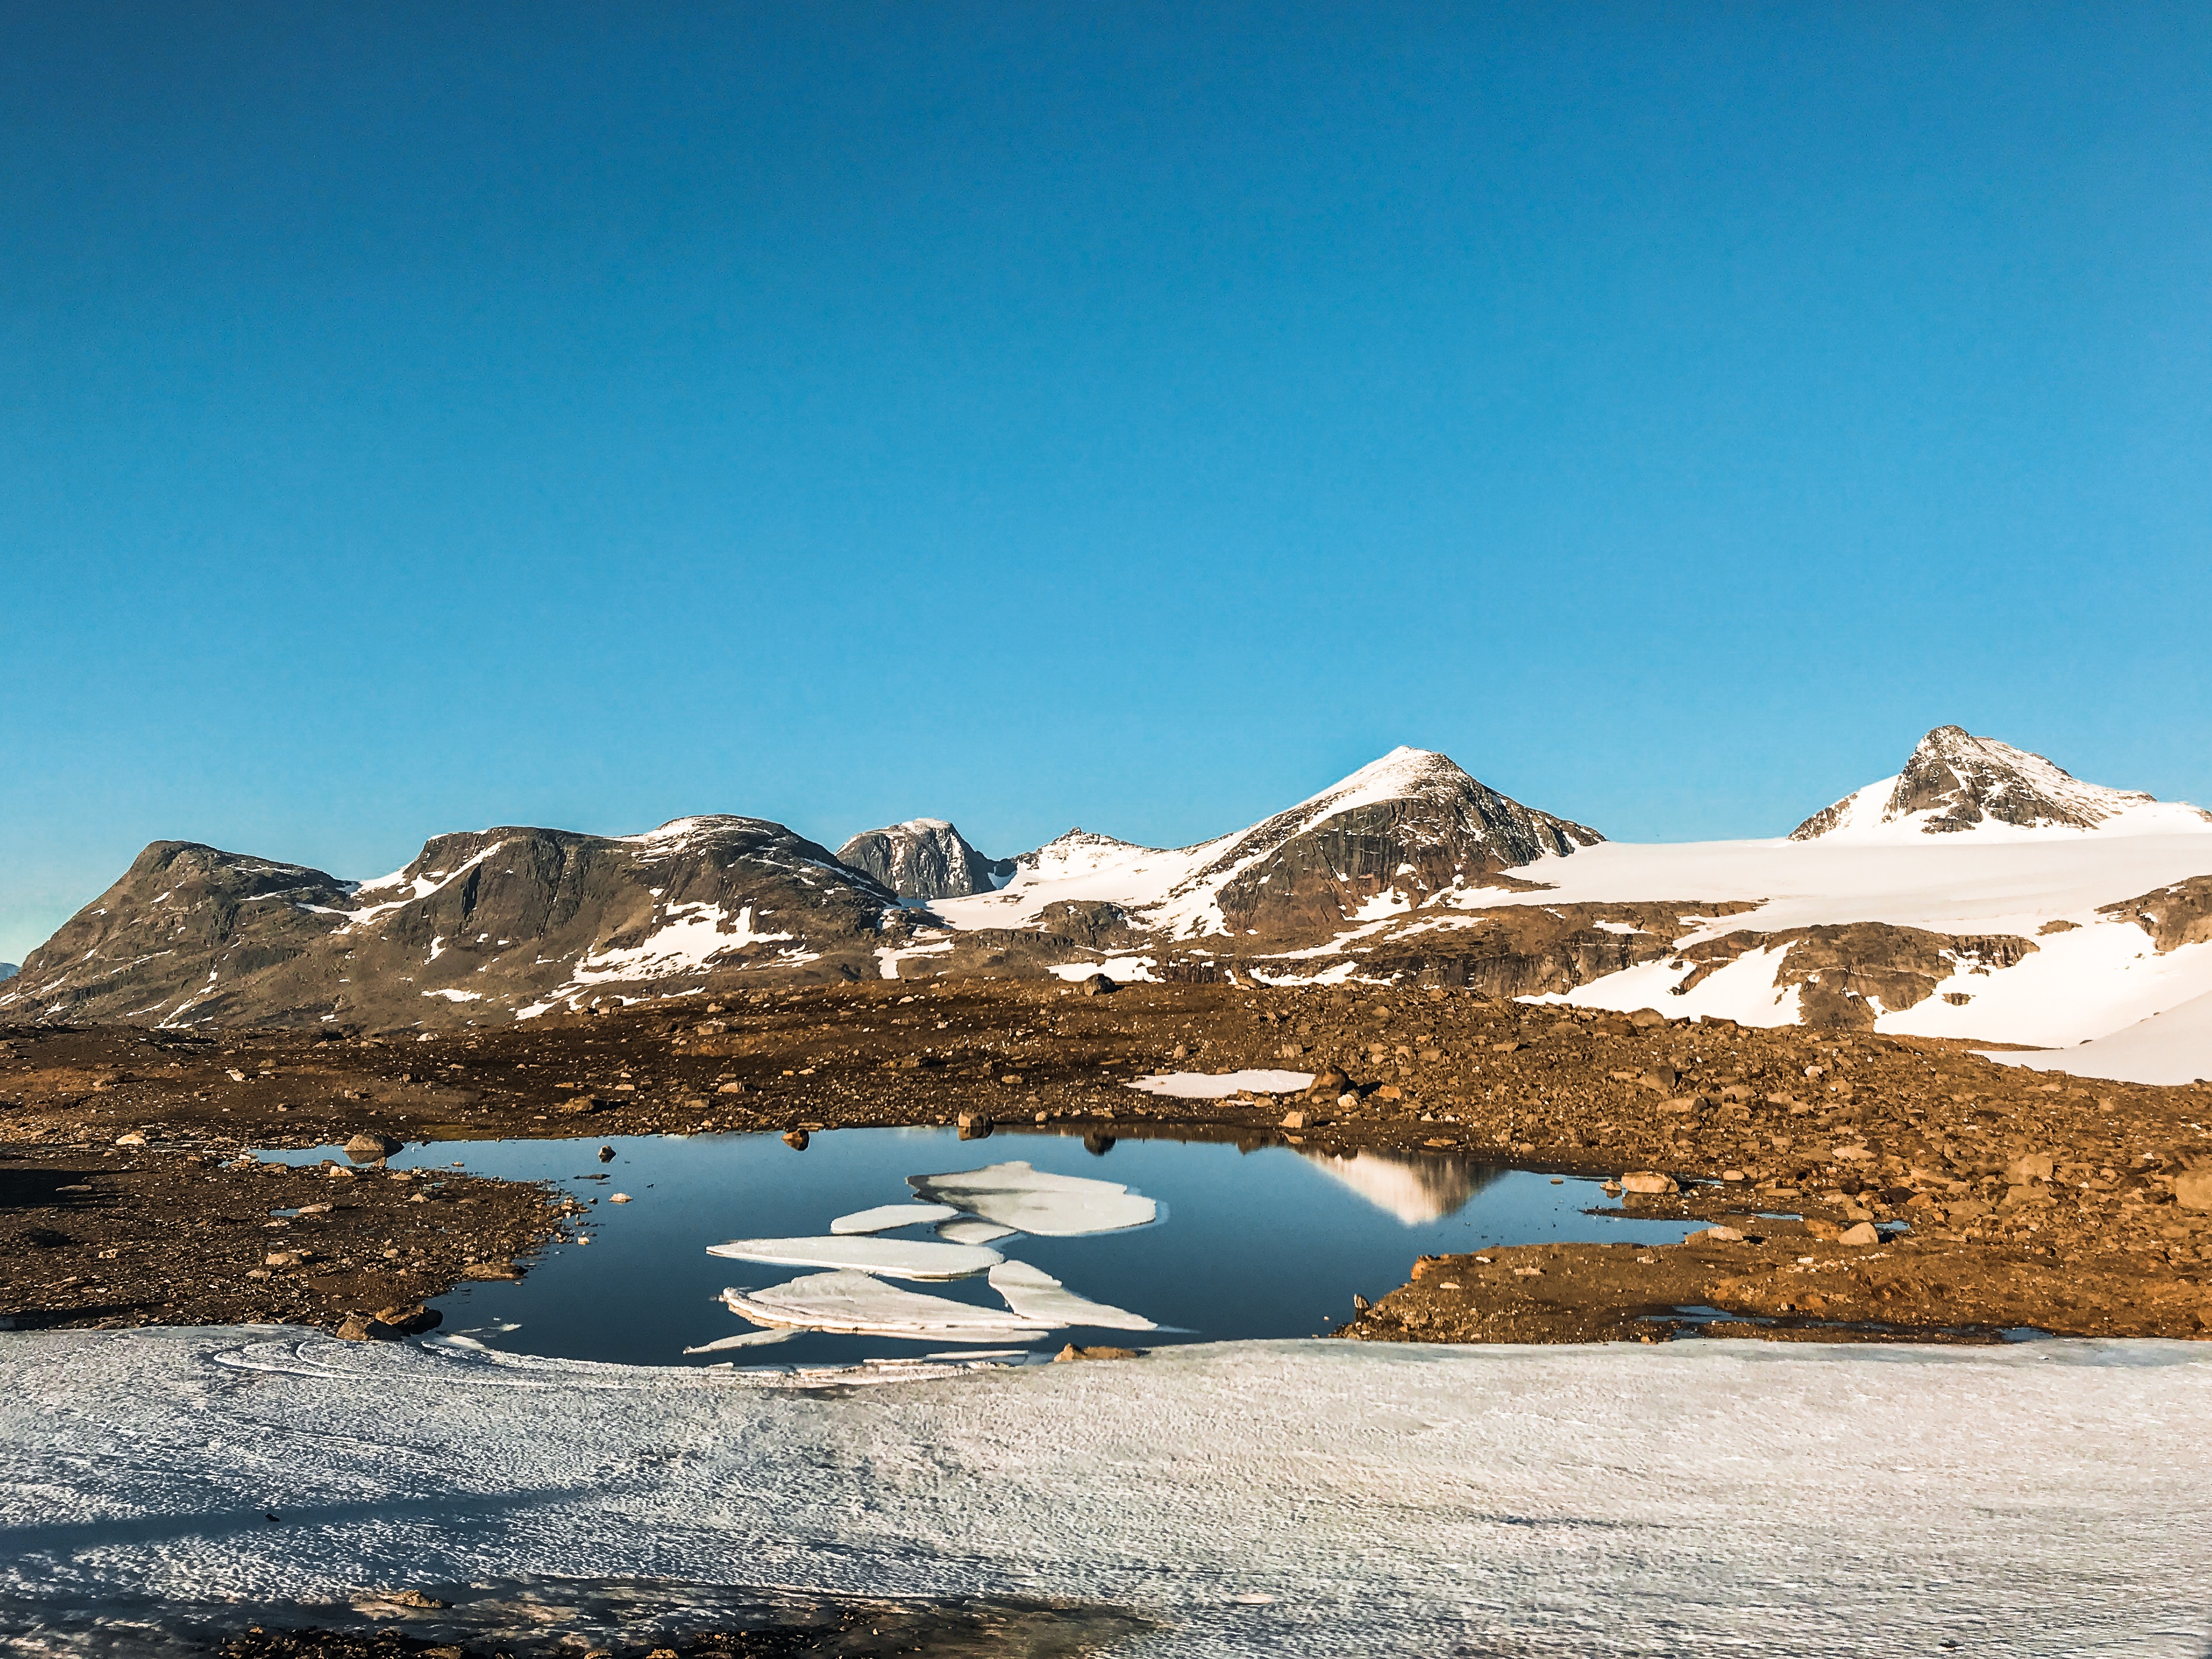
The first part of the climb quickly takes you through hairpin turns to amazing views of the fjord and Geiranger. You may want to stop at Flydalsjuvet, about 4 km from Geiranger to do some gramming. The mid part of the climb has less curves and after about 7 km the landscape opens up and you will see the climb ahead of you as well as beautiful old farmhouses, waterfalls and mountains. After about 16 km you reach Djupvatnet which is at its most scenic when covered with cracks of ice. In the morning and late evening it is possible to go roller skiing on the road along Djupvatnet and towards Grotli, but it is not advisable with the daytime traffic. From Djupvatnet there is another 6 km of nice hairpin turns and fantastic views before you reach Dalsnibba, and probably enjoy the applause from the tourists.

IMG_2077

IMG_1971 4

Strava for details: Dalsnibba rollerski

Driving from Dalsnibba to Valldal

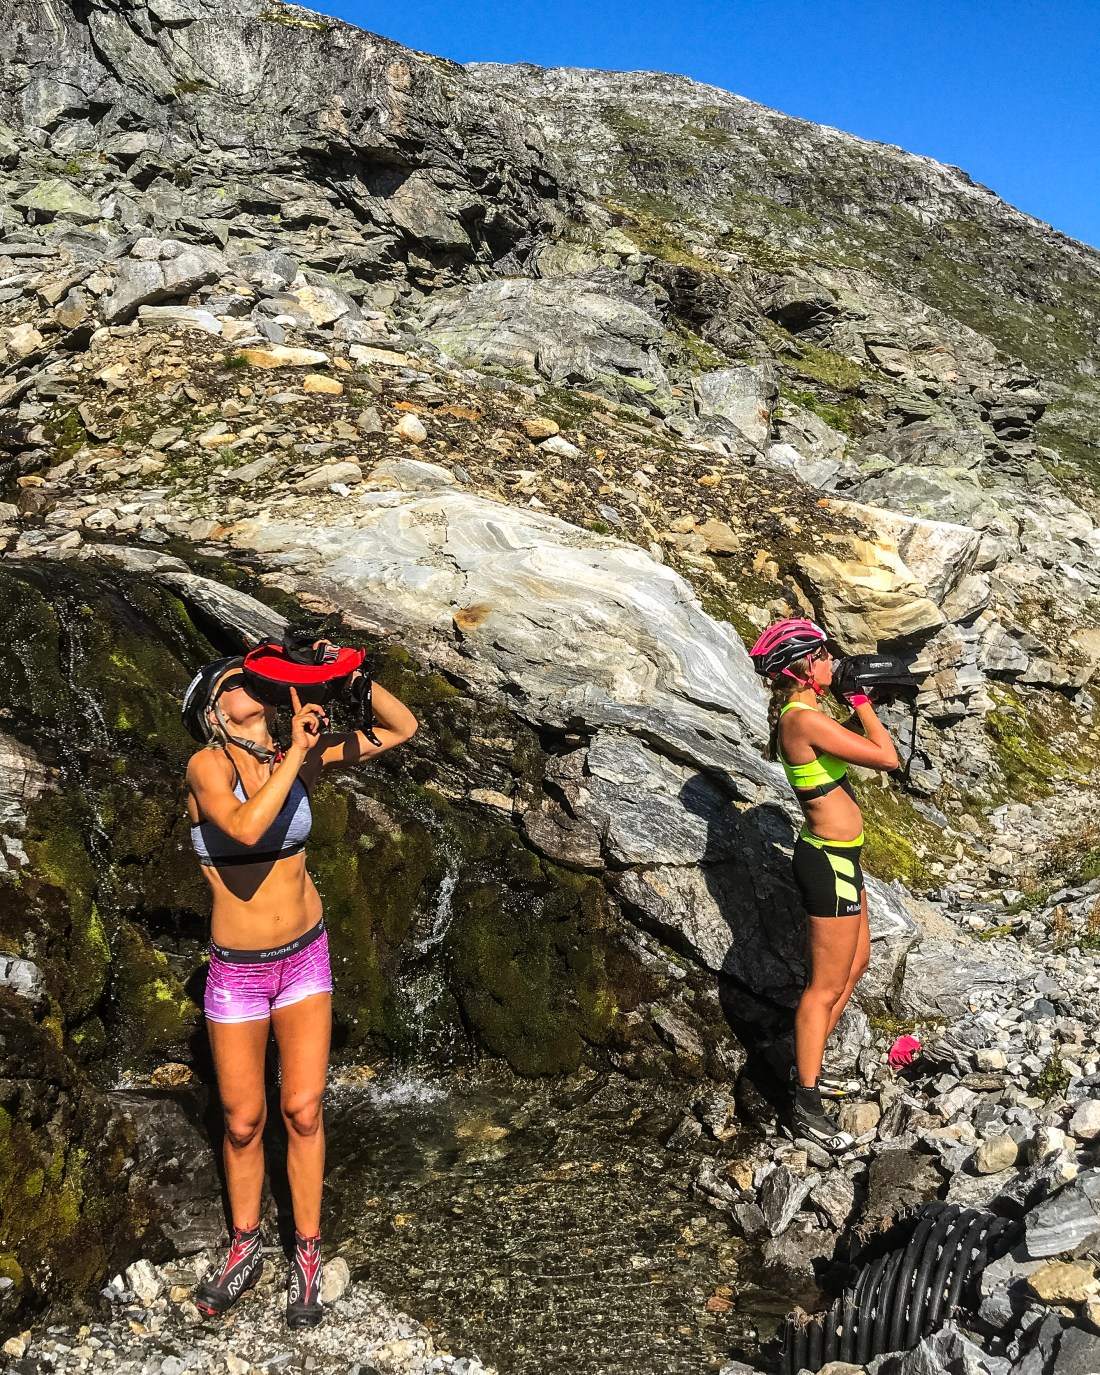
Driving down to Geiranger from Dalsnibba allow time for a refreshing dip in one of the streams just after Djupvatnet and some photographing in the kind afternoon light. If you haven’t already, make a reservation at Brasserie Posten in Geiranger, and enjoy one of their pizzas before a short stroll in Geiranger, which is now much calmer after the departure of all the cruise ship tourists.

IMG_8737

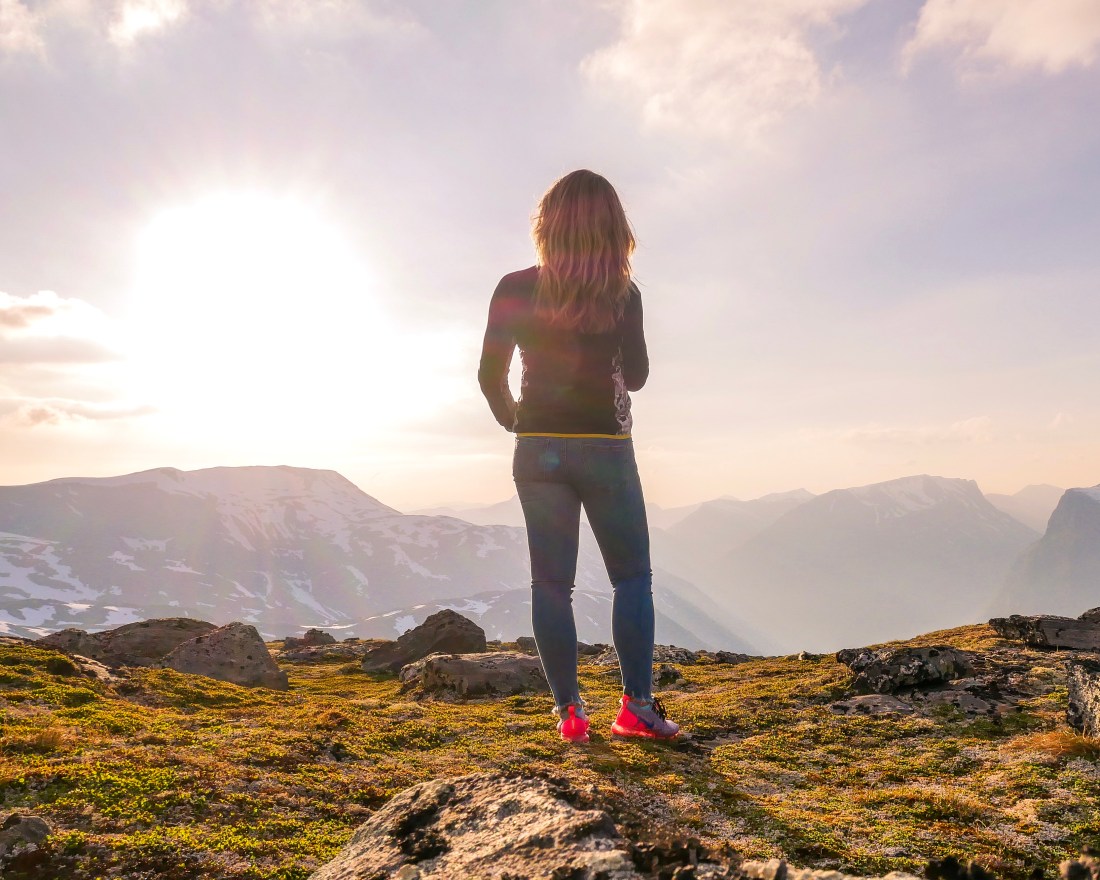
We always stay at Valldal Fjordhotell, which has a great breakfast buffet, good beds and a calm and nice atmosphere. There are also other options in Valldal, which is conveniently located between Geiranger and Trollstigen. The drive from Geiranger to Trollstigen is one of the 18 Norwegian Scenic Routes and you will do the first part of this route on your way to Valldal, which takes about one hour including a short ferry between Eidsdal and Linge. Make sure you allow time for a quick stop at Ørnesvingen, a cool view point above Geiranger on the toad to Valldal, providing you with a view of the fjord, Geiranger and the “Seven Sisters” waterfall.

Driving from Valldal to Trollstigen

IMG_2114
Trollstigen view point.

Next day you should have an early start. The hotel usually start putting out the breakfast before the scheduled opening, and you may want to ask to come early, depending on your choice of activity this day. You will be provided with two options here. If you want to do the Romsdalseggen hike, you need to be in Åndalsnes for the bus at 9:30 (or 10:30 Saturdays peak season). The drive to Åndalsnes is about 1:30. If you are not doing the express version of this road trip and have some more time, I would suggest adding one night in Åndalsnes after Valldal, and take the Romsdalseggen hike the next day. This will allow for a stop at Gudbrandsjuvet view point and more time to truly appreciate the scenic drive from Valldal to Trollstigen. Of course Trollstigen is more famous, but the drive up to the Trollstigen pass from the south side is also worth taking in (and I of course dream rollerskiing up also from this side one day).

Store Trolltind

IMG_2080 2
Barbro, Maren and me at the ridge where we had made the wrong turn.

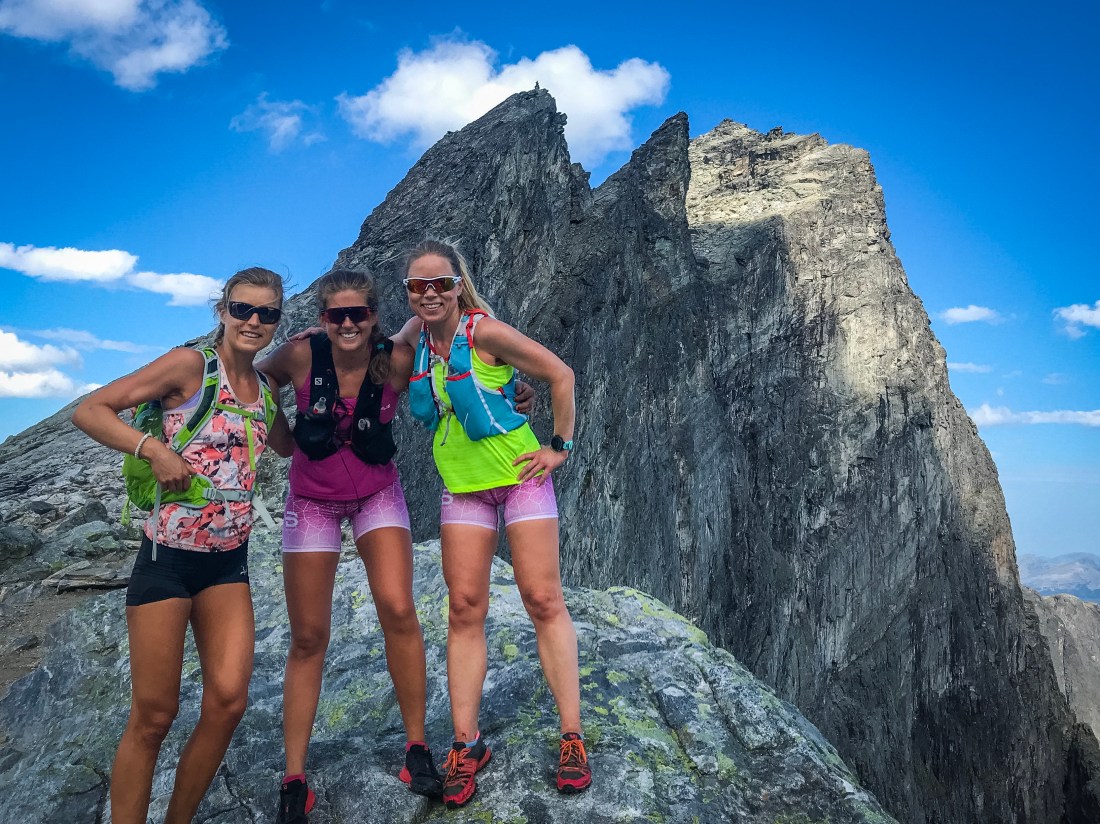
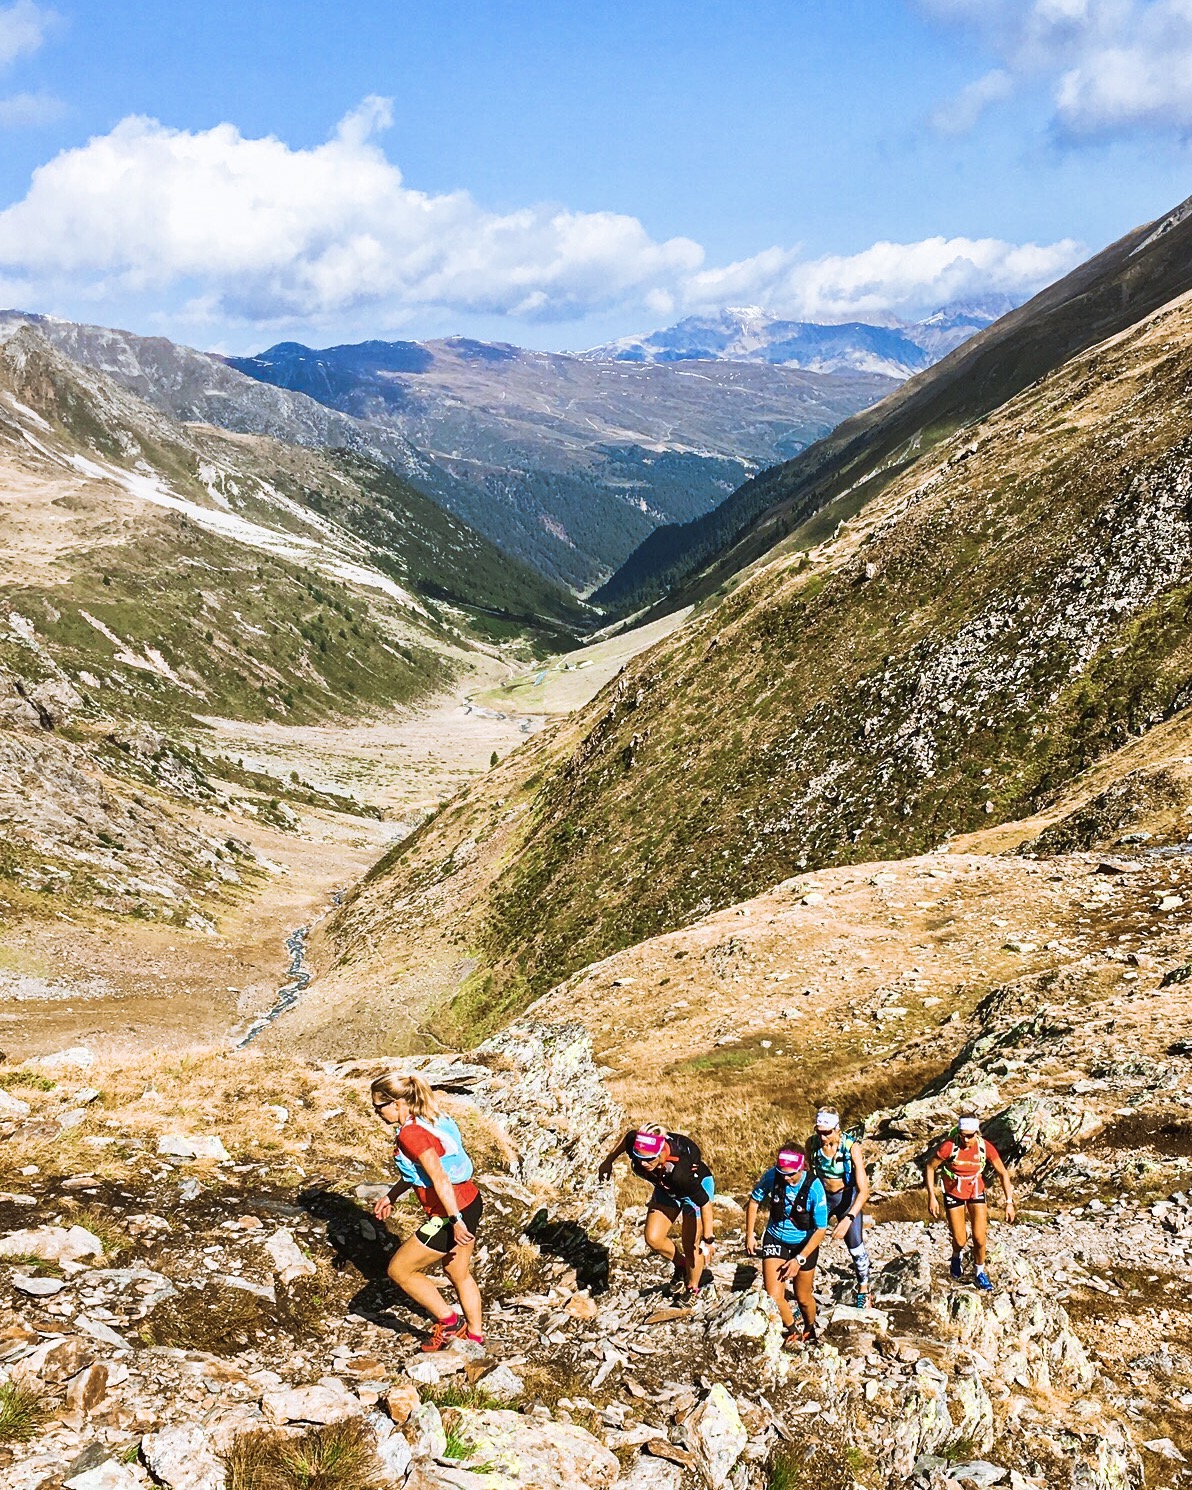
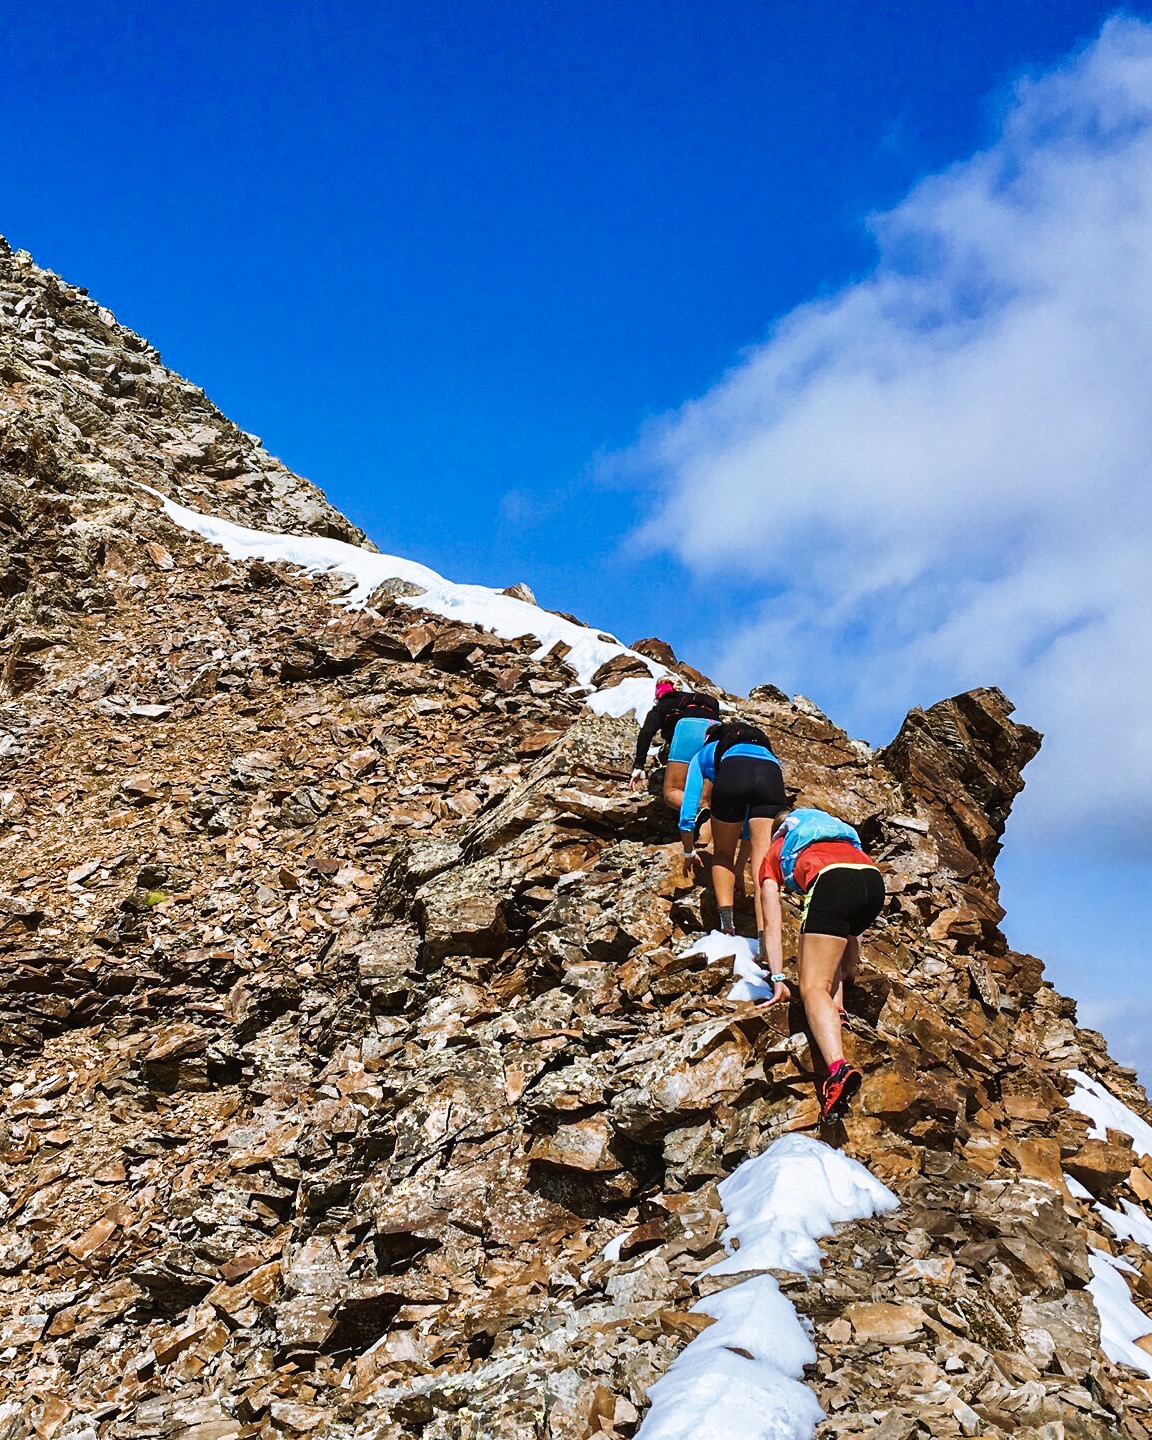
One of the mountain runs we have explored is the peak, “Store Trolltind”. With 1788 m.a.s.l. this is one of the highest peaks in Romsdalen and with steep climbs and a lot of stone and exposed areas, a hike which may be characterized as pretty hard. The views from the top and from Bruraskaret will be worth it though.

IMG_2101
At Store Trolltind, 1788 m.a.s.
IMG_2095
Maren at the top!

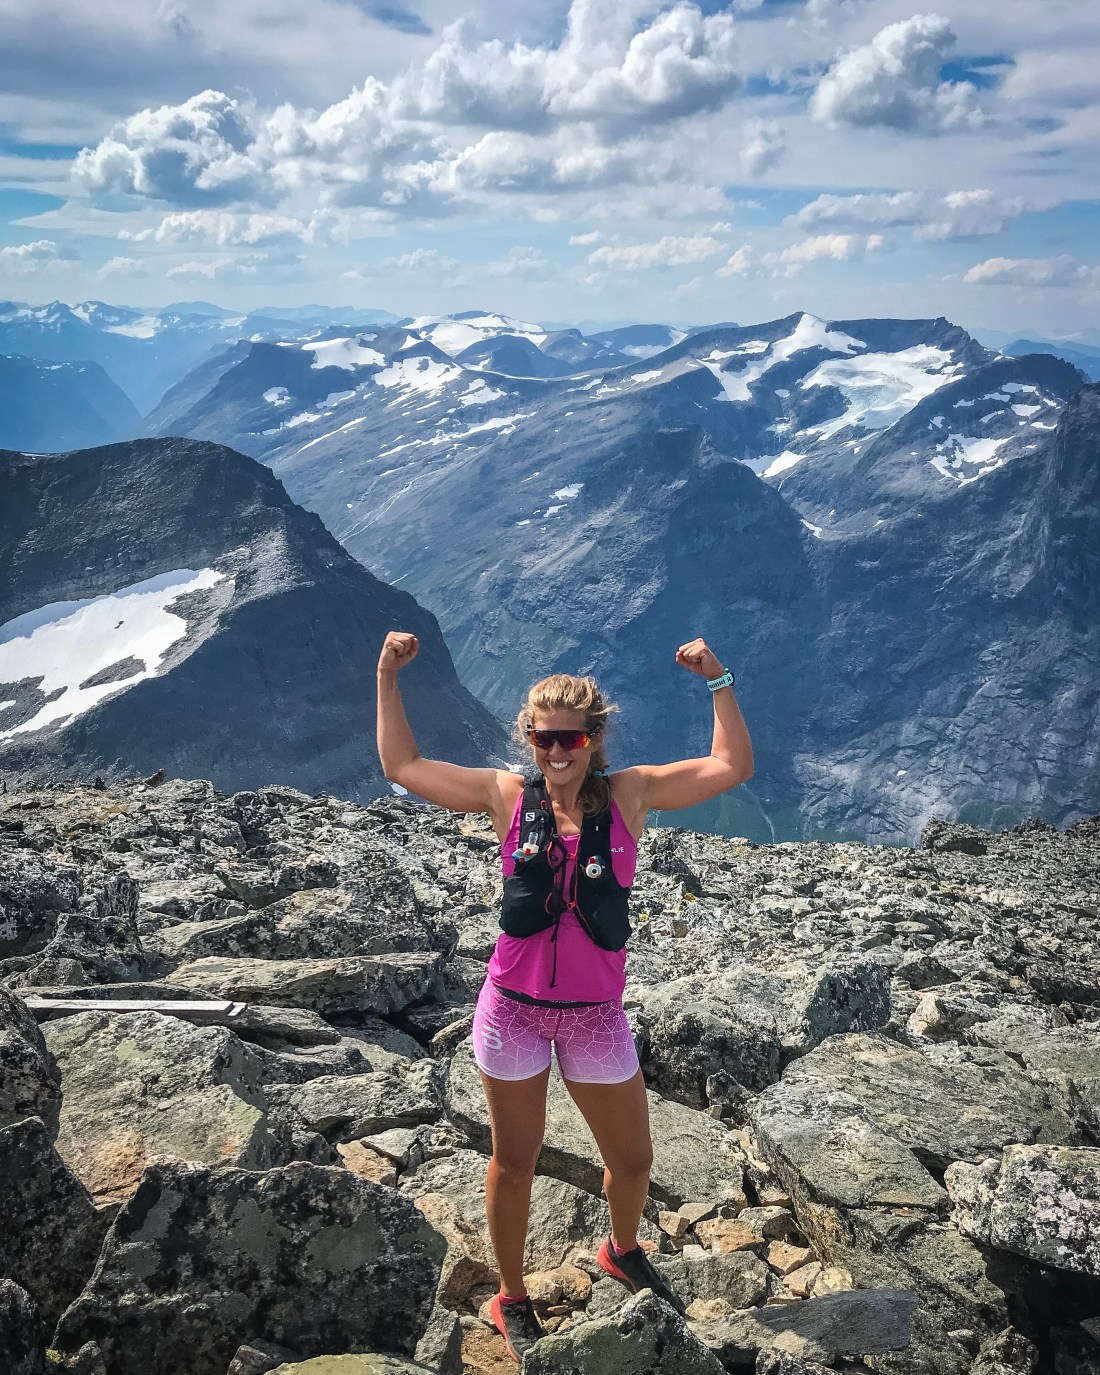
You will find the trailhead at Trollstigen. Already from the start the climb is steep and you will have great views of the Trollstigen plateau and its surrounding peaks behind you. After about two km there is some sort of a junction where you should keep left (you will see from the strava link provided that we went right on our way up, which turned out to be wrong). After about 4.7 km (if you made the right left choice at 2 km) it is easy to go wrong and take too much height. Everyone we met did the same mistake, which, if you do not go all the way down again, easily make you traverse through a very difficult terrain to get back to the trail. Have a look at the strava link and make sure to take the right path to your left, which is the one we returned on. Additional guidance may be found here (Norwegian). The most fun, and also the most challenging part, comes after Bruraskaret, where you have the view of the famous Trollveggen. A helping hand may be useful at some difficult passages. This turned out to be a hike/run very different from our expectations, although a very rewarding one in terms of the spectacular views at the top.

Strava for details: Store Trolltind
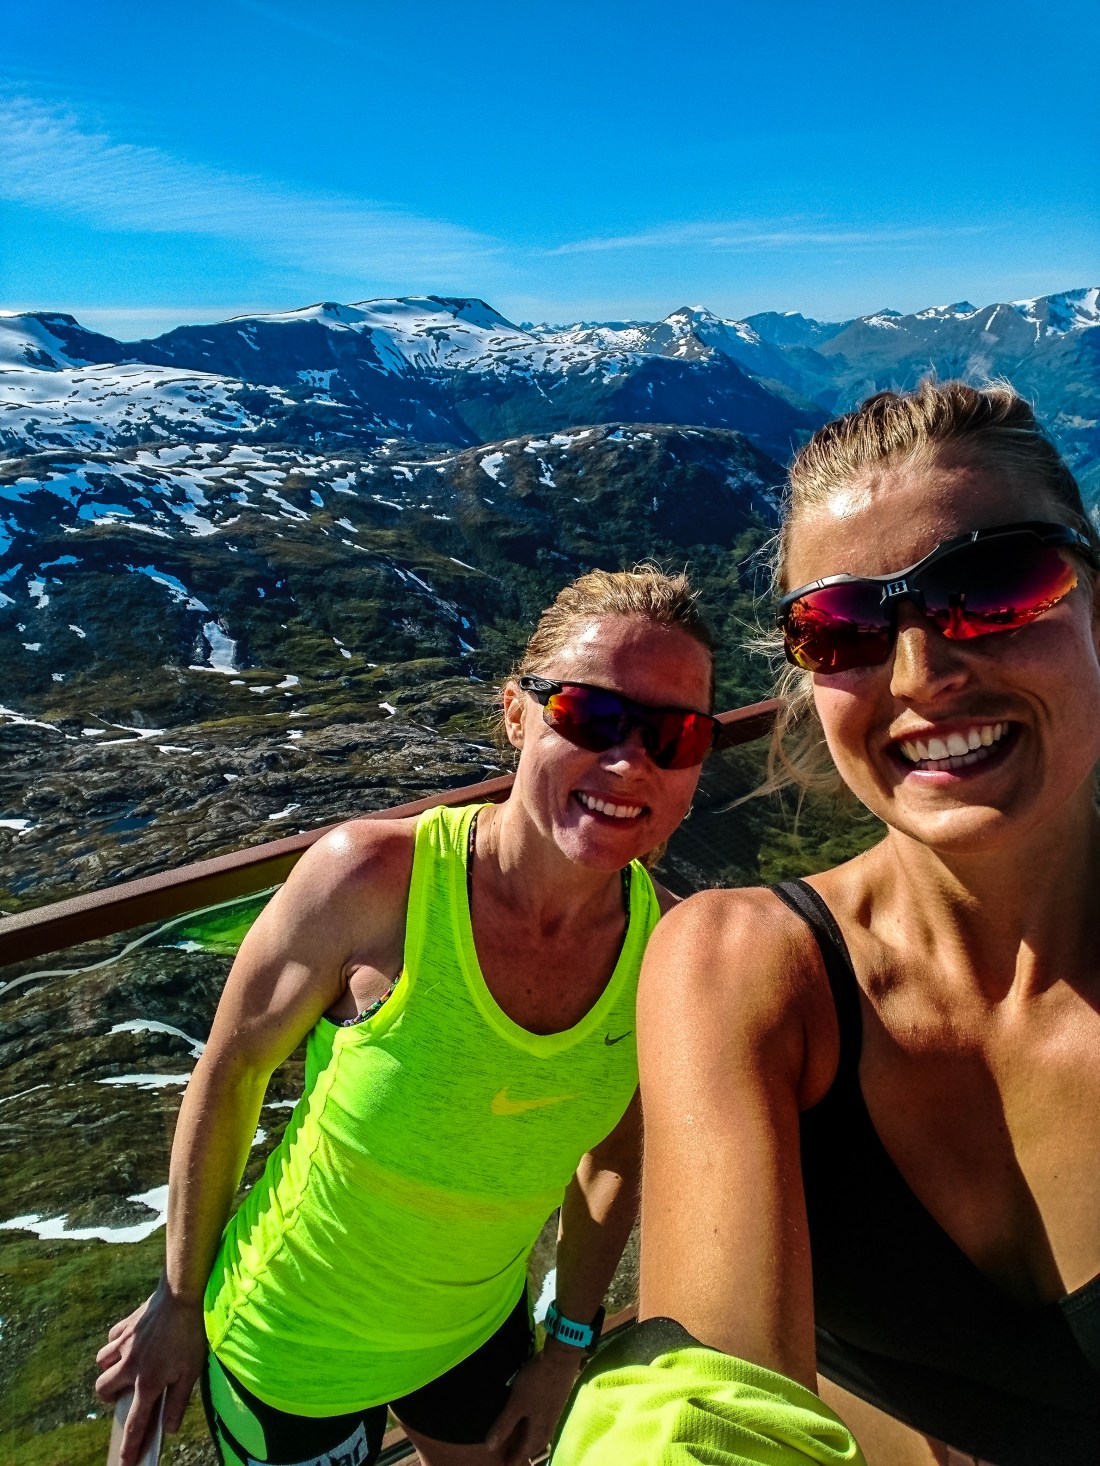
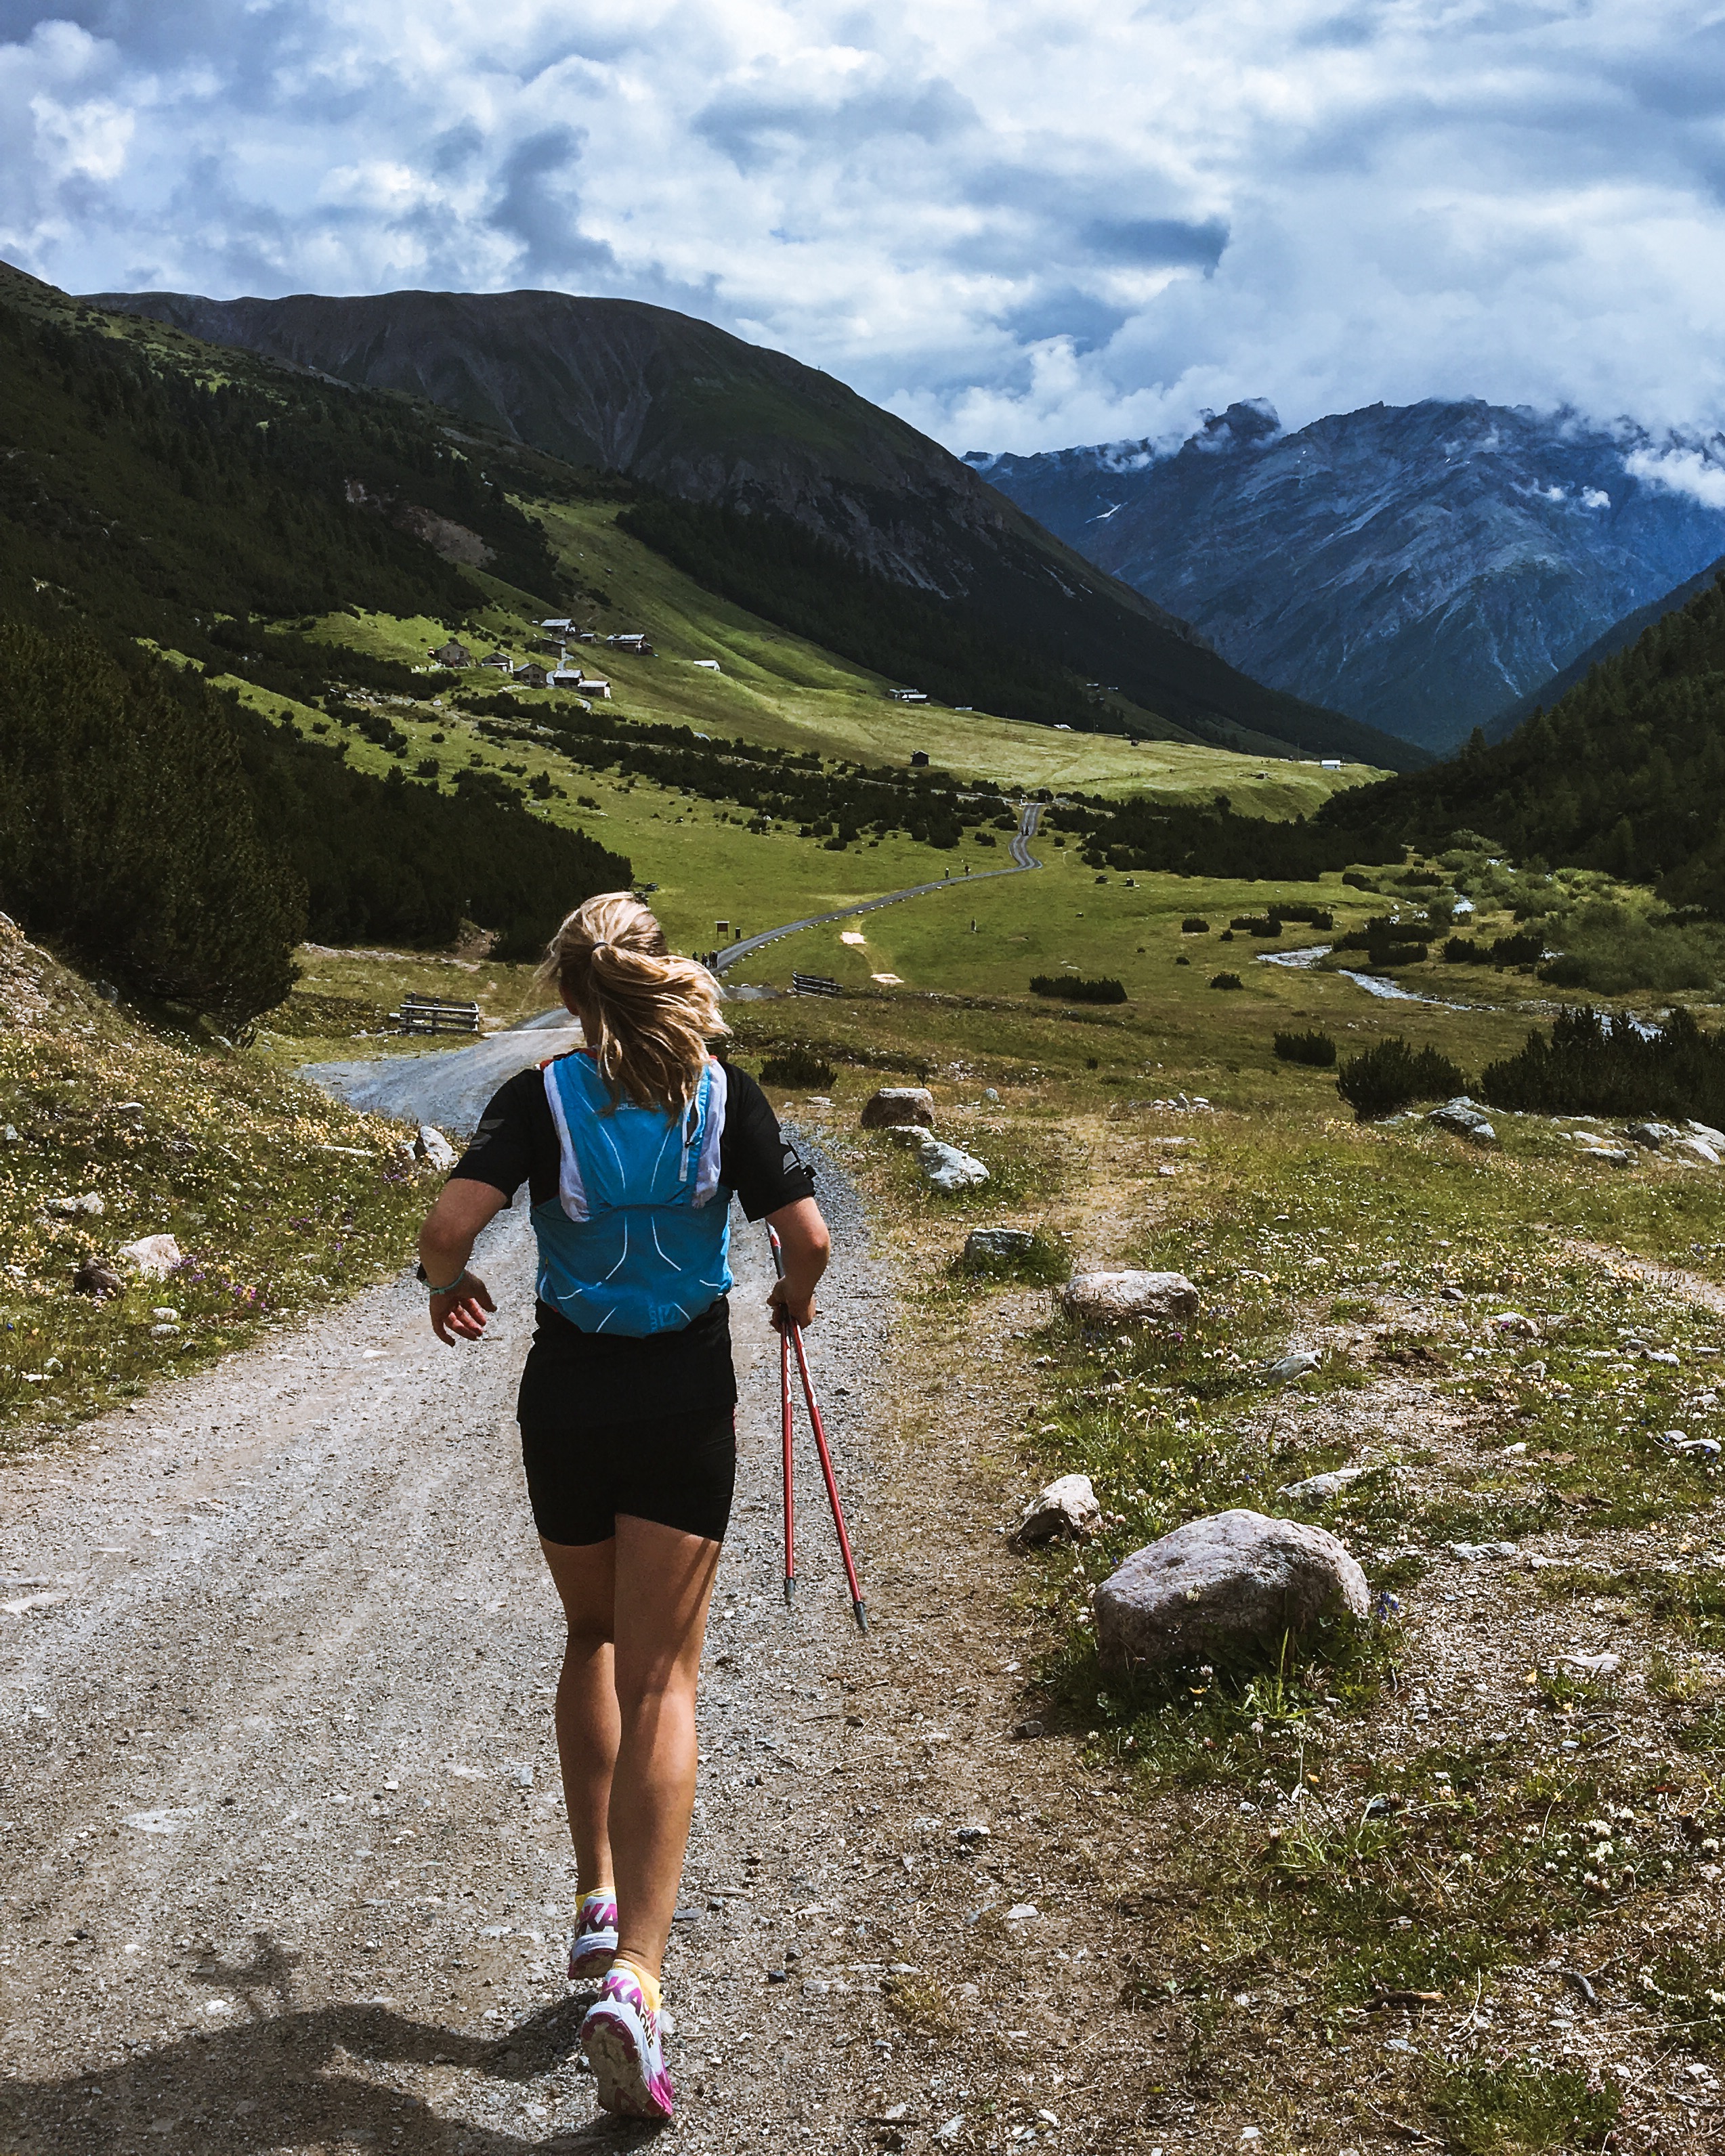
Romsdalseggen

Romsdalseggen in the obvious choice of run/hike when in the Åndalsnes/Trollstigen area and has become very popular over the last years thanks to successful promotion from the local tourist agency. This is a one-way hike, where you should take advantage of the bus from Åndalsnes to the trailhead. Booking in advance is recommended.

IMG_2093
Surrounded by mountains on Romsdalseggen.

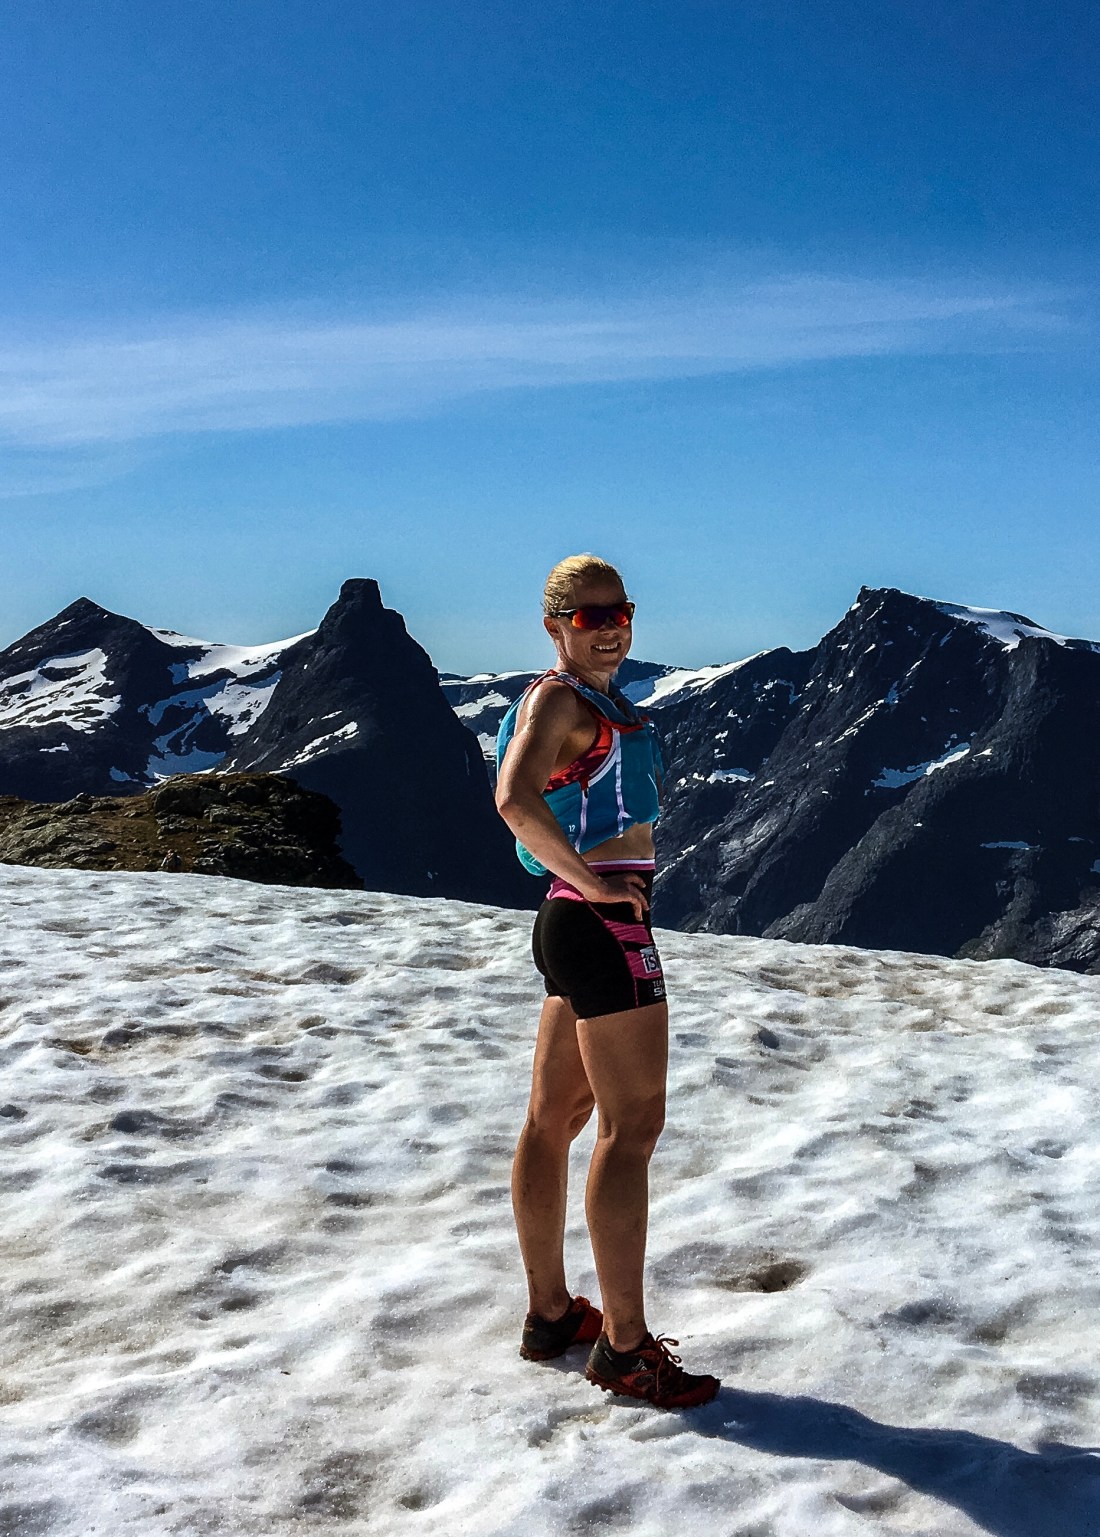
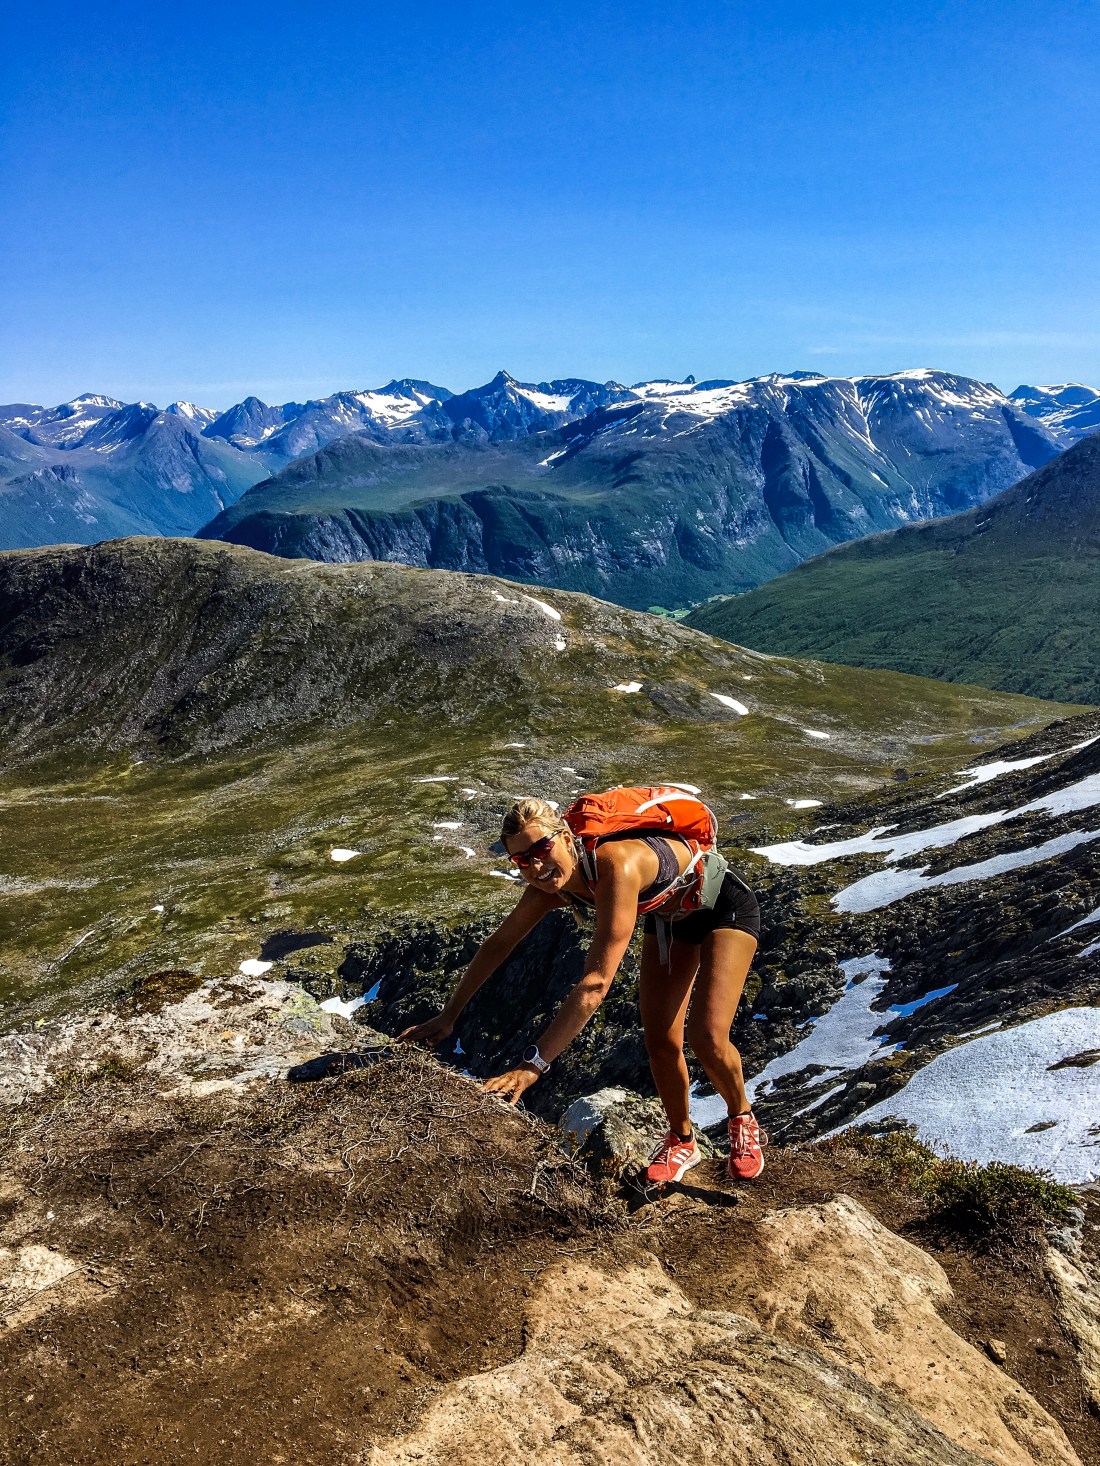
Once at the trailhead try to get ahead of the pack to avoid being slowed down by queues on the narrow trail. It get pretty steep immediately and continues up, up, up for about 3.5 km, where you can enjoy great views of Romsdalen and the surrounding mountains. If you are lucky, there may even be some snow left on the plateau. Before continuing on the Romsdalseggen trail towards your right, you may choose to explore Blånebba to your left. Continuing on the Romsdalseggen trail you are more or less done with the ascents with the exception of a few exposed climbs along the ridge. If you skip Blånebba the 1200 meters of descent over about 6 km starts after about 5 km on the trail from your starting point. Since the trail passes the famous viewpoint Rampestreken (at 537 m.a.s.) the trail gets pretty crowded the last few kilometers down to Åndalsnes.

Strava for details: Romsdalseggen

IMG_2298
Barbro at the ridge.

Trollstigen

The second challenge of the day is the Trollstigen climb on roller skis. You may of course choose to tackle the climb by bike or try out the trails that take you to the Trollstigen plateau. Compared to the Dalsnibba climb, the Trollstigen climb is like a sweet dessert, and, if done after the traffic has slowed down in the evening, feels like the perfect way to finish off a day of great climbs. We usually start from Trollstigen Camping, about 9.5 km from the Trollstigen plateau. Again, if you have two cars, take one down to the starting point and leave one at the top. If not, ask someone for a lift or plan it by the bus schedule.

IMG_2111
Instagramming at a random waterfall in Trollstigen.

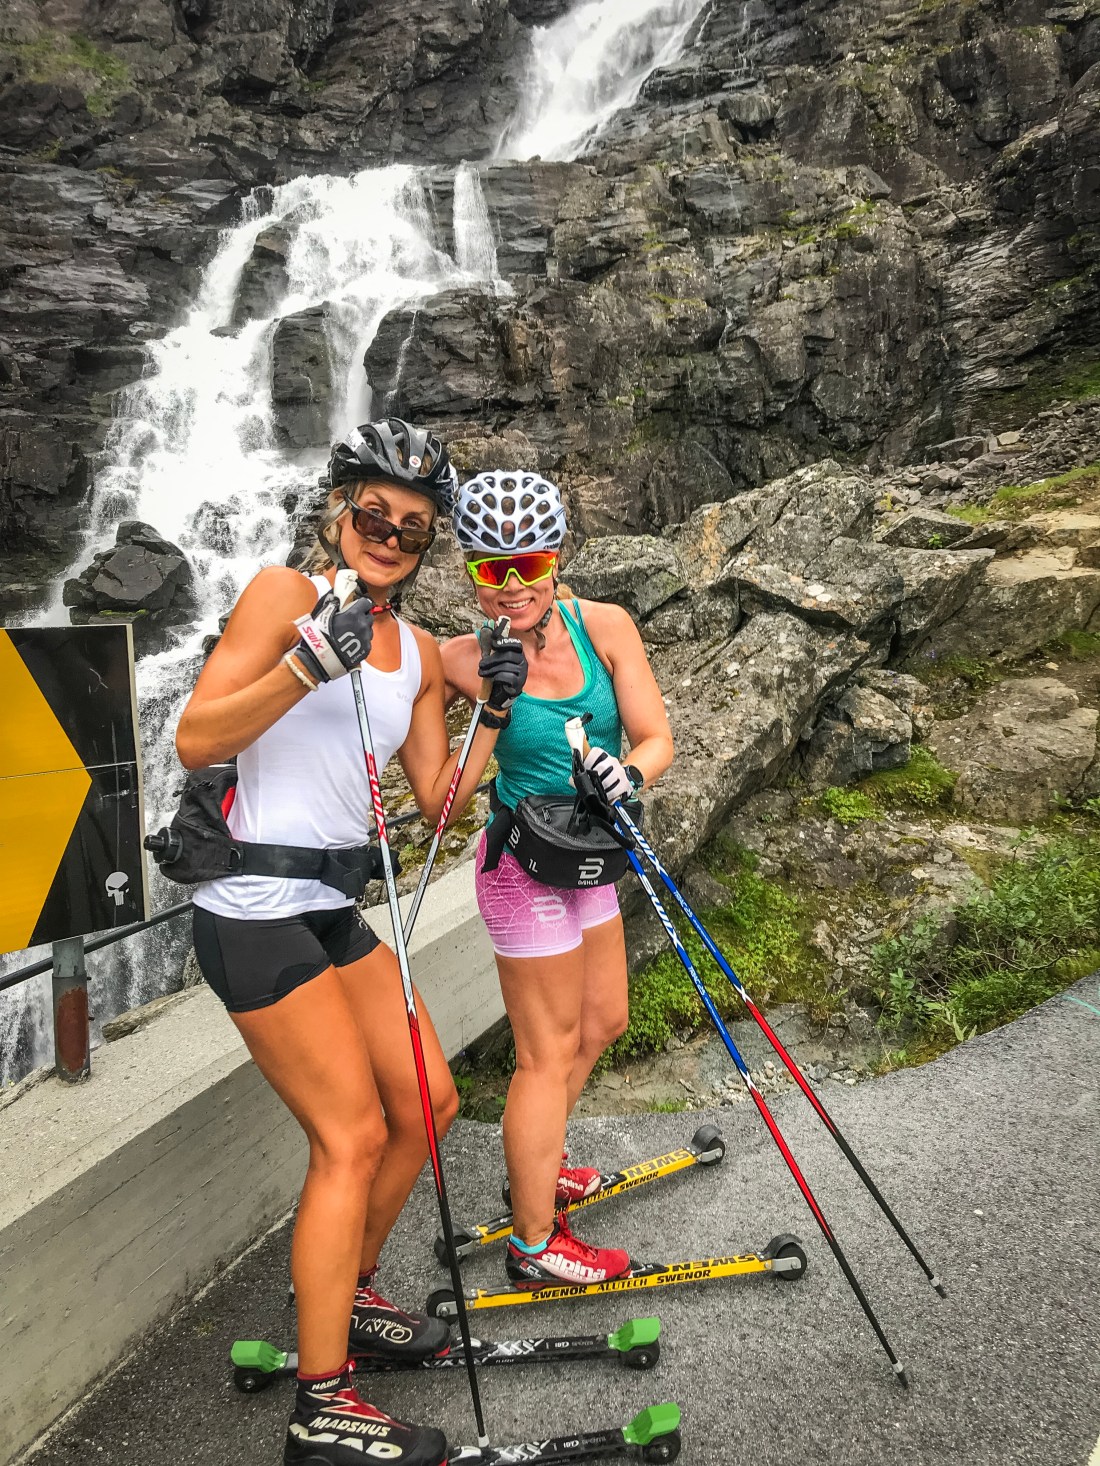
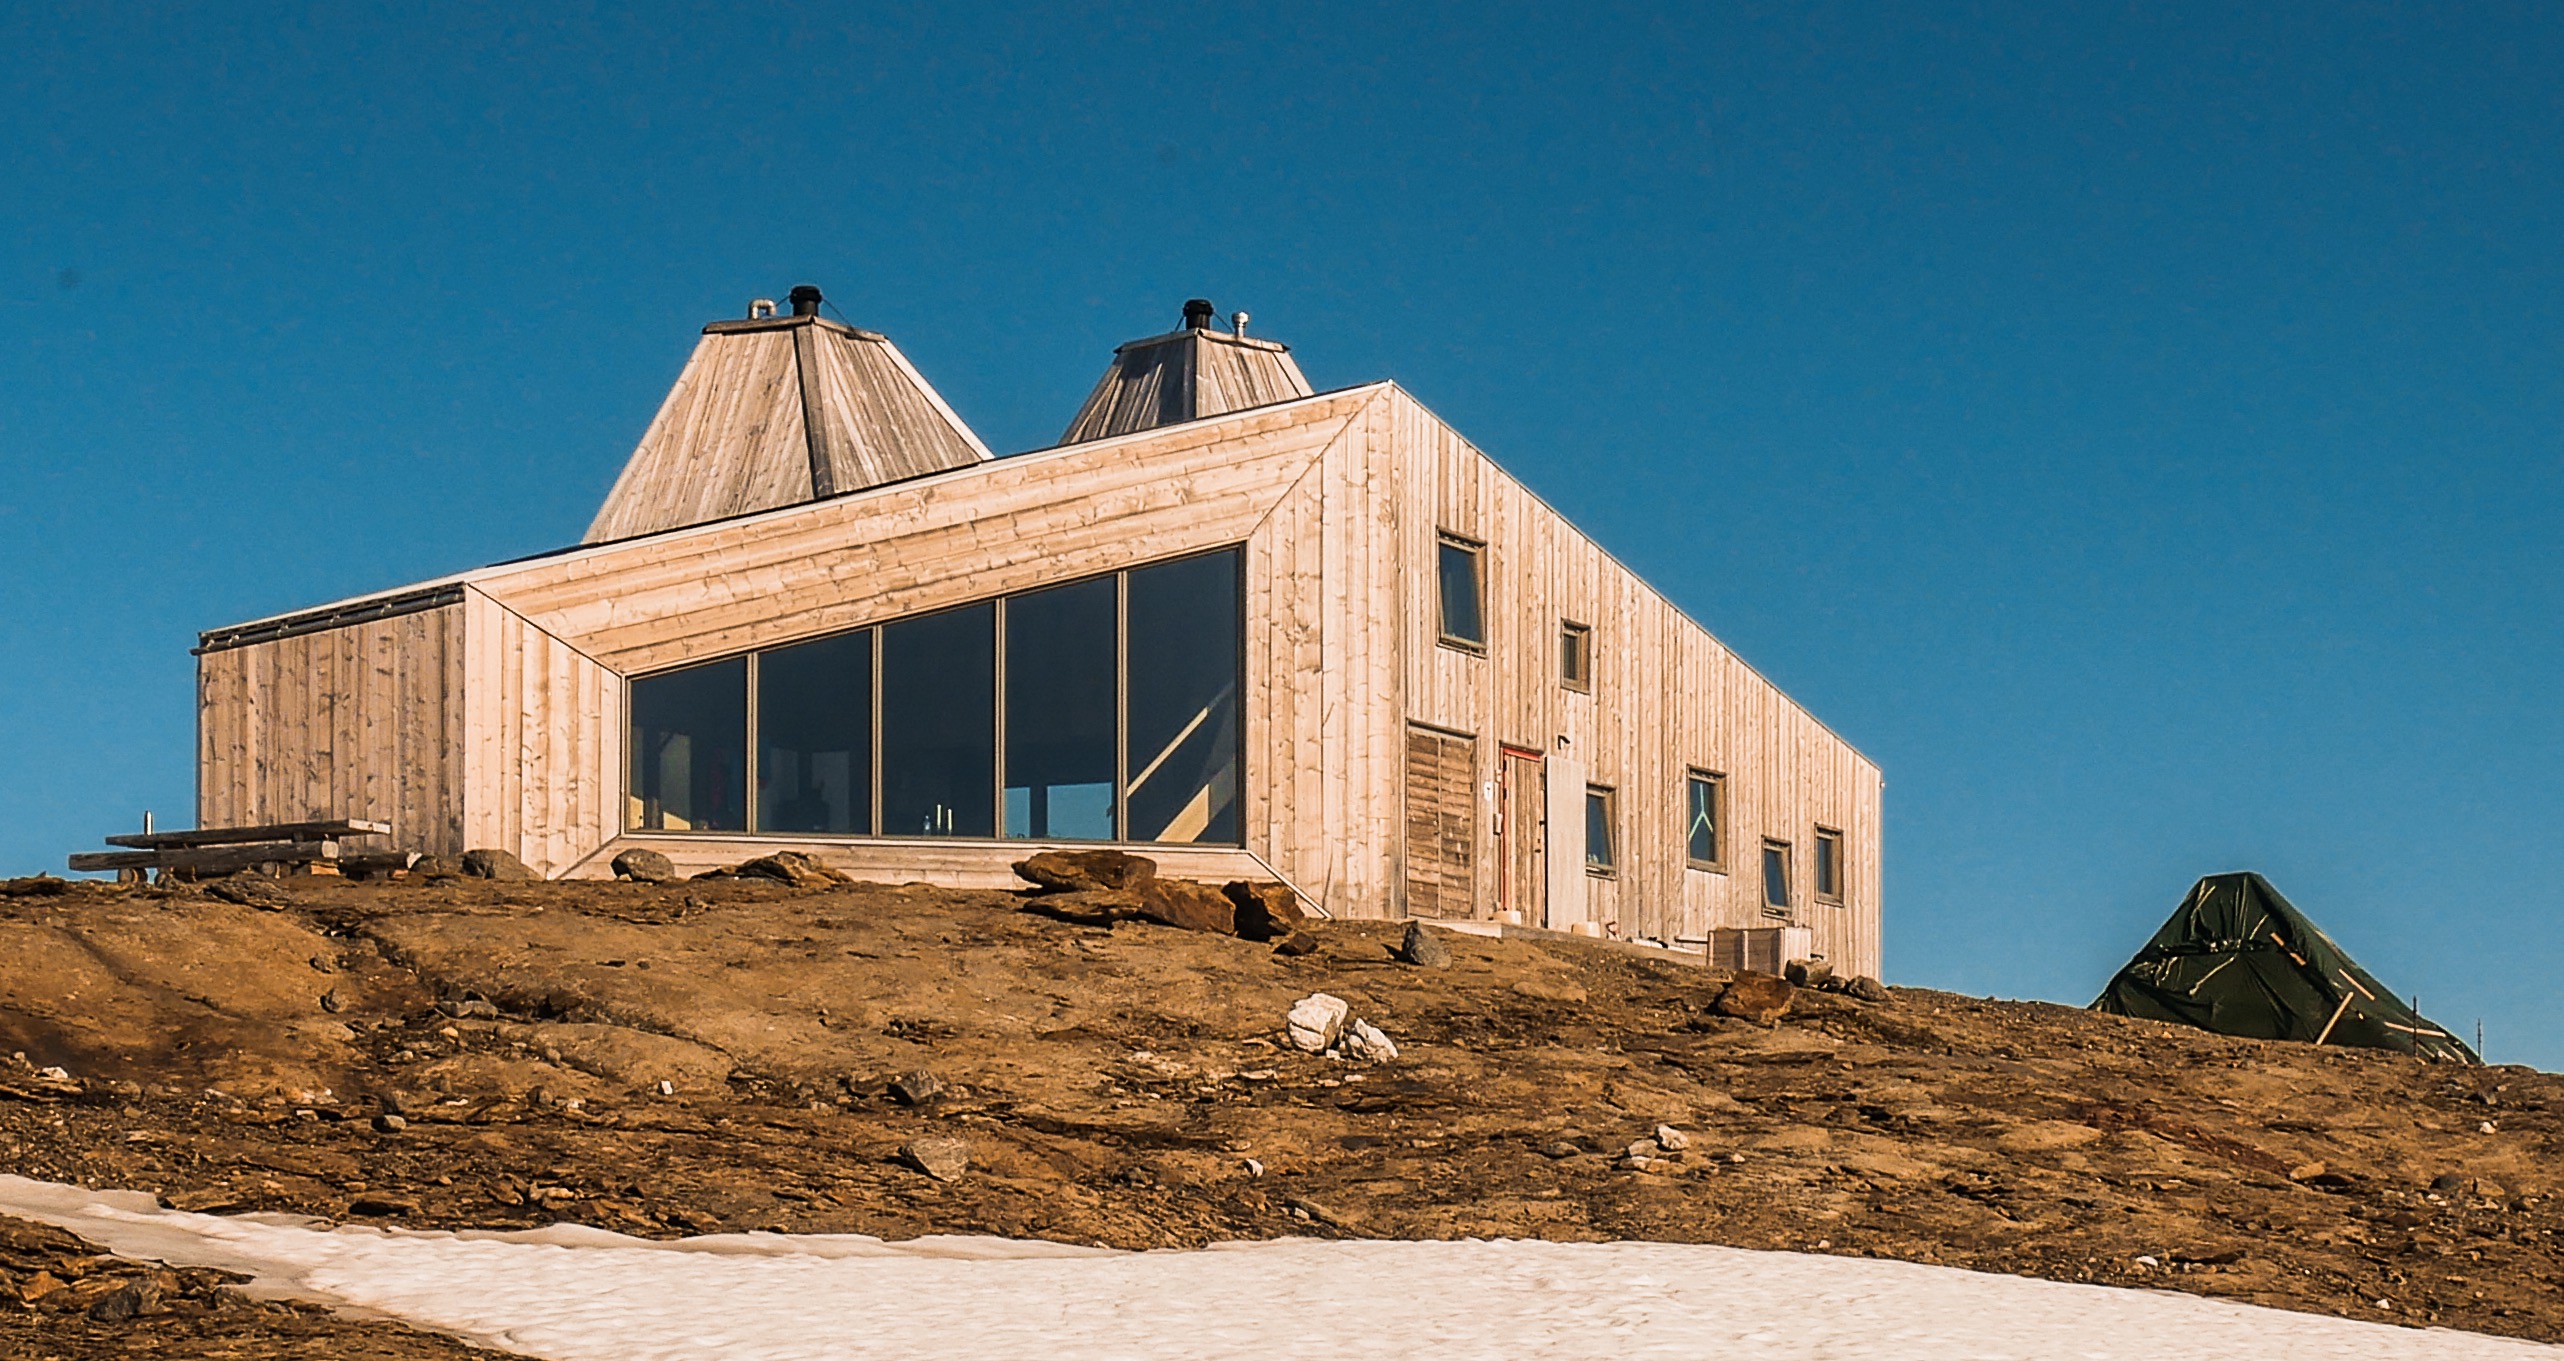
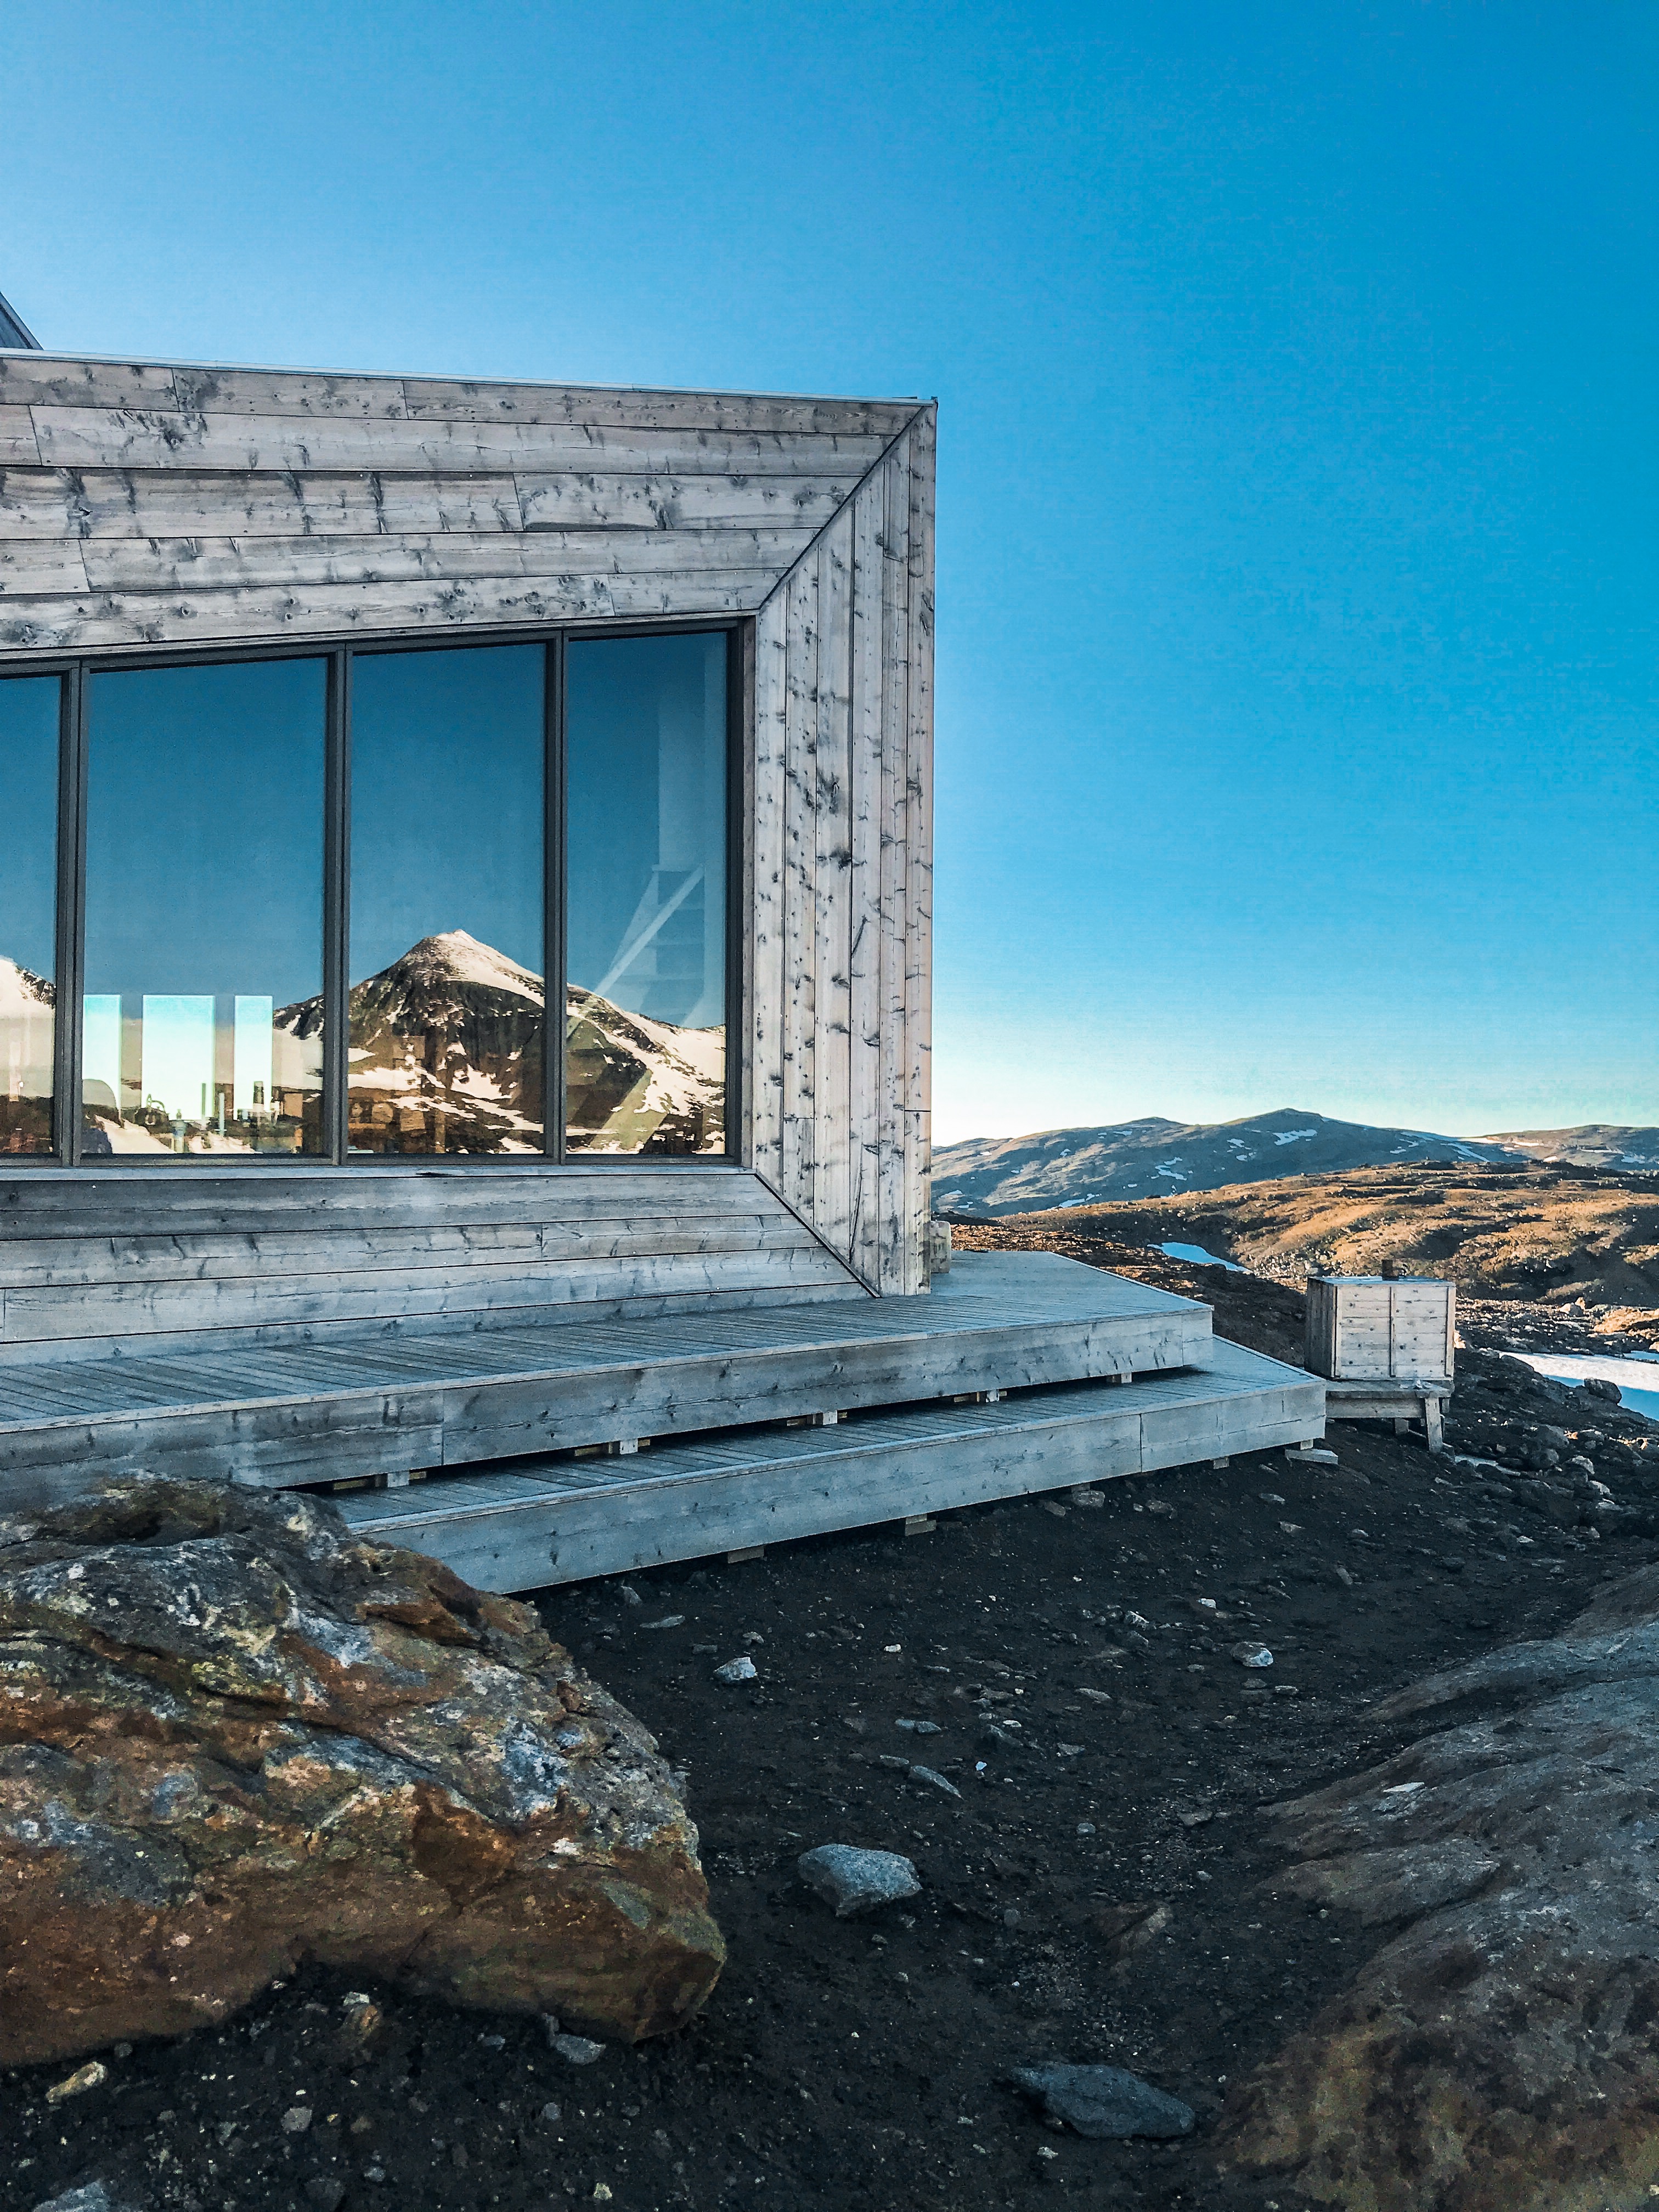
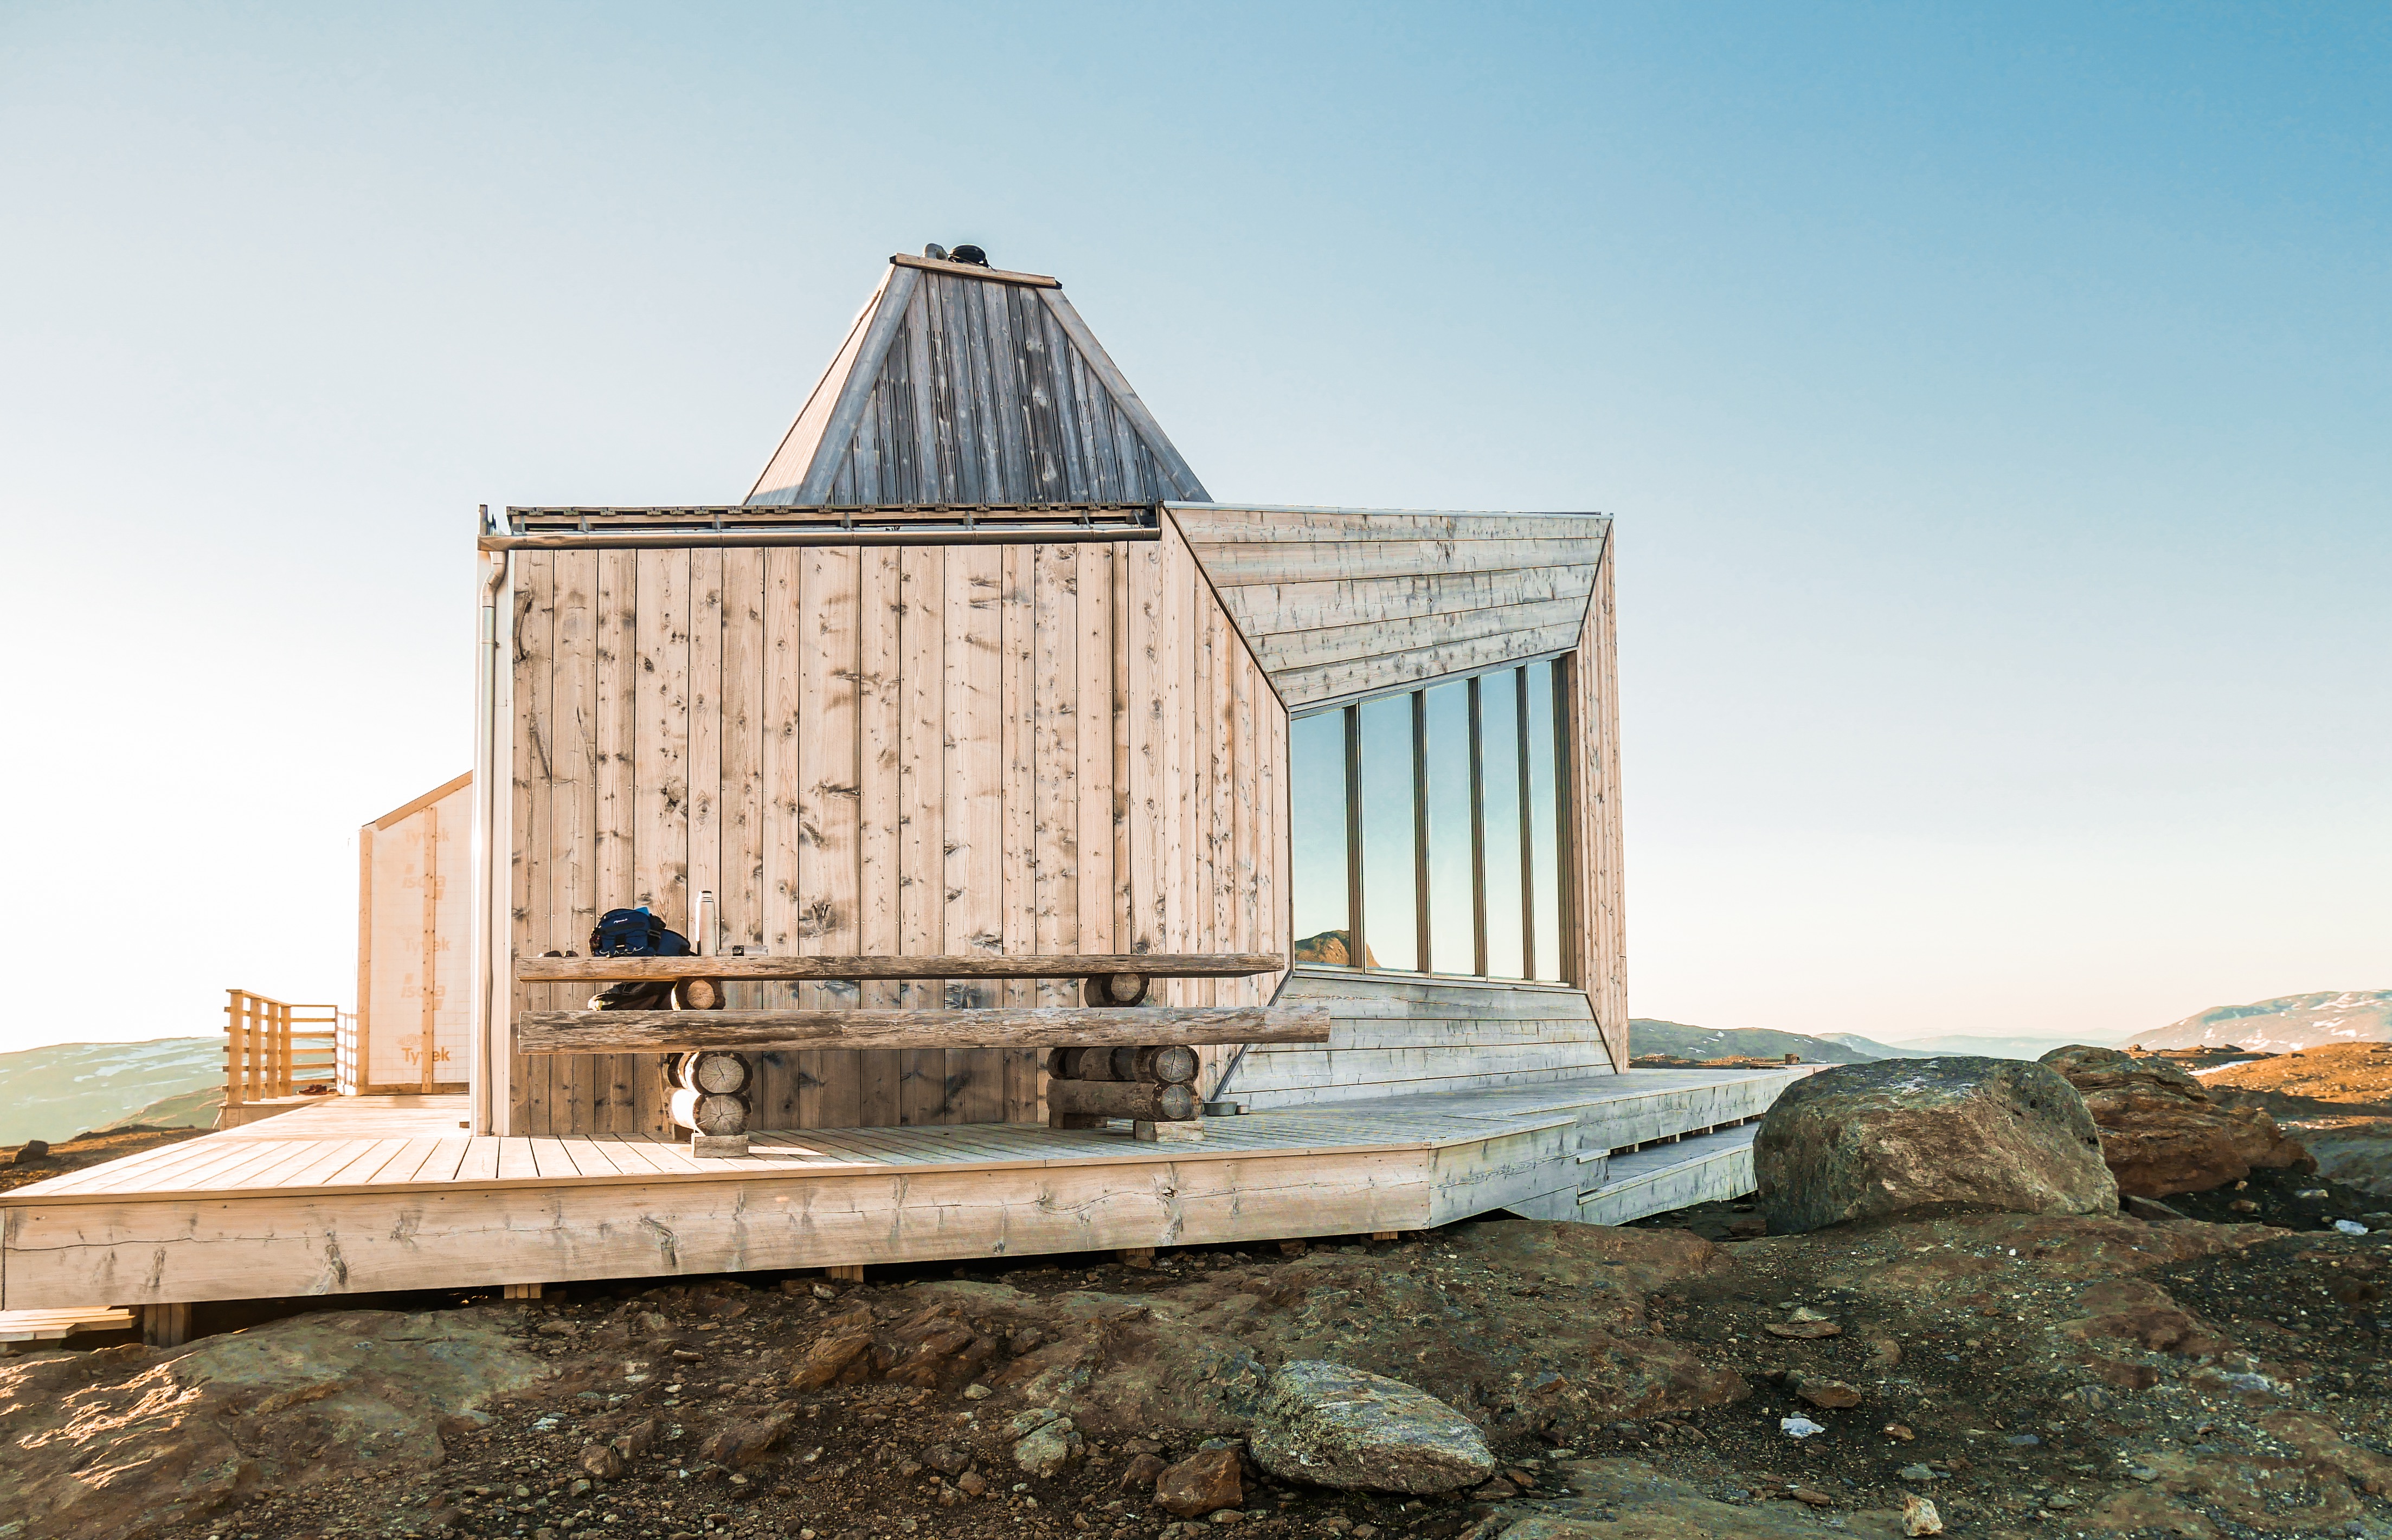
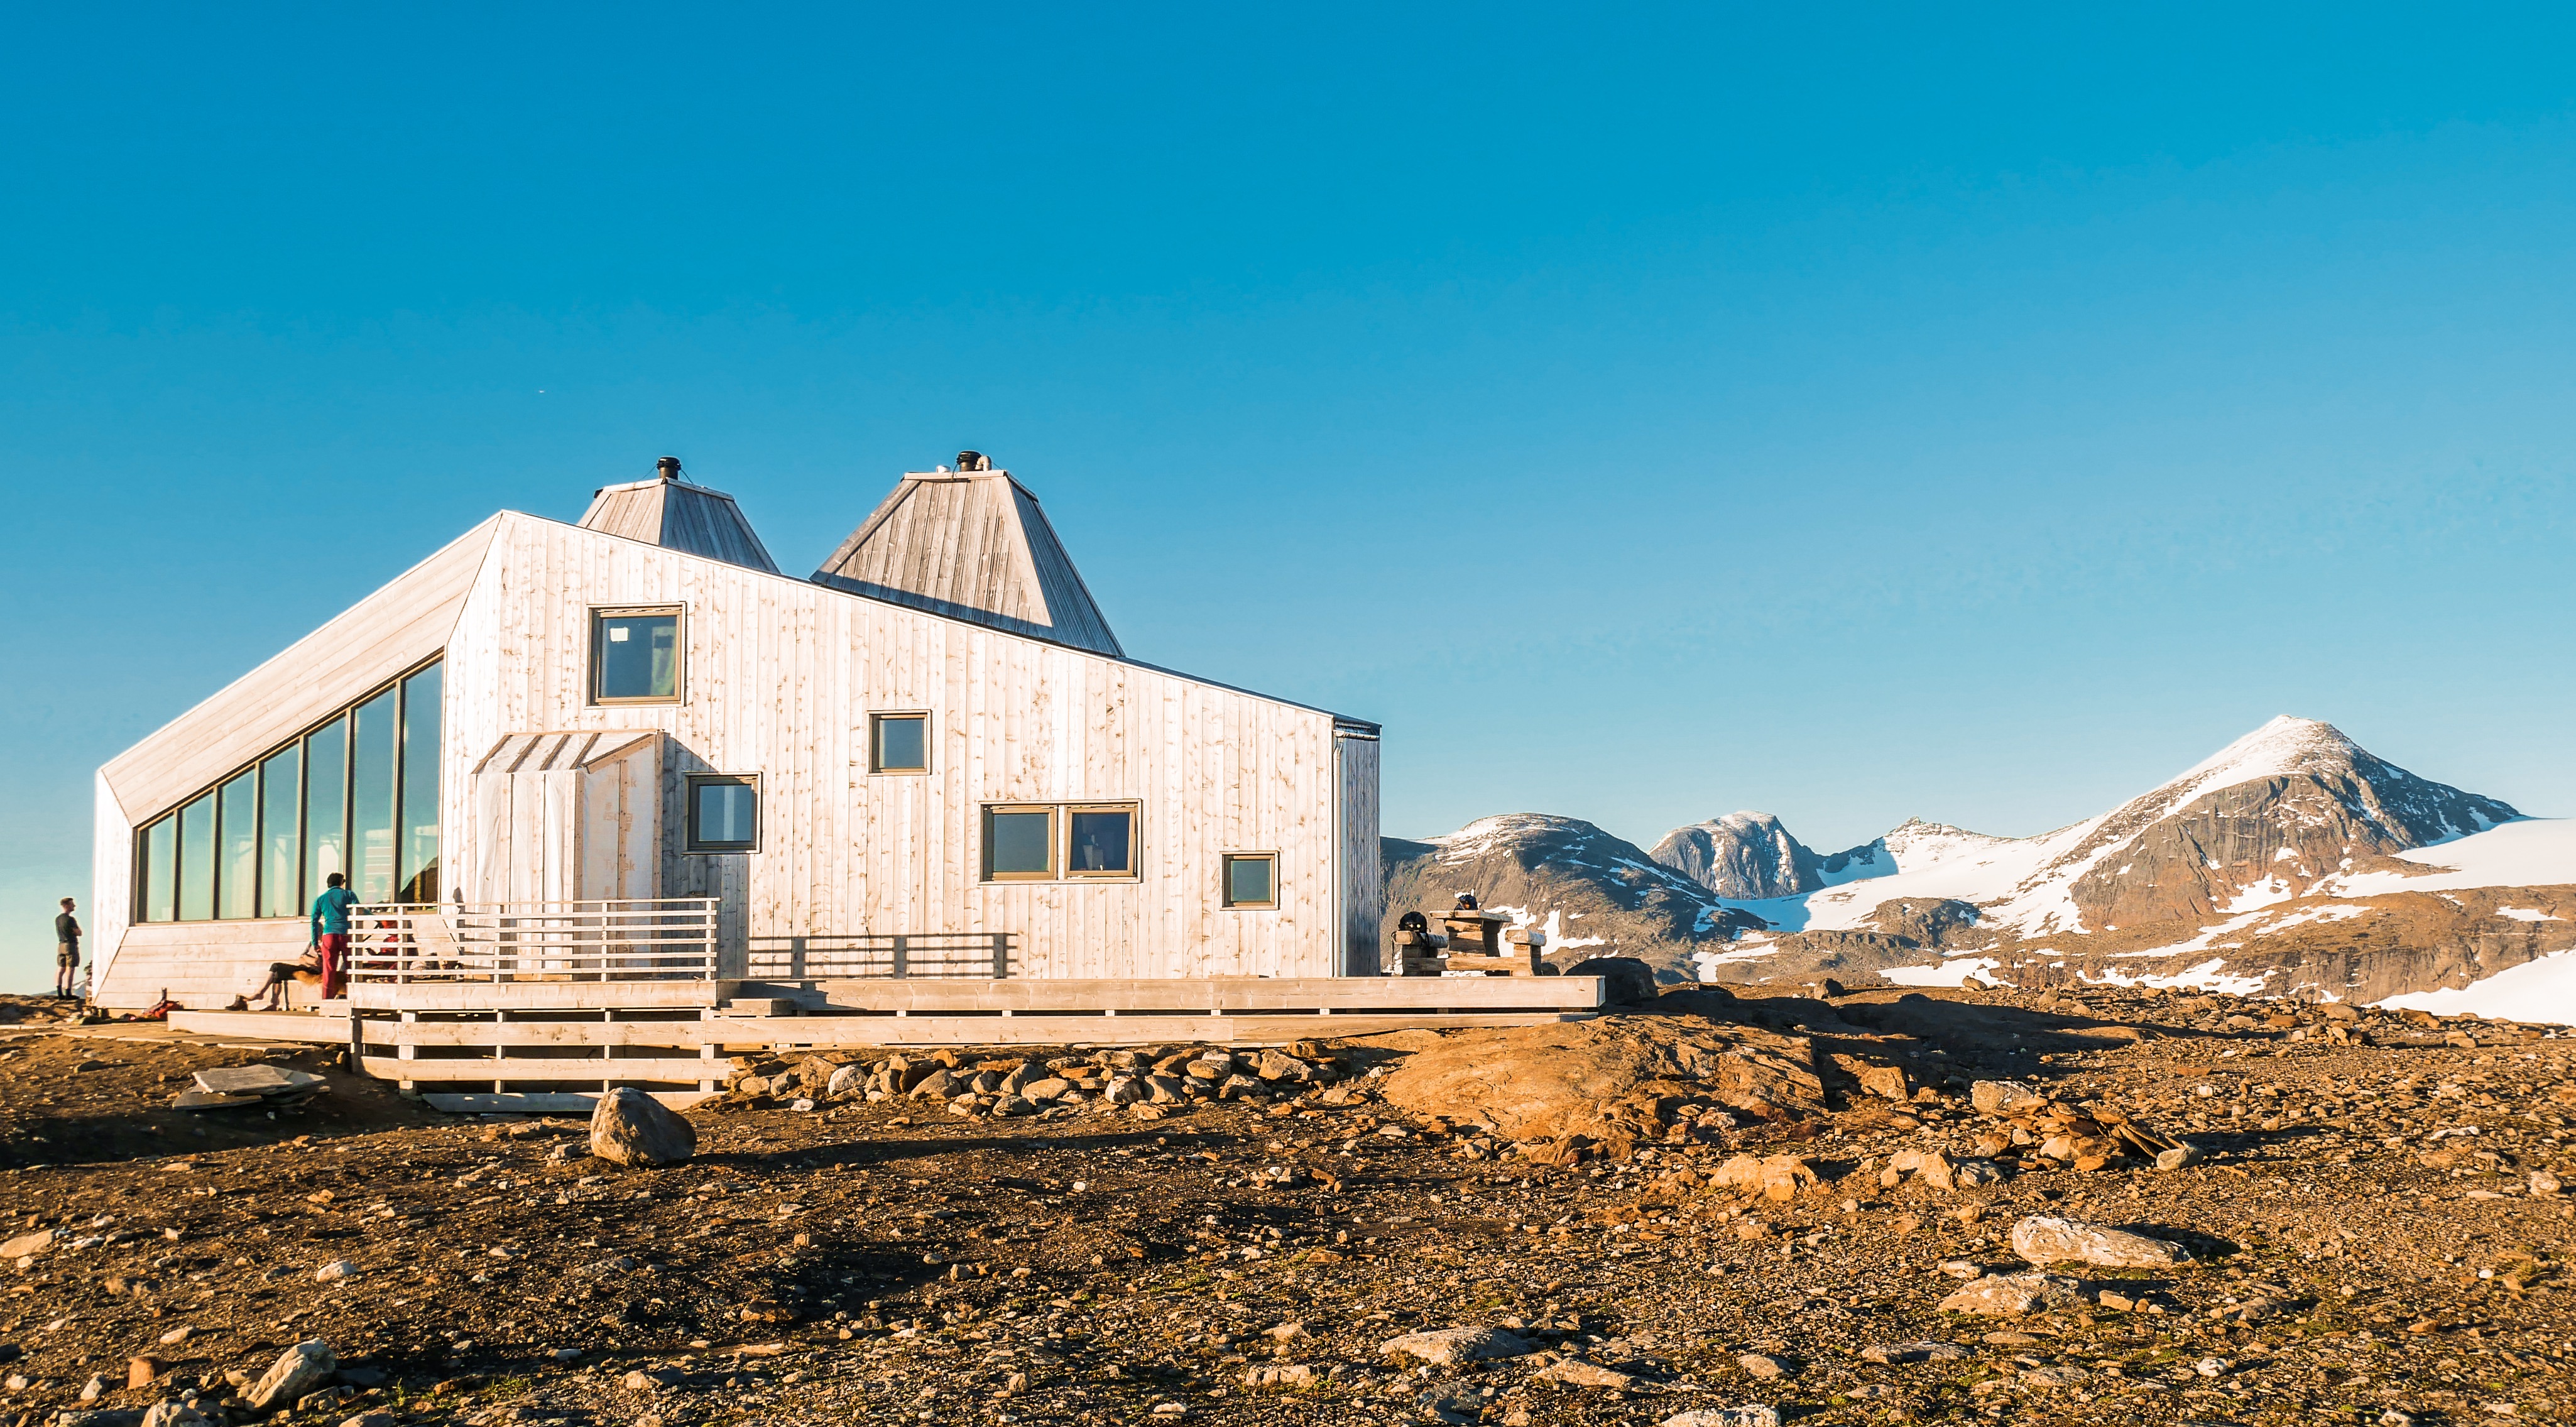
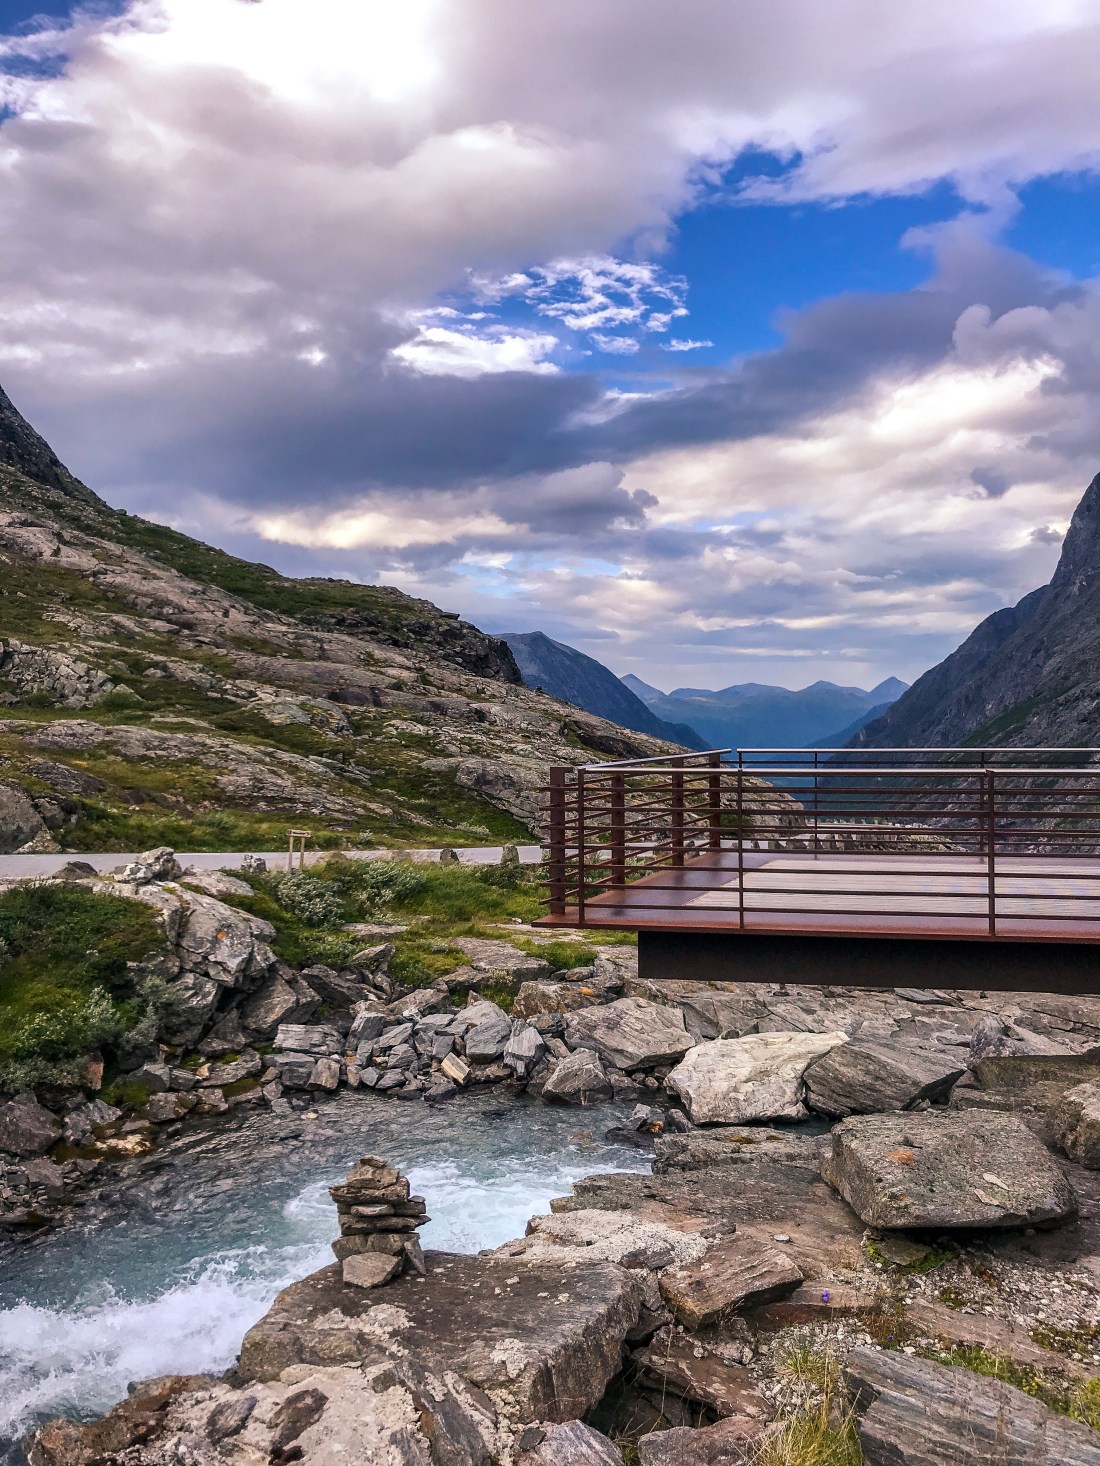
The first couple of kilometers provide a nice and easy warm-up for the climb, where the hairpin turns make out the last 4-5 kilometers and takes you through a beautiful scenery close to spectacular waterfalls on your way to the top. The view points designed and restaurant at the top designed by Reiulf Ramstad Arkitekter are worth a visit as well, and the waterfall in front of the restaurant provides great relief for tired legs.

Strava for details: Trollstigen roller ski

IMG_2390 2
Trollstigen hairpins.

Completing the Road Trip

Congratulations, you have completed 3500 meters of climb in less than two days! This provides for a nice dinner in Åndalsnes before loading up on snacks for your way home. A fast and convenient place is Spiret Spiseri at Tindesenteret.

The fastest way back to Øyer/Lillehammer or Oslo is via Dombås and E6, which is about 3 hours and 20 minutes from Åndalsnes to Øyer and takes you past Trollveggen, where you can visit Trollveggen visiting center (if open). If you have an extra day or two, it is worthwhile staying in Åndalsnes for additional adventures!

Seiser Alm & Livigno training camp

IMG_9335
Me and Barbro climbing Stelvio.

Seiser Alm and Livigno are both beloved destinations for cross country skiing athletes of all levels. These two Italian alp villages complement each other in terms of character and facilities and make a great combination for a training vacation/camp. While Seiser Alm is quiet (and out of this world beautiful) and has amazing trails and scenery for running, Livigno is more of a happening place with (tax free) shops, cafés/restaurants and the best roller ski and biking opportunities.

Here you will get the details of the training we did during a 9-day September training camp as well as some alternatives tried out over the years. The purpose is to guide you to the best locations for performing various sessions, such as interval training and long low intensity sessions. Non of us being top level athletes, our choice of activities has been guided by a desire to explore the beautiful surroundings as well as obtaining great workouts. You may (and should) of course use the information provided to tailor your activities to your own level of fitness and purpose of the trip.

IMG_1291
Seiser Alm meadow.

Please note that both Seiser Alm and Livigno are high altitude destinations and your performance will be affected. In short this means you should go slower than you normally do on low-intensity activities and avoid doing much high intensity training, especially the first 3-4 days, and when introduced, preferably low threshold. More on high altitude training here (Norwegian). It is not uncommon to feel dizziness after a high altitude workout if you go too hard and you may not get full benefit of the rest of your training camp. 

Day 1 – Seiser Alm (arrival day)

IMG_9690

We started our camp in Seiser Alm. You can read more about Seiser Alm, including accommodation recommendations, here. Traveling to Seiser Alm from Norway (or any other place requiring you to fly) usually takes almost a day and you are lucky if you arrive by sunset. We arrived just in time to stretch our legs by doing a short and easy jog on the meadow which was covered with a thin layer of wet snow. That’s the thing about Seiser Alm. Its location more than 1800 meters above sea level means weather and temperatures change quickly and you can experience snow even during summer months.

Strava for details: Snowjogging on Seiser Alm

Day 2 – Seiser Alm

IMG_0631

Waking up on our first full day in Seiser Alm, the meadow was still covered in snow, but the sun was shining and we chose to go for the planned long run taking us over the Denti Rossi to Rifugio Alpe di Tires and the Schiliar/Schlern plateau. This is a beautiful long run which is always on my itinerary when in Seiser Alm. We started out running in snow, but by the time we were back on the meadow a few hours later summer temperatures had arrived. Take time for an espresso at Rifugio Alpe di Tires and lunch at Rifugio Bolzano

IMG_9708

Strava for details: Seiser Alm classic long run

In the afternoon we took the bus down to Kastelruth and did an easy uphill roller ski session. You can also do the same hill workout by taking the cable car from Seiser Alm to Seis, which adds about 140 meters of ascent. The climb has been used for tempo stages during Giro d’Italia and has a profile great for interval training on roller skis and beautiful views. 

Strava for details: Uphill roller ski session

Day 3 – Seiser Alm


Processed with VSCO with au1 preset
Roller skiing with a view.

On our third day we put on the roller skis again and took the cable car to Seis for an interval session. After warming up from Seis to Hotel Valentinerhof we did 7×6 minutes low threshold classic technique.

Strava for details: Rollerski interval: 7×6 min

IMG_0996
Bulaccia with a view of Sasso Lungo and Sasso Piatto

Our second session of the day we explored Bulaccia, the northern meadow of Seiser Alm, running with poles in the soft afternoon light. Some of us took the cable car going down to save the legs.


Strava for details: Bulaccia run

Day 4 – Seiser Alm

IMG_1155
Girls’ trip

The highlight of our stay in Seiser Alm was the long run around Sasso Piatto and Sasso Lungo. I would say this is the running equivalent to Sella Ronda on bike, providing you with amazing views of the Dolomites from so many angles. We took the bus to Saltria (about 5-10 minutes from Compatsch) and the Florian chair lift to Williams Hütte, from where we started our run 2100 m.a.s.l. and clockwise around Sasso Piatto/Sasso Lungo. We stopped for lunch at Rifugio Sasso Piatto and continued to Rifugio Alpe di Tires and returned to Compatsch through the Denti Rossi pass. This is truly an amazing run, which of course may be divided in several parts if you are not up for the full length of it. You can also extend the run by either adding the climb to the peak of Sasso Piatto or/and continue over the Schiliar plateau after Rifugio Alpe di Tires.IMG_0373


Strava for details: Sasso Piatto/Lungo and Denti Rossi

Day 5 – Transport via Stelvio to Livigno

The obligatory part of the transfer from Seiser Alm to Livigno is the mother of all roller ski workouts, the Stelvio climb. If you don’t have a support car, the practical way to do this session is to drive to the top of the Stelvio pass and take a bus down to your preferred side of the pass, either the Prato side or the Bormio side, leaving the car with warm clothes etc at the top. Each climb is great, with spectacular views and, if you can’t go easy on it, exhaustion guarantee. During this camp we did the Prato side, starting from Gomagoi at 1280 m.a.s.l., providing about 1500 meters of ascent and 18.5 km to the top of the Stelvio pass as 2575 m.a.s.l. We chose to tackle the climb by doing an interval session of 5×20 + 10 minutes below lactate threshold. 

Strava for details: Stelvio climb, Prato side


IMG_1307
Melina climbing Stelvio from the Prato side.

Strava for details: Stelvio climb from Bormio


Please note that the bus service on the Bormio side is only available in July and August. You may contact the bus service Perego for information. For bus down from Stelvio on the Prato side, go here.

If you prefer to conquer Stelvio on bike, you can rent a bike at Mapo Bike in Valdidentro (a few kilometers from Bormio). If you want to stay a few days to explore the area and perhaps tackle Stelvio running, skiing and biking, one of my favorite hotels in the Alps is just next to Mapo Bike, Alpen Hotel. Personally I had my best session in Stelvio running up from Bormio.

Strava for details: Stelvio run  

Day 6 – Livigno

IMG_1334
Livigno roller ski paths.

Livigno is roller ski mecca with an extensive network of cycle paths protected from the traffic as well as mountain passes where you can work on your O2 levels and return safely by bus if you don’t want to ski down or have a support car. On our first day in Livigno we chose to do an easy flat roller ski session to recover from the Stelvio challenge.


Strava for details: Livigno roller ski

IMG_1373
Favorite Livigno trails.

Livigno also has a tremendous network of trails for running as well as mountain biking. There is no limit other than your fitness level as to where you can go, and even if I have visited 5-6 times there are new trails to explore. Our favorite trail for short recovery runs is the trail just above the centre providing you with great views of Livigno. You can enter the trail directly from several places in the village or my preferred entry at the south end of the village, where you can also find parking. 

Strava for details: Livigno trail 

Day 7 – Livigno

IMG_1439
On our way to Corna di Capra.

After a “rest” day it was time to do a longer session again and we decided on a run that would take us to a +3000 meter peak, Corna di Capra. We chose to drive to the trailhead just south of the village (you can also run directly from the village). Although containing a lot of ascent this run also has long runable sections and truly beautiful surroundings as well as the added satisfaction of reaching the peak at 3016 m.a.s.l.


IMG_1438

Strava for details: Corna di Capra skyrun


IMG_0275
Marthe at the top of Corna di Capra.

For an alternative long run you can take the cable car to Costaccia from the city centre and run south along the ridge following trail 162 and then 157 passing Causello 3000 and Involt dali Resa before descending back to the city centre.

Strava for details: Livigno skyrun

Our second workout of the day was a double poling session, which included the climb up to Passo Eira. From Passo Eira you can take a free bus down to Livigno (check the schedule in advance). As an alternative to the Eira ascent you can also roll up to the Forcola pass.

Strava for details: Livigno & Passo Eira roller ski + Livigno – Forcola

20170908_183442_014_01
Afternoon roller ski session to Passo Eira.

Day 8 – Livigno

Towards the end of a training camp like this adjustments to the training plan may be adequate due to energy levels, strain on legs or other reasons. For some, including me, that meant replacing a running session with yet another roll to Passo Eira, this time using kicks and not just double poling. In the afternoon we did a strength session.

Strava for details: Passo Eira roller skiing

Day 9 – Livigno

IMG_4472
Val Federia.

Last full day in Livigno and the training plan said low threshold running in Val Federia. Low on energy and with the rain pouring down, I chose to go easy on the trails instead. However, Val Federia is great for this kind of effort and having done a similar workout in 2016, I still have the appropriate Strava details to guide you. To reach Val Federia you can either drive to the parking provided at the trailhead, or run from the hotel as warm-up. Remember the altitude and go easy!


Strava for details: 5x(5x1min/15sec) running with poles

Livigno Accommodation & Restaurants

When in Livigno my choice of hotel is Hotel Larice, which is one of several hotels forming the Bivio Life Livigno group, where you can find Hotel Bivio (often used by the Norwegian national team) and Alpen Village Hotel, which specifically caters towards training groups of all sports. Larice is a small eco boutique hotel with amazing atmosphere, great rooms, personal service, superb breakfast and the best location. I love to hang out in the coffee bar out front in between training sessions.

My three favorite restaurants are all in or close to Hotel Larice: The burger restaurant Why Not, in via Botarel (across the street from Larice), Focolare, the pizzeria next door, and the restaurant at Larice, which serves sushi as well as Italian dishes.

Cycling in Livigno

Livigno has an amazing downhill bike park (never tried) and is often used for training camps by top level athletes of both road cycling and mtb. Bikes can be rented from several bike shops in Livigno. If you are into climbs and mountain passes see the strava link below for a beautiful ride my friend Maren did, going from Livigno over Passo Eira to Bormio and up to Passo Stelvio and via Passo Fuorn back to Livigno. Another alternative is the course of the ICON ironman triathlon taking place in Livigno in August, which takes you up to the Forcola pass, into Switzerland to climb the Bernina Pass before going down to St. Moritz and Zernez and via the Fuorn, Stelvio and Foscagno passes back to Livigno.

Strava for details: Long ride – Foscagno, Stelvio, Fuorn

For a beginners mtb trail, try the circuit we did with Fabrizio at MTB Livigno a few years back.

Strava for details: MTB flow

Getting There

Munich, Zürich and Innsbruck are convenient airports to fly into if you would like to combine Seiser Alm and Livigno. Innsbruck makes for a shorter drive, but often you have to accept transfer flights to get there. You will need to rent a car.

Munich Airport – Seiser Alm: 3:30, Zürich Airport – Seiser Alm: 4:30 and Innsbruck – Seiser Alm 1:45. Munich Airport – Livigno: 4:30, Zürich Airport – Livigno: 3:15, Innsbruck – Livigno: 2:45. The drive from Seiser Alm to Livigno is about 3 hours. 

My Favorite Hikes – Tysfjord

IMG_0948 2

I have been looking so much forward to sharing these two “secret” hikes with you. Well, the first one, Kjerna, may not be so secret to the locals, but for sure many of you have already passed by without knowing that you just missed the northern equivalent to the insta-famous Prekestolen and Trolltunga.

Kjerna

IMG_1176
Kjerna seen from west.

When I was a child I used to go fishing with my grandfather in the fjord under Kjerna. The tale goes that one day it would fall down, so I was always a little bit scared it would happen as we passed by. Recently I learned that this was not something my grandfather came up with. Movements around Kjerna have been monitored during the years, however without raising any red flags yet.

IMG_1169
Kjerna from east watching the sun go down. This was at about 10pm mid-July.

Kjerna is in Tysfjord, the municipality of the national mountain, Stetinden, accessible  directly from E6. The trailhead can be found on the west side, about 9.5 km north of Skarberget, where the ferry arrives if you are arriving from the south. There is a parking space on the east side of the road (see map below and link to Strava).

IMG_1159
Stetinden to your left.

The main reason for adding Kjerna to your bucket list is obviously the view. And it comes surprisingly cheap. The hike is less than two kilometers (each way) on relatively easy trails and with about 400 meters of elevation gain. Once at the top you have amazing views and can easily spot Stetinden looking east. If you have the chance, I would recommend to do the hike in the late evening. There is nothing like watching the sunset from the peak.

IMG_1152
Viewpoint on the east side of Kjerna, looking south with a view of Skrovkjosen.

IMG_1147

From Kjerna you can continue towards Stortinden or drop down to about 500 m.a.s. to take the marked trail from the pond. For more on the Stortinden hike, go here.

Stortinden

Strava for details: Family hike to Kjerna

Eide Ridge Line Running

IMG_1052
Running the ridge with Eidtinden and Stortinden as backdrop.

So, to something even more special to me, and maybe the most beautiful place I ever run. From the age of six, I spent the whole summer with my grandparents in Eide, a tiny place just beneath Kjerna and Stortinden, about 3.5 km drive from E6, turning left about 6 km north of Skarberget. There is a small parking about 100 meters before you reach Eide. Leave your car here and walk to the second house on your right hand. From here, walk straight up the lawn between the houses and look for the trail, which is slightly to your right when leaving the lawn walking uphill, and to the left of the cabin in the right corner where the forrest starts.

IMG_0912
This is how you know you are on the right track. If you turn around just before you find the trailhead, this is what you see. You will leave the road between the two houses to the left in this picture.

After about another 100 meters you reach the climb which is marked with red dots. You reach the ridge (Eidskaret) after about 600 meters steep climb with 200 meters elevation gain (the last part on rocks) and get a spectacular view of Eidtinden right in front of you. Already at this point you have marvelous views towards Ofoten (south) and Efjorden (north). From here, but after having made a loop around the pond, with your back to where you came from, you go left (west). It is not easy to find the trail, but if you seek the highest point on the ridge line you will find it eventually. If not, don’t worry, the terrain is easy to run off-track as you continue as far as you please towards the end of the ridge.

IMG_0932
The pond with Eidtinden as backdrop.

If you are as lucky as me, you may meet dozens of reindeers.

IMG_1071
View of the ridge facing Eidtinden, Stortinden and Kjerna, with your starting point down to your right and Stetinden in the upper right corner.

IMG_1140
View of Efjorden

Please note that this hike should not be done when it is wet as the rocks can be very slippery. Also, take note of the spot where you are leaving the marked trail (below the pond) to ensure you find the right way back down (you should not leave the path in the steep sections).

Strava for details: Very special skyrun

Oh, if my aunt is at home in the white house you pass on your left when starting the hike, say hi!

Andøya – Arctic Road Trip Day 8 and 9

IMG_0468
Høyvika, Andøya

Andøya is one of the islands forming the Vesterålen archipelago. In the summer you can take advantage of the ferry connecting Andøya and Senja, which makes for a scenic road trip along the coast as opposed to the main inland route, E6. 

Andøya has amazing beaches and is a great playground for road cycling, roller skiing, trailrunning and kayaking. It also offers tourist attractions such as whale safari, bird safari and the Aurora Space Ship, which unfortunately is closed down in 2019. 

I was there for the amazing trails around Måtind, a much photographed peak just south of the fishing village, Bleik, and to go roller skiing along the national scenic route on the west coast of Andøya. 

IMG_0493
Måtinden, with the view of the bird island, Bleiksøya.

The Trails

The coastal trail from Bleik to Stave, which passes Måtinden at 408 meters above sea level, is about 9 km. You can also reach Måtinden from Baugtua, a trailhead starting from a parking about midway on FV976 between Stave and Bleik.

IMG_0447

I did a return run to Måtinden from Stave beach and added a loop on the plateau behind Måtinden. From Stave most of the climb is at the beginning of the run, providing you with magnificent views of the Stave beach and village from the start and, after the first steep climb, you are rewarded with a great view of the beach Høyvika. To reach Måtinden you continue north. It is not always obvious where the path goes, but unless you are caught by the fog (as I was at the end of the run) it is easy to see where you are going and the terrain is easy and fun to overcome off-track. Once at the peak of Måtinden you have great views of Bleiksøya, a small characteristic bird island housing thousands of puffins as well as eagles. 

Strava for details: Måtinden trail runIMG_0470


IMG_0469

Rollerskiing and cycling

The national scenic route   along the west coast is almost flat and excellent for rollerskiing as well as cycling. I jumped out of the car at the west junction of FV974 and FV973 and roller skied the 30 kilometers to Stave beach, where we had rented an apartment (see below). After about 12 kilometer you reach the view point Bukkekjerka, and after another 10 kilometer you ski on a breakwater with the ocean on your left and the Skogvoll lake on your right. Another 7 kilometer and you reach the village of Stave while the road continues for additional 20 kilometers all the way up to Andenes, if you would like to go further.

Strava for details: Andøya rollerskiingProcessed with VSCO with l5 preset


Where to Stay

We stayed at Stave Camping in a one-bedroom fully-equipped apartment (sleeps 6) called the Shipwreck. The location was absolutely great and if you have the weather on your side, this is the place to be for sunset/midnight sun.

The Drive

The drive from Nyksund to Stave is about 2.5 hours and 140 kilometers. You will pass by Sortland again. Please see previous post on information about Sortland. Make sure you take time to stop at the view points provided, such as Bukkekjerka (mentioned above) and, when driving to Andenes for the ferry to Senja, Kleivodden.

The ferry between Andenes in Andøya and Gryllefjord in Senja takes about two hours and runs only in the summer. You can check the schedule here.

Nyksund in Vesterålen – Arctic Road Trip Day 7

IMG_0402 2.jpg
Queen’s Trail, Nyksund

Continuing north on our arctic road trip, our next destination is Nyksund, a small fisherman’s village in the Vesterålen archipelago, north of the more famous Lofoten archipelago. The traditional fisherman’s village slowly fell into disuse, but is now an active and creative place with artists and tourism businesses. My reason for going there was to run the Queen’s trail between Nyksund and Stø.

IMG_0300
Happy trailrunner!

The Queen’s Trail

The Queen’s trail between the two fiserman’s villages of Nyksund and Stø is a round trip of about 17 kilometers. Due to steep parts it is recommended to run the mountain part of the trail from Nyksund to Stø and the coast part coming back to Nyksund (anti-clockwise). I did the opposite direction, which also worked out fine, but would do the “correct” direction if I got the chance again. With small kids I recommend to take the coastal trail only. The highest point on the round trip is Finngamheia 448 m.a.s.l.

IMG_0411
Skipssanden

IMG_0399
View of Skipssanden

The trail takes you to the beautiful beach Skipssanden, the view of which you can also enjoy from the mountain part of the trail. The beach is a short hike from Stø in case you don’t have the time to do the full hike.

The Queen’s route was broadcasted as part of NRK’s summer program “minute by minute” with the outdoor celebrity Lars Monsen last year, and you can watch one of the episodes and the beautiful scenery here. This is one of my absolute favorite trails in Norway. There is no boring moment and if you do the hike in the evening you may be all alone on the trail and even see the midnight sun.

Strava for details: Nyksund – Stø – Nyksund

IMG_0396
The climb from Stø.

Accommodation

Truth be told, we did not enjoy our choice of accommodation, which was Holmvik Brygge, where we stayed at “Giseløya” with shared bathrooms. Although the place does indeed have an interesting historic vibe, it does not provide value for money in our opinion. I would recommend to try out other alternatives, suggested here, or stay at the camping ground in Stø.

IMG_0357
Stø

The Drive

The drive from Nordskot harbor to Nyksund is 250 kilometers and takes about 5 hours, including the ferry from Bognes to Lødingen. I recommend a stop in Sortland, where you can grab a bite at Miscela Kaffebar and stock up on snacks and other groceries. If open (check the website), I also suggest stopping at Eldhusbakeriet, a few kilometers south of Sortland.

Manshausen – Arctic Road Trip Day 5 & 6

Processed with VSCO with g6 preset
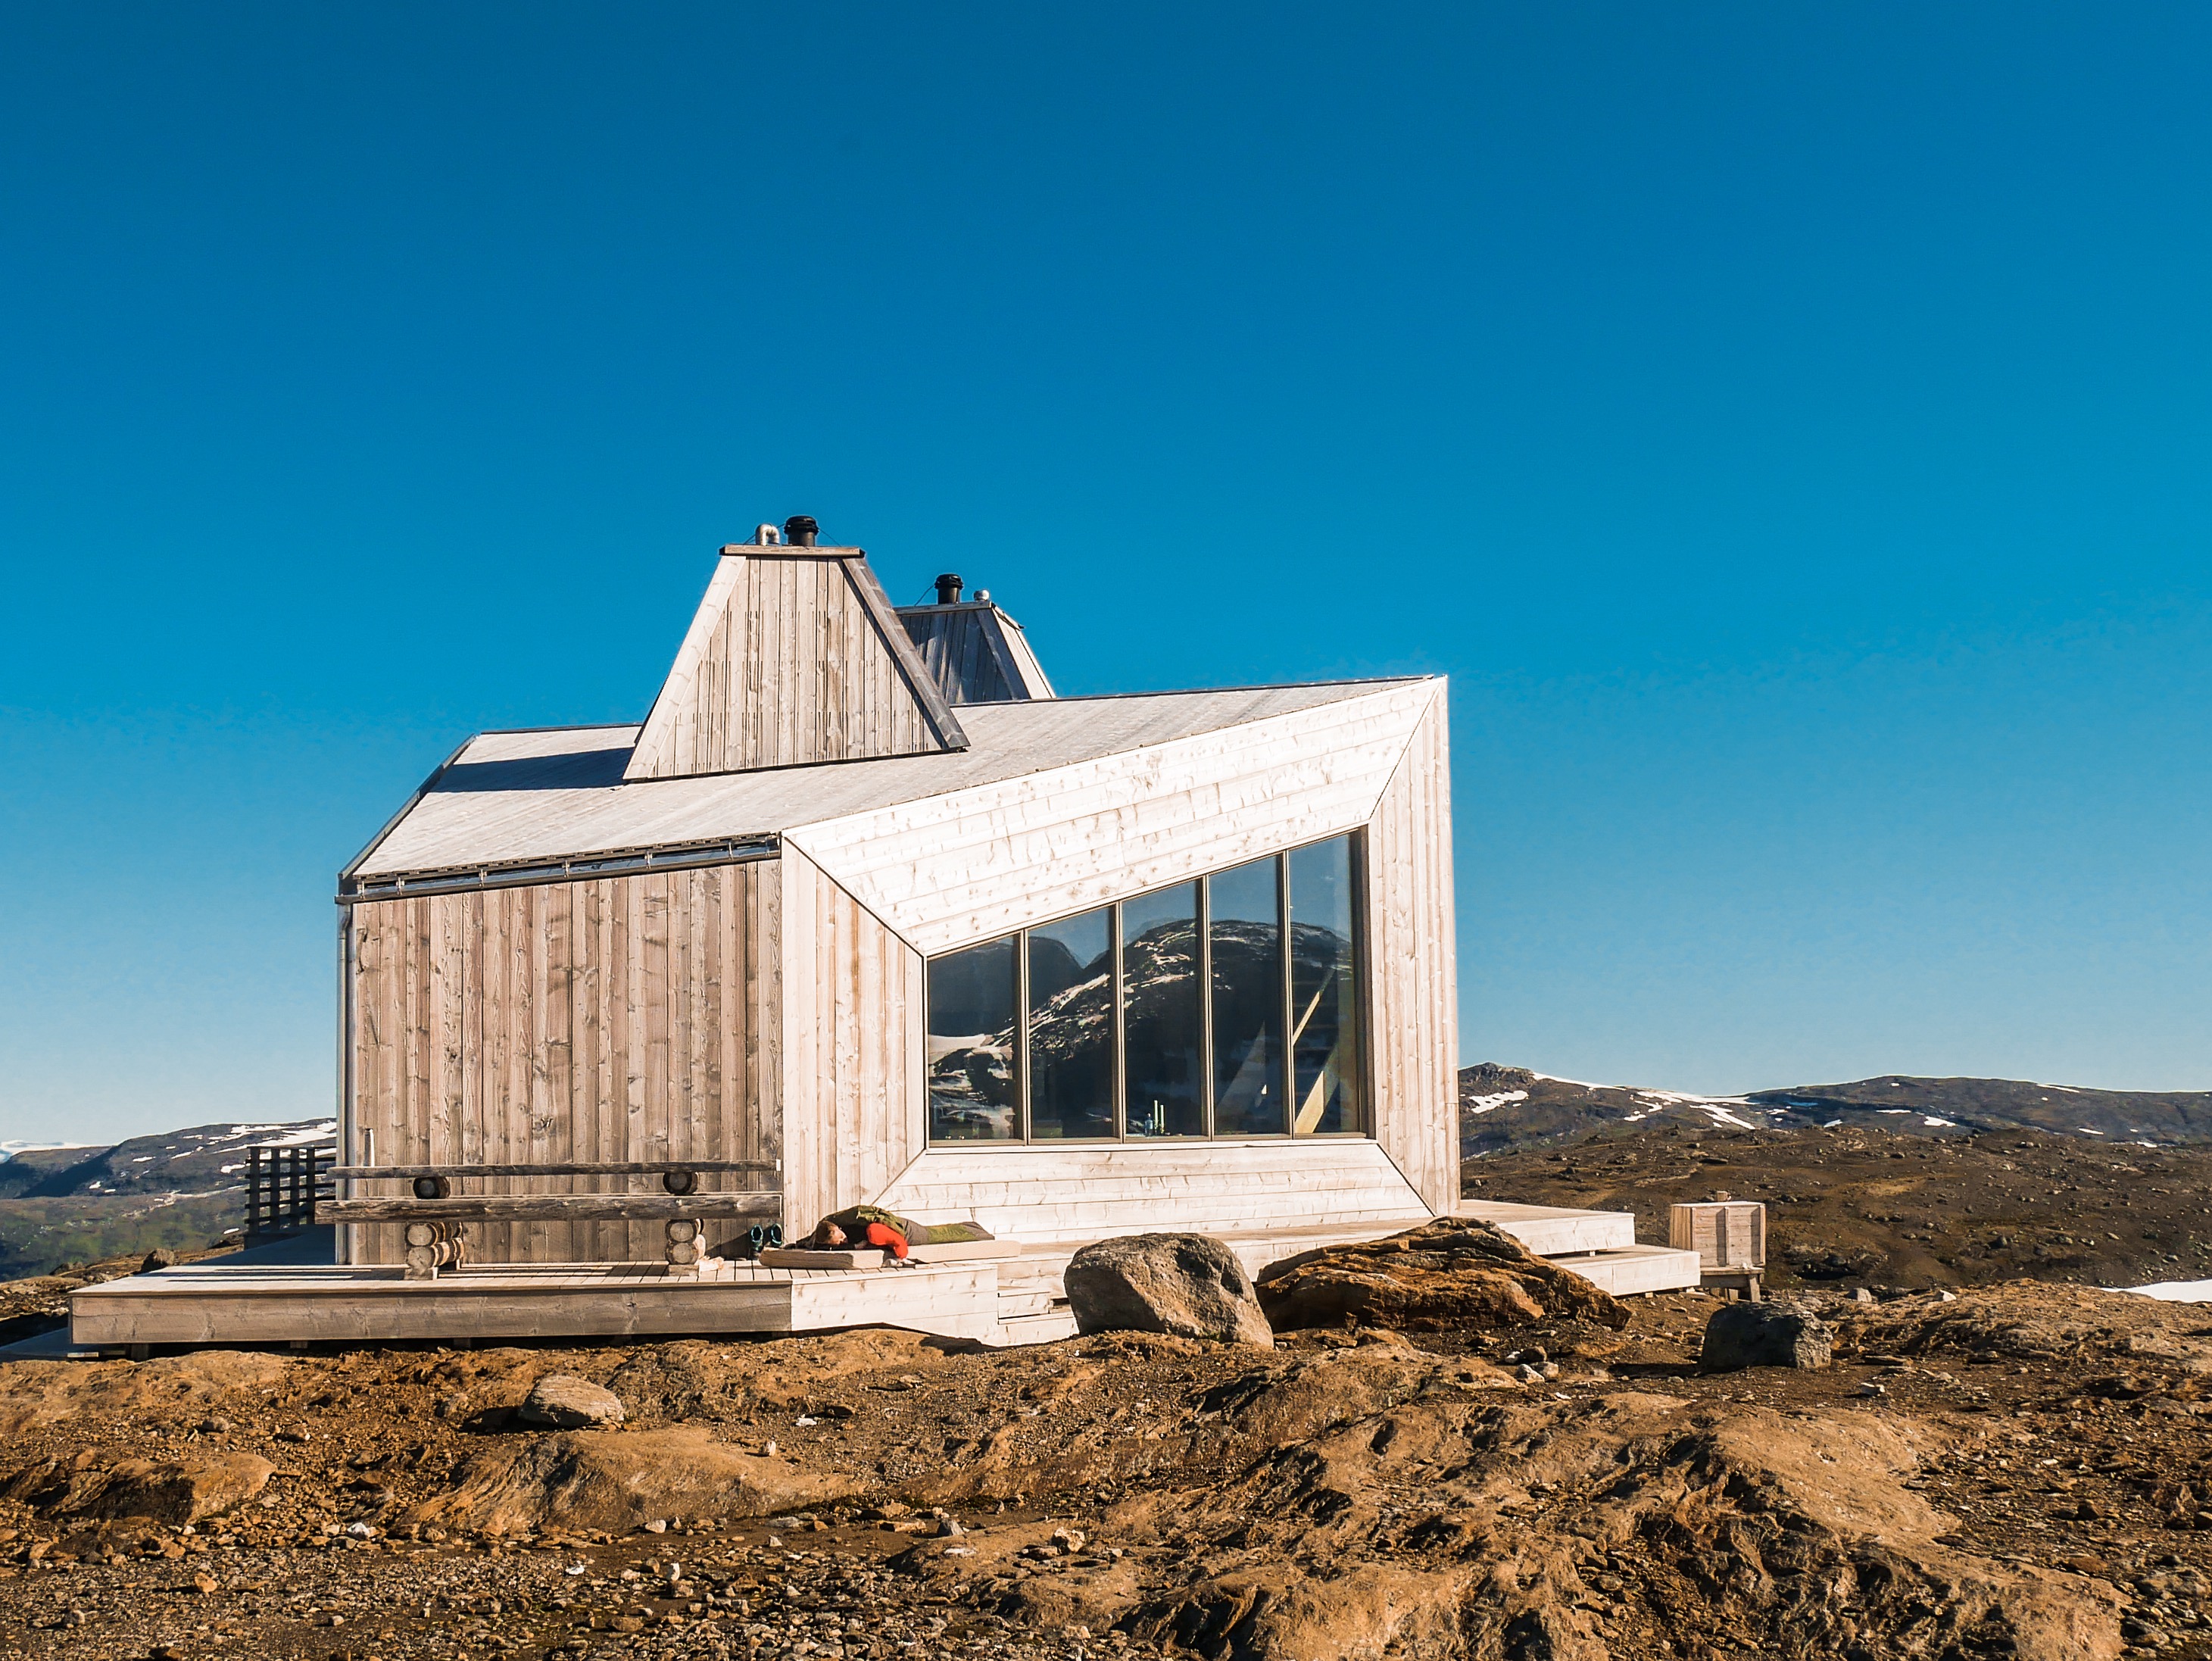
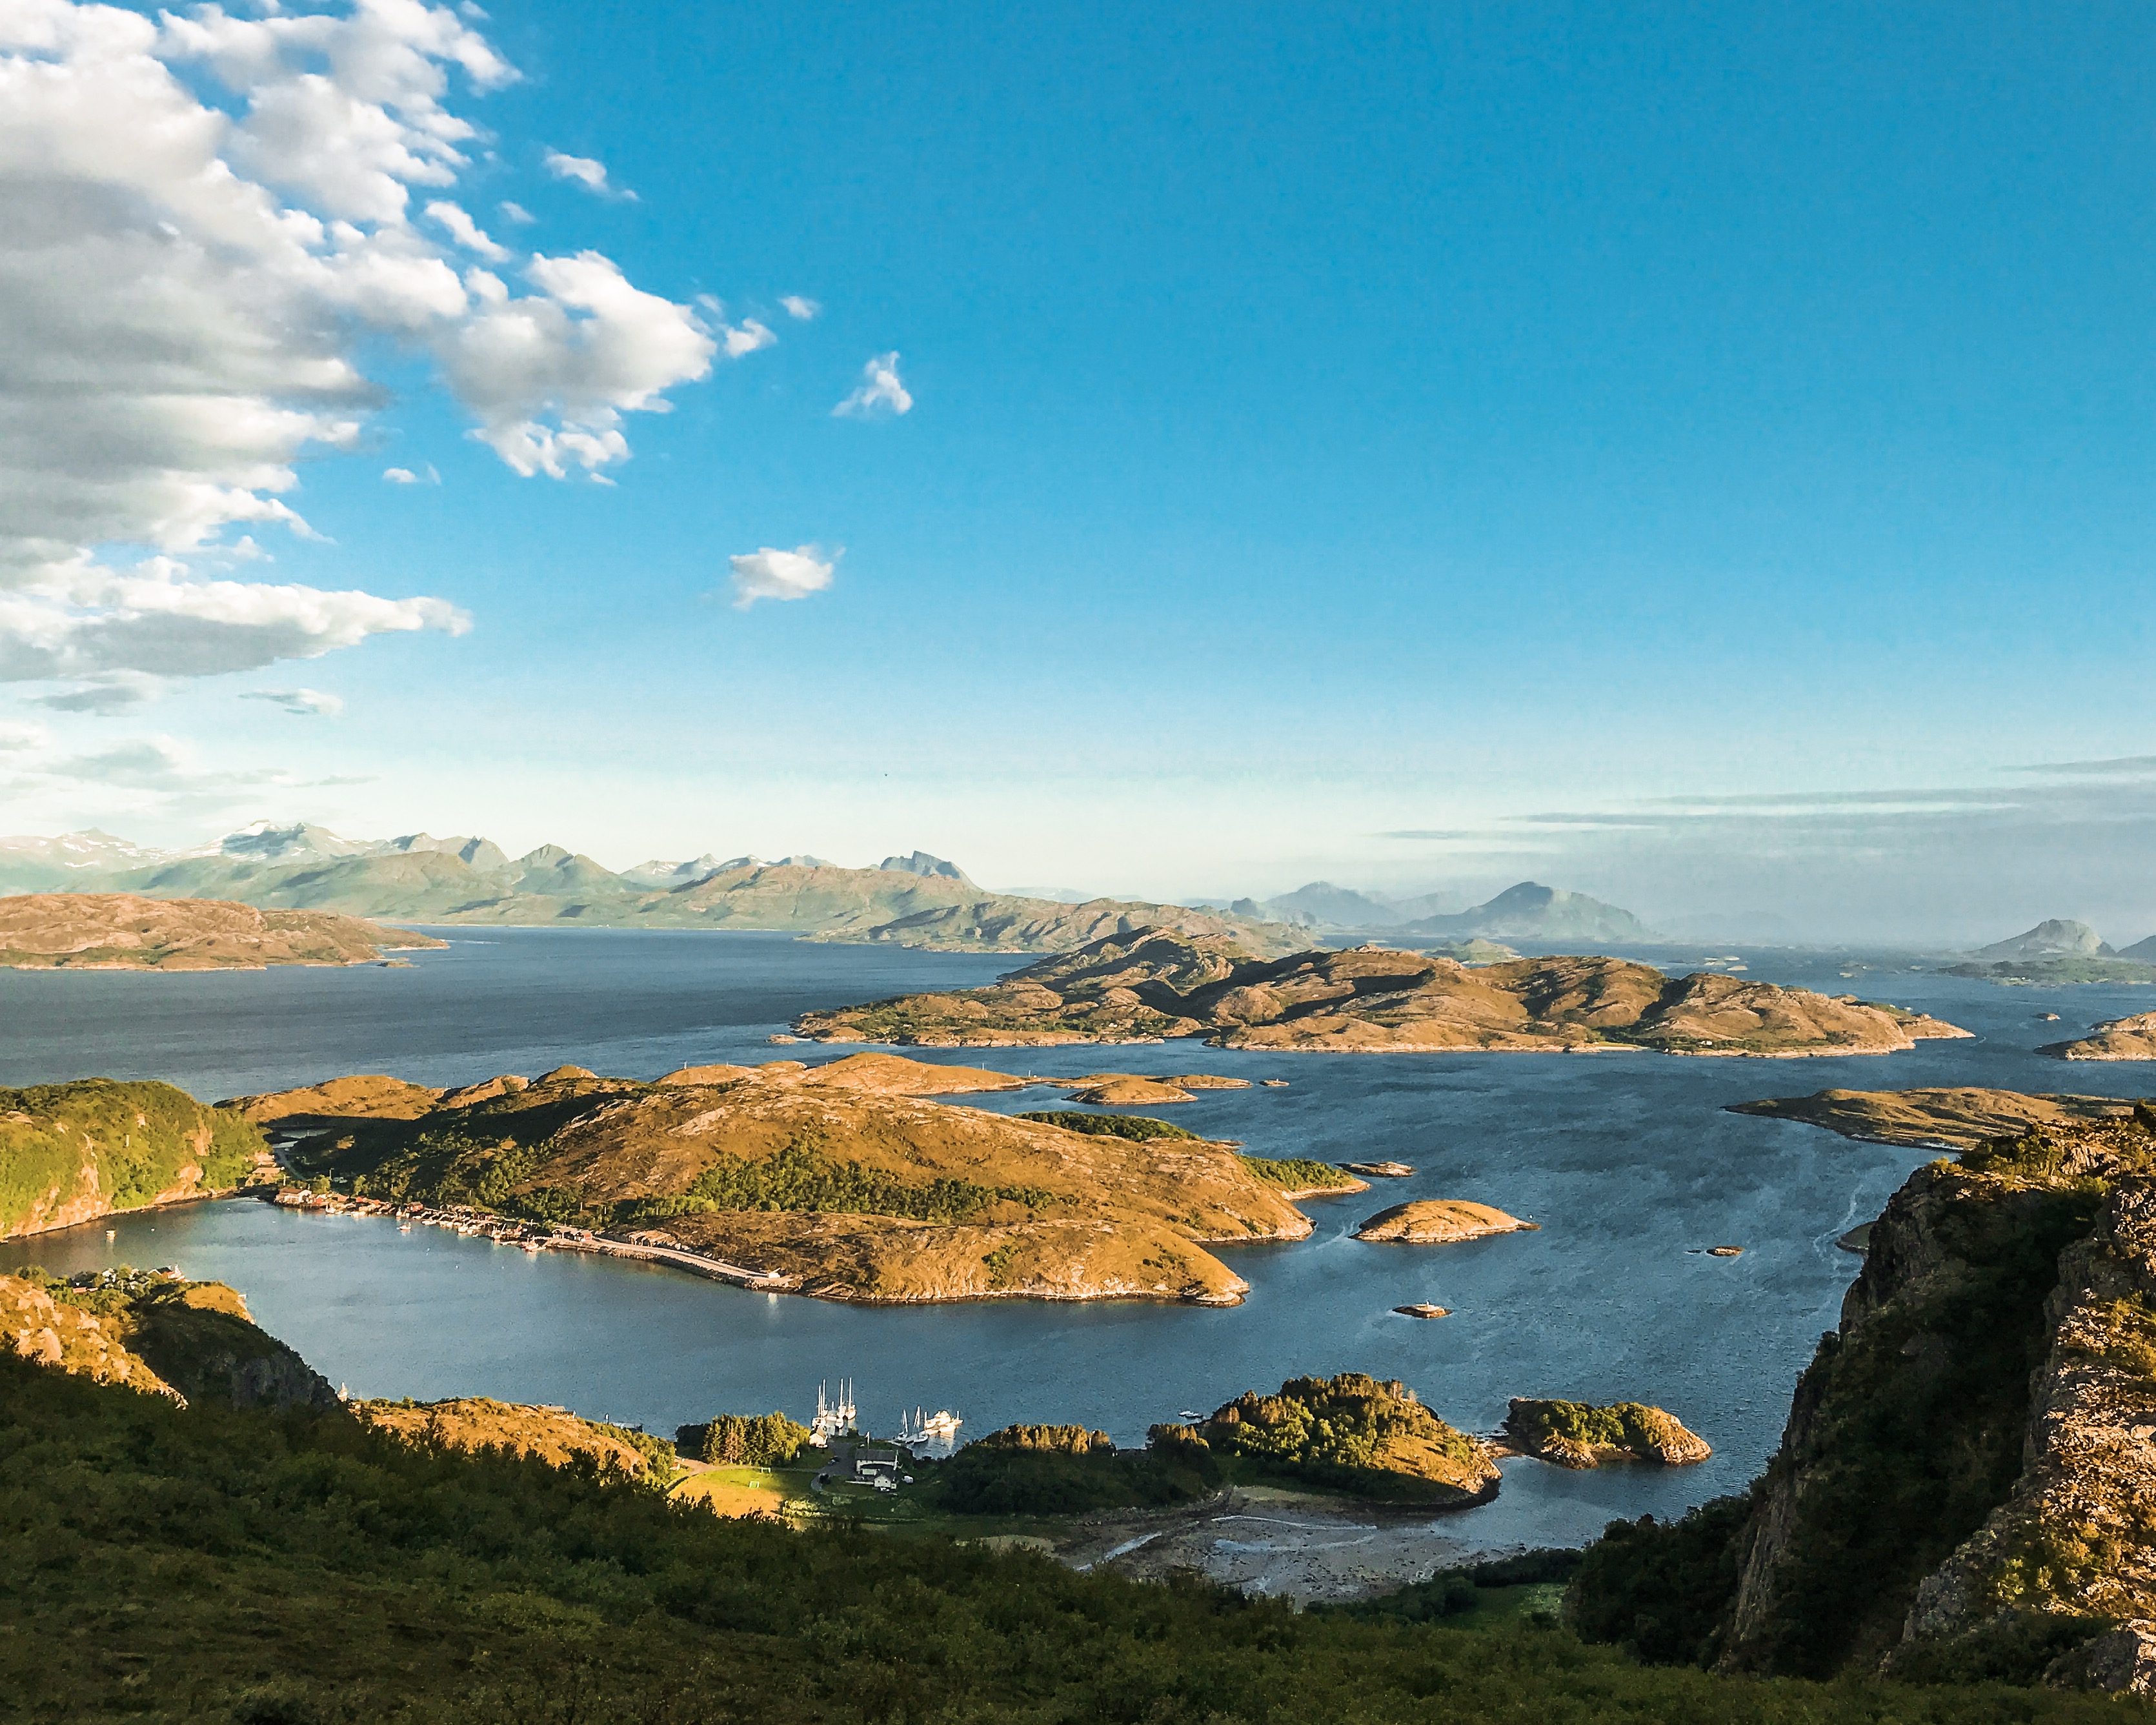
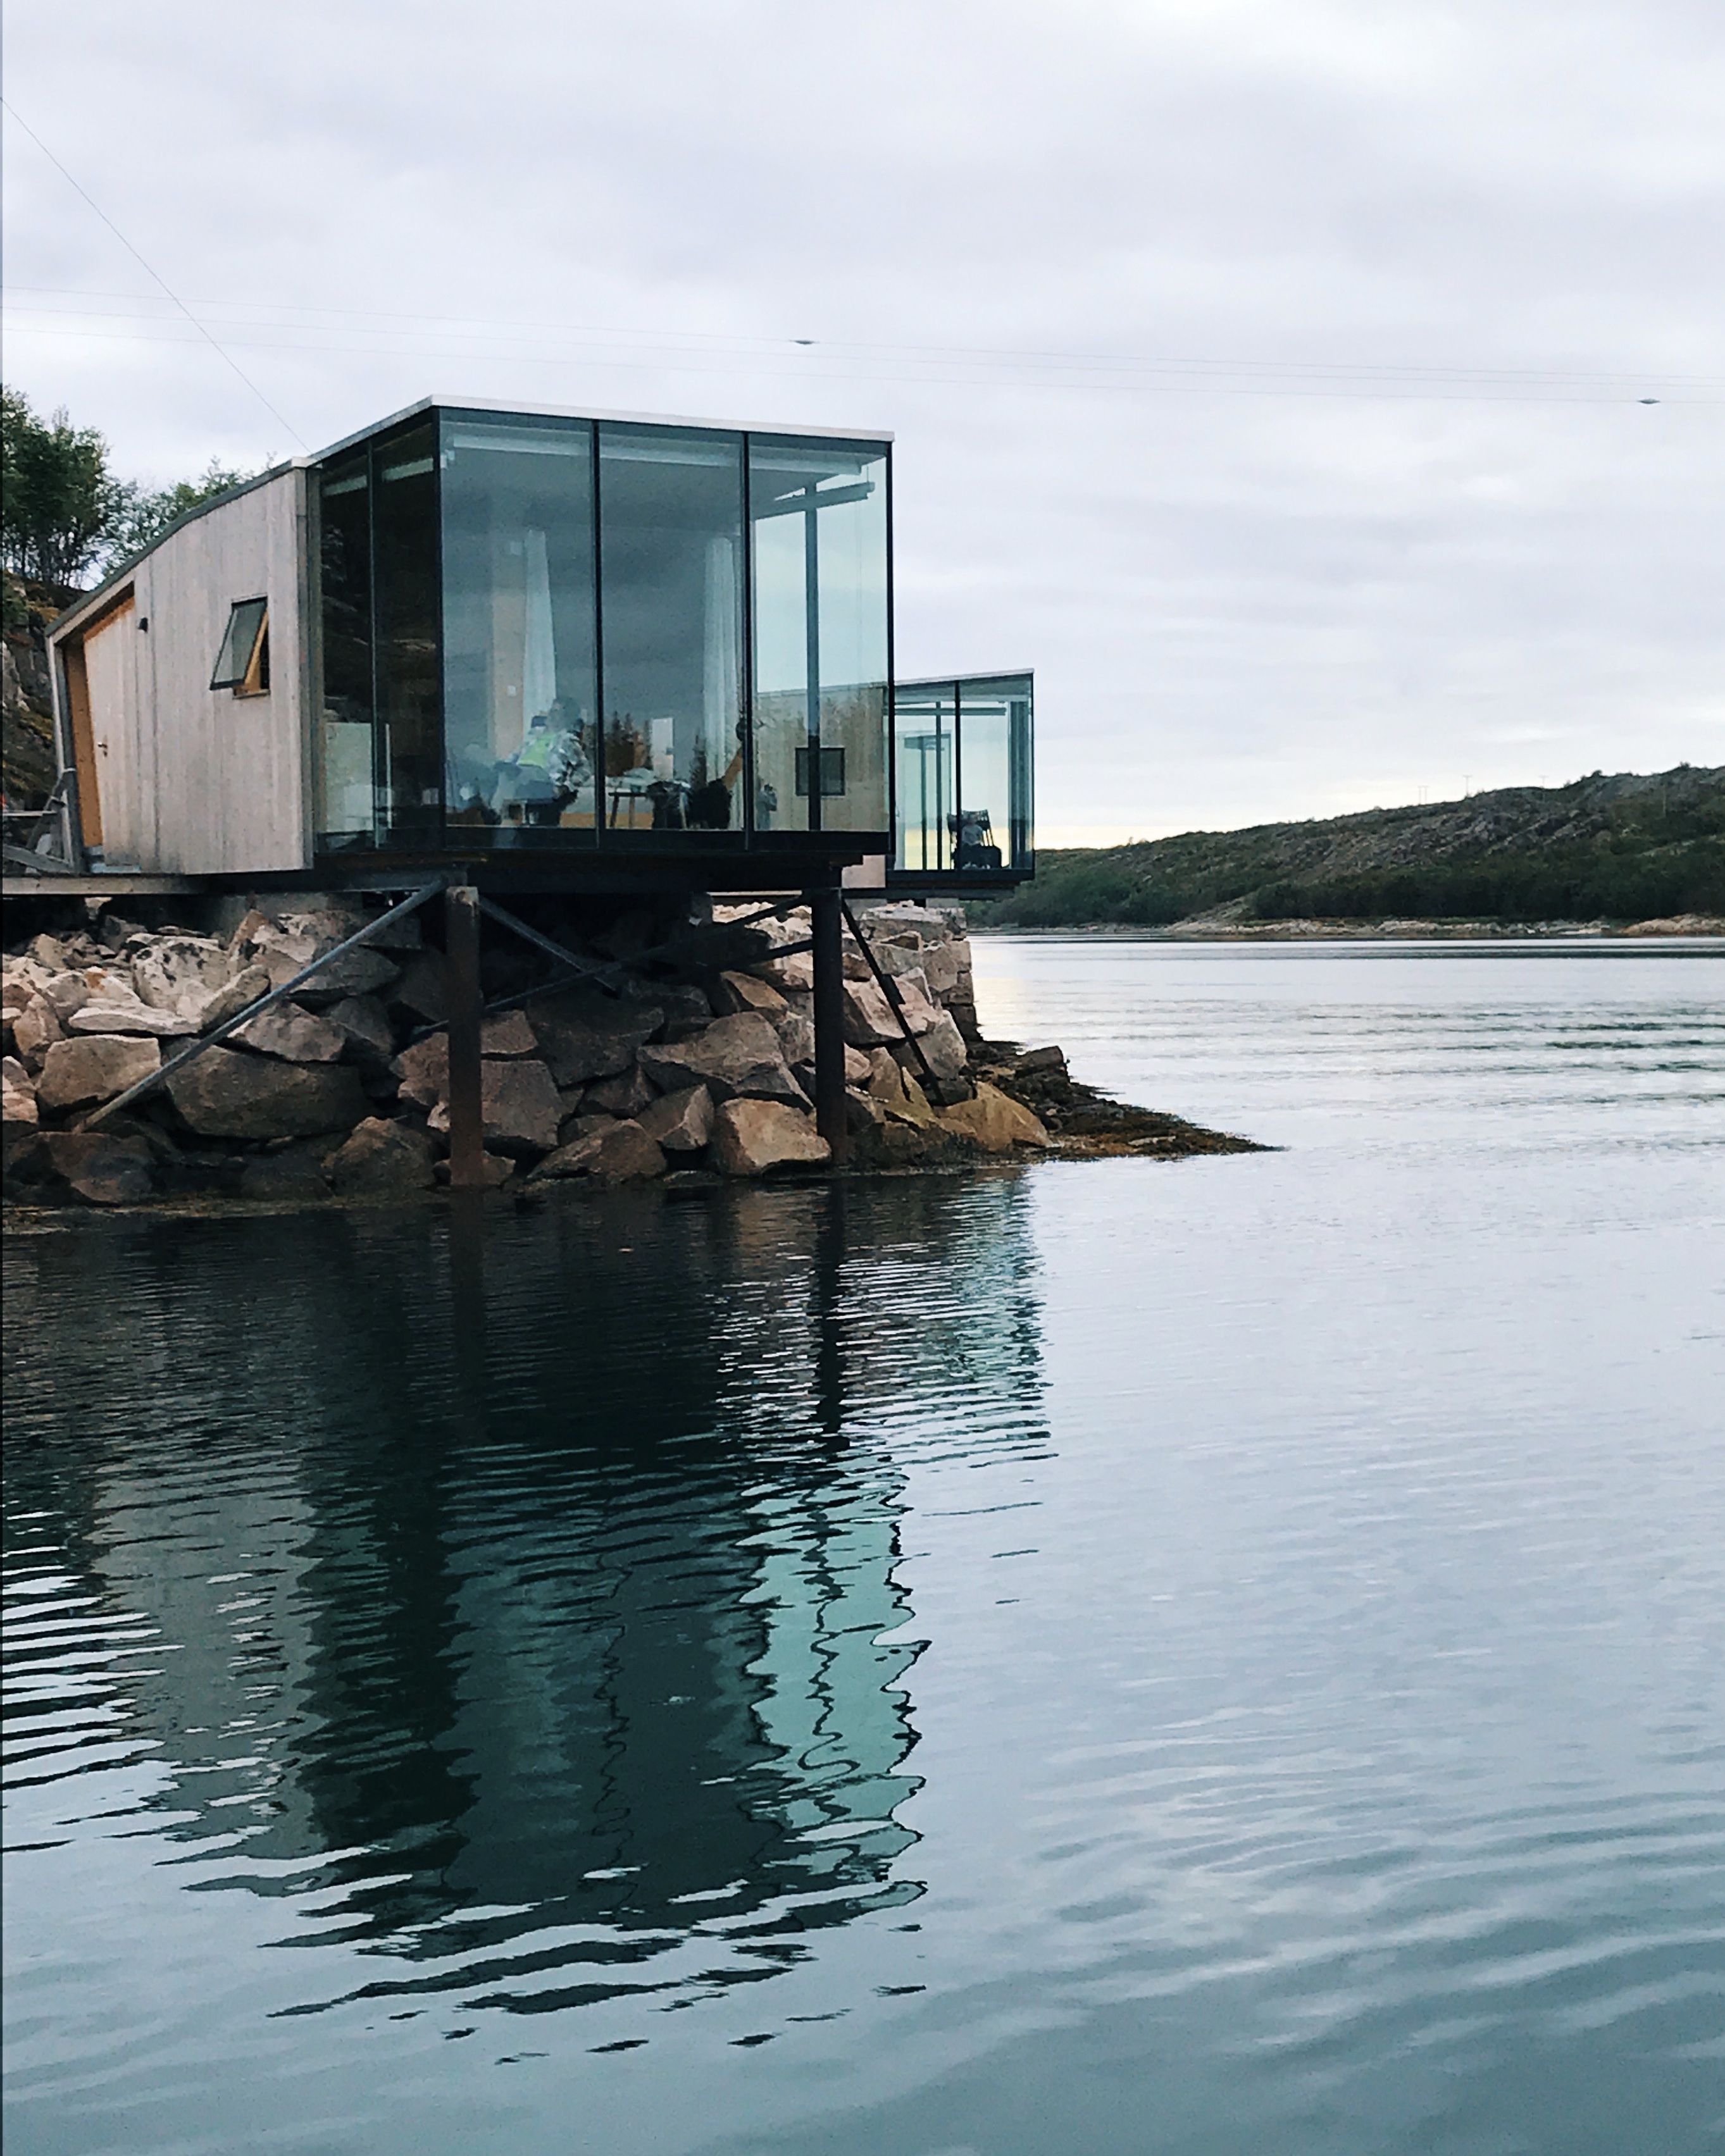
Next up on the Arctic Road Trip itinerary is Manshausen. You may already have seen pictures of the award-winning sea cabins on the island Manshausen on Instagram, blogs or in magazines. Manshausen is owned by the explorer Børge Ousland and is a unique destination if you want to experience nature, whether by simply sitting in your private sea cabin watching the ocean flow by or whether padling, hiking, running, diving, fishing or other activities are your thing. I applaud initiatives like Manshausen, which really takes traveling to a new level.

The fairy tale at Manshausen starts from the minute you are being picked up by boat at the harbor in Nordskot. The wind in your face during the short boat trip promises a fresh and different experience, which certainly continues as you walk into the sea cabin. You may feel like never wanting to leave.

The Cabins

The seven sea cabins provide compact living Scandinavian style and consist of a small bedroom with a 140cm bed and a single bed underneath, corian bathroom and a main room with a walkthrough corian kitchen, a 160cm bed in the back and living room in the front. There is nothing like waking up here in the morning! Be warned that in the summer 24 hours of daylight may mess up with your sleep. The curtains provided do not help with that.

You may cook your own food in the cabin, have lunch/dinner at the restaurant, or you can grill outside at one of the campfires provided. Breakfast is included and served at the main house, where you can also find a library/living room.

Activities

Although you may not want to leave your cabin, there are so many cool things to do at Manshausen. First on my agenda was to explore the beautiful white sanded beaches around Manshausen by kayak. And of course, I checked out some of the trails on the mainland. My choice as a hike/run to Sørskottinden, which takes you along a pretty steep trail in the forest up to a small lake, which provides Steigen with drinking water (bathing prohibited). From the lake and going further up you get a great view of Steigen and the Lofoten islands across the fjord. From Sørskottinden you can also continue along the ridge towards Nordskottinden. For the ridge a guide and proper equipment is advised and may be arranged with Manshausen.

Strava for details: Sørskottind

IMG_0209
View from Sørskottinden

IMG_0237
Nordskottinden and Sørskottinden

Another great run is “Dronningruta” (the queen’s trail) over Fløya, which starts at Skånland and takes you to Holkestad. The drive to Skånland from Nordskot is about 40 mintues.

You may also choose a more chill approach and try out the hot-tub and cool off in the saltwater pond. There is also a sauna next to the pond.

More on the activities offered here.

Getting there

If you have followed my itinerary, traveling to Manshausen from Rødøy takes about six hours in addition to the ferry, which takes between 40 minutes and two hours, depending on the schedule. I would therefore recommend adding another overnight stay on the road, especially since there are so many things to see and do along the road (make sure you get a glimpse of the glacier Svartisen I had planned to run up to Sandhornet in Gildeskål, and stayed overnight at Saltstraumen. Unfortunately, weather prevented me from doing the hike/run and Saltstraumen wasn’t that interesting, so I would recommend to search for other accommodation alternatives for example in Gildeskål.

Make sure you make a stop at some of the view points established along the road, such as Ureddplassen, Storvika and Gildeskål.

Manshausen is also worth the trip in its own. More on how to get there here: http://www.manshausen.no/en/travel-to-manshausen/


Rabothytta – Rødøy – Arctic Road Trip Day 4

IMG_9918
Looking down at Klokkergården on Rødøy.

Waking up at Rabothytta, at the feet of the magnificent Okstindan mountains, your best option would be to stay. I am sure I could spend a full day enjoying the views and the quietness, that is if I could avoid exploring the surrounding mountains. This time I had to move on, and already at eight in the morning I started the one hour hike down from the cabin in the morning sun. 

After the almost spiritual experience near Okstindan mountains, I had decided to head out to the coast for the remaining part of the road trip. The first destination was Rødøy, a small island about two hours with the ferry from the mainland, when arriving from the south (important information on travel planning to Rødøy below). With Rødøy on the itinerary, you get to explore the northern part of the coastal route (“Kystriksveien”) as a wonderful side effect.

The drive & the ferry

From the parking in Leirskardalen the drive to the harbour, Kilborghamn, where you can take the ferry to Rødøy, is about 2.5 hours. After about an hour you reach Mo I Rana, the last city of some size on the route. Take the opportunity to stock up on necessities. In another forty minutes you reach the coastal route. Several beautiful view points have been created along the road in order to inspire you to take a break and take in the surroundings, such as Hellåga, about an hour from Mo I Rana.

IMG_9880
Hellåga view point

The ferry only runs twice a day, so make sure you check the schedule and plan your trip carefully, both for your arrival at Rødøy and your departure.

Klokkergården

The place to stay at Rødøy is Klokkergården, a more than 100 years old school building, which has been renovated by Malin and her family to one of the most unique  accommodation opportunities in Norway. The rooms give you the feeling of staying at someone’s home, and the restaurant downstairs serve impeccable food. Klokkergården is also the starting point for the climb to the famous mountain, Rødøyløva, which was my reason for adding Rødøy to my itinerary in the first place.

IMG_9937
Rødøyløva just before midnight.

Rødøyløva – the hike

Hoping to experience the midnight sun from the top, I waited until late in the evening before running up to Rødøyløva. The mountain has its name from the resemblance of a lion (“Red island lion”). Watching clouds coming in, in the end I had to give it a go a couple of hours before midnight.

IMG_9920

IMG_9921
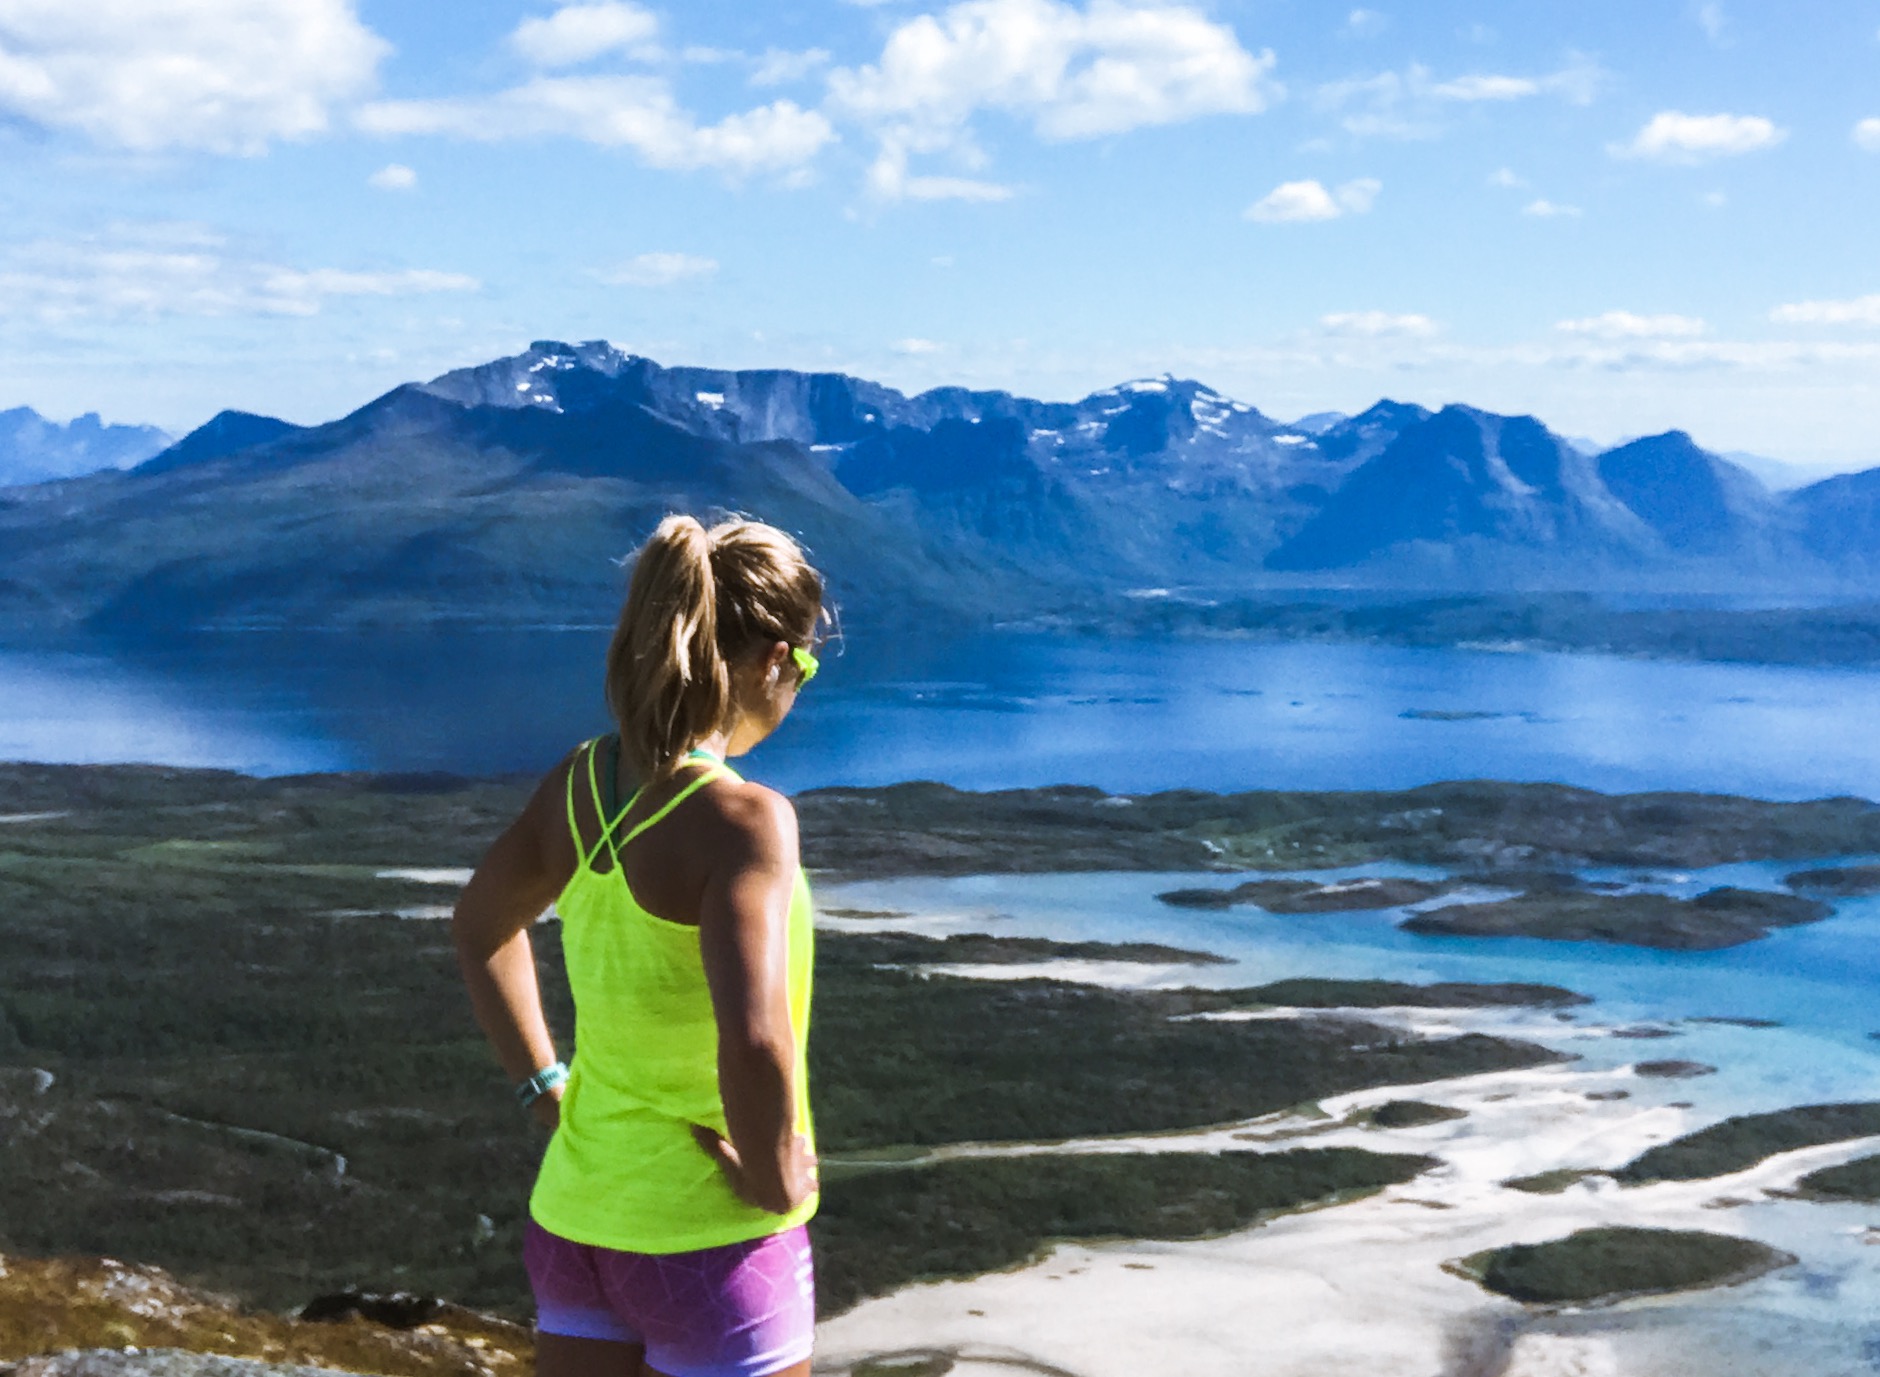
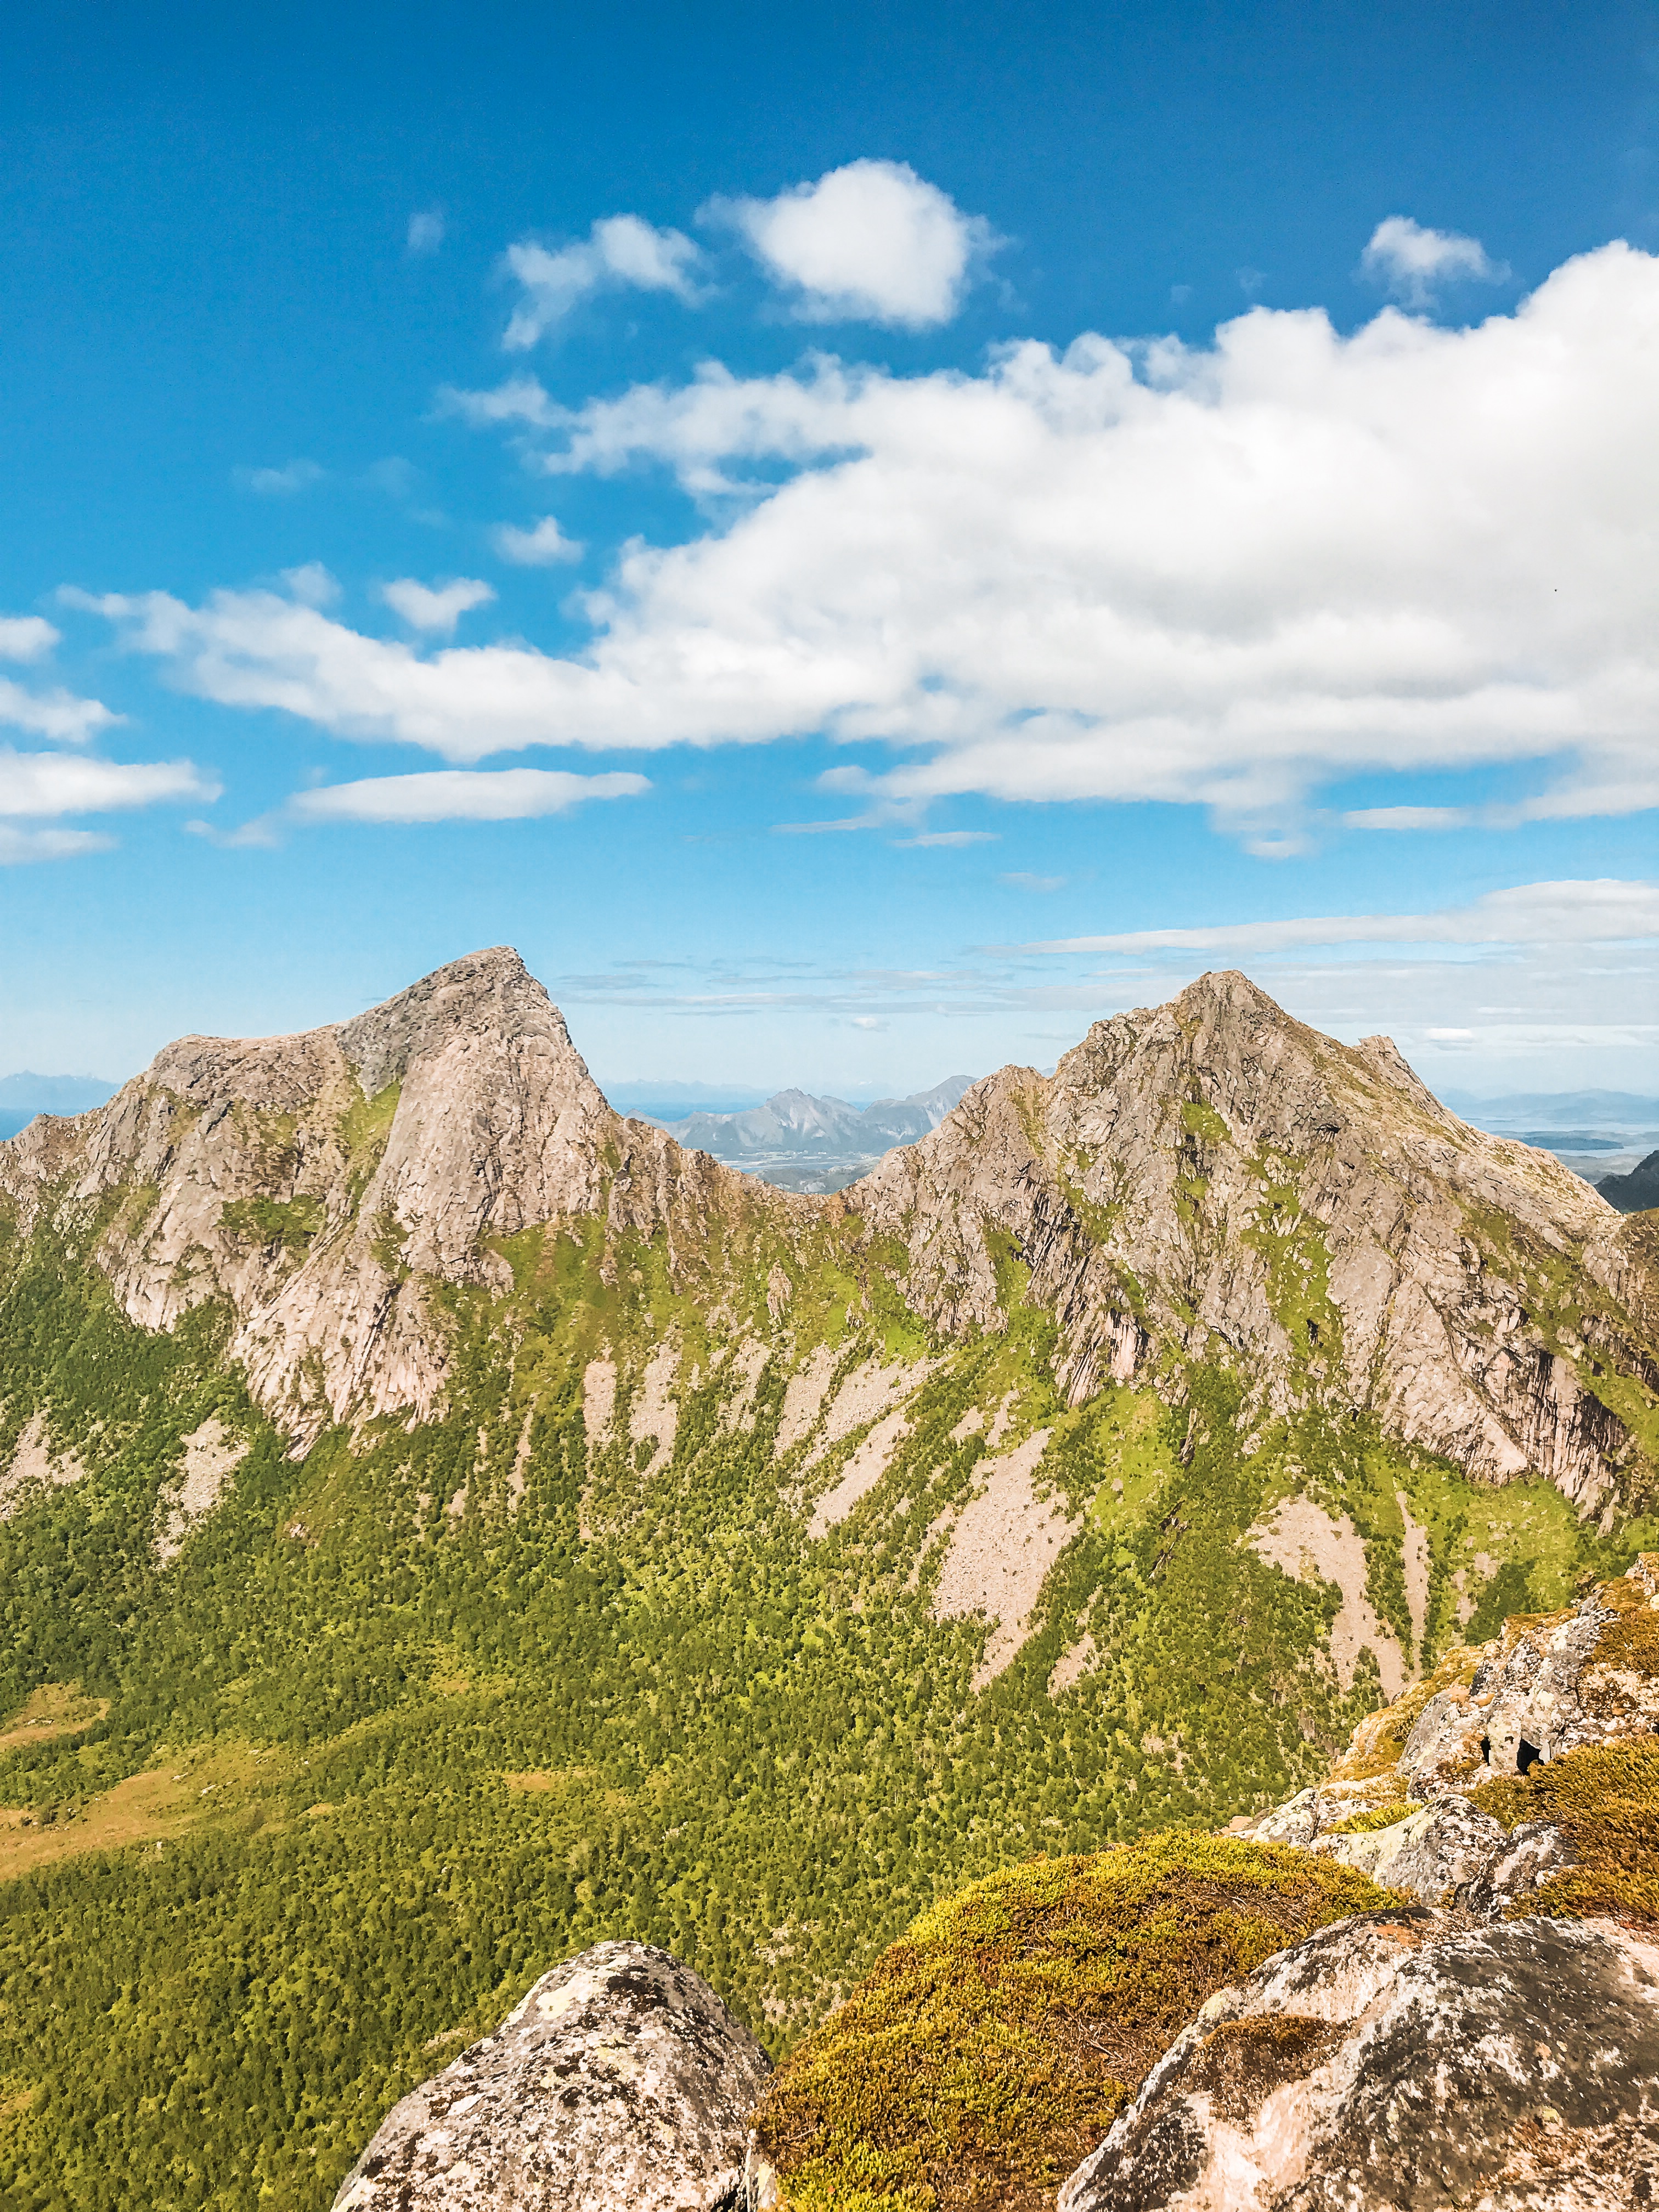
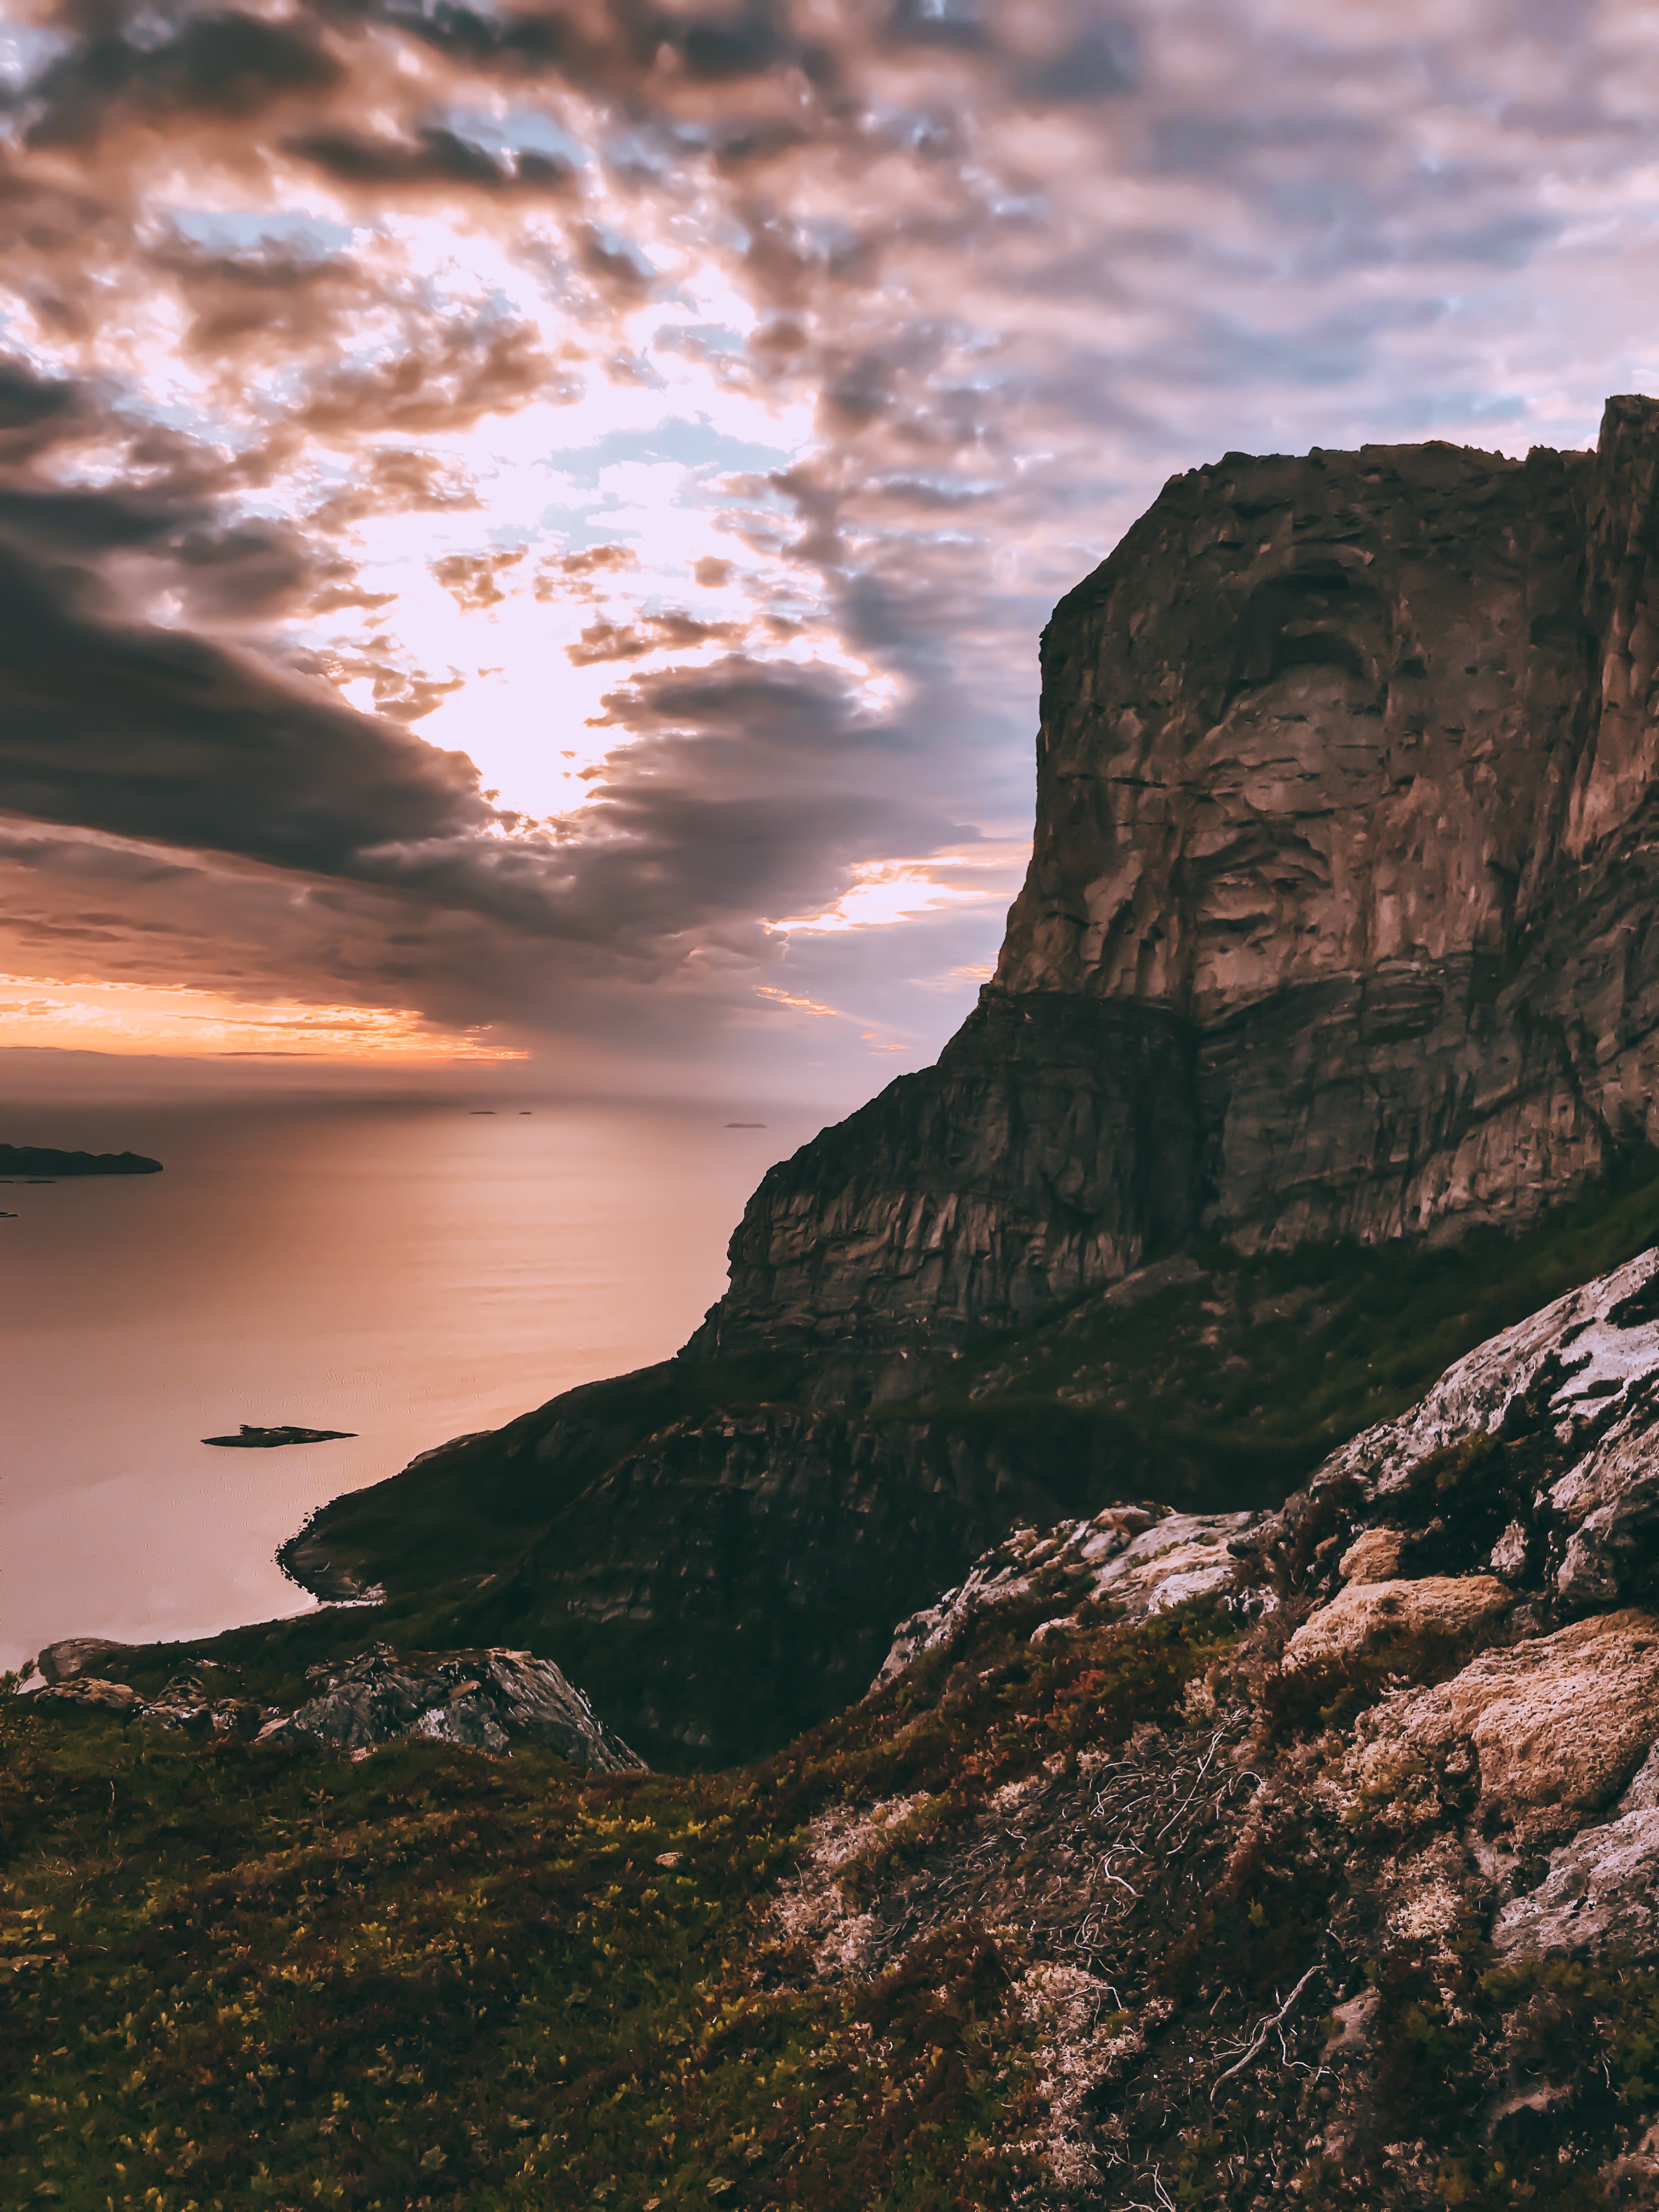
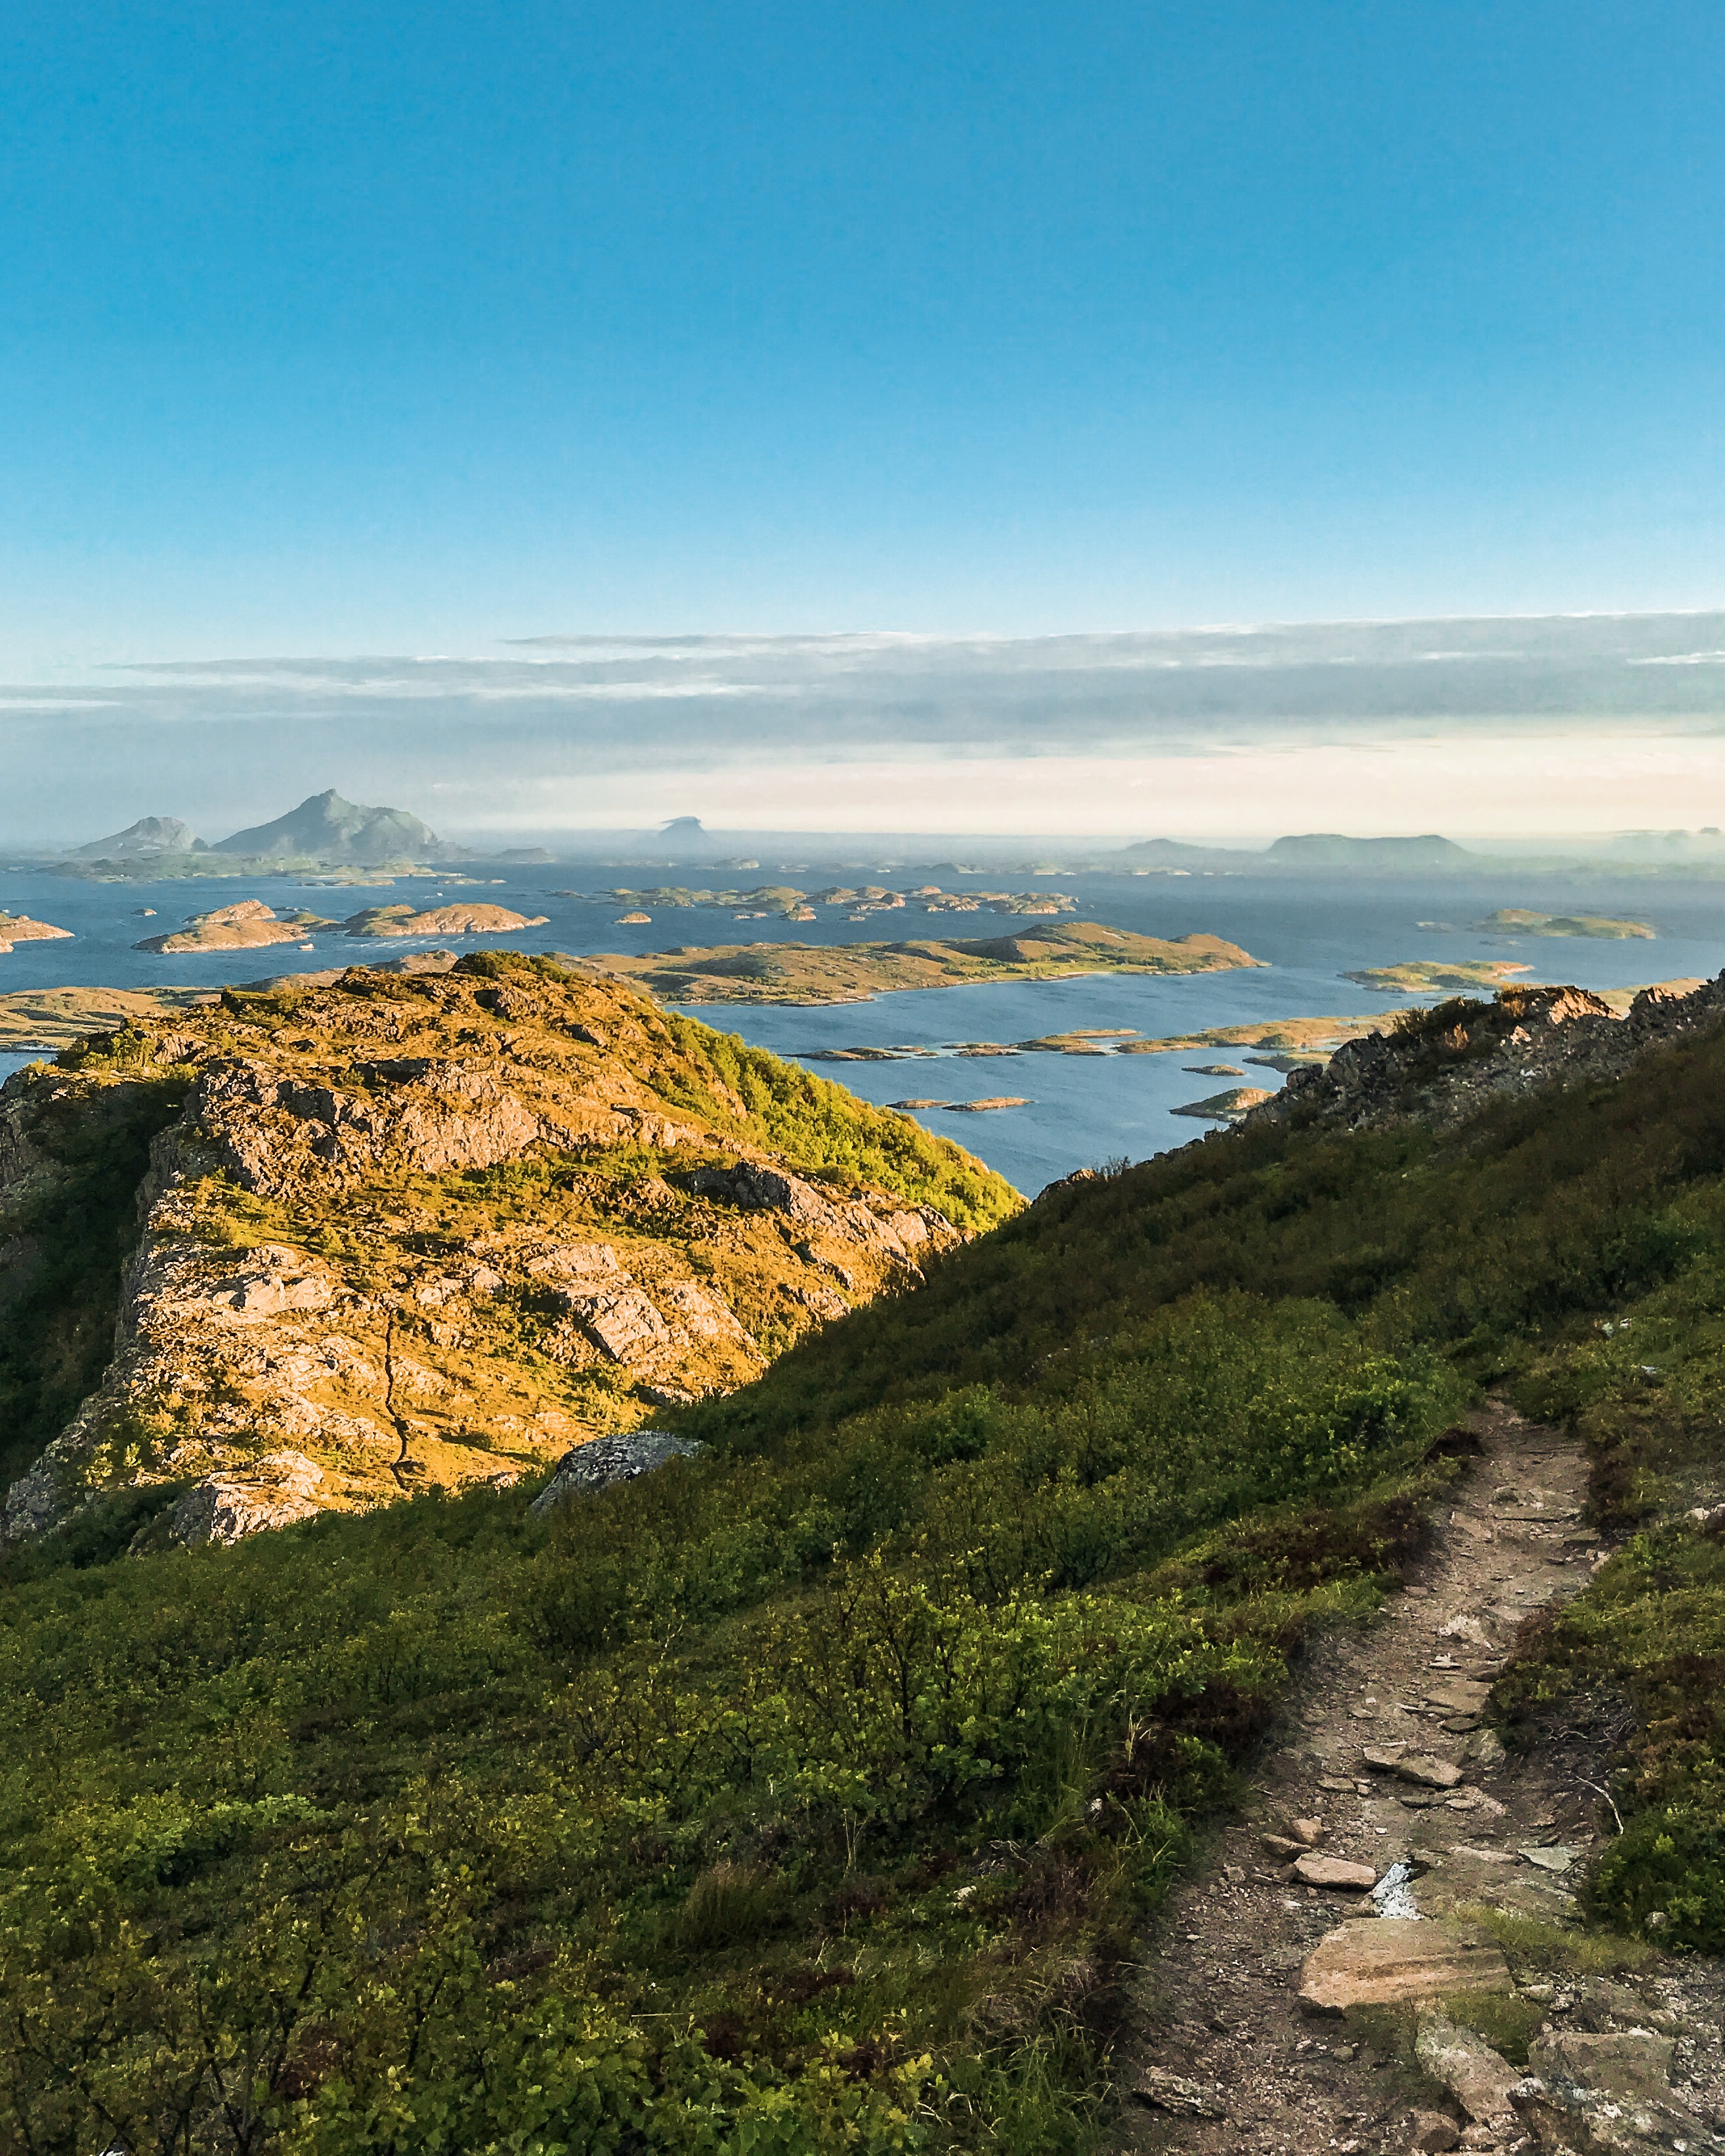
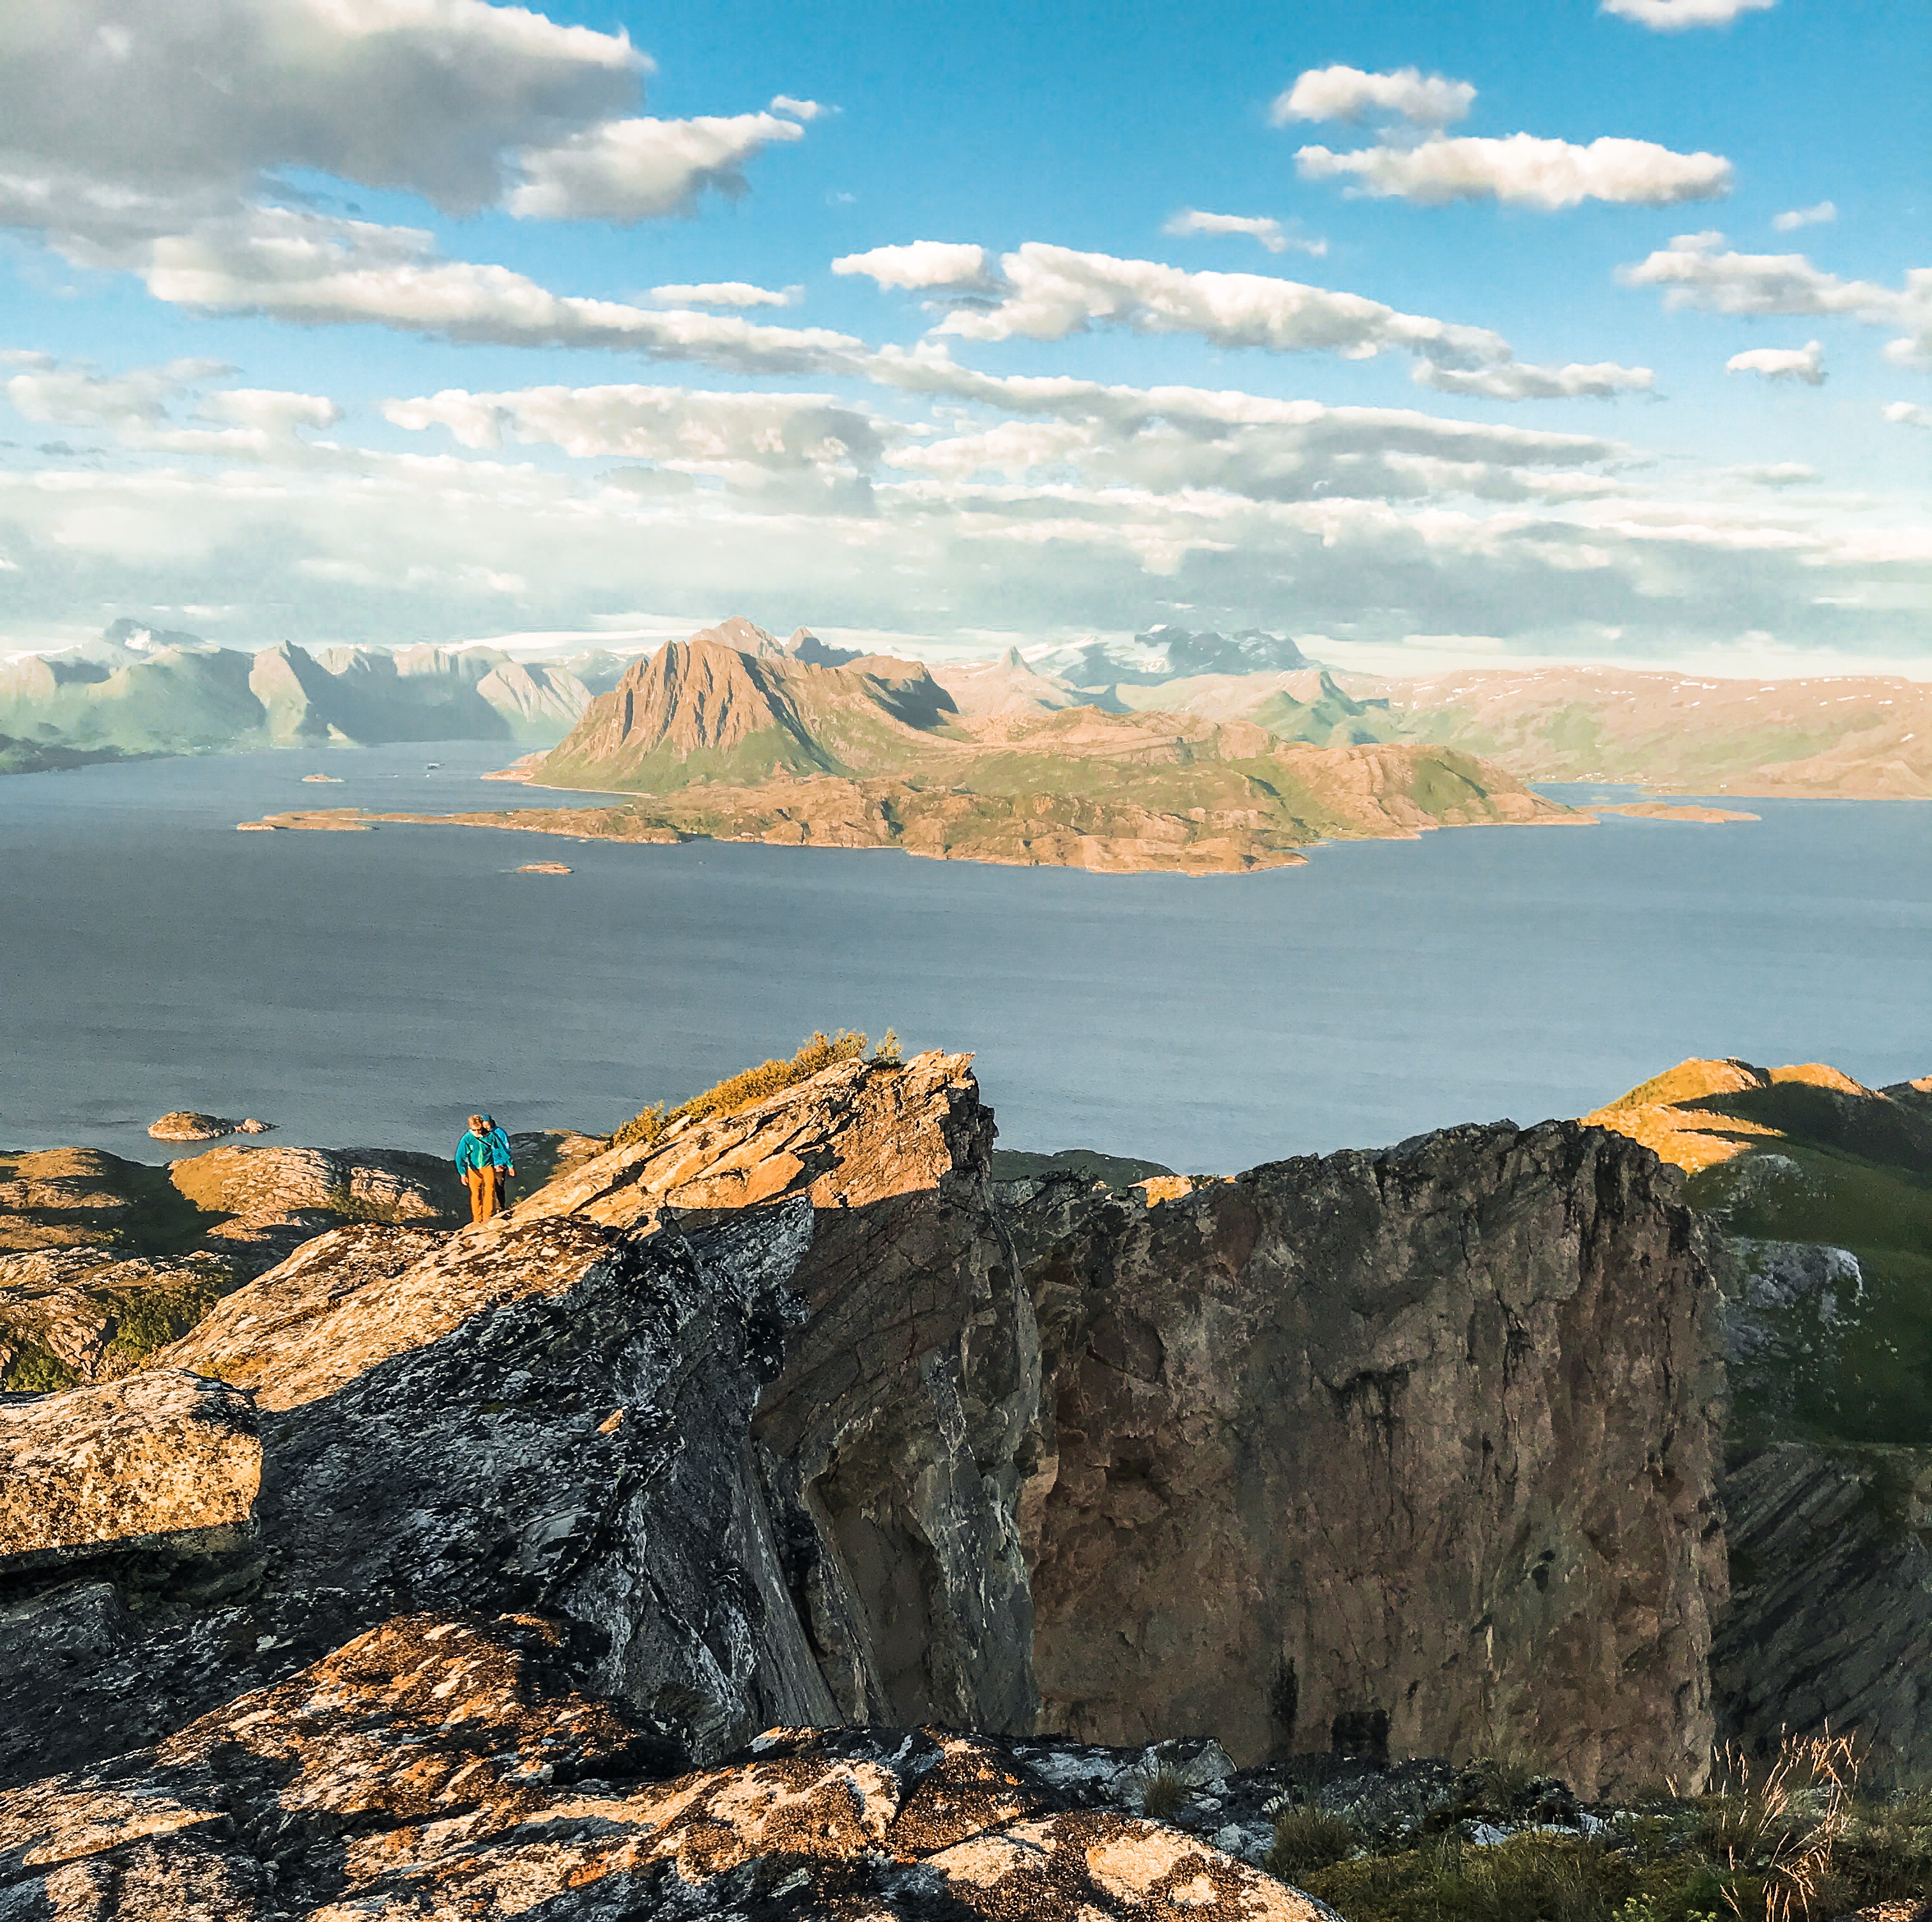
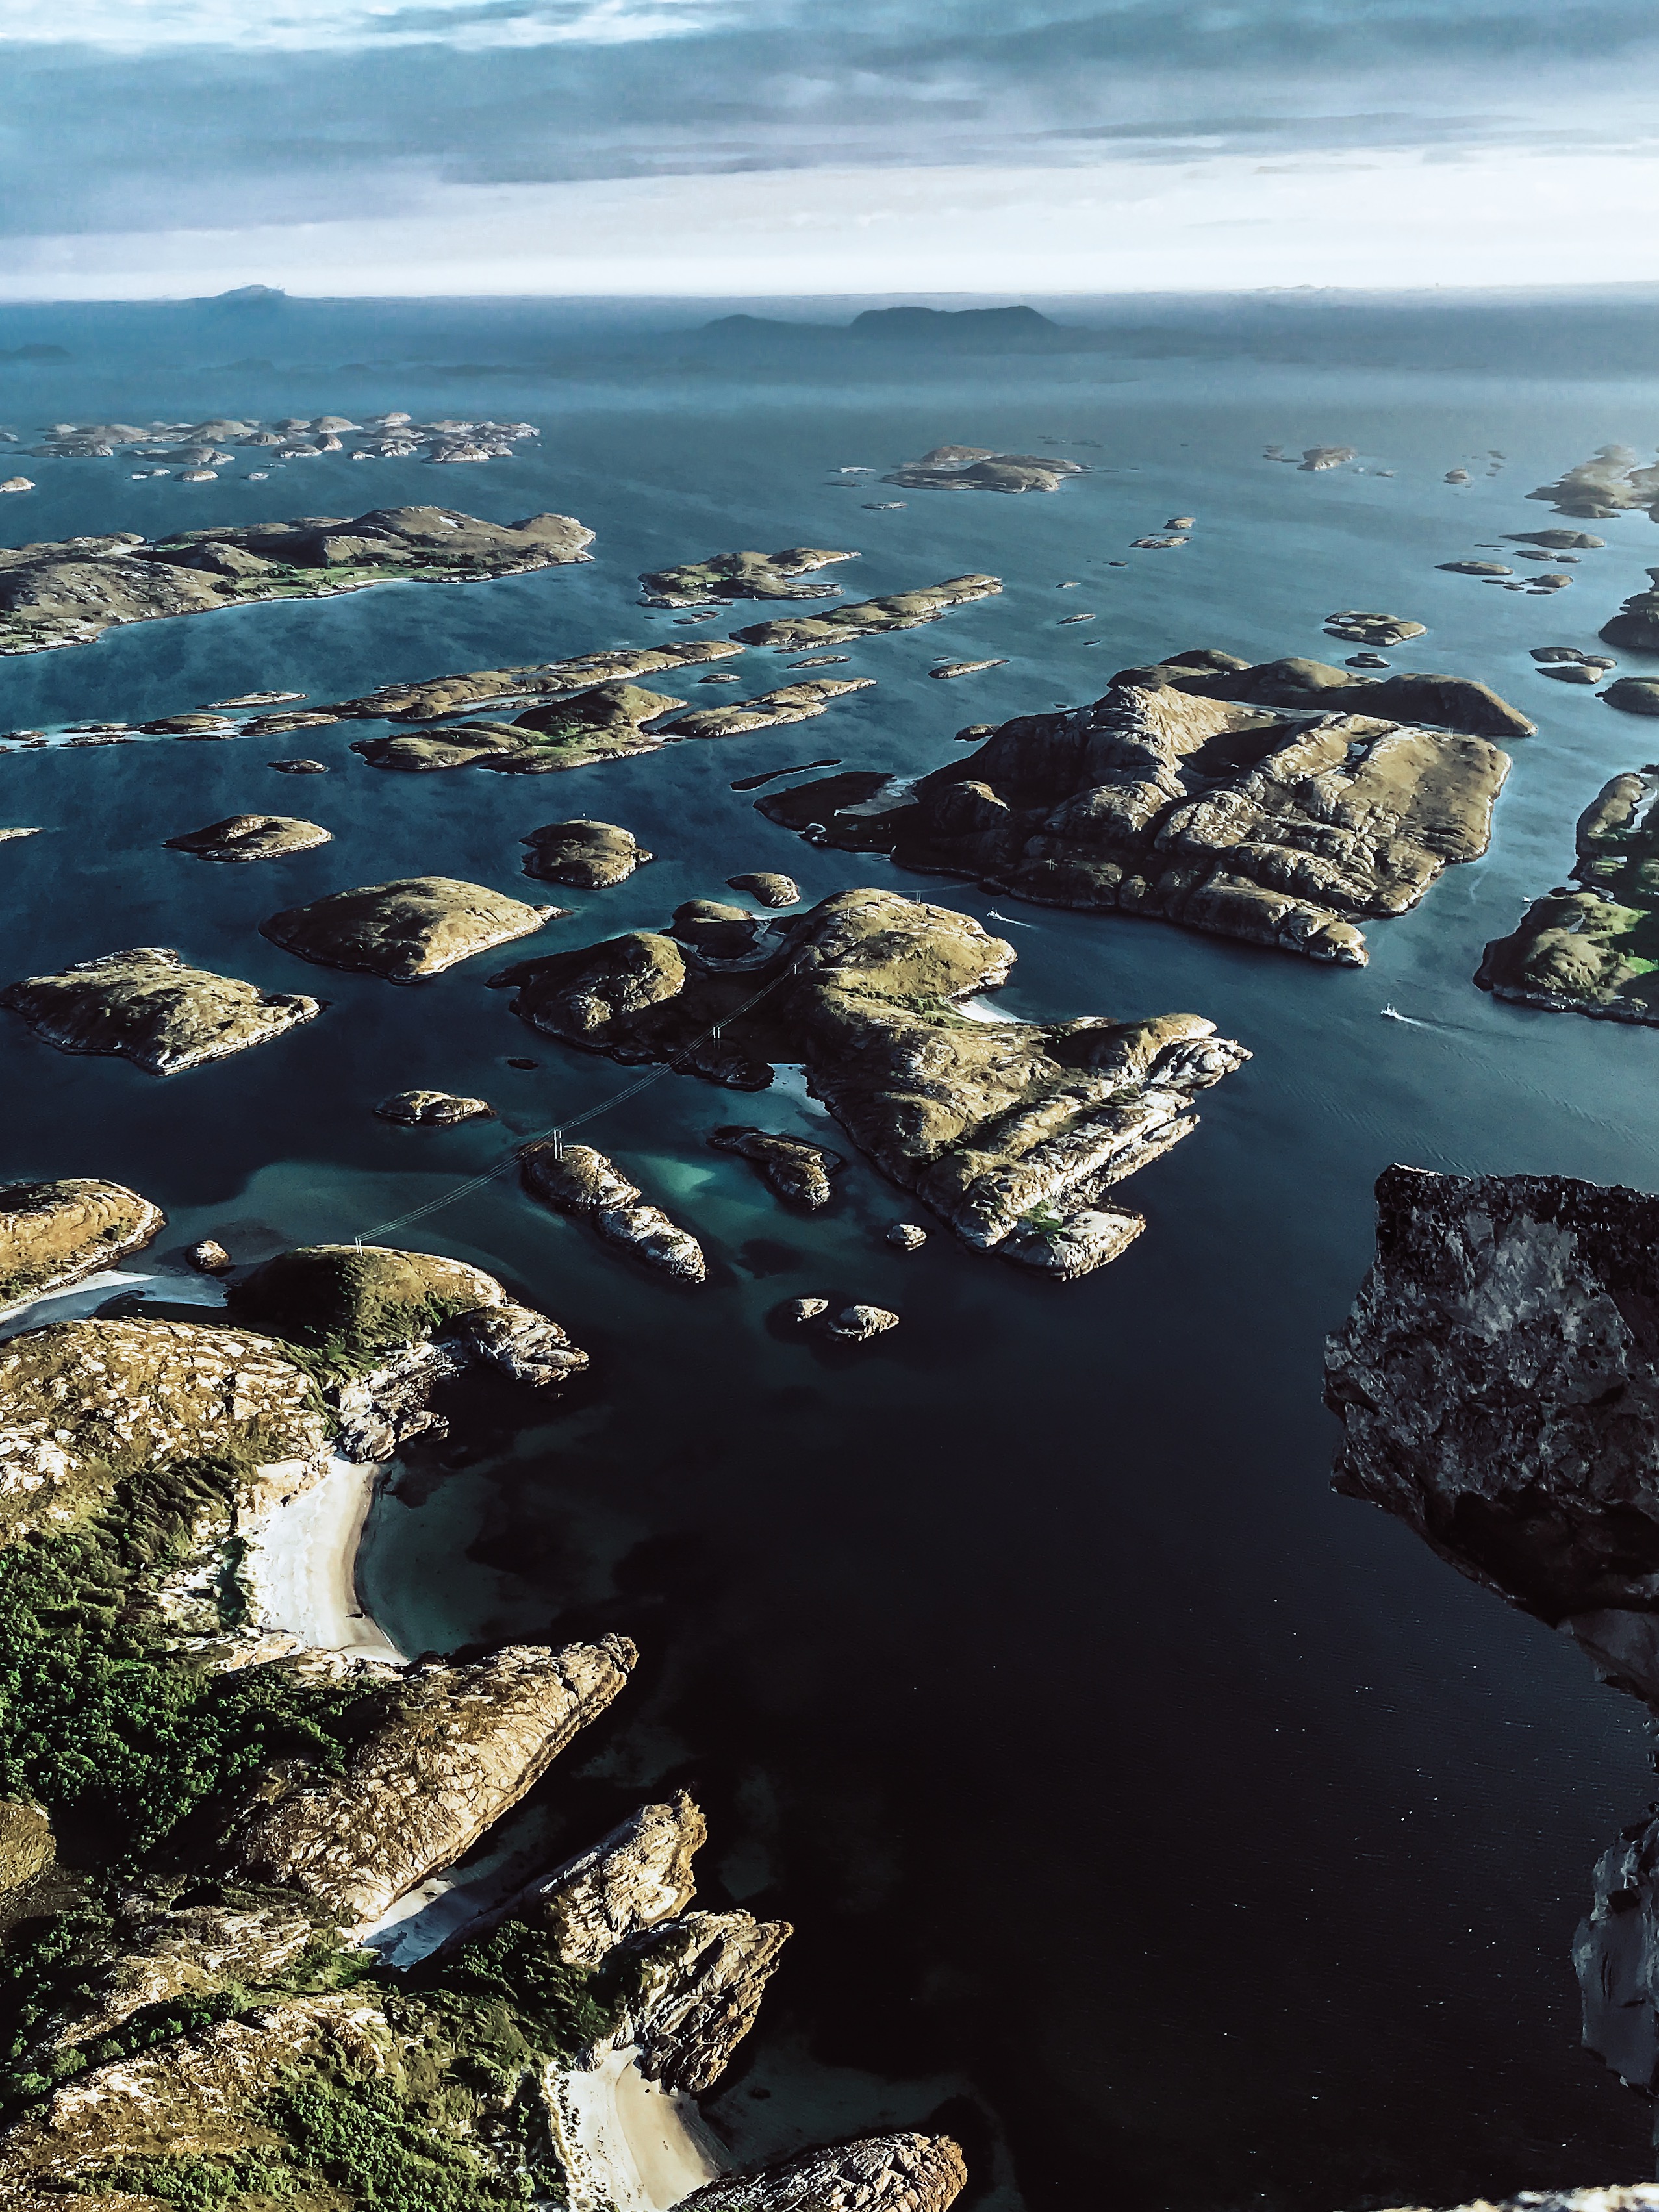
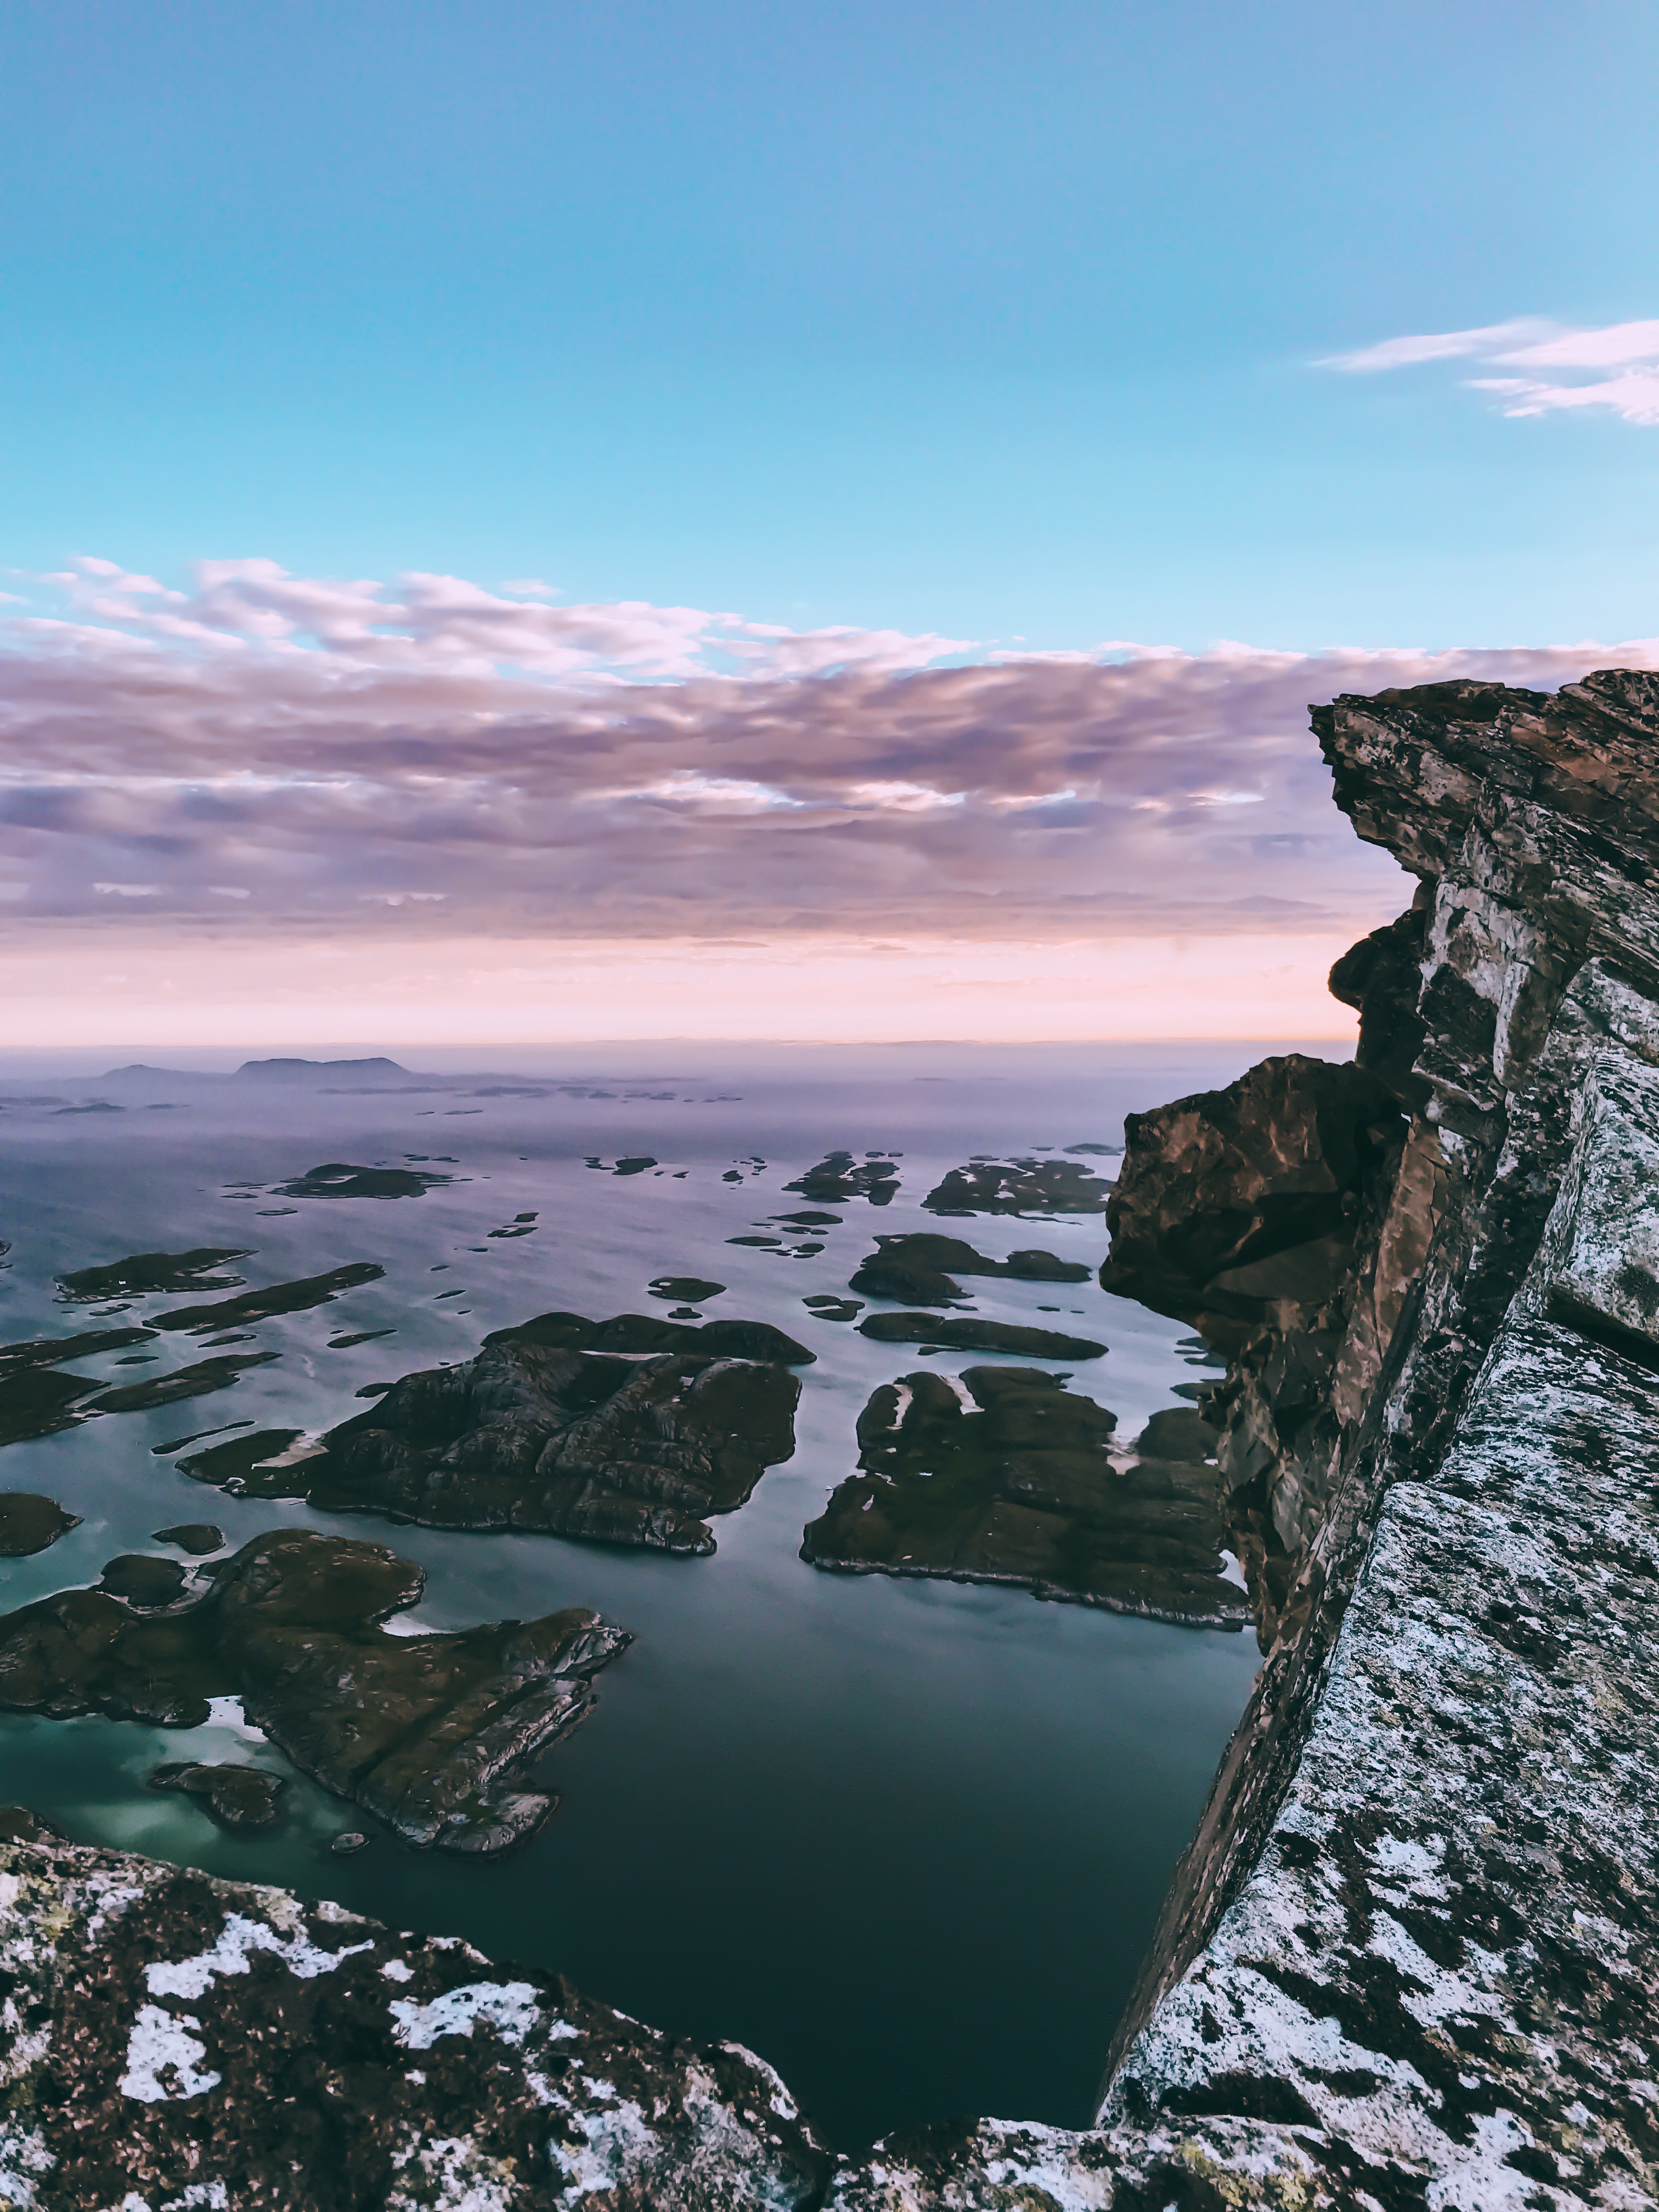
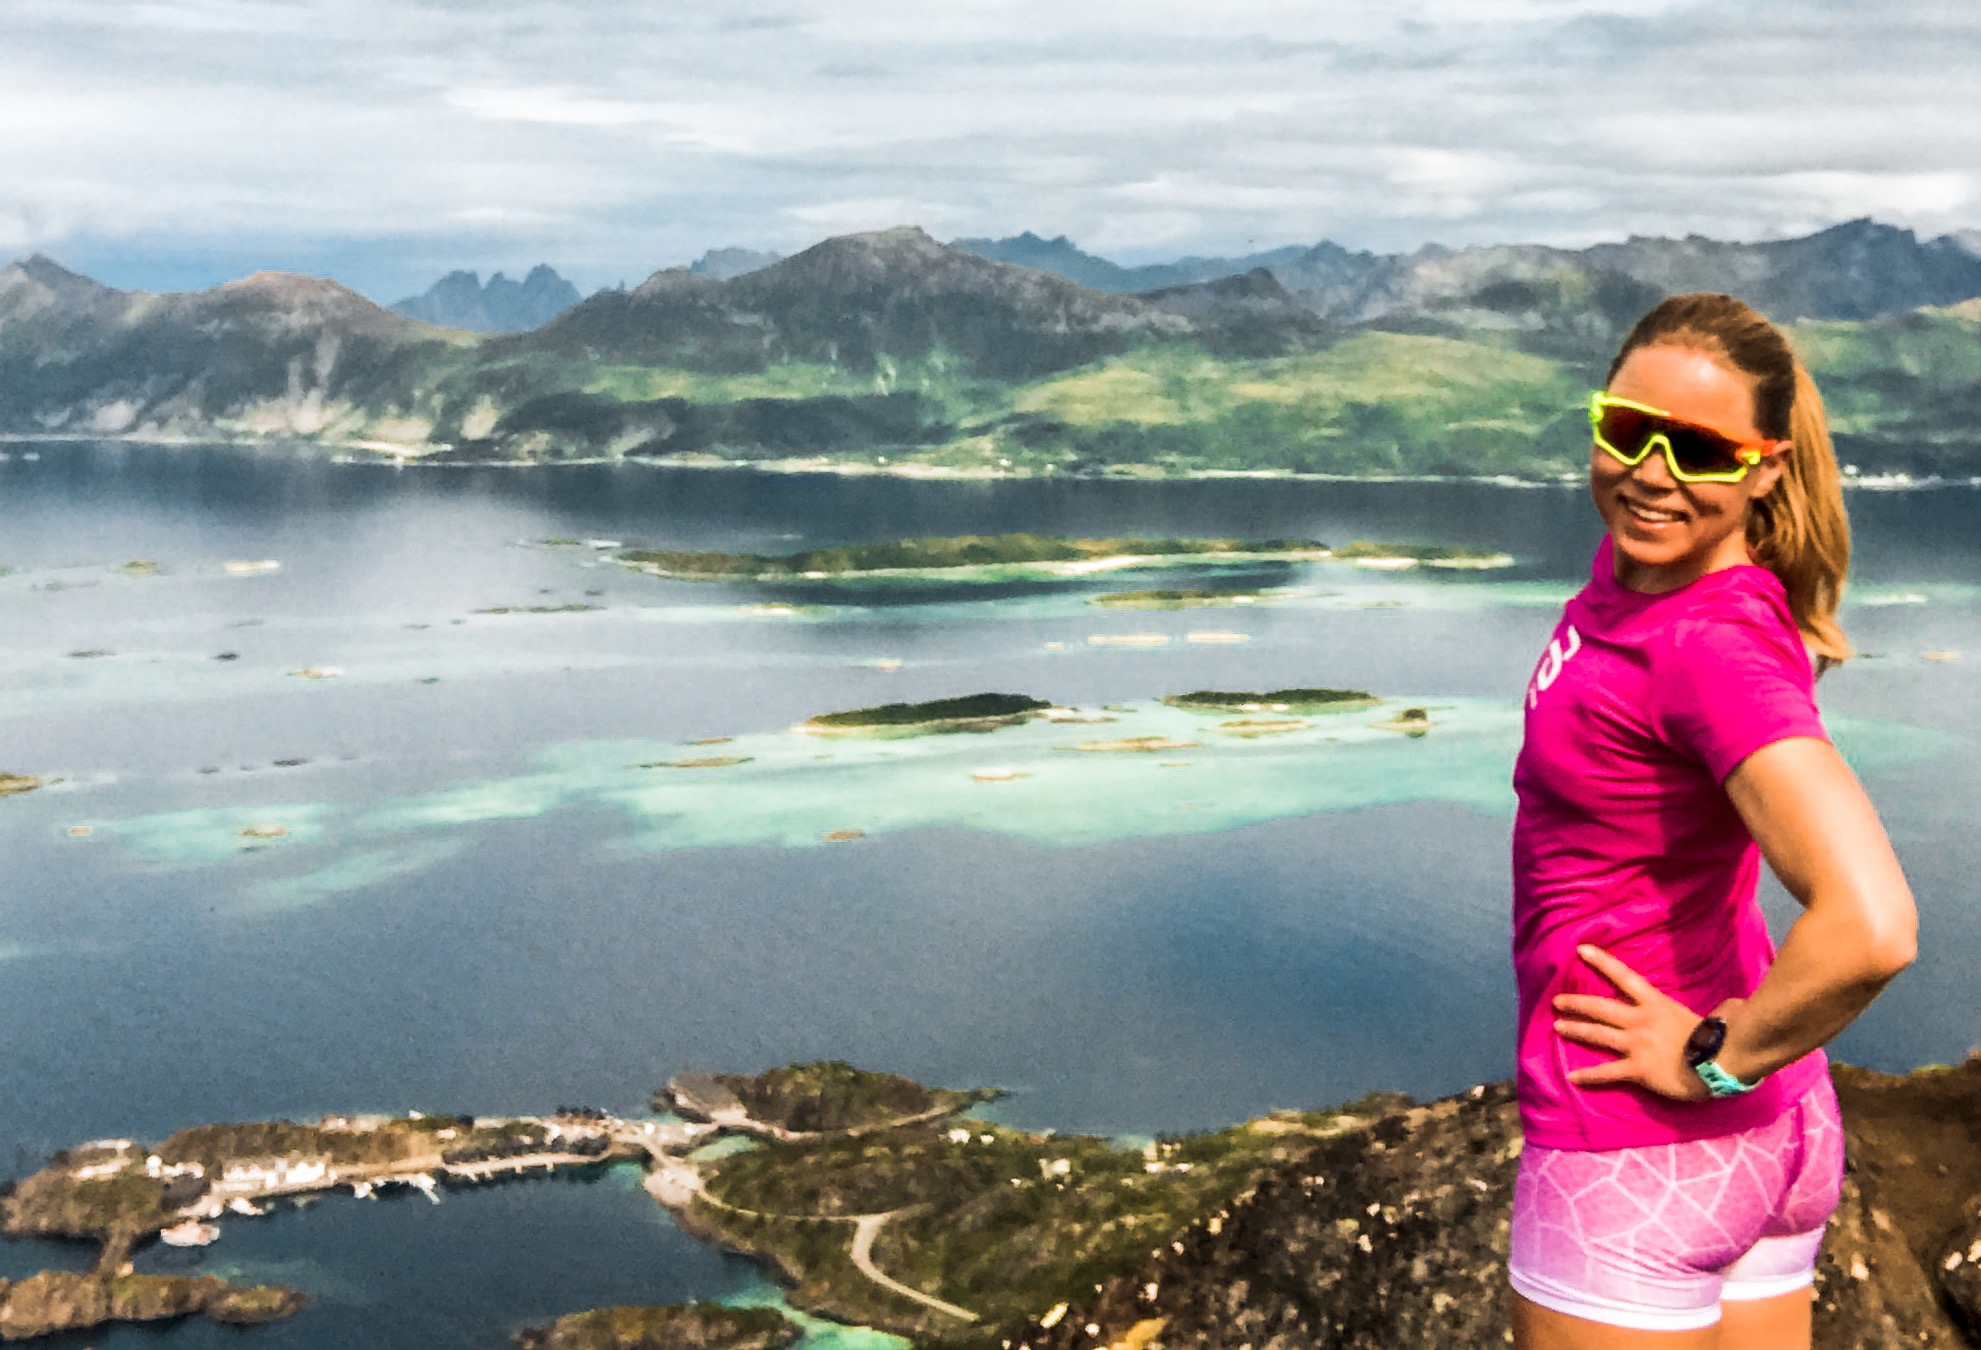
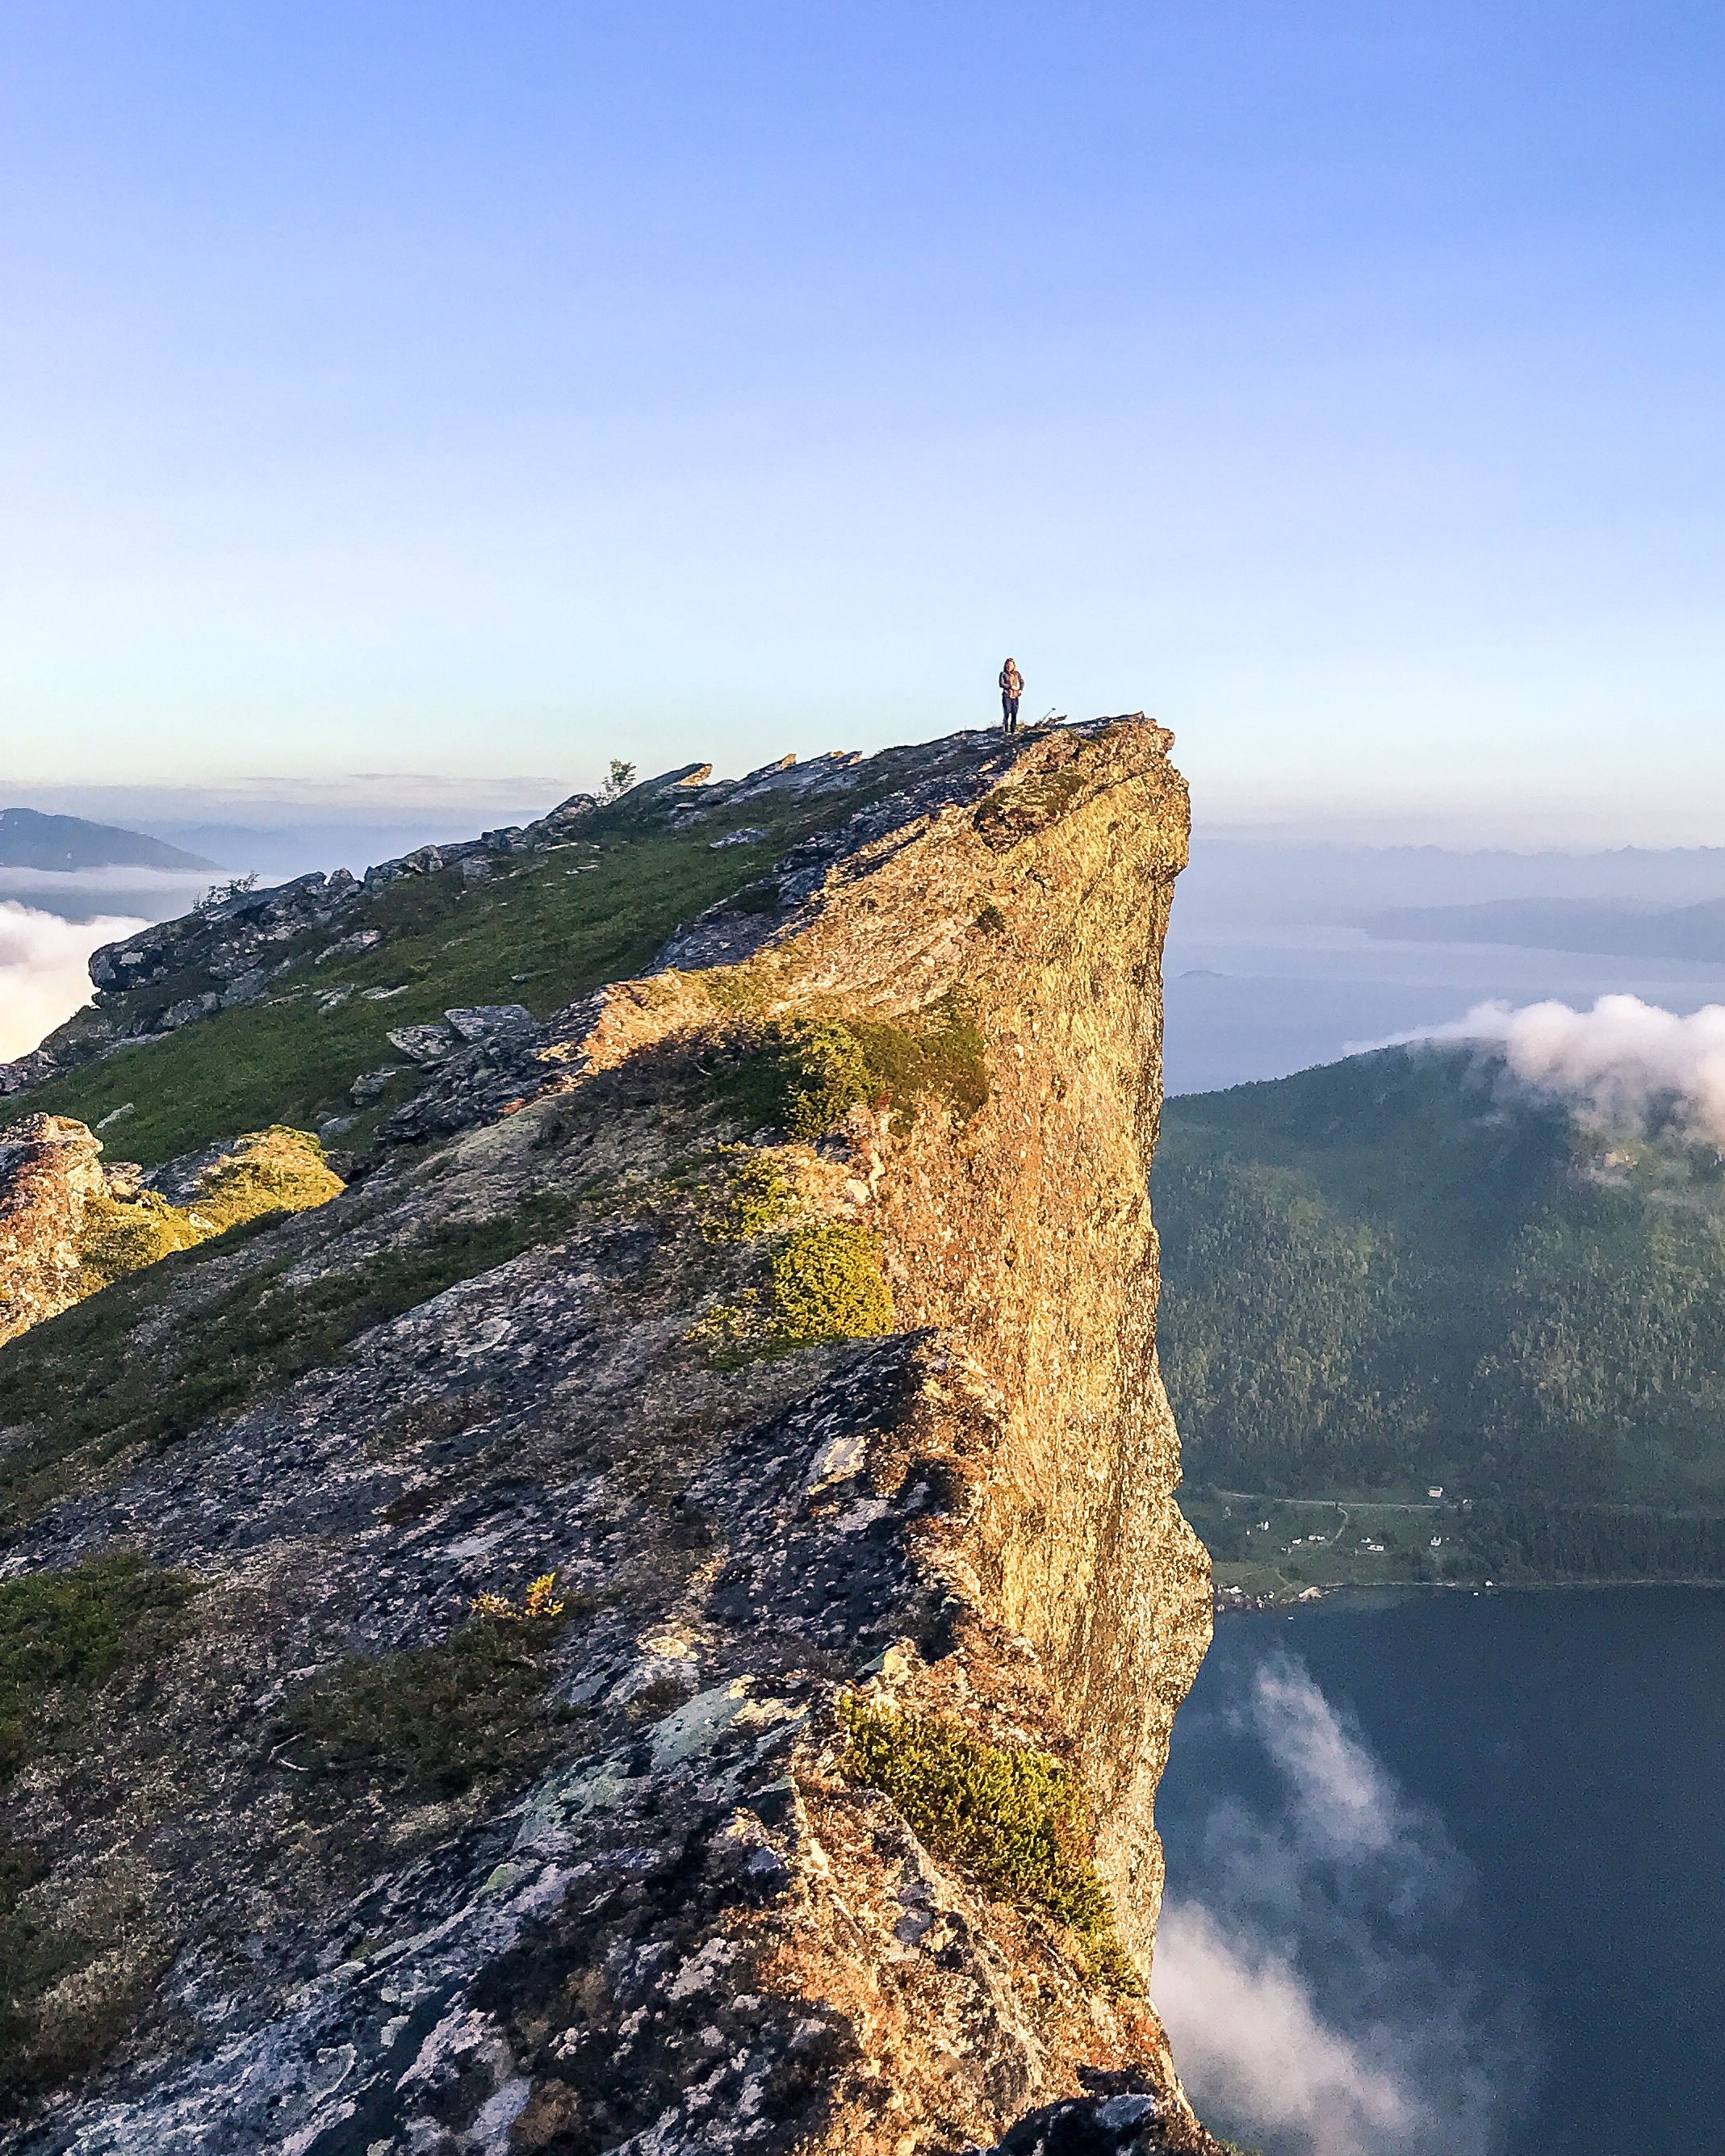
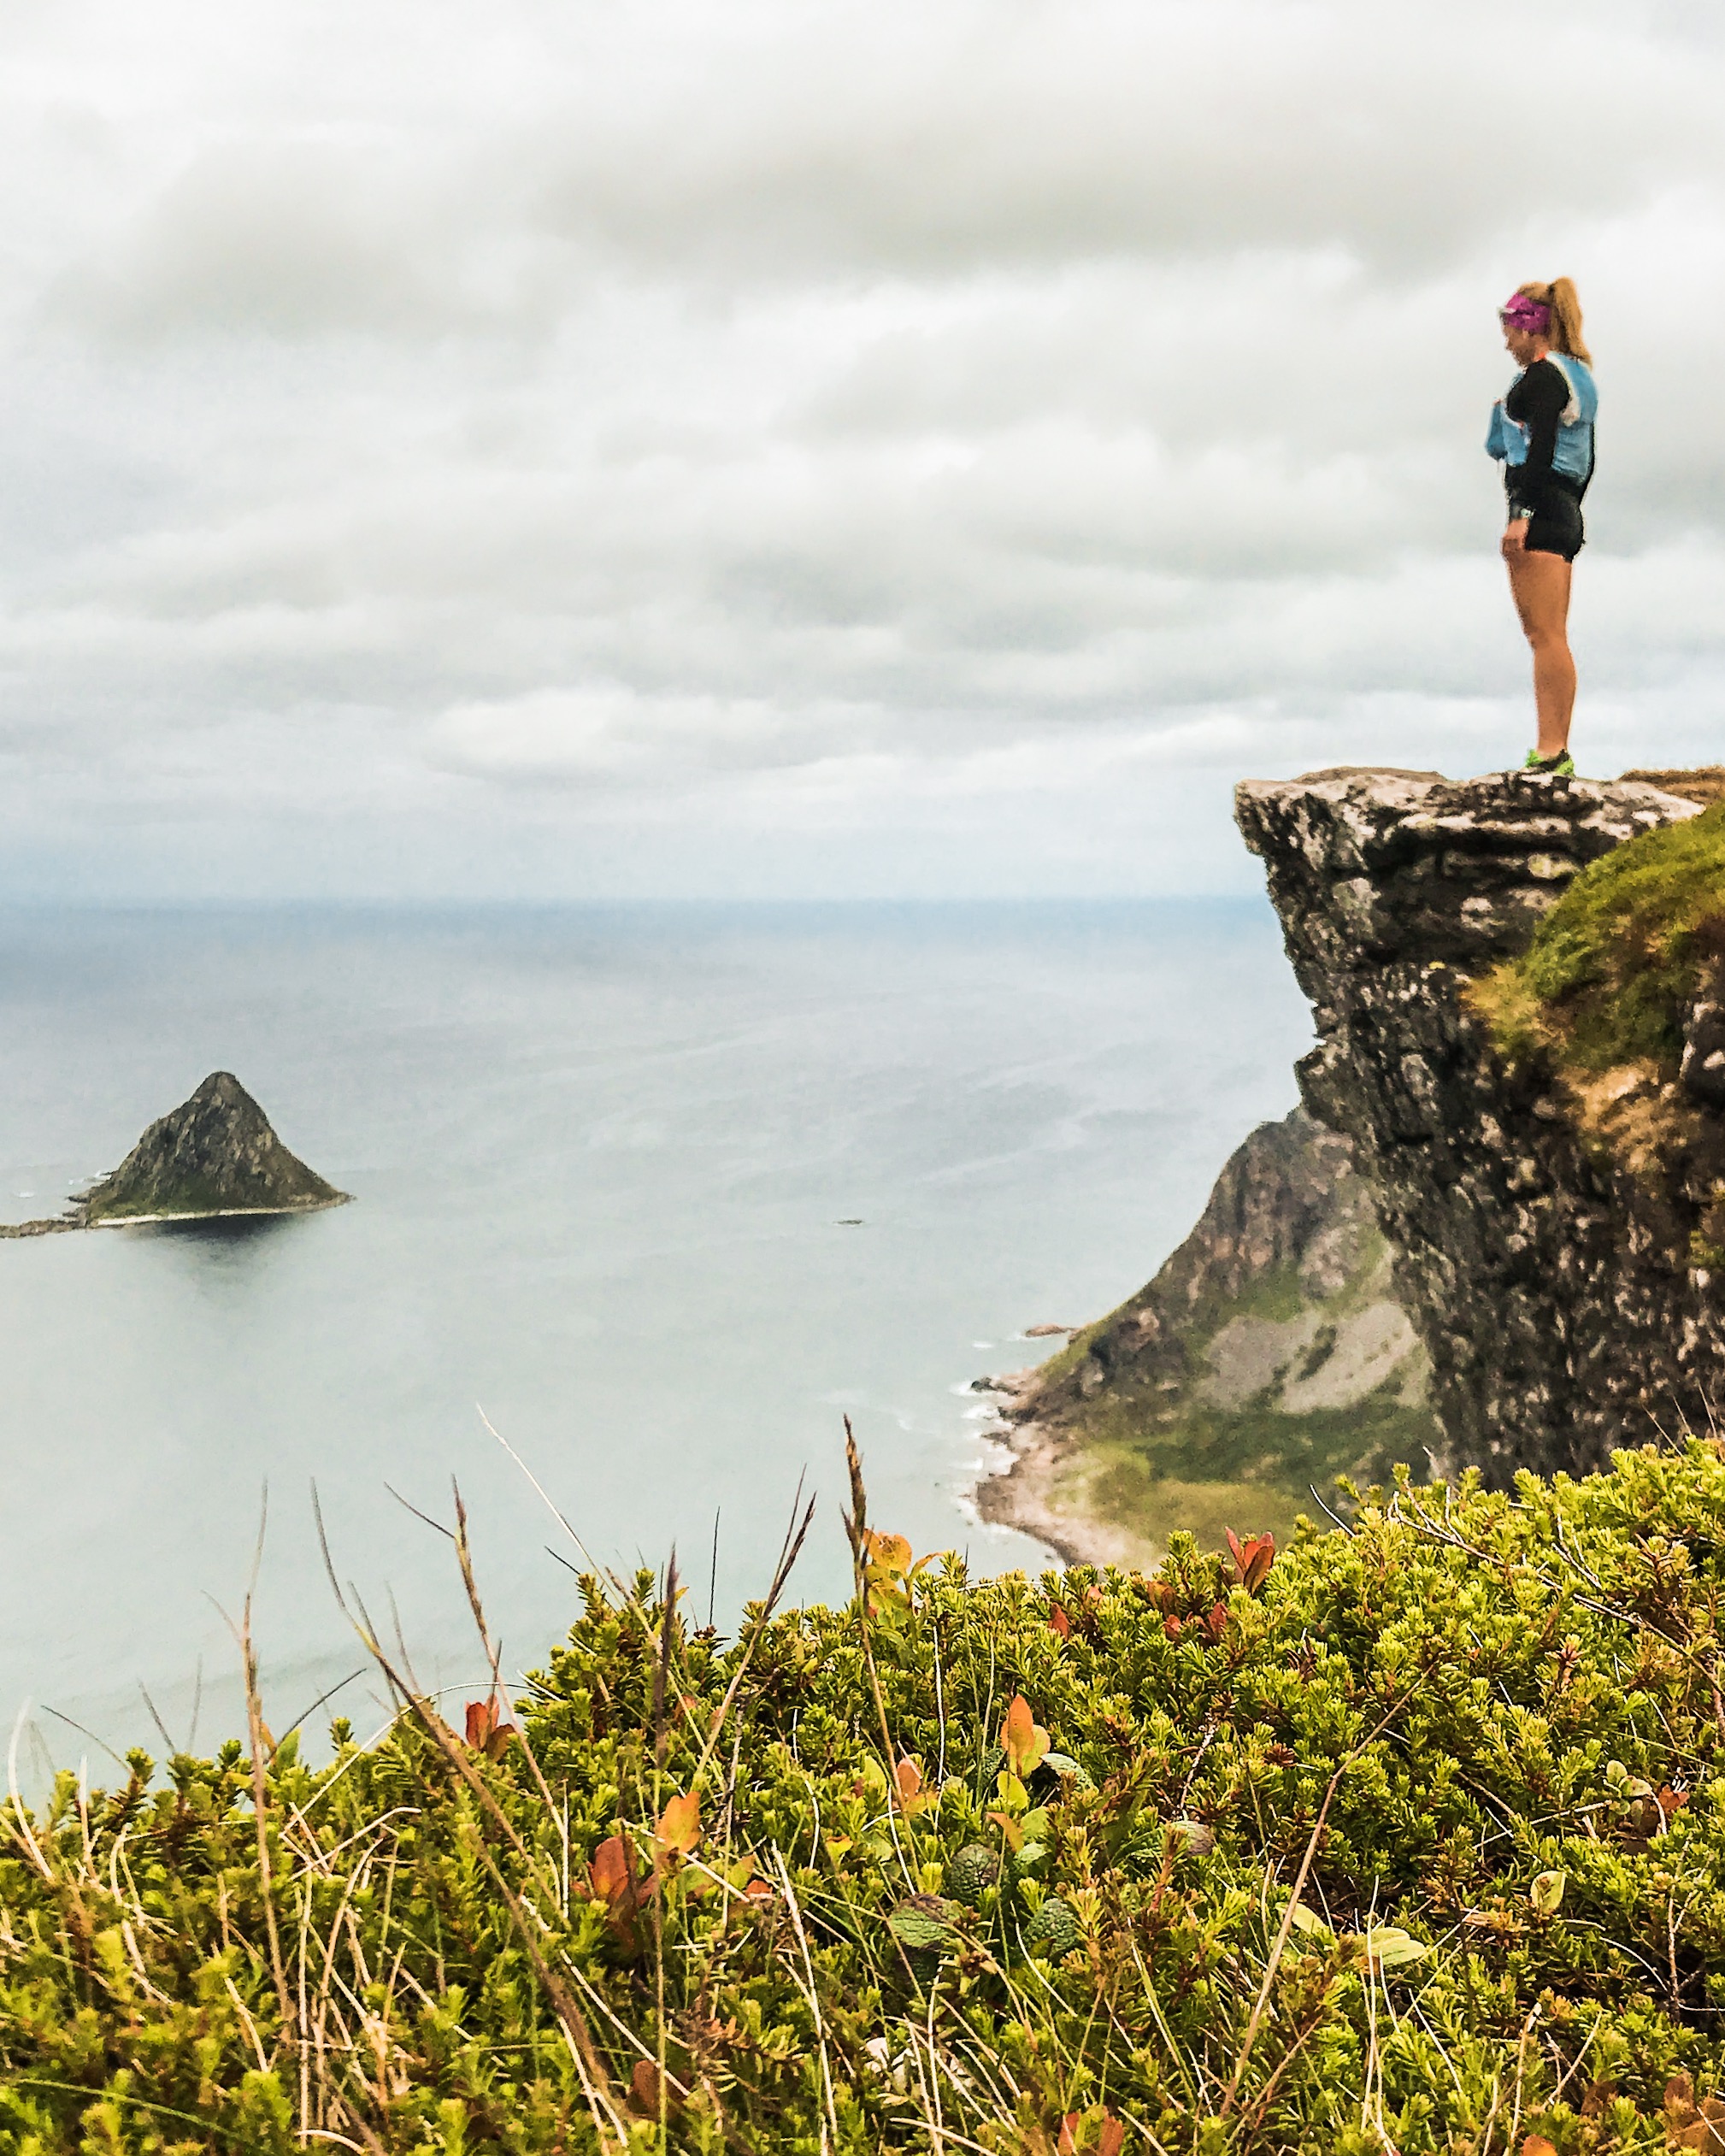
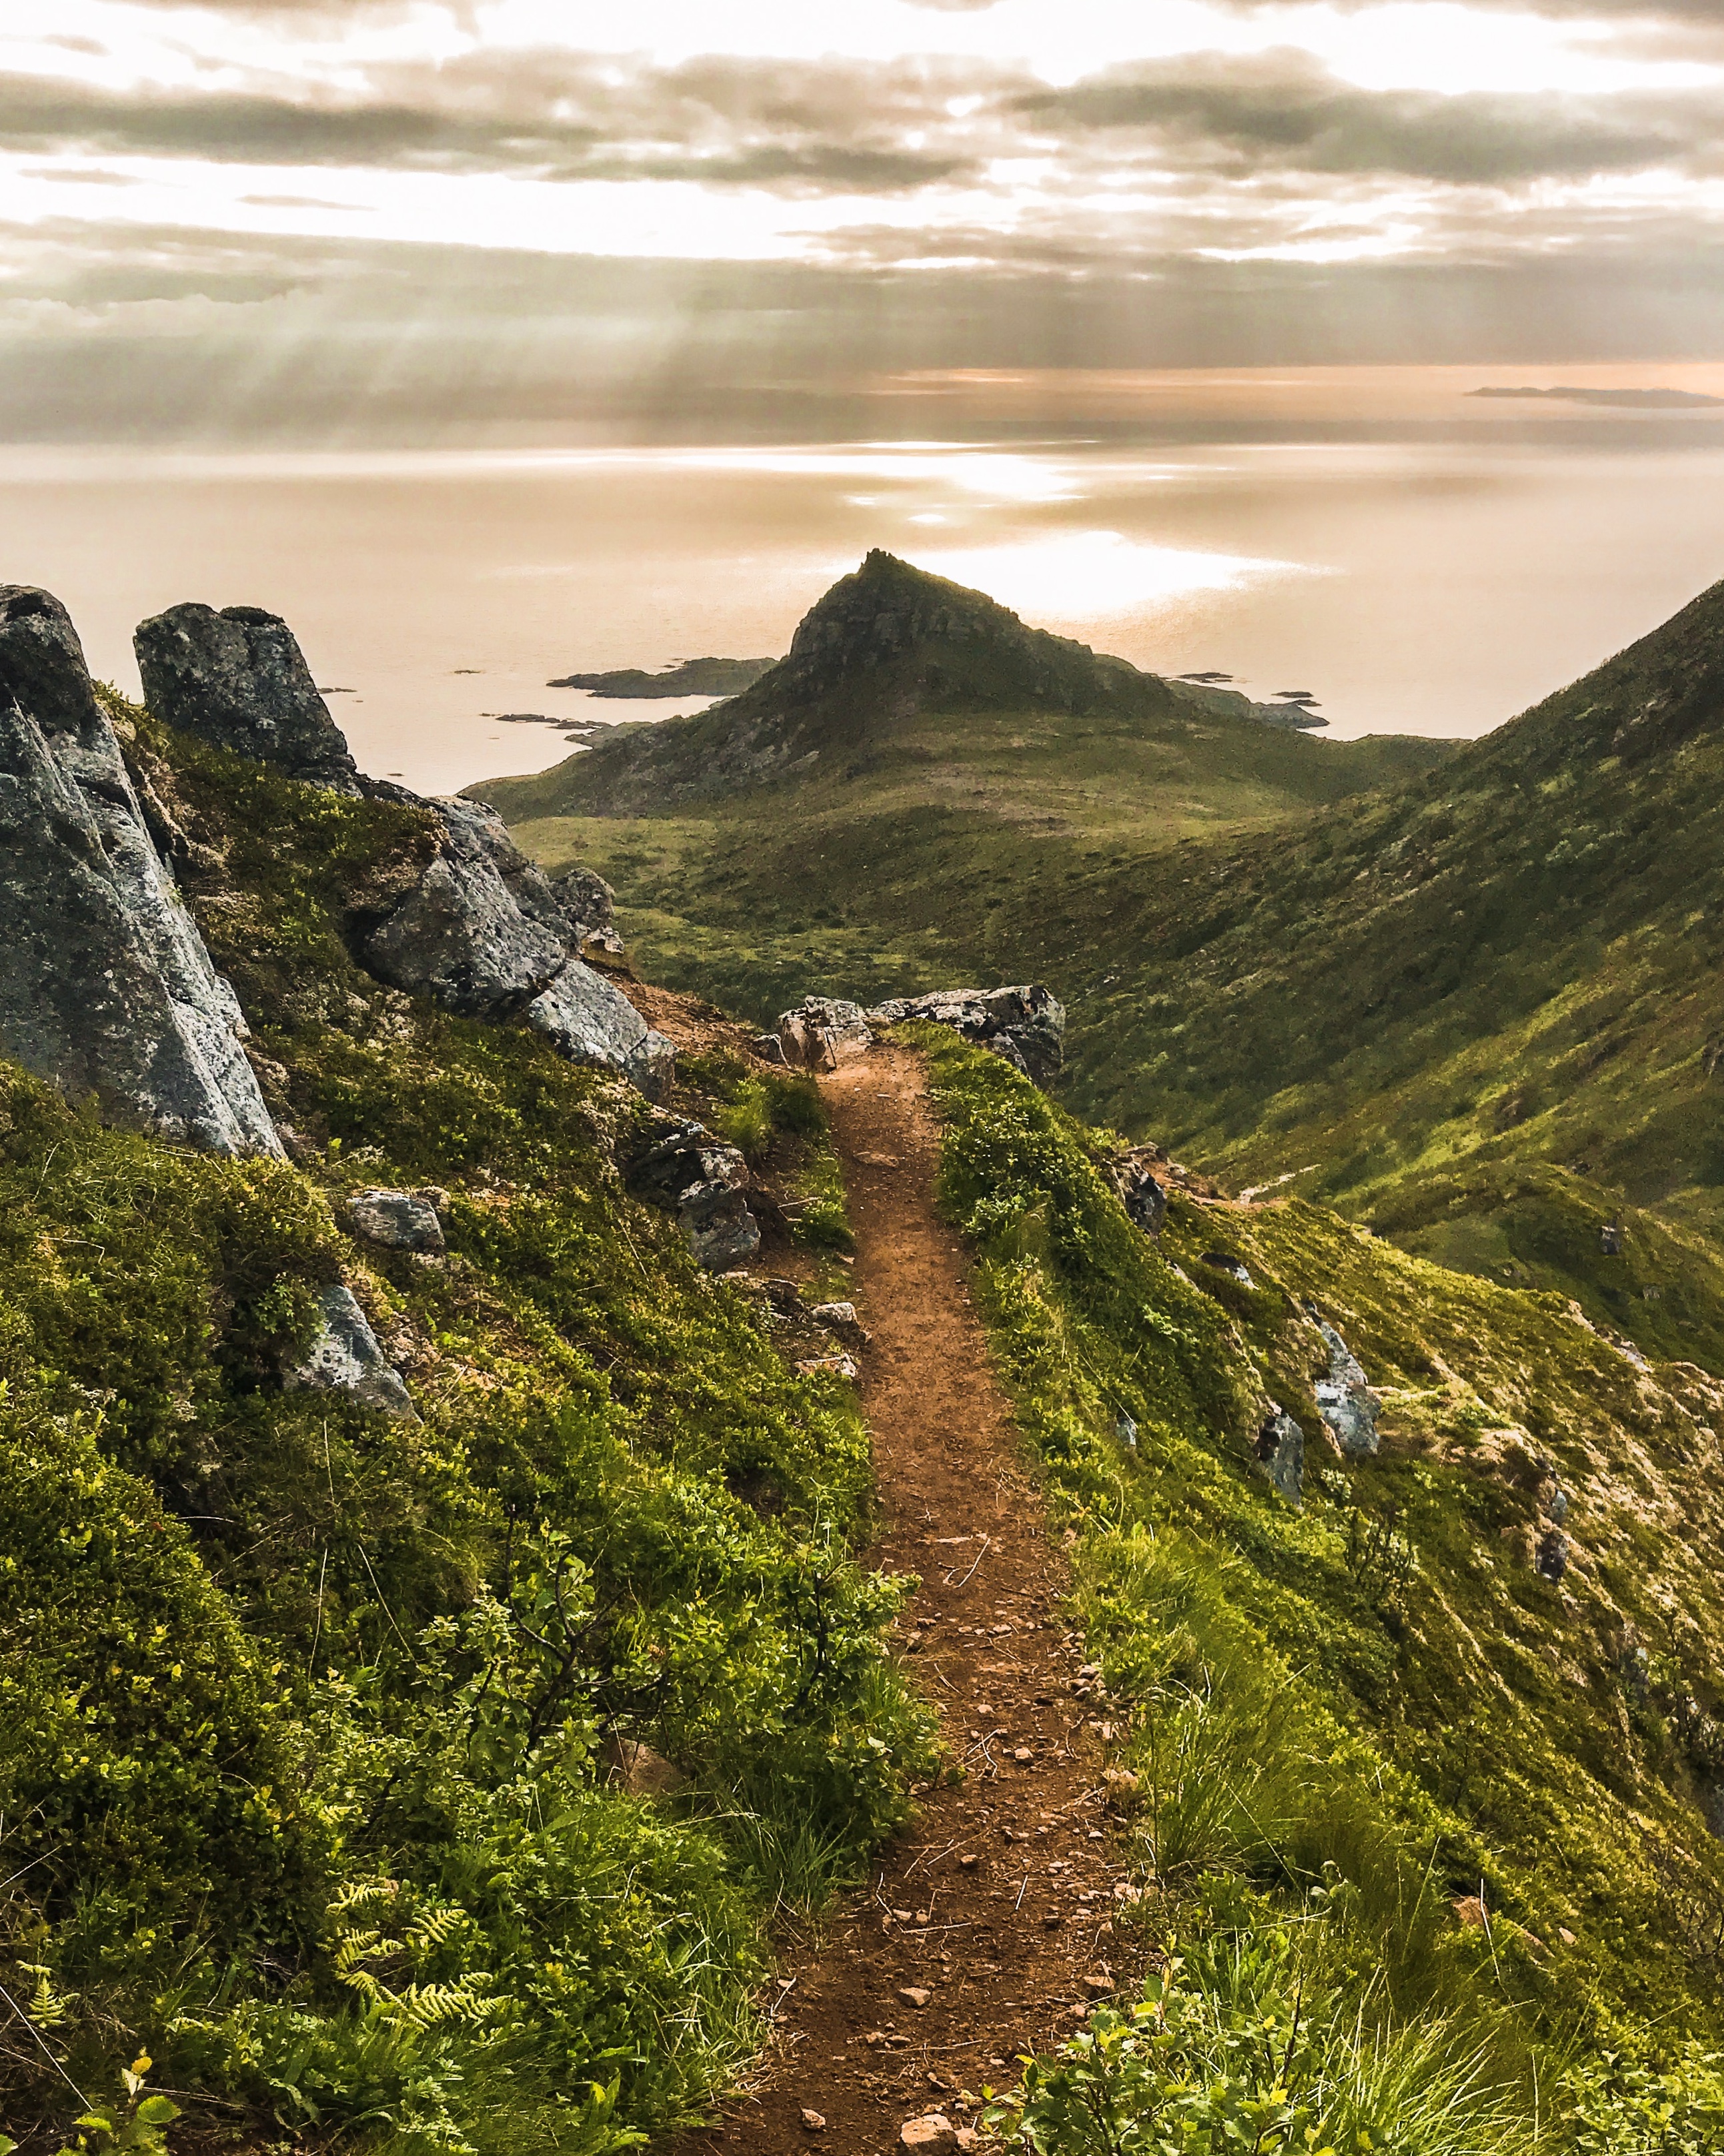
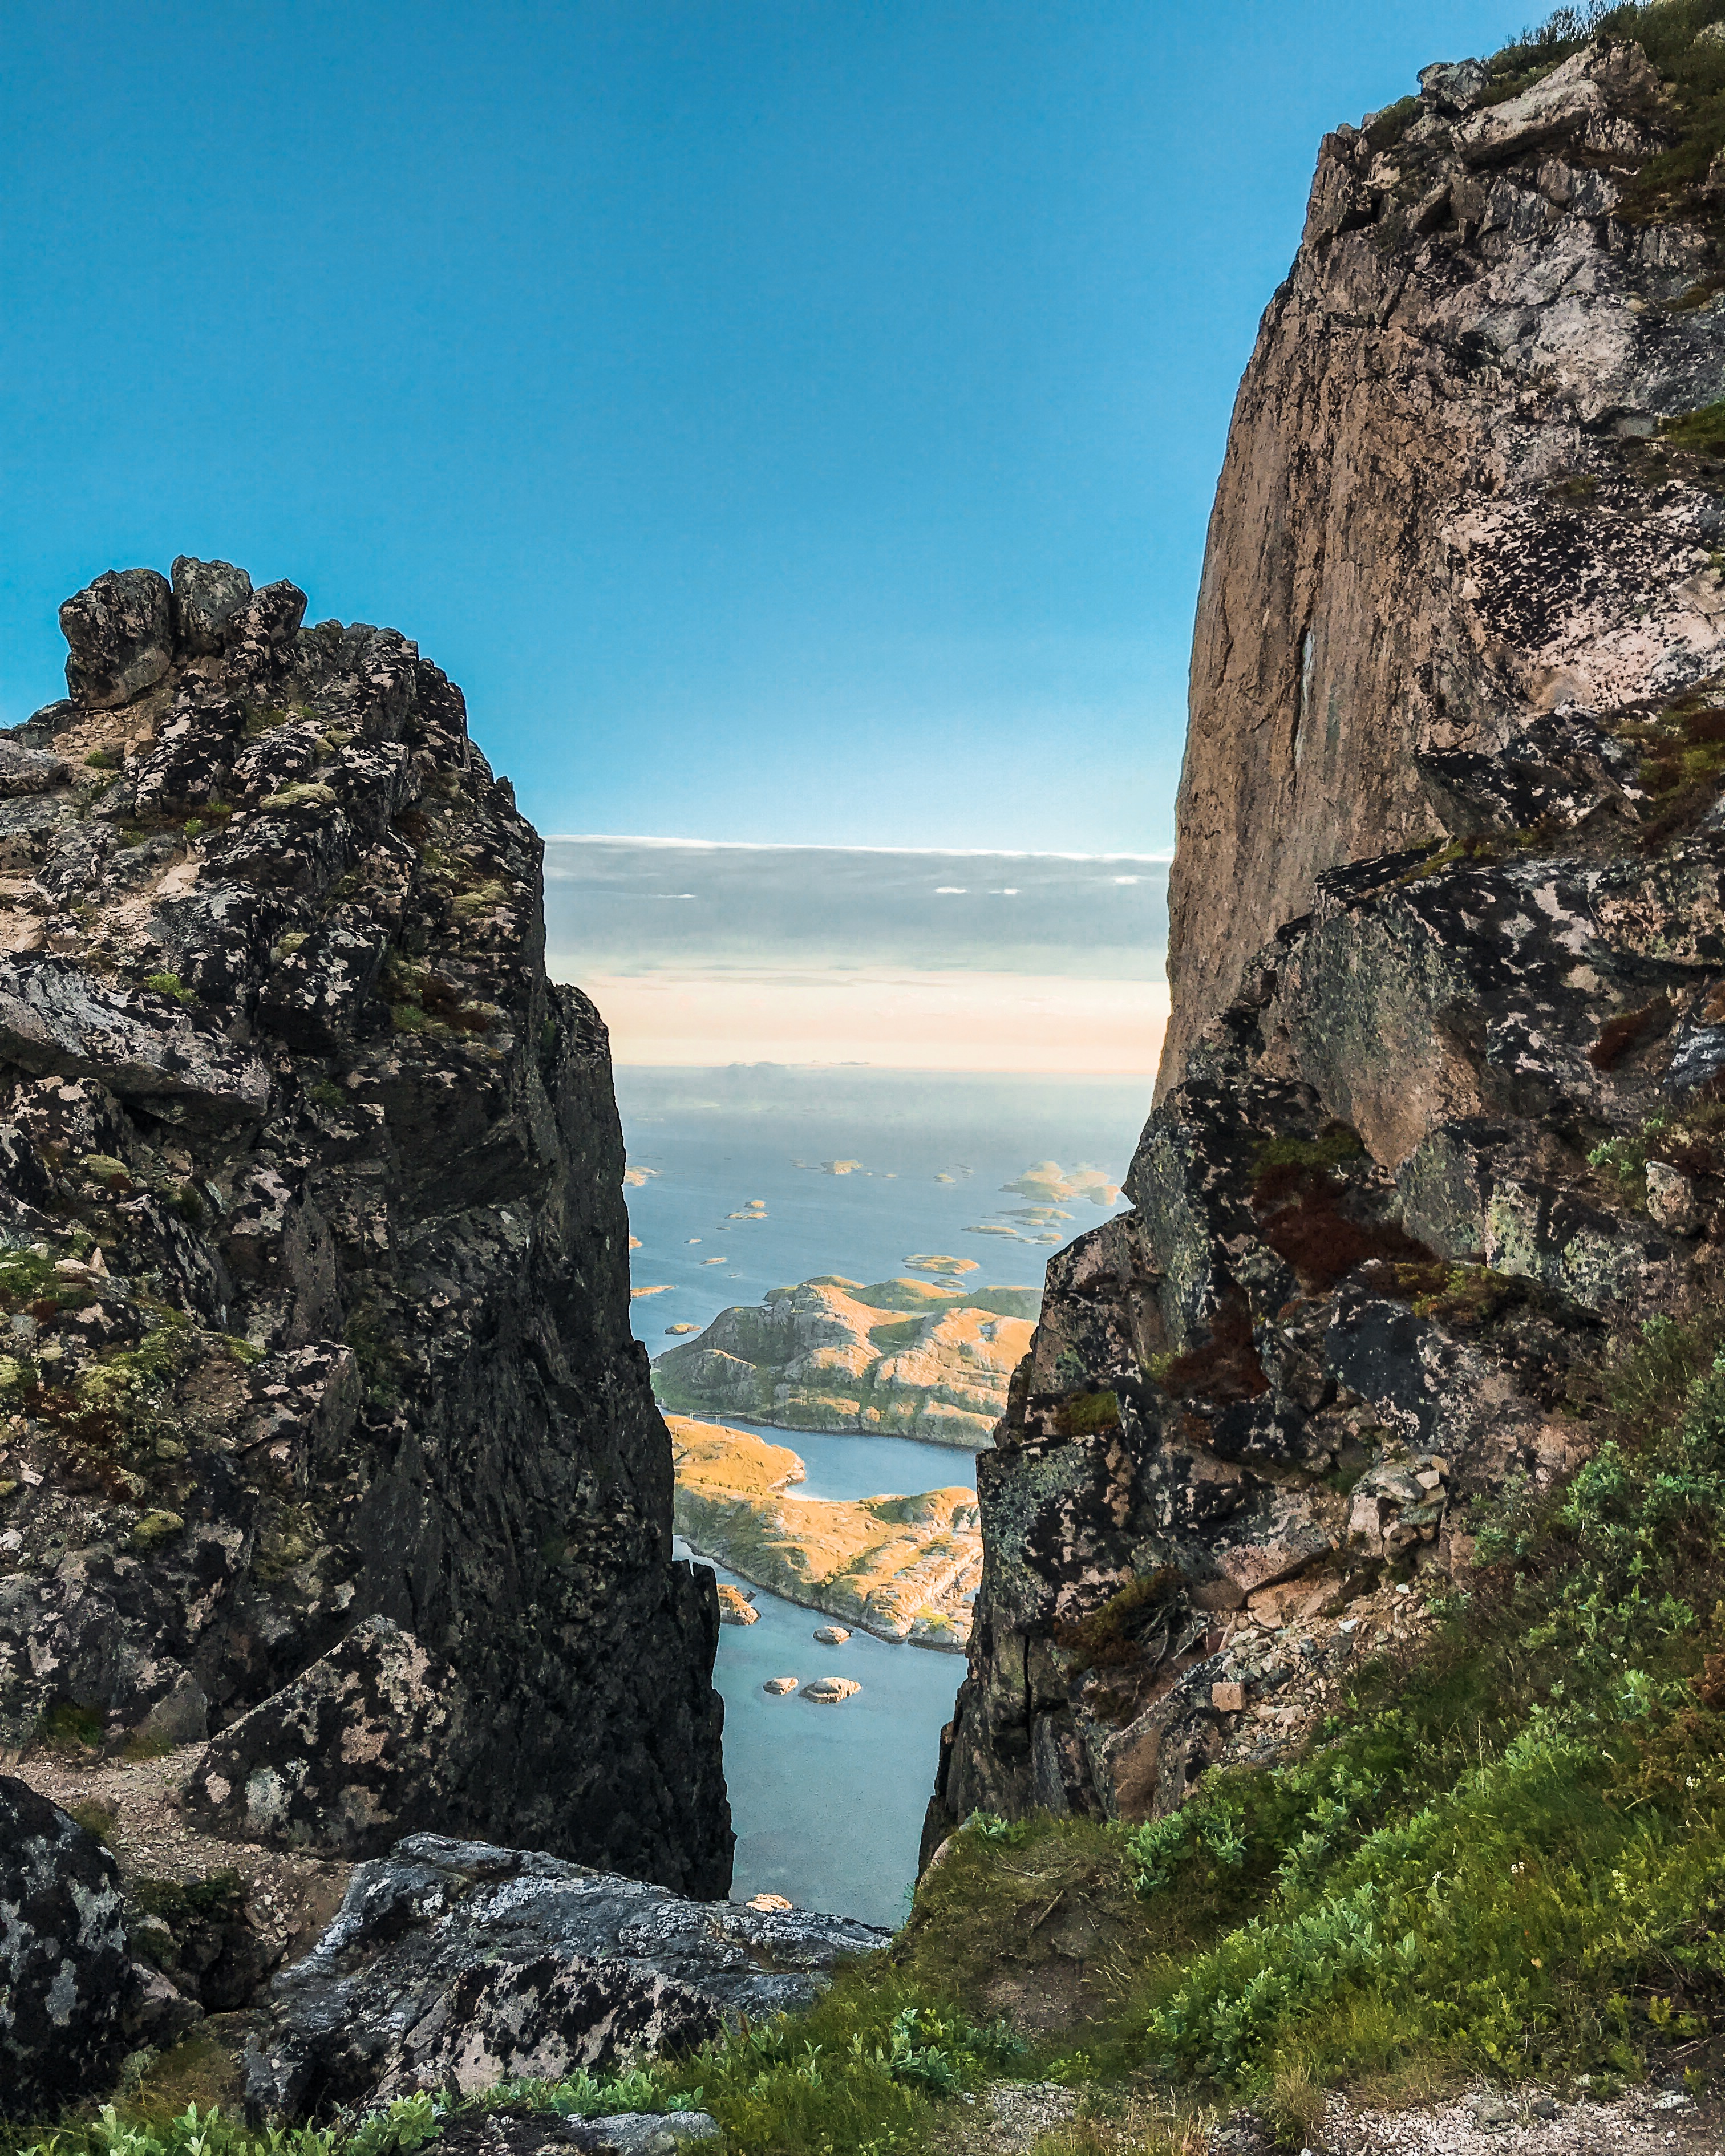
The peak is at 440 meters above sea level and if you are in shape you will reach the peak in around 30 minutes. The first part of the trail is in the forest and is improved by the help of steps laid down by sherpas. The last part is quit exposed, but feels safe as long as the stone is dry. As you gain height quickly the view is simply amazing all the way up to the lion peak, and there are several opportunities for grammable pictures, even if the clouds get in the way of the midnight sun. If it is windy, you will hear a spectacular “noise” from the front wall of Rødøyløva.

If you have the time, check out all the connecting trails you see on your way down, one takes you to a beautiful white sand beach. The island is not big, so you wont get lost.

I love this run/hike/climb so much, I would have done it twice if I had the time!

Strava for details: Rødøyløva (and some of the connecting trails)

IMG_9933
From the top of the Lion, looking north.


IMG_9928
The white beaches in front of the Lion.

IMG_9934
The Lion wall.

Inderøya – Rabothytta – Arctic Road Trip Day 3

IMG_9909
Rabothytta

From Inderøya, continuing your drive towards the arctic circle, one obvious choice would be the coastal route, which starts in Steinkjer and runs along the coast all the way up to Bodø. Having explored the southern part of the coastal route before, this time I went for the much faster, but oh so boring, drive along the route E6, as one of my main targets for this road trip was the architectural gem, Rabothytta (the Rabot cabin), which is one of many DNT (Norwegian Trekking Association) lodging facilities throughout Norway. This turned out to be a really amazing experience, which I will get back to below.

Exploring Inderøya

Considering the long drive, you may want to get your heart rate up exploring Inderøya in the morning. I went for a short and sweet roller ski workout north along route 761. If you opt for a longer workout, taking the other direction, towards Mosvika, would allow you to get a taste of ski legend Petter Northug’s training ground and the beautiful Skarnsund bridge. Another great way to explore the area would be a run along the 16 km long coastal trail between Vangshylla and Straumen.

Strava for details: Inderøya roller ski

Processed with VSCO with s3 preset
Rollerskiing at Inderøya

In any case, make sure you drop by some of the local entrepreneurs, such as Gangstad Gårdsysteri (ice cream/cheese). Look up The Golden Road for more information.

The Drive

The drive from Inderøya to the starting point for the hike to Rabothytta is 355km and about 5h 30min, the last part on roads with poor conditions. There are not so many things to do or see on this drive, so stack up on podcasts and snacks, or spend a few more days and opt for the coastal route. I suggest stopping in Mosjøen (after about 4 hours drive) for a proper meal before the final part of the drive and the hike towards the cabin. Make sure you reach the starting point in time for completing the hike in daylight (which of course is no trouble in the summer).

The Rabot Cabin

Located 1200 meters above sea level near the mountain range Okstindan and the Okstindan glacier, the cabin was designed by Jarmund/Vigsnæs and completed in 2014. The cabin is named after the French glaciologist and geographer Charles Rabot who thoroughly explored the mountain areas in the 1880s.

IMG_8260

The cabin is self-served, which means you have to bring all the food you need for your stay as well as sleeping bag or bed linen. There are beds for 30 people and reservations should be made in advance.

The hike to the Rabot cabin starts from the parking space at the upper end of Leirskardalen and is about 5 km with 520 meters of incline (about one hour hike, if you are in good shape). The trail is well marked with red Ts, however, there is also a well marked trail from the same parking on the wrong side of the river, so you want to make sure you take the trail on the left side of the river (facing uphill). Despite taking the wrong trail and having to run all the way back to the starting point, this was one of the most beautiful hikes I have ever done: The views of the green valley in the evening sun was like nothing I have seen before, the thunder from the mighty river, and the incredible sight of the cabin resting in the sun with the glacier and mountains surrounding it, when I finally reached my destination.

IMG_9779

Strava for details: Rabothytta (with all the wrong turns). Look at the last 65 minutes for the right trail.

IMG_9780

IMG_8269

IMG_8268

Once there, you want to explore the cabin and the surroundings from the inside as well as the outside, from every angle. The weather can extremely tough in this area, this night however, the sun was shining almost the whole night and you felt like an idiot going to bed. Had I known that I would win the jackpot weather, for sure I would have brought a sleeping bag to sleep outside on the terrace.

The Rabot cabin may also be visited in the winter and the surrounding area is very popular for randonee skiing (even in the summer, although you have to carry your skis for a while).

IMG_9810

IMG_9781

Trollheimen – Inderøya – Arctic Road Trip Day 2

Processed with VSCO with l4 preset
Blåhøa 1671m

Waking up at Gjevilvasshytta in Trollheimen you have multiple hiking and running options on your doorstep. I had decided on a run to Blåhøa, peaking at 1671 meter about 12 km from Gjevilvasshytta. You can take the car to a parking 1-2 km from the cabin if you want to avoid running the hard sufaced road. The path is surprisingly runable and not too technical, except for the last couple of km. The view from the summit is amazing on a sunny day!

Strava for details: Blåhø run

img_9670
Blåhøa towards Gjevilvatnet

Make time for a coffee and a cinnamon bun outside Gjevilvasshytta and, if you didn’t the evening before, a stroll along Gjevilvatnet, before you hit the road.

The Drive, 245 km/3 h 40 min

In Oppdal, about 25 minutes from Gjevilvasshytta, Bakeriet Sprø is worth a stop for loading up on sandwiches and coffee for the road. Unless you want to make a stop in Trondheim, in another three hours or so driving the route E6, you reach Inderøya. Inderøya has created its own concept, The Golden Road, catering for tourist on the road, or as a destination in itself.

Accomodation & Restaurant

At Inderøya you have several unique accomocation alternatives. This time I stayed at Husfrua, a country farm hotel situated on a hill top with great views of the fjord. Husfrua offers rooms in historic  surroundings as well as modern free-standing small external houses in the farm yard. The highlight of my stay was the home made breakfast served on the sunny terrace of the main building. Another option would be Jegtvolden Fjordhotell.

IMG_9760.JPG
Husfrua

A few hundred meters away from Husfrua you find Øyna, a truly fantastic place offering local food and magnificient views of the fjord. Remember to make a reservation in advance, and if the weather is good, ask to be seated outside.

Local Tip


img_9742
Øyna restaurant

Closing the Senja chapter: Grytetippen, Keipen and Sukkertoppen

IMG_0856
The view from Grytetippen

Bringing the Senja trilogy to an end (for now), let me take you to three breathtaking peaks, Grytetippen, Keipen and Sukkertoppen. These three may be done in one day as Grytetippen and Keipen are right next to each other sharing most of the same trails, and Sukkertoppen is short enough to make a quick morning or evening run. The drive between the two is about one hour and in between you find the beautiful Ersfjordstranda, the perfect spot for recharging and refueling.

Let´s go!

Grytetippen & Keipen

IMG_0876
Segla, Hesten and “Kongene” from Grytetippen

You find the joint trailhead of Grytetippen and Keipen next to the road half way along the lake Mefjordvatnan. There is a sign next to the road. For exact position see the Strava link provided below. It is also possible to start the run from the tunnel at Mefjordbotneidet (direction Fjordgård). The start of the trail from Mefjordvatnan is a bit messy and wet with more than 450 meters of ascent in less than two kilometers, after which you can enjoy about a kilometer of easy running and maybe get a glimpse of  reindeers. The view is great already from the start and you will have Breidtinden on your left side during the climb. After about 2.5 km from the trailhead the steep climb towards the ridge between Grytetippen and Keipen starts. I went for Grytetippen, the southern and lower peak with 885 meters first and reached the top after about 70 minutes. Despite having been to legendary mountains as Segla and Husfjellet the previous days, my jaw dropped by the sight that awaited me and I was screaming for joy! The view of the “black wall” is brutal and Segla from this new angle looks almost like a small hill. You can also see Husøy, where the TV-program “Da damene dro” was recorded.

Make sure you take a lot of photos before you start the descent of about 160 meters before the climb towards Keipen. On my way to Keipen I met a couple who told me that the view from Keipen was even better than from Grytetippen, and its 360 degrees of glory from 938 meters above sea level did not let me down.

IMG_0902
The view from Keipen

Both Grytetippen and Keipen have steep and dramatic edges and instagramable outcrops, but the trails are safe and fairly easy.

Strava for details: Grytetippen and Keipen

Ersfjordstranda

Make sure you pack what you need for a picnic at Ersfjordstranda when driving between Keipen/Grytetippen and Sukkertoppen. There are no shops or restaurants nearby. This beach is the location of the famous golden toilette and a popular site for camping. There is also an outdoor shower next to the toilette.

IMG_0972
Ersfjordstranda

Sukkertoppen

Sukkertoppen is only 456 meters above sea level and a fairly short run close to the hotel and restaurant Hamn. You can start the run from the hotel or take the car to the parking next to “Nikkelverket”, about a km from Hamn. The Strava link provided below starts from Nikkelverket and finishes at the hotel.

IMG_4809
From Sukkertoppen

IMG_0599
From Sukkertoppen towards Hamn and Husfjellet

The trail is easy to find and is marked towards Sukkertoppen. The beginning is quite easy and runable, while the last climb gets steeper and raises your heart rate. Given the short distance and reasonable climb it provides a great opportunity to play with some speed, also because you will have your back towards the view for the most of the climb. Don´t forget your camera though. Once you reach the top you will be rewarded with a beautiful view of the archipelago of Hamn. In the distance you can also see Husfjellet.

Strava for details: Sukkertoppen (“The Sugar Peak”)

Some last notes

  • Go back to Senja – Segla, Hesten and (almost) Breidtinden and Husfjellet – my favorite on Senja for more on Senja, where to stay, how to get there, other attractions along the road and a suggested itinerary.
  • The best season to check out the trails is June – September. Go in June/July for the midnight sun and try to do at least some of your runs in the late evening in order to enjoy the midnight sun from a mountain top (weather permitting).
  • Remember to fill up a cooler with food and beverages as there are few supermarkets and even less restaurants on the island.

Coming up

I have a series of posts in the making, which will take you on an exciting road trip all the way from Oslo to Senja. Stay tuned!